How to Seal Metal Roof Seams and Laps
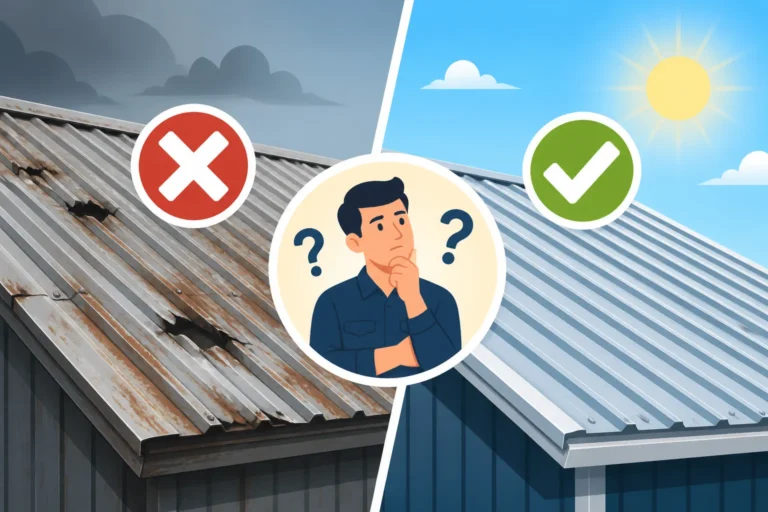
Few things are as disheartening as discovering a leak in your metal roof, especially when you thought you were done with roofing worries for decades. Often, the culprit isn't a mysterious puncture, but rather a breach in the very seams and laps designed to keep water out. This guide will walk you through exactly how to effectively seal those vulnerable spots, restoring your peace of mind and protecting your home from costly water damage.
Why Sealing Metal Roof Seams and Laps is Absolutely Critical
It's easy to assume that once your beautiful new metal roof is up, your worries are over for 50 years or more. And while metal roofs are incredibly durable, their Achilles' heel can sometimes be the very points where panels connect – the seams and laps. Neglecting these areas is like inviting trouble, and trust me, water is a persistent and unwelcome guest.
The Silent Threat of Water Intrusion
Water, in its relentless pursuit of the path of least resistance, will find any tiny opening. A compromised seam might not immediately lead to a waterfall in your living room, but it can cause significant, insidious damage over time. Think about the slow creep of mold and mildew in your attic, the rotting of your roof decking, or the damage to insulation that goes unnoticed for months or even years. This isn't just a hypothetical scenario; it's a common and costly reality for homeowners who overlook seam maintenance. The initial leak might be a drip, drip, drip into an unseen void, slowly degrading the structural integrity of your home. Before you know it, what could have been a simple sealant application turns into a major repair project, possibly involving replacing sections of your roof deck or attic insulation.
Protecting Your Investment from the Elements
You invested in a metal roof for its longevity, superior protection, and aesthetic appeal. Leaving seams and laps vulnerable to the elements undermines that entire investment. Properly sealed seams act as a vital barrier against rain, snow, ice, and even wind-driven debris. In areas prone to heavy weather, like the coastal regions of Florida or the hail-prone plains of Texas, robust seam sealing isn't just a good idea; it's a necessity. It’s part of ensuring your roof lives up to its promise of being a fortress against Mother Nature. Moreover, strong seals contribute to the overall structural integrity of the roof system, preventing panels from lifting or separating in high winds, which can be disastrous. Without proper sealing, your home is more susceptible to the kind of damage that leads to expensive insurance claims and extensive repairs.
Understanding Your Metal Roof's Seams and Laps
Before you grab a tube of caulk, it's crucial to understand the different ways metal roof panels connect. Not all seams are created equal, and the type of panel you have will dictate the best approach to sealing them. Each profile presents its own unique challenges and vulnerabilities.
Exposed Fastener Panels and Overlapping Laps
Many residential and commercial metal roofs utilize exposed fastener panels. These are typically corrugated or R-panel systems where the fasteners (screws) go directly through the metal panel and into the purlins or decking below. With these systems, the individual panels often overlap each other, creating a 'lap' joint. This overlap is where many leaks can occur. While these systems are generally more budget-friendly, they rely heavily on the integrity of the screw gaskets and the sealant within these laps.
Imagine a corrugated panel roof on a barn or garage. Each panel sits slightly over the next, creating a horizontal or vertical overlap. When these panels are installed, a bead of sealant (often a butyl tape or a liquid caulk) is ideally placed between the overlapping sections before they are screwed down. Over time, this sealant can dry out, crack, or lose its adhesion due to constant thermal expansion and contraction. The screws themselves, and more specifically, their rubber washers, also play a huge role. If those washers degrade, the screw penetrations become tiny conduits for water. Understanding these points is key to knowing where to focus your sealing efforts. For homeowners looking to understand the broader implications of these choices, you might find our guide on Exposed vs Hidden Fastener Metal Roofing insightful.
Concealed Fastener Systems and Standing Seams
On the other end of the spectrum, we have concealed fastener systems, most notably standing seam metal roofs. These are characterized by their tall, interlocking seams that stand proud above the flat panel surface. The fasteners are hidden beneath these raised seams, protected from direct exposure to the elements. This design is inherently more watertight than exposed fastener systems because there are no penetrations through the face of the panel.
However, even standing seam roofs have seams – specifically, the interlocking mechanism where one panel's edge "snaps" or is mechanically seamed to the next. While many standing seam systems are designed to be watertight without additional sealant in the primary panel seams, there are still critical areas that need attention. These include end laps (where one panel meets another end-to-end, usually on very long roof runs), transition points, penetrations for pipes or vents, and the perimeter flashing. Even the most robust standing seam roof, if not properly flashed and sealed around these edges, can develop leaks. The beauty of a standing seam roof lies in its seamless appearance, but the points where that "seamlessness" breaks, such as around a chimney or skylight, are still potential leak points. A deeper dive into specific profiles can be found in our comprehensive article on Metal Roofing Types Explained Profiles & Panels.
Common Areas Where Leaks Develop
Regardless of the panel type, certain areas are universally more prone to leaks and require diligent sealing:
- Overlapping Panel Laps: As mentioned, these are prime candidates, especially on exposed fastener systems, where the sealant between layers degrades.
- Fastener Penetrations: The screws themselves are entry points if their washers fail or if they become loose over time.
- Ridge Caps and Hip Caps: These are the points where roof slopes meet at the top or angles. They are often separate pieces installed over the main panels and rely on sealant and proper fastening.
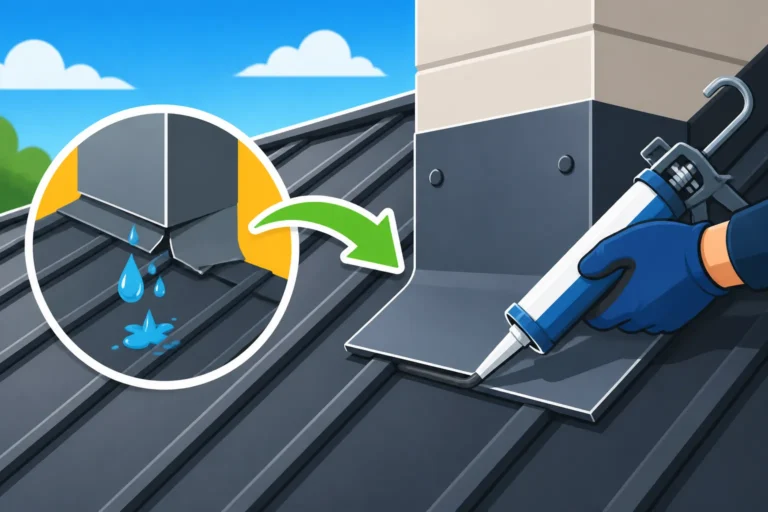
- Flashings: Around chimneys, skylights, dormers, pipe boots, and wall intersections, flashing components are designed to redirect water. If these flashings are improperly installed or if their seals fail, leaks are almost guaranteed. This is often the first place roofers look when diagnosing a leak.
- Eaves and Rake Edges: While less common for direct leaks into the home, compromised sealing here can lead to water intrusion behind fascia boards or into soffits.
- Valleys: These are internal angles where two roof planes meet, channeling a significant amount of water. Valleys require specific, robust flashing and sealing techniques.
- Panel Ends: Where panels terminate at an edge or transition, proper sealing is critical to prevent water from wicking back under the panel.
Identifying these high-risk areas allows for a targeted approach to maintenance and repair, saving you time and money in the long run.
Common Causes of Seam and Lap Failure
Understanding why metal roof seams and laps fail is just as important as knowing where they fail. It's not always about poor installation, though that's certainly a factor. Environmental stresses and the inherent properties of metal play significant roles in the degradation of seals over time.
Thermal Expansion and Contraction Woes
This is perhaps the biggest nemesis for metal roof seals. Metal, by its very nature, expands when heated and contracts when cooled. On a roof, exposed to direct sunlight and then cooling overnight or in winter, this movement is constant and often significant. A 50-foot metal panel, for instance, can expand and contract by up to an inch or more over a wide temperature swing.
Imagine the stress this puts on any sealant applied to a fixed joint! Flexible sealants are designed to handle this movement, but over decades, even the best ones can succumb to fatigue. The constant pulling and pushing can cause the sealant to lose adhesion (delaminate) from the metal surface, crack, or become brittle. This is particularly true for less flexible sealants or those not specifically formulated for dynamic joints. This phenomenon is a primary reason why regular roof inspections are crucial, especially in climates with extreme temperature fluctuations. It’s also why materials with good thermal properties are so important; our guide on Metal Roofing Materials Compared Steel, Aluminum, Copper & Zinc delves into this more deeply.
Degradation of Existing Sealants and Fasteners
Time, weather, and UV radiation are relentless. The original sealants used during installation, whether butyl tape, caulk, or another material, simply won't last forever.
- UV Radiation: Sunlight breaks down the chemical bonds in many organic materials, including sealants. Over years, this causes them to become chalky, brittle, and eventually crack and crumble, losing their protective qualities.
- Temperature Extremes: Beyond thermal expansion, extreme heat can accelerate degradation, while extreme cold can make sealants rigid and prone to cracking under stress.
- Moisture and Chemicals: Constant exposure to rain and humidity can wash away or break down certain sealants. Airborne pollutants, acid rain, or even chemicals leaching from surrounding building materials can also contribute to their demise.
- Fastener Failure: For exposed fastener systems, the rubber washers under the screw heads are critical. These washers seal the penetration point. However, they are also made of organic materials that degrade under UV light and temperature cycles, becoming brittle and cracking. Once a washer fails, water can seep directly through the screw hole, even if the surrounding panel laps are still sealed. Screws can also back out over time due to wind uplift and thermal movement, further compromising the seal. If you’re dealing with this issue, our post on Why Is My Metal Roof Leaking at the Screws offers specific advice.
Installation Errors and Insufficient Sealing
Unfortunately, not all roof installations are perfect, and sometimes the root cause of seam failure dates back to the day the roof was put on.
- Improper Surface Preparation: Sealants need a clean, dry, and sometimes primed surface to adhere properly. If the metal panels were dirty, oily, or wet during installation, the sealant might never have formed a strong bond, leading to premature failure.
- Insufficient Sealant Application: Not enough sealant, or an uneven bead, can create weak points. A thin or broken sealant line might look okay from a distance but won't provide a continuous, watertight barrier.
- Wrong Sealant Type: Using a sealant that isn't compatible with metal roofing or isn't designed for exterior, dynamic applications is a recipe for disaster. For instance, using interior-grade caulk on an exterior metal roof will quickly lead to failure. Different climates also necessitate different sealant choices; a sealant that performs well in a dry, mild climate might fail miserably in a humid, storm-prone region.
- Skipping Primer: Some sealants, especially on certain metal types or older, weathered surfaces, require a primer to ensure optimal adhesion and longevity. Skipping this step can drastically reduce the sealant's effective lifespan.
- Over-tightened or Under-tightened Fasteners: For exposed fastener systems, over-tightening screws can crush and damage the rubber washer, while under-tightening leaves it loose and ineffective. Both scenarios compromise the seal around the fastener.
- Lack of Redundancy: In critical areas like valleys or complex flashing details, a single line of defense isn't always enough. Experienced roofers often use multiple layers of protection, including underlayment, flashing, and sealant, to create robust, redundant barriers against water.
Understanding these pitfalls can help you not only seal existing leaks but also prevent future ones by ensuring correct application and material choice. If you're considering a new roof, knowing these details helps you ask the right questions when hiring a contractor.
Choosing the Right Sealant for the Job
Selecting the correct sealant is paramount to the success and longevity of your repair. With so many options available, it can feel overwhelming. Let's break down the most effective types for metal roofing, their characteristics, and when to use them.
Silicone-Based Sealants: The Flexible Powerhouses
When it comes to metal roofing, 100% silicone sealants are often considered the gold standard for their incredible flexibility, durability, and excellent adhesion to metal.
- Pros:
- Exceptional Flexibility: Silicone retains its elasticity over a wide temperature range, making it ideal for joints subject to constant thermal expansion and contraction. This flexibility is key to preventing cracking and delamination.
- Superior UV Resistance: Unlike many other sealants, silicone is highly resistant to UV radiation. It won't break down, chalk, or become brittle when exposed to sunlight, meaning it maintains its integrity for decades.
- Waterproof: It forms a truly waterproof, impenetrable barrier, making it excellent for sealing against rain and moisture.
- Longevity: High-quality silicone sealants can last 20 years or more, often outliving other roofing components. Brands like GE Silicone II or Tremco often come highly recommended by professionals.
- Adhesion: They adhere very well to clean, dry metal surfaces, including painted or unpainted steel, aluminum, and Galvalume.
- Cons:
- Non-Paintable: This is a big one. Most silicone sealants cannot be painted over. If aesthetics are a concern and you need to match the roof color, this can be a drawback. Clear silicone is an option, but even it can sometimes accumulate dirt.
- Difficult to Remove/Clean: If you mess up, silicone can be notoriously difficult to clean off tools or surfaces. Once cured, it's also tough to remove if you ever need to replace it.
- Cost: Generally more expensive per tube than acrylic or butyl sealants.
- Curing Time: Some professional-grade silicones might have longer cure times, though many quick-curing options are available.
When to use: Silicone is excellent for critical areas like around pipe boots, skylights, chimneys, and any dynamic joint where maximum flexibility and UV resistance are needed. It's a top choice for sealing standing seam end laps and flashing details. If you're not planning to paint the repair, silicone is usually your best bet.
Butyl and Urethane Sealants: Durable and Resilient Options
These are another category of heavy-duty sealants offering different strengths and weaknesses compared to silicone.
Butyl Sealants
Butyl sealants, often available in caulk tubes or as pre-formed tapes, are known for their strong adhesive properties and resistance to water.
- Pros:
- Excellent Adhesion: Butyl provides a very strong, tenacious bond to a variety of substrates, including metal, wood, and masonry.
- Good Water Resistance: Forms a durable, watertight seal.
- Flexibility: While not as flexible as silicone, it offers good flexibility for many roofing applications and can accommodate some thermal movement.
- Paintable (some formulations): Some butyl sealants can be painted, which is a significant advantage if color matching is important.
- Less Expensive: Generally more affordable than high-end silicones.
- Cons:
- UV Resistance: While good, it's generally not as stellar as 100% silicone. Over long periods, butyl can degrade under intense UV exposure, becoming stiff and brittle.
- Messy to Work With: Butyl can be very sticky and stringy, making application and cleanup a bit challenging.
- Tacky Surface: Even when cured, the surface can remain slightly tacky, attracting dirt.
When to use: Butyl tape is frequently used between overlapping panels in exposed fastener systems during initial installation. Liquid butyl sealants are good for general lap sealing, around exposed fasteners, and in areas where you need strong adhesion and potentially paintability, but where extreme flexibility isn't the absolute top priority. Many professionals use brands like Geocel or Novaflex for their versatility.
Urethane Sealants
Polyurethane (or urethane) sealants are another robust option, known for their toughness and adhesion.
- Pros:
- Extremely Durable: Urethane sealants are tough, resilient, and highly resistant to abrasion and impact.
- Strong Adhesion: They form very strong bonds to metal, concrete, wood, and other common building materials.
- Paintable: Most urethane sealants are paintable, allowing for color matching.
- Good Flexibility: They offer good flexibility, though generally less than silicone, making them suitable for many dynamic joints.
- Chemical Resistance: Often have good resistance to various chemicals.
- Cons:
- UV Resistance: Like butyl, UV resistance is good but generally not as good as silicone, and they can sometimes yellow or chalk over time.
- Curing Time: Can have longer cure times, especially in low humidity.
- Application Temperature: Best applied within a specific temperature range; very cold temperatures can make them difficult to gun.
- Isocyanates: Some urethane sealants contain isocyanates, which require proper ventilation and personal protective equipment during application.
- When to use: Urethane sealants are excellent for sealing around flashing, vents, and in areas requiring a very tough, durable, and paintable seal. They are often favored for applications where mechanical strength and adhesion are critical, in addition to weatherproofing.
The Role of Seam Tapes and Adhesives
Beyond liquid sealants, specialized tapes also play a vital role in metal roof sealing.
- Butyl Tape (Pre-Formed): This is a non-curing, permanently flexible rubberized asphalt mastic tape. It's often used between overlapping panels of exposed fastener systems (like R-panels or corrugated sheets) during installation. It comes in rolls and is simply pressed into place. It's incredibly effective for creating a continuous seal that can handle some movement without breaking. While great for initial installation, applying it to existing, already fastened seams can be challenging.
- Self-Adhering Flashing Tapes (e.g., Peel-and-Stick): These tapes, often made of rubberized asphalt or butyl with a foil or fabric backing, are incredibly versatile. They are used for flashing details around penetrations, sealing difficult transitions, or reinforcing existing seams. They offer immediate waterproofing and strong adhesion. Brands like M-Clad by Metal-Fab or Dicor's Butyl Seal Tape are popular choices. They often have an aluminum or EPDM backing for added durability and UV resistance.
- Fabric-Reinforced Liquid Membranes: For severely degraded or complex seam areas, a fabric-reinforced liquid membrane system can be a robust solution. This involves applying a base coat of liquid sealant, embedding a reinforcing fabric (like polyester mesh) into it, and then applying one or more topcoats. This creates a monolithic, highly durable, and flexible membrane over the entire seam. This approach is more labor-intensive but provides exceptional, long-term protection for troubled areas.
When making your choice, consider the specific location of the seam, the material of your roof, the local climate, and whether paintability is a concern. If you're unsure, it's always wise to consult with a roofing professional or refer to the manufacturer's recommendations for your specific metal roofing product. For general guidance on roof components, our article on Metal Roof Components & Accessories Explained can offer more insights.
| Sealant Type | Key Benefits | Best For | Drawbacks | Paintable? |
|---|---|---|---|---|
| 100% Silicone | Extreme flexibility, excellent UV resistance, long lifespan | Dynamic joints, flashing, pipe boots, skylights | Non-paintable, difficult to clean/remove | No |
| Butyl (Liquid) | Strong adhesion, good water resistance, flexible | Lap seams, general repairs, around exposed fasteners (if paintable variant) | Can be messy, not as UV resistant as silicone | Some |
| Urethane | Very durable, strong adhesion, good flexibility | Flashing, vents, high-traffic areas, applications needing strength | UV degradation over time, longer cure times, contains isocyanates | Yes |
| Butyl Tape | Permanent flexibility, immediate seal, easy to use (pre-installation) | Between overlapping panels (during installation), small, static gaps | Messy, hard to apply to existing seams | No |
| Self-Adhering Tape | Instant waterproof seal, easy application, strong adhesion | Flashing details, emergency repairs, reinforcing existing seams | Can be thick/visible, may not conform to complex shapes easily | Often No |
Step-by-Step Guide to Sealing Metal Roof Seams and Laps
Alright, let's get down to business! Sealing metal roof seams and laps isn't rocket science, but it does require attention to detail and proper technique. Rushing through the preparation steps or using the wrong application method can lead to premature failure, and you'll be back to square one.
Essential Preparation for Lasting Adhesion
This is where the real work happens, and it's absolutely non-negotiable. Skipping steps here guarantees a short-lived repair.
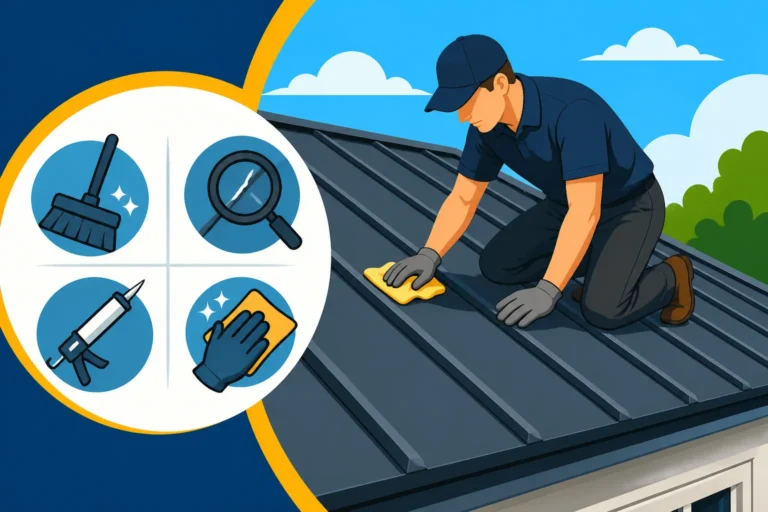
- Safety First: Before you even think about getting on the roof, assess the risks. Metal roofs can be slippery, especially if wet or dusty. Use a sturdy ladder, wear non-slip shoes with soft soles (to avoid damaging the roof), and consider a safety harness, especially if your roof has a steep pitch or if you're working alone. Avoid working on extremely hot days (metal can get scalding) or in windy, rainy, or icy conditions. Remember, your safety is worth more than any repair. If you're not comfortable on a roof, it's best to call a professional. Services like Modernize can help you find qualified local roofers.
- Locate and Assess the Problem Area: Don't just seal willy-nilly. Carefully inspect the roof to identify all areas where sealant is failing or where water might be entering. Look for cracked, brittle, or missing sealant; loose fasteners; signs of rust near seams; or water stains on the underside of the roof deck or in the attic. Sometimes, the entry point isn't directly above the drip you see inside. Water can travel.
- Clean, Clean, Clean: This cannot be stressed enough. Sealants won't adhere to dirt, grease, old flaking paint, or loose debris.
- Remove Old Sealant: Carefully scrape away all old, degraded sealant using a plastic scraper or wire brush. Be gentle to avoid damaging the existing paint finish on the metal. For stubborn residue, a solvent like mineral spirits or denatured alcohol can help, but test it in an inconspicuous area first to ensure it doesn't harm the roof coating.
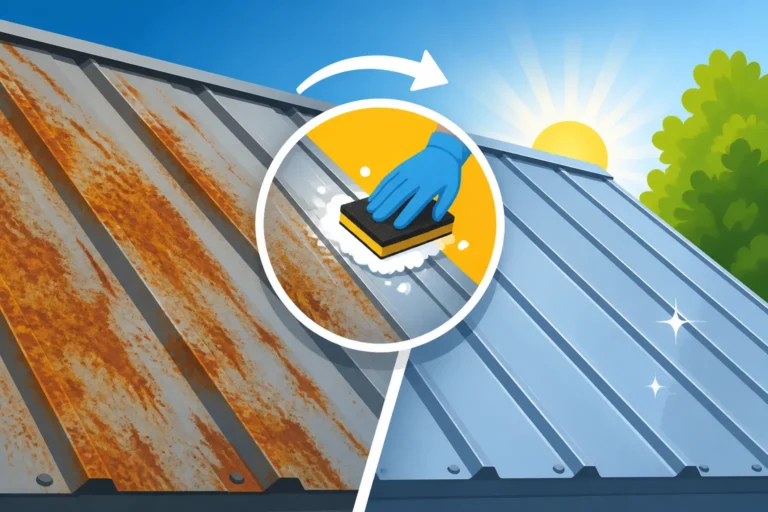
- Wash the Surface: Use a mild detergent solution (like dish soap and water) and a stiff brush to thoroughly scrub the seam and surrounding areas. Rinse thoroughly with clean water, ensuring no soap residue remains. For heavy grime, a pressure washer on a very low setting can be used, but extreme caution is advised to prevent water intrusion or damage to panels.
- Remove Rust: If you find any surface rust, gently remove it with a wire brush or fine-grit sandpaper. For more extensive rust, you might need a rust converter product, followed by a metal primer before sealing. Our guide on Metal Roof Rust and Corrosion Treatment provides more detailed instructions.
- Dry Completely: This is crucial. Do not apply sealant to a wet or even damp surface. Use towels or allow ample time for the area to air dry completely. A leaf blower can speed up the process, but moisture must be gone.
- Prime (If Necessary): Some sealants, especially urethanes, recommend a primer for optimal adhesion, particularly on older or chalking surfaces. Always check the sealant manufacturer's instructions. If a primer is specified, apply it evenly and allow it to cure fully before moving on.
Applying Liquid Sealants Correctly
Once your surface is prepped, it's time to apply the chosen liquid sealant.
- Prepare the Sealant: Cut the tip of the sealant tube at a 45-degree angle, making an opening just wide enough to create the desired bead size. Puncture the inner seal. Load the tube into a quality caulk gun. A good caulk gun with a smooth trigger action makes a big difference.
- Apply a Continuous Bead:
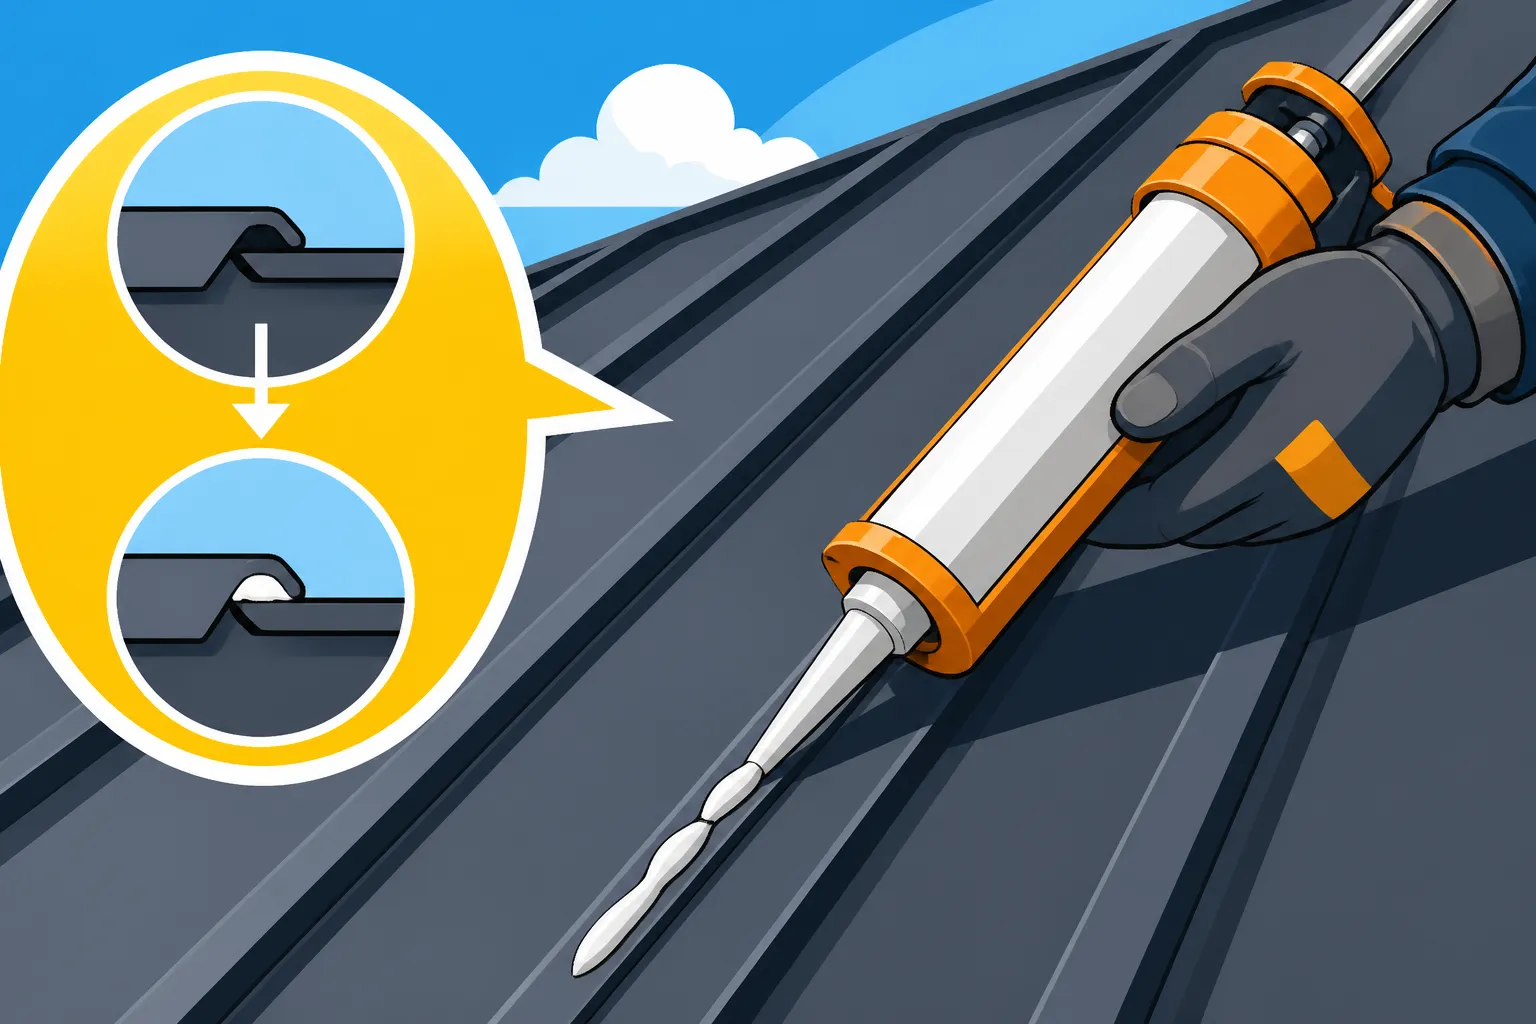
- Seams/Laps: For overlapping laps or around flashing, apply a consistent, continuous bead of sealant directly into the joint or along the edge of the flashing. Aim for a smooth, even flow.
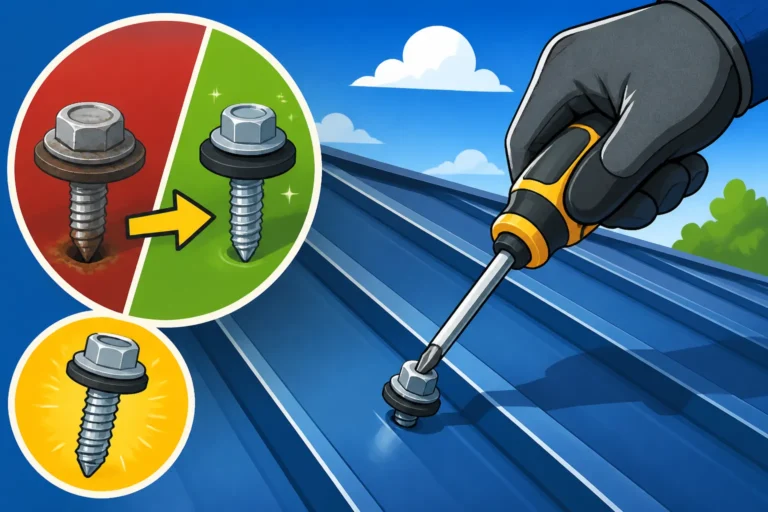
- Fasteners: For exposed fasteners, if the rubber washer is degraded, carefully remove the old screw (one at a time to maintain panel stability). Apply a dab of sealant into the screw hole, insert a new screw with a fresh washer, and tighten it appropriately (snug, but don't over-tighten and crush the washer). Then, apply a small "dab" or cap of sealant directly over the head of the new screw and washer.
- Tooling the Bead (Optional but Recommended): Immediately after applying the bead, use a caulk tooling tool, a gloved finger, or a damp sponge to smooth the sealant. This ensures good contact with both surfaces, pushes the sealant into any crevices, and creates a neat, professional-looking finish. For very narrow or intricate areas, a small plastic spreader can be useful.
- Clean Up Excess: Wipe away any excess sealant with a damp cloth or a rag soaked in the appropriate solvent (check the sealant manufacturer's guidelines for cleanup instructions). Do this while the sealant is still wet.
- Curing: Allow the sealant to cure fully according to the manufacturer's instructions before exposing it to heavy rain or traffic. Cure times can vary widely based on sealant type, temperature, and humidity.
Working with Seam Tapes and Fabric Reinforcement
For tougher repairs or when using tape-based systems, the approach is slightly different.
- Applying Butyl Tape Between Laps (Existing Roofs): While butyl tape is primarily for new installations, it can sometimes be used to reinforce existing laps. This is much harder to do effectively on an already installed roof. If you can lift an edge of a panel carefully (sometimes possible with exposed fastener systems if you remove the screws), clean both mating surfaces meticulously. Then, apply the butyl tape evenly along one edge, peel the backing, and carefully lower the panel back into place, pressing down firmly to ensure good adhesion. Re-fasten securely.
- Using Self-Adhering Flashing Tapes:
- Cut to Size: Measure and cut the tape to the appropriate length, adding a few inches for overlap at corners or ends.
- Peel and Press: Starting at one end, peel back a small section of the release liner. Carefully align the tape over the seam or penetration. Press down firmly as you slowly peel back the rest of the liner, ensuring no air bubbles are trapped underneath. Use a roller or your hand to apply continuous, firm pressure across the entire surface of the tape, forcing out any air. Overlap sections by at least 3-6 inches for a watertight seal.
- Corners/Transitions: For complex corners, you might need to cut and overlap sections of tape, ensuring each layer sheds water.
- Fabric-Reinforced Liquid Membranes (for difficult areas):
- Base Coat: Apply a liberal, even base coat of the liquid membrane sealant to the thoroughly prepped seam or area.
- Embed Fabric: While the base coat is still wet, embed the reinforcing fabric (e.g., polyester mesh) into it, ensuring it's fully saturated and there are no wrinkles or air bubbles. Overlap fabric sections by at least 2-3 inches.
- Top Coats: Once the base coat and fabric are set (check manufacturer's instructions for timing), apply one or two additional topcoats of the liquid membrane, fully encapsulating the fabric. Build up the thickness slightly over the seam. This creates a highly durable, flexible, and seamless repair. This method is often reserved for professional roof restoration companies or very challenging repairs.
Always remember that proper preparation and careful application are your best friends in achieving a long-lasting, watertight seal for your metal roof. If you’re unsure about your ability to tackle a repair, don’t hesitate to get quotes from certified metal roofing contractors through resources like Modernize. A small investment in professional help now can save you a fortune in water damage down the line.
Maintaining and Inspecting Your Sealed Metal Roof
Even after you've diligently sealed all those seams and laps, your work isn't entirely done. A metal roof, while low-maintenance compared to some other roofing materials, still benefits greatly from a little attention over its long life. Proactive maintenance is key to maximizing its lifespan and preventing future headaches. For more on extending your roof’s life, check out How Long Do Metal Roofs Last.
Regular Checks for Wear and Tear
Think of your metal roof like any other critical system in your home – it needs periodic check-ups. You wouldn't ignore your furnace for decades, right? Your roof protects everything under it, so it deserves the same consideration.
- Bi-Annual Visual Inspections: The best practice is to conduct a thorough visual inspection of your metal roof at least twice a year, ideally in the spring after winter storms and in the fall before the cold weather sets in.
- From the Ground: Start by walking around your home. Use binoculars to look for obvious issues like loose panels, missing fasteners, excessive dirt accumulation, or areas where the roof's coating appears faded or chalky. Look for any signs of water runoff issues, like stained fascia or siding, which could indicate a problem with the roof or gutters.
- On the Roof (with caution): If you're comfortable and it's safe to do so, get up on the roof (always using proper safety gear and techniques). Focus your attention on all the critical areas we discussed earlier: ridge caps, valleys, pipe boots, skylight flashings, and especially the seams and laps you recently sealed.
- Look for Cracks and Shrinkage: Are there any new cracks in the sealant you applied? Has it pulled away from the metal surface (delamination)? Has it shrunk, exposing a gap?
- Check Fasteners: For exposed fastener roofs, inspect every screw. Are the rubber washers still intact and flexible, or are they dry-rotted, cracked, or missing? Are any screws backed out or loose?
- Inspect Flashing: Ensure all flashing details around penetrations are tight and that their seals are still intact. Look for any signs of rust or deterioration around these critical junctions.
- Clear Debris: Remove any leaves, branches, or other debris that might have accumulated, especially in valleys or around flashing, as this can trap moisture and accelerate degradation.
- Post-Storm Assessment: After any significant weather event – a heavy hailstorm, strong winds, or an ice storm – it’s crucial to conduct an extra inspection. Even if you don't see immediate damage, high winds can loosen fasteners, hail can dent panels and compromise sealant, and ice dams can stress seams. While metal roofs are excellent for Best Metal Roof for High Wind Areas and Best Metal Roof for Snow and Cold Climates, extreme events can still take their toll. Be on the lookout for anything out of the ordinary.
Proactive Measures to Extend Sealant Life
Beyond inspections, a few proactive steps can help extend the life of your seals and your entire roof system.
- Keep it Clean: Regularly cleaning your metal roof, especially in areas where organic matter can accumulate, prevents moisture retention and chemical degradation of sealants. A simple rinse with a garden hose can often do the trick. For stubborn grime, a soft brush and mild soap work wonders. Avoid harsh chemicals or high-pressure washing that could damage the roof's coating or force water into seams.
- Address Issues Promptly: Don't procrastinate! If you spot a small crack in the sealant or a loose fastener during an inspection, address it immediately. A small repair now can prevent a major leak and costly damage later. Keep some of your preferred sealant on hand for quick touch-ups.
- Maintain Gutters: Clogged gutters cause water to back up onto the roof edges, potentially seeping under flashing and compromising seals. Ensure your gutters are clean and draining properly.
- Proper Ventilation: While not directly related to sealant on seams, good attic ventilation is vital for the overall health of your roof system. It helps regulate roof temperature, reducing the extremes of thermal expansion and contraction that stress sealants. It also prevents condensation buildup, which can lead to moisture damage from the underside. For more on this, check out our guide on Metal Roof Underlayment and Ventilation Guide.
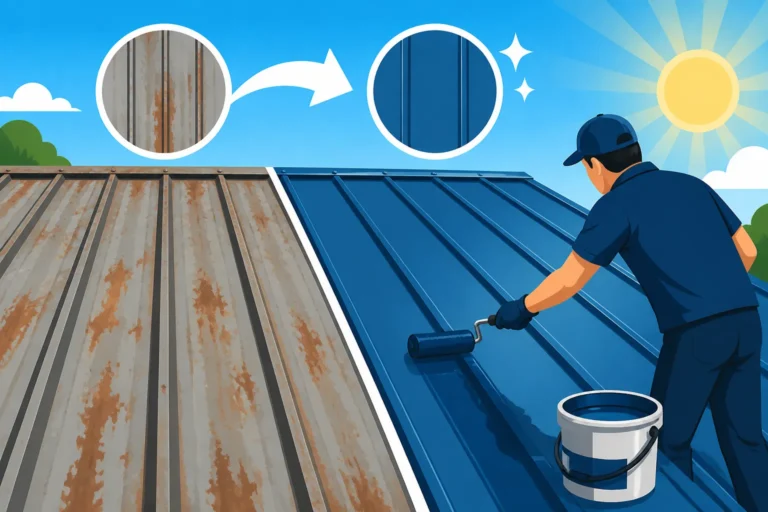
- Consider Coatings: For older metal roofs where the entire surface, including many seams, is showing signs of widespread degradation but the underlying structure is sound, a full roof coating system can be a game-changer. These elastomeric coatings can encapsulate existing fasteners and seams, providing a new, monolithic, and highly durable protective layer that can add many years to the roof's life. This is a bigger project than spot-sealing but can be a cost-effective alternative to full replacement.
By being vigilant and taking these proactive steps, you can significantly extend the life of your metal roof's seals, keep your home protected, and ensure your investment continues to pay off for decades to come.
Disclaimer
Please note that this guide provides general information and recommendations. Metal roofing systems and repair techniques can vary widely. Always consult your specific metal roof manufacturer's instructions and local building codes. If you are not comfortable or experienced with roofing work, it is highly recommended to consult with a qualified, licensed, and insured metal roofing professional. Working on roofs can be dangerous and should only be undertaken with proper safety equipment and precautions.