How to Repair Metal Roof Flashing Leaks
There's nothing quite like the stomach-dropping feeling of discovering a leak in your home, especially when that tell-tale drip or damp spot points straight up to your roof. For metal roof owners, flashing leaks are a particularly vexing issue, often masquerading as a minor nuisance until they become a major headache, leading to costly interior damage or even structural problems. This comprehensive guide is here to walk you through understanding why metal roof flashing fails, how to pinpoint those sneaky leaks, and the practical steps you can take to repair them, saving your home from further damage and restoring your peace of mind.
Understanding Why Metal Roof Flashing Leaks
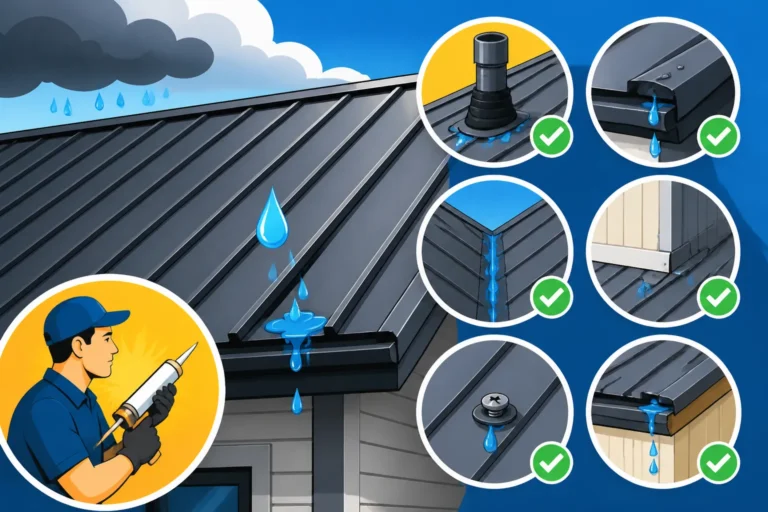
Flashing is the unsung hero of your roof, the specialized metal strips and pieces designed to prevent water from penetrating your home at vulnerable points like valleys, chimneys, skylights, vents, and wall intersections. When it's working right, you never notice it. But when it fails, oh boy, you definitely notice it. Leaks around flashing are incredibly common because these are the areas where the roof system transitions, creating opportunities for water intrusion if not perfectly sealed and installed.
Common Culprits: Why Flashing Fails
Several factors can lead to flashing failure, and often, it’s a combination of these elements working against your roof's integrity. One of the primary reasons is simply the age and exposure of the materials. Over decades, the constant assault from sun, rain, wind, and temperature fluctuations can cause flashing materials to degrade. Sealants can dry out, crack, and pull away, leaving tiny gaps for water to exploit. Even the metal itself can sometimes corrode or develop pinholes, especially in coastal areas with salt air or regions with high acidity in rain, though this is less common with modern, coated metal roofing materials.
Another frequent issue arises from movement. Your house, and by extension, your roof, is constantly experiencing slight expansions and contractions due to temperature changes. Different materials expand and contract at different rates. If the flashing wasn't designed or installed with this thermal movement in mind, it can stress the material or the sealants, leading to cracks and separations. This is particularly true where flashing meets dissimilar materials, like brick chimneys or concrete walls.
The Impact of Poor Installation
Honestly, so many flashing issues trace back to subpar installation. It’s one of those areas where cutting corners simply won’t pay off. If the flashing wasn't properly overlapped, crimped, or sealed according to manufacturer specifications and best practices, it’s a leak waiting to happen. For instance, if the underlayment wasn't correctly installed beneath the flashing, or if the flashing pieces aren't adequately interlocked and sealed, water can easily seep underneath.
Think about a chimney flashing – it's a complex area with multiple pieces of flashing (base, step, counter-flashing) all needing to work in concert. If any of these layers are incorrectly installed, perhaps not cut to the right size, or if the counter-flashing isn't properly mortared into the chimney, it creates a direct pathway for water. It's not always obvious right away, but a strong downpour or persistent ice dam can reveal these hidden flaws with an undeniable drip. This is why having experienced, qualified installers is so crucial, as they understand the nuances of Metal Roof Installation Process: Step by Step.
Weathering and Wear and Tear
Beyond just aging, extreme weather events take a significant toll on flashing. High winds can lift, bend, or even tear flashing away from its attachment points, especially at edges or around penetrations. Hail can dent and compromise the protective coatings, potentially leading to faster degradation of the underlying metal, though metal roofs are generally quite resilient to hail. Heavy snow and ice dams are particularly notorious for causing flashing leaks. When ice dams form, water can back up under the roofing materials and then seep through any tiny breach in the flashing or seals.
Even seemingly innocuous issues like falling debris or branches can damage flashing over time, bending it out of shape or puncturing it. Regular Metal Roof Maintenance Guide can help you spot these issues early, but sometimes, Mother Nature has other plans. The continuous expansion and contraction from daily temperature swings also contribute to the gradual fatigue of flashing materials, leading to the sealants losing their elasticity and the metal itself developing small stress cracks.
Diagnosing a Flashing Leak: Becoming a Leak Detective
Finding the source of a roof leak can often feel like a frustrating game of hide-and-seek, especially with metal roofs. Water has a cunning way of traveling along structural elements before showing itself far from its entry point. But with a systematic approach, you can significantly improve your chances of pinpointing the exact location of a flashing leak.
Visual Inspection Techniques
Start your leak investigation from the exterior, ideally on a dry, clear day. Safely climb onto your roof, or use a good pair of binoculars from the ground if getting on the roof isn't safe or possible. Pay close attention to all areas where flashing is present: around chimneys, skylights, vent pipes, valleys, dormers, and along wall intersections. Look for obvious signs of damage such as bent, rusted, or missing flashing. Are there any cracks or gaps in the caulk or sealant around the edges of the flashing? Is the flashing loose or pulling away from the roof deck or adjacent structures?
Also, inspect the integrity of the surrounding roofing panels. Sometimes, the issue might not be the flashing itself but a compromised panel right next to it that allows water to run under the flashing. Check for missing or backed-out screws, especially on exposed fastener systems, as these are common entry points for water. You might want to review our guide on Why Is My Metal Roof Leaking at the Screws? for more insights on this specific issue. Look for streaks or discoloration on the roof panels below the flashing, which could indicate a water path.
Water Testing for Stubborn Leaks
When a visual inspection doesn't reveal the culprit, it's time for some controlled water testing. This is best done with a helper and on a dry day, so you can clearly see the fresh water's path. Start by having one person inside with a flashlight, ready to call out when a drip appears. The person on the roof should begin by running a garden hose directly onto the suspected area above the flashing. For example, if it's a chimney, start by wetting the roof panels directly above the chimney, then gradually work your way down.
Be patient. Leaks don't always appear instantly. Sometimes it takes several minutes for water to travel. Isolate sections as you go. For a chimney, first wet the roof above it, then the chimney sides, then directly onto the base of the flashing, then the counter-flashing. By moving systematically and waiting for a response inside, you can often narrow down the precise point of entry. This process is far more effective than just dousing the entire roof, which can confuse the leak's origin.
Interior Clues and Hidden Damage
While the leak might be showing up as a stain on your ceiling, the actual entry point on the roof could be several feet away, especially on a pitched roof. Water often travels along rafters, trusses, or the underside of the roof deck before gravity pulls it through a ceiling panel. Look for water stains, discoloration, sagging drywall, or peeling paint on your interior ceilings and walls. These are clear indicators of water intrusion.
In your attic or crawl space, use a powerful flashlight to inspect the underside of the roof deck, rafters, and insulation directly above and around the stained area. You might see wet wood, dark stains, or even mold growth, which can help trace the path back towards the flashing. Sometimes, removing a small section of drywall or ceiling panel might be necessary to get a clearer view of the water's trajectory and pinpoint the exact entry point. Remember to exercise caution in attics, as tripping hazards and exposed electrical wiring can be dangerous.
Step-by-Step Guide to Repairing Flashing Leaks
Once you've successfully played detective and found the source of your flashing leak, it's time to roll up your sleeves and get to work. Repairing flashing leaks can range from a simple caulk application to more involved panel adjustments or even partial re-flashing. Always prioritize safety when working on your roof.
Gathering Your Tools and Materials
Before you even think about climbing onto the roof, make sure you have everything you need. This saves you from countless trips up and down the ladder, and it ensures you can complete the job efficiently and safely. Here's a typical checklist:
- Safety Gear: A sturdy ladder, non-slip shoes, work gloves, safety glasses, and ideally, a safety harness with a rope and anchor.
- Cleaning Supplies: Wire brush, stiff bristle brush, rags, and a cleaner like mineral spirits or a dedicated roof cleaner to prep the surface.
- Repair Materials:
- High-Quality Sealant: This is paramount. Don't cheap out here. Look for a sealant specifically designed for metal roofing, with excellent adhesion, flexibility, and UV resistance. Products like those from companies like GE Silicone 2+ or other reputable brands offering professional-grade elastomeric sealants are often recommended. Make sure it's compatible with your specific metal roof coating.
- Butyl Tape/Sealing Strips: For seams, overlaps, or screw penetrations that need a more robust, long-lasting seal than caulk alone.
- Metal Repair Patches: If you have small holes or cracks in the flashing itself, a self-adhesive metal repair tape or a small piece of matching metal secured with appropriate fasteners can work.
- Fasteners: If existing fasteners are loose or rusted, you'll need new ones, ideally self-tapping metal screws with rubber washers for a watertight seal.
- Paint (Optional): If you're patching or extensively sealing, you might need matching touch-up paint to protect the repair and maintain aesthetic consistency.
Preparing the Area for Repair
Proper surface preparation is absolutely critical for a successful, long-lasting repair. If you apply sealant over dirt, old crumbling caulk, or rust, it simply won't adhere properly and will fail quickly.
First, carefully clean the entire area around the leak. Use a wire brush or scraper to remove any loose debris, old caulk, rust, or flaking paint. If there's mold or mildew, scrub it away thoroughly. Next, clean the surface with a rag and mineral spirits or a similar degreaser to remove any oils or residues. This creates a clean, dry surface for the new sealant to bond to. Ensure the area is completely dry before proceeding with any sealing or patching. For more detailed tips on general leak detection and repair, you might find our article on How to Fix a Leaking Metal Roof quite helpful.
Specific Repair Methods for Different Flashing Types
The approach you take will depend on the type of flashing and the nature of the leak.
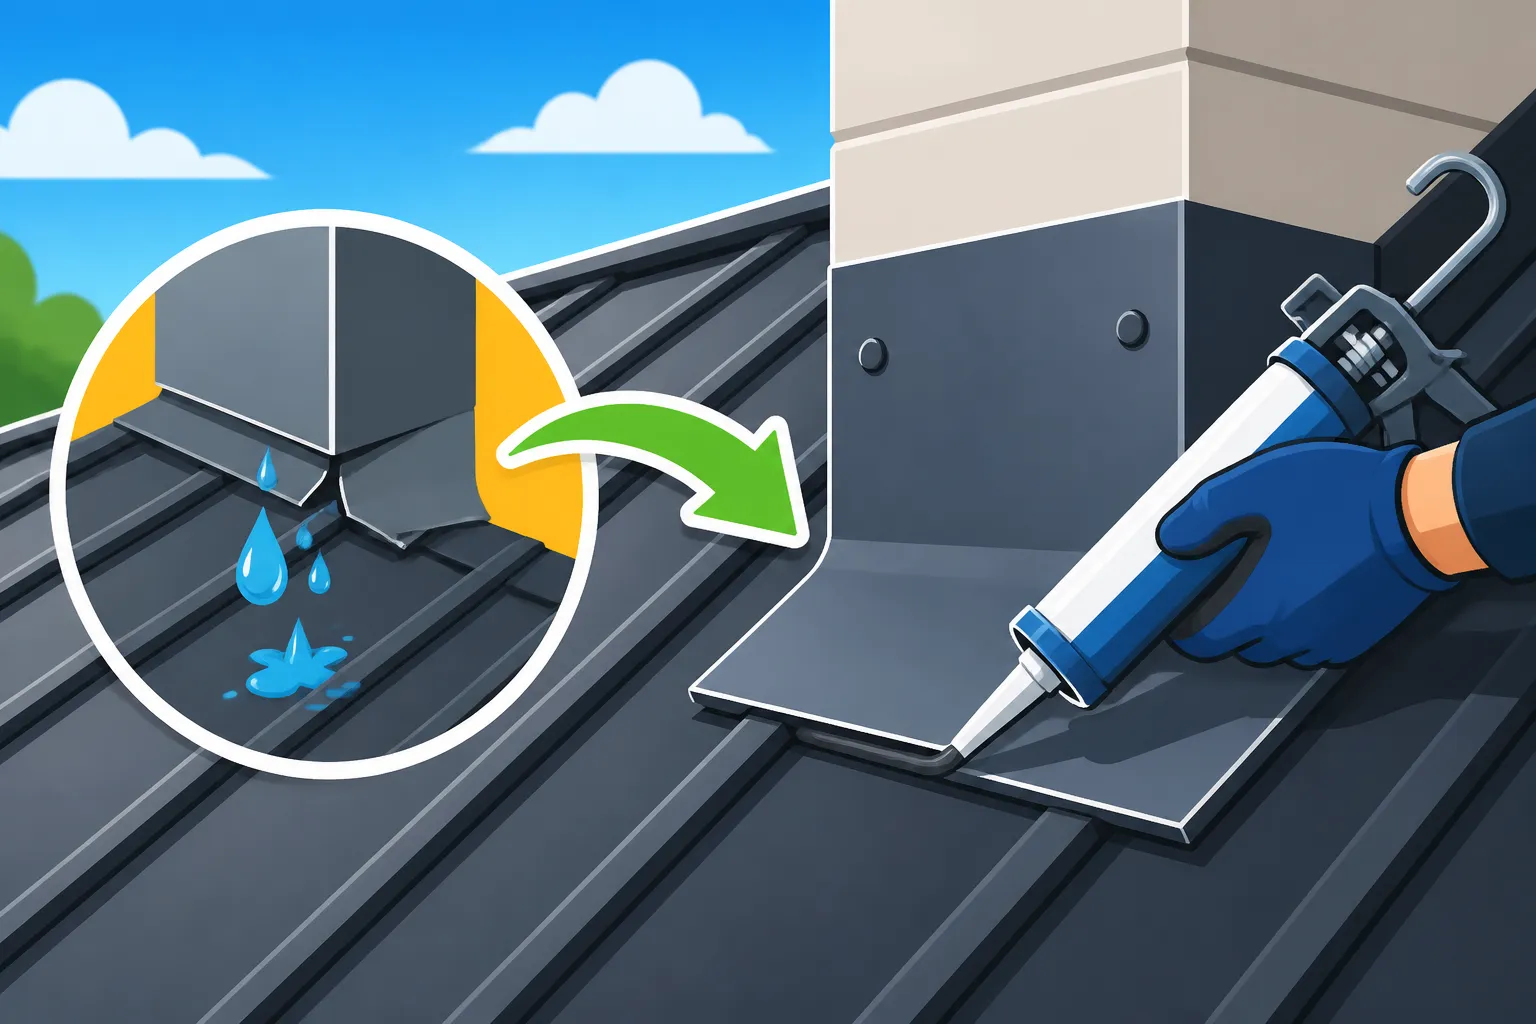
- Sealing Gaps and Cracks: For minor separations or cracks in existing caulk, after cleaning, apply a continuous bead of high-quality metal roofing sealant directly into the gap. Smooth it out with a wet finger or a caulk tool to ensure good adhesion and a clean finish. Don't skimp on the sealant, but don't over-apply either; you want a solid, uniform seal.
- Loose Flashing: If a piece of flashing is loose but otherwise intact, re-secure it. This might involve replacing old fasteners with new ones, ensuring they have robust rubber washers. For standing seam systems, this could mean re-clamping or reforming a seam. For step flashing, it might mean re-nailing or re-screwing the individual pieces to the roof deck and wall. If counter-flashing has pulled out of a mortar joint, you may need to tuck-point it back in with fresh mortar or a masonry sealant.
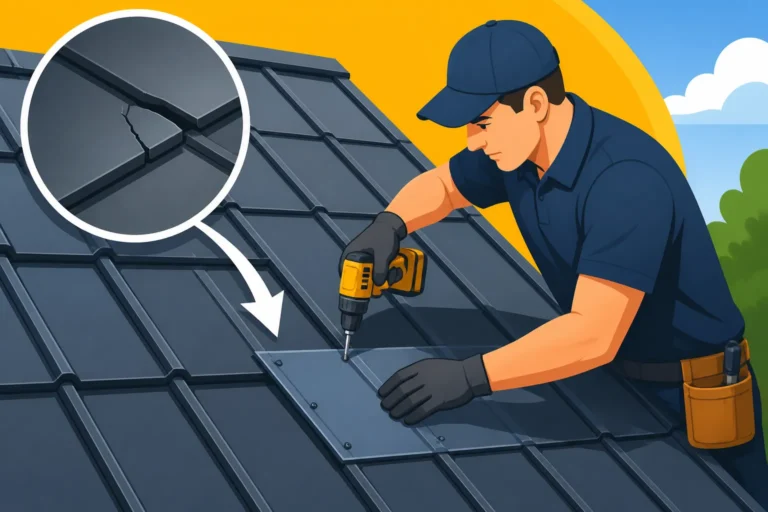
- Punctures or Holes: For small holes (e.g., from a popped nail or stray debris), you can often use a specialized metal repair tape or a small patch of matching metal secured with sealant and screws. If using a patch, ensure it extends at least an inch beyond all sides of the hole and is thoroughly sealed underneath and around the edges.
- Compromised Valleys: Valley flashing is designed to channel large amounts of water. If it’s leaking, it's often due to improper overlaps, missing fasteners, or accumulation of debris. Clear any debris, inspect for damage, and re-seal overlaps with butyl tape and sealant. In some cases, a severely damaged valley might require partial replacement, which is typically a job for a professional.
- Replacing Damaged Sections: For extensive damage, like a severely bent or rusted piece of flashing that cannot be repaired effectively, replacement is the only option. This is often the most challenging repair and may require carefully detaching surrounding roofing panels or siding. Unless you are highly experienced, this is definitely a scenario where professional help is recommended, as improper replacement can lead to even bigger problems. If you need to source specific parts, understanding Metal Roof Components & Accessories Explained can be beneficial.
Here's a quick comparison of common repair materials:
| Material Type | Best Use Case | Pros | Cons | Expected Lifespan (Repair) |
|---|---|---|---|---|
| Elastomeric Sealant | Small cracks, gaps, perimeter sealing of flashing | Flexible, good adhesion, UV resistant | Can degrade over time, needs clean surface | 5-15 years |
| Butyl Tape | Seams, overlaps, under fasteners | Excellent waterproofing, highly adhesive, long-lasting | Less flexible for complex contours, messy to work with | 10-25 years |
| Metal Repair Tape | Small punctures, tears in flashing | Easy to apply, strong immediate seal | May not match roof color, limited to small repairs | 5-10 years |
| New Fasteners | Loose screws, exposed fastener systems | Restores secure attachment, integrated washer for seal | Requires proper torque, potential for overtightening | 10-20 years |
| Matching Metal Patch | Larger holes, rusted sections | Durable, blends well, strong structural repair | Requires cutting and sealing, more involved installation | 20+ years |
Post-Repair Inspection and Maintenance
After your repair, give the sealant ample time to cure according to manufacturer instructions. This could be 24-72 hours. Once cured, perform another visual inspection to ensure everything looks secure and tidy. The next time it rains, or if you conduct another water test, keep a close eye on the repaired area and the interior to confirm that the leak has been stopped.
Regular roof maintenance is key to preventing future leaks. Make it a habit to inspect your roof at least twice a year, usually in the spring and fall, and after any major storms. Clear away leaves, branches, and other debris that can accumulate around flashing, especially in valleys and near chimneys. Check the condition of all sealants and flashing, and address any small issues before they escalate into major leaks. This proactive approach will significantly extend the life of your roof and the effectiveness of your repairs.
When to Call a Professional for Flashing Repairs
While many minor flashing leaks can be tackled by a diligent homeowner, there are definite times when bringing in a professional metal roofing contractor is not just a good idea, but essential. Knowing when to step back and call for expert help can save you money, time, and potential headaches in the long run.
Recognizing Complex or Extensive Damage
If you're dealing with extensive rust, multiple damaged flashing sections, or structural issues beneath the flashing, it's time to call in the pros. For example, if your valley flashing is so corroded that it needs to be completely replaced, or if the step flashing around your dormer is delaminating from the sub-surface due to long-term water damage, these are not DIY jobs. Such repairs often require specialized tools, techniques, and the ability to temporarily remove and reinstall roofing panels without causing further damage. Trying to DIY these complex repairs without the proper expertise can easily lead to bigger, more expensive problems down the line.
Another sign that you might need professional help is if the leak persists even after you've attempted a repair. This indicates that the leak's true source is either more complex than you initially thought, or there's underlying damage that you couldn't identify. Professional contractors have the experience to quickly diagnose elusive leaks and the tools, like moisture meters or even infrared cameras, to see what the naked eye cannot. This expertise can pinpoint issues related to inadequate Metal Roof Underlayment and Ventilation Guide or other concealed problems.
The Value of Expert Workmanship
There's a reason roofing contractors go through extensive training and certification. They understand building codes, proper installation techniques, and the specific requirements for different types of metal roofing materials and flashing profiles. An experienced professional will not only fix the immediate leak but will also assess the overall condition of your flashing and address any potential future problem areas. They can also ensure that the repair meets industry standards, providing you with a lasting solution rather than a temporary patch.
For intricate areas like custom chimney flashing or intricate wall-to-roof transitions, the precision and skill of a specialist are invaluable. They have access to commercial-grade materials and sealants that may not be available to the average homeowner, and they can fabricate custom flashing if needed. Reputable contractors also stand behind their work with warranties, offering you an extra layer of protection and peace of mind. If you're wondering how to find such a pro, services like Modernize can help connect you with qualified local roofing contractors who specialize in metal roofing.
Warranty Considerations and Future Prevention
Many metal roofing manufacturers offer warranties that are contingent on proper installation and repair by certified professionals. If you attempt a complex repair yourself and something goes wrong, you could inadvertently void your roof's warranty. This is a huge consideration, especially for a significant investment like a metal roof, which is designed to last 40-70 years. Discussing any potential repairs with your manufacturer or original installer can clarify these warranty implications. Our guide on Metal Roof Warranties: Workmanship vs Manufacturer delves into this topic in more detail.
Beyond the immediate repair, a professional can offer expert advice on preventative measures to extend the life of your flashing and your entire roof. They can suggest enhancements like additional sealants, improved storm collars for vents, or better debris diversion strategies. While the upfront cost of hiring a professional might seem higher than a DIY attempt, the long-term savings from a durable, warrantied repair and avoided future damage often make it the more economical choice. When in doubt, it’s always best to get a professional opinion, especially when dealing with the structural integrity and weatherproofing of your home.
Disclaimer
Please remember that this guide provides general information and recommendations. Roofing work can be dangerous. Always prioritize your safety and take necessary precautions, including wearing appropriate safety gear and ensuring a stable working environment. If you are not comfortable or experienced with roofing repairs, or if the damage is extensive, it is always best to consult with a qualified and licensed metal roofing professional. They can provide a thorough assessment and ensure repairs are performed safely and correctly, adhering to local building codes.