How to Fix a Leaking Metal Roof
There's nothing quite like the stomach-dropping feeling of discovering a leak in your roof, especially when you thought your durable metal roof was impenetrable. It's frustrating, disheartening, and immediately brings up a cascade of worries about water damage, repair costs, and structural integrity. You might wonder how a material known for its longevity and resilience could possibly be letting water in. This guide is here to walk you through the often-stressful process of pinpointing and effectively fixing those pesky metal roof leaks, helping you restore peace of mind and protect your home.
Understanding Why Metal Roofs Leak: It's Not Always What You Think!
When you invest in a metal roof, you're usually banking on its incredible durability and long lifespan. So, when a leak appears, it can feel like a betrayal of that investment. The truth is, even the toughest metal roofs aren't entirely immune to issues, though their failure points are often different from traditional shingle roofs. Understanding these common weak spots is the first step in diagnosing and repairing the problem, saving you a lot of headache and potentially expensive professional intervention later.
Common Leak Sources You Might Overlook
It's easy to assume a leak means a giant hole, but often, the culprits are far more subtle. Many metal roof leaks stem from small, cumulative failures that go unnoticed until water starts making its unwelcome appearance inside your home.
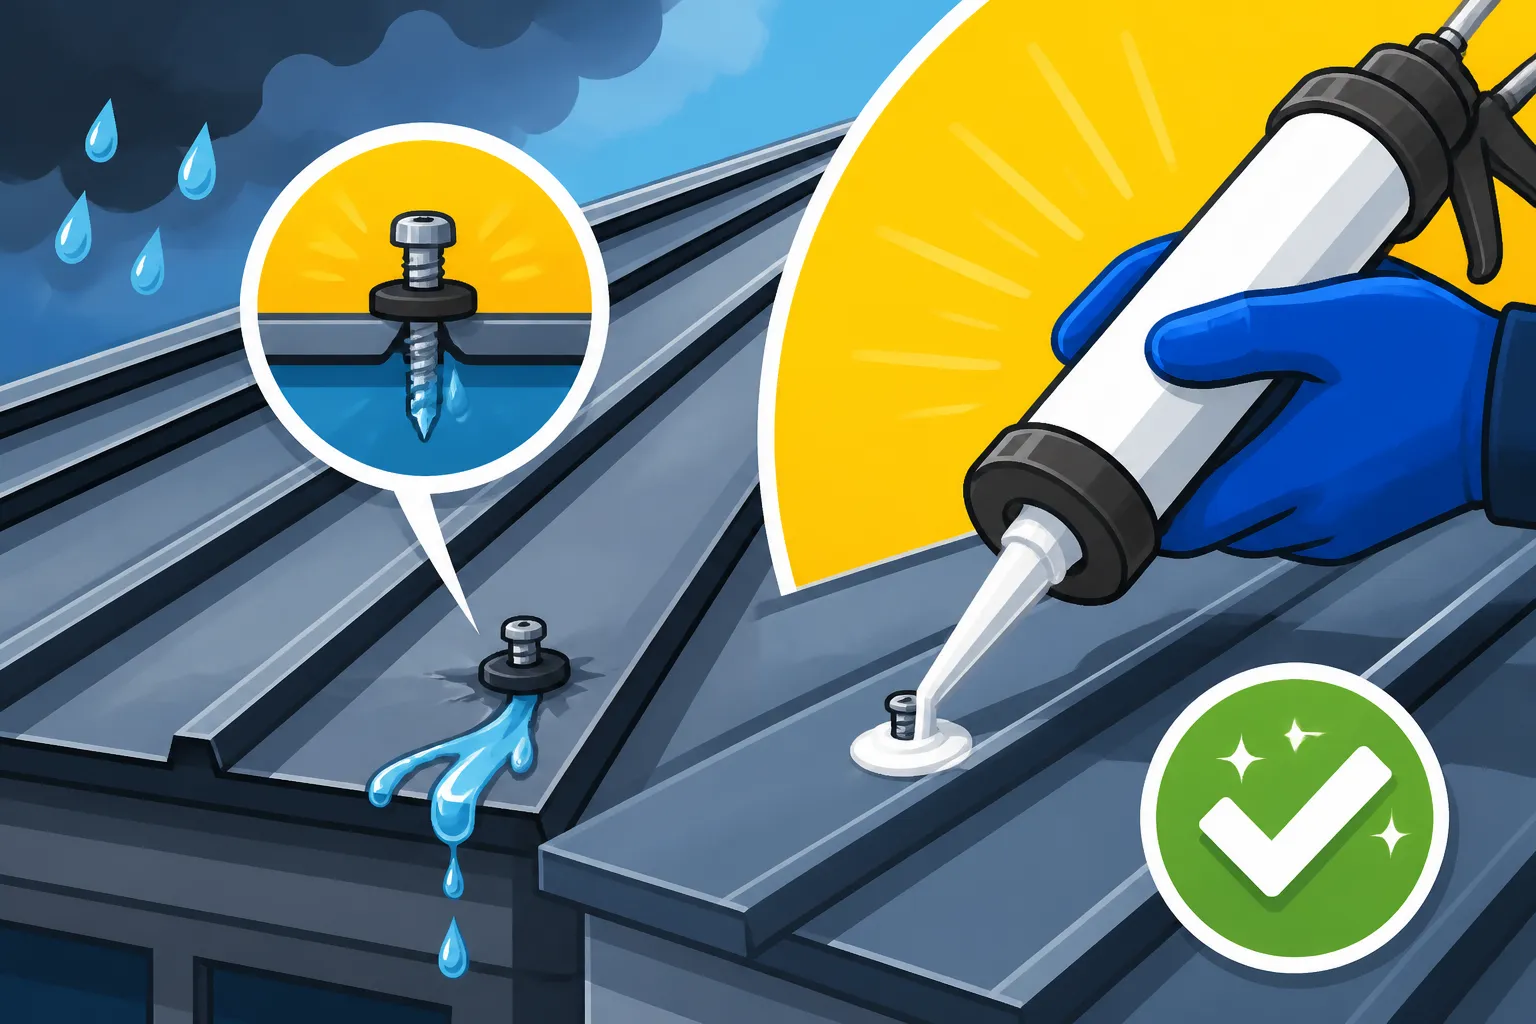
One of the most frequent offenders involves the fasteners or screws that secure your metal panels. If you have an exposed fastener system, these screws are literally on the front line against the elements. Over time, the rubber washers beneath the screw heads can degrade, dry out, crack, or compress, losing their ability to create a watertight seal. When this happens, water seeps past the screw shank and into your roof decking. Additionally, temperature fluctuations can cause the metal panels to expand and contract, which can lead to screws backing out slightly over the years, further compromising the seal. It’s a slow, insidious process that can leave homeowners scratching their heads. For more detailed information, check out our guide on why your metal roof is leaking where the screws are.
Another significant area of vulnerability lies in the seams, overlaps, and transitions between metal panels. While standing seam roofs are designed with hidden fasteners and interlocking seams that are incredibly robust, even they can develop issues if not installed perfectly or if subject to extreme forces. For exposed fastener systems, where panels often overlap, these seams are typically sealed with caulk or mastic. This sealant, like the rubber washers on screws, has a finite lifespan. UV radiation, extreme heat and cold cycles, and general weathering can cause it to crack, shrink, or detach from the metal, creating a direct pathway for water. Improperly applied sealant during installation is also a major factor, leading to premature failure.
Finally, any penetrations through your metal roof are prime candidates for leaks. This includes chimneys, vents (plumbing, attic, dryer), skylights, and even satellite dishes or solar panel mounts. The flashing — the metal or rubber seals designed to divert water away from these openings — is critical. If flashing is installed incorrectly, becomes bent or damaged, or if the sealants used around it deteriorate, water will find its way in. It’s a classic weak point for any roofing system, and metal is no exception. These areas are complex, involving multiple layers and materials, making them tricky to seal perfectly for the long haul.
Factors That Contribute to Leaks
While we've touched on some of the direct causes, a few overarching factors accelerate these problems and increase the likelihood of a leak developing on your metal roof. Understanding these helps in both prevention and identifying the root cause of an existing leak.
Age and general wear and tear are unavoidable. Even the best metal roofs, designed to last 50 years or more, will eventually show signs of their age. Coatings can fade, sealants can degrade, and the constant stress of weather takes its toll. A roof that’s 20, 30, or even 40 years old is naturally more prone to developing leaks than a brand-new installation. Components simply don't last forever, and regular maintenance becomes increasingly critical as the roof ages.
Improper installation or shortcuts taken are perhaps the most infuriating causes of leaks because they could have been avoided. A metal roof is a precise system. If panels aren't aligned correctly, fasteners are over-tightened or under-tightened, the wrong type of sealant is used, or flashing details are rushed, the roof's integrity is compromised from day one. Unfortunately, not all contractors are equally skilled or conscientious, and a poorly installed roof can start leaking much sooner than expected, often within the first few years. This underscores the importance of choosing a reputable, experienced installer who understands the nuances of metal roofing.
Finally, extreme weather damage can turn a perfectly sound roof into a leaky mess overnight. High winds can lift or warp panels, tear flashing, or even rip out fasteners. Hail, especially large hailstones, can dent metal panels and, critically, compromise the integrity of paint coatings or stone-coated finishes. While metal roofs are known for their resistance to hail, extreme impacts can still cause damage that leads to leaks over time. Heavy snow loads and subsequent ice dams can also create conditions where water is forced into tiny openings it wouldn't normally penetrate. Even a single severe storm can introduce new vulnerabilities to an otherwise robust metal roofing system.
Identifying the Source of the Leak: The Detective Work
Finding a leak can sometimes feel like a frustrating game of hide-and-seek, especially with metal roofs where water can travel far from its entry point before showing itself indoors. You need to put on your detective hat and be systematic. Rushing into repairs without accurately pinpointing the source is a surefire way to waste time, effort, and materials.
Interior Inspection Strategies
When you see a water stain on your ceiling or a drip in your attic, your first instinct might be to look directly above it. However, water rarely drips straight down. It follows the path of least resistance, often running along rafters, trusses, and ceiling joists before collecting and eventually breaching your drywall or plaster.
Start your interior investigation in the attic, if you have one. Bring a powerful flashlight. Look for water stains on the underside of the roof decking, rafters, and insulation. These stains are usually yellowish or brownish and might still be damp. Pay close attention to areas around plumbing vents, chimneys, skylights, and any other penetrations you can see from below. Sometimes, you'll see glistening water trails on the wood framing, leading you directly to the general area of the leak. If your attic is fully insulated, you might have to carefully move insulation aside, watching for damp spots in the insulation itself. Mold or mildew growth is another strong indicator of a long-standing moisture problem, potentially stemming from a leak. Don't forget to check the walls of your attic space, as leaks can sometimes run down vertical surfaces before pooling.
If your ceiling is stained, try to mark the exact location. Then, go into the attic and use a tape measure to get a relative position from a known reference point, like an exterior wall or a vent stack. This will help you narrow down the exterior search area. Remember, the actual leak on the roof could be several feet uphill or even sideways from where the water is showing inside.
Exterior Inspection Techniques
Once you have a general idea of the leak's location from your interior detective work, it's time to head outside. Safety is paramount when working on a roof. Always use a sturdy ladder, ensure it's properly secured, and wear non-slip shoes. If your roof is steep, high, or you're uncomfortable with heights, it’s always best to call a professional. For those comfortable and safe, a systematic approach is key.
Start with a thorough visual inspection of the general area you identified from the inside. Look for obvious signs of damage:
- Loose, missing, or rusted fasteners: Are screw heads corroded? Are washers visible and intact, or have they degraded?
- Compromised seams: Are there gaps in the sealant along panel overlaps? Has caulk cracked or pulled away? Are there signs of separation in standing seam panels?
- Damaged flashing: Check around all roof penetrations. Is the flashing bent, torn, or lifted? Are there cracks in the sealant where the flashing meets a chimney or vent pipe?
- Visible holes or punctures: While less common, impacts from falling debris or improper foot traffic can create small holes.
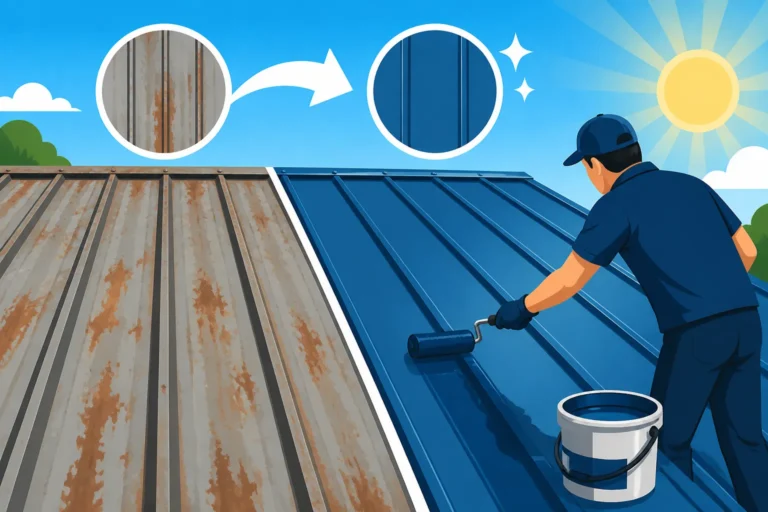
- Excessive rust or corrosion: While modern metal roofs are highly resistant, older or damaged roofs can show rust, especially in exposed fastener systems. Widespread rust can indicate material degradation that could lead to leaks. Our guide on how to repair a rusted metal roof can offer more insights if this is your issue.
If the visual inspection doesn't immediately reveal the source, a water test can be incredibly effective, but it must be done carefully to avoid causing more damage. Grab a garden hose and a helper. Starting below the suspected leak area, have your helper slowly and systematically spray water onto the roof. Work your way uphill from the interior leak point. The idea is to isolate sections of the roof. When the water starts dripping inside, you've likely found the general vicinity of the leak. Have your helper stop spraying immediately and note the exact location. This method is precise but requires patience and coordination. Never spray water directly into a vent or a specific crack for an extended period, as you could force water into areas that were previously dry. Begin with a gentle flow and only increase if necessary.
Remember that sunlight, shadows, and the roof's color can make identifying subtle issues tricky. A good pair of binoculars can help with initial scans from the ground, but up-close inspection is usually necessary for definitive identification.
Essential Tools and Materials for Leak Repair
Once you've done your detective work and honed in on the leak, it's time to gather your repair arsenal. Having the right tools and materials on hand isn't just about efficiency; it's about making sure the repair is durable and effective. Don't skimp on quality here; a cheap fix might only be temporary.
Must-Have Tools in Your Arsenal
Before you even think about climbing onto the roof, make sure your toolkit is ready. Safety should always be your top priority, so some of these tools are less about the repair itself and more about getting there and back safely.
First and foremost, a sturdy ladder is non-negotiable. Ensure it's tall enough to reach your roof safely and extends at least three feet above the eave line for easy access. Always have someone hold the ladder or use a stabilizer. For steep roofs, consider a roofing harness and rope system – fall protection is critical. You'll also need basic personal protective equipment: heavy-duty work gloves to protect your hands from sharp metal edges and safety glasses to shield your eyes from debris or sealant splashes.
For the actual repair work, you'll definitely need a power drill (cordless is ideal for roof work) with various bits, including a screw gun bit for driving fasteners. A caulk gun is indispensable for applying sealants. Have a wire brush or stiff-bristled brush, along with rags and a cleaning solution (like denatured alcohol or mineral spirits), for properly preparing surfaces before applying any sealants. A utility knife or tin snips might be needed for cutting patches or trimming excess material. Finally, a tape measure and a marker will help you accurately size patches or mark areas for repair.
Repair Materials You'll Need
Choosing the correct repair materials is just as important as the precision of your application. The type of metal, the climate, and the specific nature of the leak will all influence your choices.
For general sealing, you'll encounter a few main types of sealants. Butyl caulk is a good general-purpose sealant, offering flexibility and adhesion, but it can degrade with long-term UV exposure. Urethane sealants are much more durable, flexible, and have excellent adhesion to metal, making them a top choice for professional repairs. Products like Geocel's 2300 series are often recommended for their superior performance and longevity on metal roofs. Silicone sealants are also common, offering good flexibility and UV resistance, but some types can be difficult to paint over. Make sure whatever sealant you choose is rated for exterior use and specifically for metal roofing applications. Our guide on the Best Sealant for Metal Roof Leaks delves deeper into these options.
If you're dealing with fastener leaks, you'll need replacement metal roofing screws with integrated rubber washers (EPDM washers are generally preferred for their durability). These are readily available at most hardware or roofing supply stores. Ensure they are the correct length and gauge for your existing screws.
For patching small holes or damaged areas, metal repair patches are available. These can be small pieces of matching metal, sealed in place with a high-quality sealant. Alternatively, butyl tape (a thick, sticky, rubber-like tape) offers an instant, waterproof seal and can be used for small patches or sealing seams. Brands like Eternabond are well-regarded for their strong adhesion and weather resistance. For more extensive but still minor damage, liquid-applied patch materials or elastomeric roof coatings can be a good option. These products form a seamless, waterproof membrane over the damaged area. Always ensure the patch material is compatible with your existing metal roof type and coating.
Before applying any sealant or patch, a primer designed for metal surfaces might be necessary to ensure optimal adhesion, especially on older or oxidized metal. Finally, consider having matching touch-up paint for your roof. After repairs, applying a fresh coat of paint not only helps protect the repaired area from UV degradation but also makes the repair blend in seamlessly.
Step-by-Step Guide to Fixing Common Metal Roof Leaks
Okay, you've identified the leak, gathered your tools, and you're ready to get this done. Let's walk through the most common types of metal roof leaks and how to tackle them head-on. Remember, always prioritize safety, and if you're ever unsure or uncomfortable, call a professional.
Repairing Fastener Leaks
Leaks around fasteners are incredibly common, especially on exposed fastener metal roofs. The good news is they’re often among the easiest to fix.
- Clean the Area Thoroughly: Before you do anything, use your wire brush to gently clean around the leaking screw. Remove any loose rust, old sealant, dirt, or debris. Then, wipe the area clean with a rag and a cleaner like denatured alcohol or mineral spirits to ensure excellent adhesion for new sealant. Let it dry completely.
- Inspect the Screw and Washer: Examine the existing screw. Is it loose? Is the rubber washer beneath the screw head cracked, brittle, or completely disintegrated? If the screw is just loose, you might be able to tighten it.
- Tighten or Replace Loose Screws: If the screw is merely loose, try to tighten it with your power drill, but be careful not to over-tighten, which can strip the threads or damage the panel. The goal is snug, not wrenched down. If the washer is visibly damaged, or if tightening doesn't stop the leak, you'll need to replace the screw. To replace, carefully back out the old screw. Apply a small dab of high-quality urethane or butyl sealant into the hole before driving a new, slightly longer (if possible) metal roofing screw with a fresh EPDM washer. The new screw should bite into fresh wood below.
- Seal Around Existing Screws (Proactively): For screws that aren't actively leaking but whose washers look suspect, you can proactively seal them. Apply a small bead of sealant (like Geocel 2300 or another good quality urethane) directly over the screw head and around its base, creating a dome-like seal. This provides an extra layer of protection. This step is also a good practice to perform periodically as part of your metal roof maintenance guide.
Sealing Panel Seams and Overlaps
Leaking seams can be a bit more challenging, especially on older roofs where the original sealant has completely failed.
- Clean and Prepare the Seam: This is the most crucial step. Use your wire brush, scraper, and cleaning solution to meticulously remove all traces of old, failed sealant, dirt, and oxidation from the seam area. The new sealant needs a perfectly clean, dry surface to adhere properly.
- Apply New Sealant: For standing seam roofs that might have a small separation, a high-quality urethane sealant applied directly into the gap can work. For exposed fastener systems with overlapping panels, apply a continuous, even bead of sealant along the entire length of the seam where water is penetrating. Ensure good contact between the sealant and both panels.
- Consider Butyl Tape for Durability: For larger or more persistent seam leaks, especially on low-slope roofs, butyl tape can be an excellent solution. Once the seam is clean and dry, apply a strip of butyl tape directly over the seam, pressing it down firmly to ensure full adhesion. Some tapes, like Eternabond, even allow you to paint over them for a better aesthetic match. This method creates a highly durable, flexible, and long-lasting seal that can often outperform liquid sealants in critical areas. Our guide on how to fix a leaking metal roof seam has more specifics.
Addressing Flashing and Penetration Leaks
Flashing around chimneys, skylights, plumbing vents, and other penetrations is a common culprit for leaks because it's a complex transition point where different materials meet.
- Inspect All Penetrations: Systematically check every pipe, vent, chimney, or skylight on your roof. Look for bent or damaged flashing, gaps in old caulk, rust spots on the flashing itself, or areas where the flashing has pulled away from the roof or the penetration.
- Clean and Reseal Old Flashing: Just like with seams, thorough cleaning is essential. Scrape away all old, degraded caulk and clean the area with solvent. Then, apply a new, generous bead of high-quality urethane or elastomeric sealant where the flashing meets the roof panels and where it meets the penetration (e.g., chimney brick, vent pipe). Tool the sealant smooth for a watertight finish.
- Repair or Replace Damaged Flashing: If the flashing itself is bent, torn, or severely rusted, a simple reseal won't cut it. Small tears might be patched with a liquid repair product or a metal patch sealed with butyl tape. However, severely damaged flashing may require replacement. This is often a job best left to professionals, as it can involve disassembling parts of the roof or chimney structure. If you’re considering replacing it yourself, refer to our detailed article on metal roof flashing repair for guidance.
- Check for Other Penetrations: Don't forget smaller penetrations like wires for solar panels or antennas. Ensure these are also properly sealed with pipe boots or sealant.
Patching Small Holes and Punctures
Small holes or punctures can occur from dropped tools, falling tree branches, or even improperly installed accessories. They are less common but certainly happen.
- Clean and Prepare the Area: Clean the area around the hole meticulously, extending several inches beyond the damaged spot. Remove all dirt, grease, and loose paint with a wire brush and cleaner.
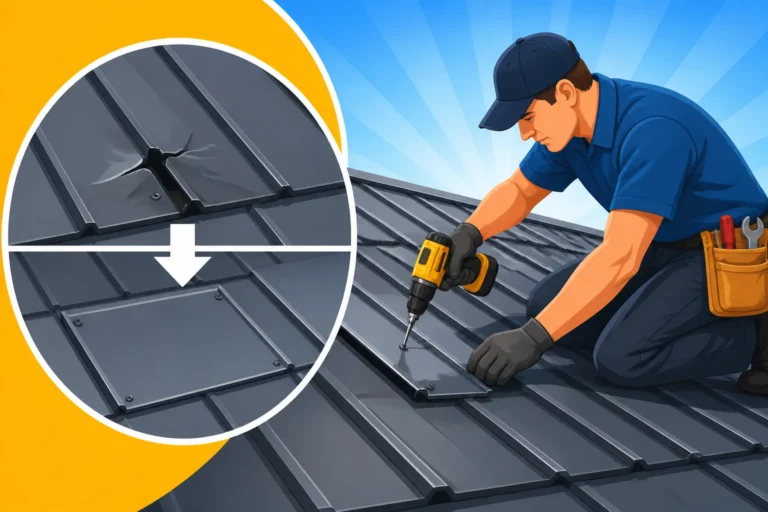
- Apply a Metal Repair Patch: For a durable repair, cut a piece of matching metal (if possible) or a flexible metal repair patch slightly larger than the hole. Apply a thick layer of high-quality urethane sealant or butyl adhesive to the underside of the patch. Center the patch over the hole and press down firmly, ensuring the sealant squeezes out around the edges.
- Seal the Edges: Apply another bead of sealant around the perimeter of the patch for an extra watertight seal. Smooth it out.
- Consider Liquid-Applied Patch Materials: For very small holes (pinholes) or areas with minor surface damage, a liquid rubberized or elastomeric patch material can be brushed or troweled over the cleaned area. These products cure into a flexible, waterproof membrane. Always follow the manufacturer's instructions for application thickness and drying times. For step-by-step instructions on this specific repair, consult our article on how to repair a small hole in a metal roof.
- Touch-Up Paint: Once the sealant or patch material has fully cured, consider applying a matching touch-up paint to protect the repair from UV degradation and blend it into the rest of the roof.
When to Call a Professional: Knowing Your Limits
While tackling minor metal roof leaks yourself can be empowering and cost-effective, there absolutely comes a point where professional help isn't just recommended, it's essential. Knowing when to call in the cavalry can save you from bigger headaches, further damage, and even dangerous situations.
Signs a DIY Repair Won't Cut It
There are clear indicators that a leak is beyond a homeowner's DIY capabilities. Ignoring these signs can lead to more extensive and expensive problems down the line.
One major red flag is extensive or widespread damage. If you're seeing multiple leaks across different sections of your roof, large areas of corrosion, significant panel damage, or an overall degradation of the entire roof system, you're looking at a bigger project than a simple patch job. A professional can assess the full scope of the damage, determine if a partial replacement is needed, or if the entire roof has reached the end of its functional life. Trying to continually patch a failing roof is like putting band-aids on a gaping wound – it’s not a sustainable solution.
Structural issues are another immediate call for a pro. If you notice any sagging in the roof deck, soft spots when walking on the roof, or visible damage to rafters or trusses in the attic, these aren't just minor leaks; they could indicate significant water damage that has compromised the structural integrity of your home. Addressing these requires expert knowledge in both roofing and structural repair. It’s not just about stopping the drip, but ensuring your home is safe and sound.
Finally, your own safety concerns should never be ignored. If your roof has a very steep pitch, is exceptionally high, or if you simply aren't comfortable working at heights, attempting a DIY repair is a significant risk. A fall from a roof can result in serious injury or worse. Professional roofers have the training, equipment, and insurance to work safely in challenging conditions. Also, if you've tried multiple times to fix a leak and it keeps reappearing, that's a good sign that either the true source hasn't been found, or the repair technique is inadequate. This is when a fresh, experienced set of eyes is invaluable. Don't be too proud to admit defeat; sometimes, expertise is worth every penny.
How to Find a Reputable Metal Roofing Contractor
When you decide it's time to bring in the pros, finding the right metal roofing contractor is crucial. Metal roofing requires specialized knowledge and equipment, so you don't want just any general roofer.
Start by looking for contractors who specialize in metal roofing. They understand the nuances of different panel types (like standing seam versus corrugated), specific fastening systems, and proper flashing techniques for various penetrations. A general roofer might be great with shingles but lack the expertise for a long-lasting metal roof repair. You can often find specialists by searching for "standing seam roof specialist" or "metal roofing contractor near me." Online platforms like Modernize can also be a fantastic resource for connecting with reputable, pre-screened local contractors who specialize in metal roofing, saving you a lot of legwork in finding reliable professionals.
Once you have a few candidates, thoroughly vet them. Check their licensing, bonding, and insurance. A reputable contractor will carry liability insurance and workers' compensation, protecting you from potential costs if an accident occurs on your property. Ask for references and actually call them. Inquire about their experience with metal roofs specifically, how long they've been in business, and what kind of warranties they offer on their workmanship. For an in-depth checklist, refer to our guide on how to hire a metal roofing contractor and questions to ask a metal roofing contractor before you hire.
Finally, get multiple quotes (at least three) for the repair. A good contractor will conduct a thorough inspection, explain the source of the leak, and detail their proposed repair plan in writing, along with a clear breakdown of costs. Be wary of estimates that are significantly lower than others, as this can sometimes indicate shortcuts or less experienced labor. A quality repair is an investment in your home's longevity, and it’s important to understand exactly what you’re paying for. Don't be afraid to ask questions until you're completely comfortable with the contractor and their approach.
| Leak Type | Common Causes | DIY Fix Possibility | When to Call a Pro |
|---|---|---|---|
| Fastener Leaks | Degraded washers, loose screws, corrosion | High | Widespread corrosion, stripped holes, many failed screws |
| Seam Leaks | Deteriorated sealant, panel separation | Medium | Extensive seam failure, warped panels, poor installation |
| Flashing Leaks | Cracked sealant, bent/damaged flashing, improper install | Medium | Complex chimney/skylight flashing, structural damage |
| Holes/Punctures | Impact damage, dropped tools, excessive wear | High | Large holes, multiple punctures, underlying structural issues |
| Widespread Damage | Hail, wind, age, poor initial installation | Low | Almost always needs professional assessment & repair |
Preventing Future Metal Roof Leaks
An ounce of prevention is worth a pound of cure, especially when it comes to your metal roof. Once you've successfully fixed a leak, the last thing you want is for another one to pop up. Proactive measures and smart choices can significantly extend the life of your metal roof and keep it watertight for decades to come.
Regular Maintenance and Inspections
Unlike traditional shingle roofs that often get ignored until they fail, metal roofs benefit greatly from routine care and inspection. It's not difficult, and it can catch potential problems long before they turn into costly leaks.
Annual visual checks are paramount. At least once a year, and ideally after any significant storm, take the time to carefully inspect your metal roof. From the ground with binoculars, or safely from a ladder (if you’re comfortable), look for any signs of trouble. Pay close attention to all the areas we discussed as common leak sources: fasteners, seams, flashing around penetrations, and the general condition of the panels. Are there any loose screws? Is the sealant around flashing cracking or pulling away? Are there any small dents or areas of faded coating? Catching a deteriorating washer or a hairline crack in sealant early can prevent a major leak down the road. Our guide on how often should a metal roof be inspected? provides a good framework for this.
Keeping your roof clean of debris is another simple yet effective maintenance task. Leaves, twigs, and other organic matter can trap moisture against the metal panels, promoting corrosion over time, especially in valleys or around flashing. This debris can also clog gutters, leading to water backing up onto the roof where it can exploit even tiny vulnerabilities. Regularly clearing your roof and gutters, usually with a leaf blower or a soft brush, helps ensure water drains properly. For areas prone to heavy snow, consider investing in snow guards to manage snow loads and prevent ice dams, which can force water under panels.
Finally, don't underestimate the power of proactive sealant reapplication. While modern sealants are durable, they don't last forever. If you notice any caulk or sealant around flashing or seams beginning to show signs of age (cracking, shrinking, or peeling), it's a good idea to clean the area thoroughly and apply a fresh bead of high-quality urethane or butyl sealant. This periodic touch-up can greatly extend the watertight integrity of your roof and is a key part of any comprehensive Metal Roof Maintenance Guide. Think of it like changing the oil in your car – it's preventative medicine for your roof.
Proper Installation and Quality Materials
The best way to prevent future leaks often comes down to how your metal roof was installed in the first place and the quality of the materials used. While you can't change past installation, if you're ever considering a new metal roof or a major re-roofing project, these factors are critical.
Emphasizing reputable installers cannot be stressed enough. The longevity and performance of a metal roof are highly dependent on the skill and experience of the installation crew. A contractor specializing in metal roofing will adhere to manufacturer specifications, use the correct tools, and pay meticulous attention to detail, especially at vulnerable points like flashing and seams. They'll also be aware of local building codes and best practices for your climate. Taking shortcuts during installation, even seemingly minor ones, can lead to premature leaks and a host of other problems. Using platforms like Modernize to find certified, experienced metal roofing professionals can help you ensure your installation is done right the first time.
Investing in quality components also plays a huge role. This includes the metal panels themselves (choosing the appropriate gauge and coating for your climate), but also the fasteners, sealants, and underlayment. For instance, high-quality metal roofing screws with durable EPDM washers will outlast cheaper alternatives by decades. Similarly, using premium synthetic underlayment can provide a critical secondary water barrier, offering extra protection if the primary metal roof is ever compromised. Our Metal Roof Underlayment and Ventilation Guide offers extensive details on why these choices matter.
Understanding the Metal Roof Installation Process: Step by Step can also empower you as a homeowner. While you might not be doing the installation yourself, knowing the proper steps and what to look for allows you to ask informed questions and ensure your chosen contractor is following industry best practices. A properly installed metal roof, using quality materials, truly minimizes the risk of leaks and provides decades of worry-free protection for your home.
Disclaimer
Please remember that this guide provides general information and recommendations. Metal roof repairs can be complex and dangerous. Always prioritize your safety and consult with a qualified, licensed, and insured metal roofing professional for any significant repairs or if you are uncomfortable performing the work yourself. Laws and building codes vary by location, and professional advice should always be sought for specific situations.