How to Touch Up Scratched Metal Roof Paint
Seeing a scratch on your beautiful metal roof can feel like a punch to the gut. You invested in metal for its durability and longevity, and then bam, a branch falls, a tool slips during maintenance, or even just some flying debris leaves an unsightly mark. It's frustrating to think that something meant to last for decades could show wear and tear so quickly, and often, these aren't just cosmetic issues. This guide is here to walk you through everything you need to know about properly touching up scratched metal roof paint, ensuring your roof stays protected and looks its best.
Understanding Why Your Metal Roof Paint Scratches
It’s easy to get upset when you see a scratch, but understanding why it happened can help you prevent future damage and choose the right repair method. Metal roofs are tough, but their painted surfaces, while incredibly resilient, aren't completely impervious to all forms of wear.
Common Causes of Scratches
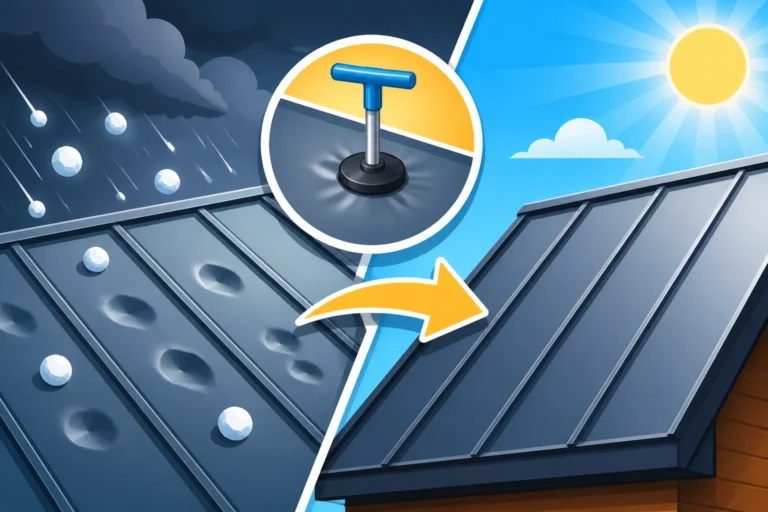
Metal roof scratches don't just appear out of thin air; they're usually the result of some form of physical impact or abrasion. One of the most frequent culprits is falling debris. Think about it: during a strong storm, tree branches, hail, or even larger airborne objects can strike your roof with significant force. Even smaller, seemingly innocuous things like acorns or pinecones, especially when hitting at speed, can chip or scratch the surface over time. If you live in an area with a lot of mature trees, this is a constant battle.
Another common source of damage comes from installation mishaps or maintenance activities. While professional installers are trained to be careful, a dropped tool, a misplaced ladder, or even just dragging a panel incorrectly can cause scrapes. Similarly, if you or a contractor are up on the roof for cleaning, inspection, or to install things like solar panels or snow guards, accidental contact with abrasive materials or sharp edges can leave its mark. It's a tricky balance between performing necessary work and maintaining the pristine finish. Always remember to use proper precautions and know how to walk on a metal roof without damage.
Lastly, and often overlooked, is wear and tear from human or animal activity. If people frequently access your roof for any reason, their shoes or gear can cause abrasion. Even small animals or birds with sharp claws could potentially cause light scratches over many years, though this is less common for deeper damage. The environment itself plays a role, with constant exposure to dust, sand, or other fine particles carried by wind acting like a natural abrasive, slowly eroding the topcoat.
The Importance of Paint Coatings and Their Durability
The paint on your metal roof isn't just for aesthetics; it's a critical layer of protection for the underlying metal. These specialized coatings are designed to withstand harsh weather, UV radiation, and even chemical exposure, but their resilience varies depending on their composition. Knowing what type of coating your roof has can greatly influence how you approach a scratch repair and what kind of touch-up paint you'll need.
The most common high-performance coatings include PVDF (Polyvinylidene Fluoride), often known by brand names like Kynar 500 or Hylar 5000, and SMP (Silicone Modified Polyester). PVDF coatings are renowned for their exceptional color retention, chalk resistance, and flexibility, making them incredibly durable and long-lasting. They are often considered the premium choice for metal roofing due to their superior performance against fading and weathering. For more on this, check out our guide on PVDF vs SMP Paint Coatings for Metal Roofs. SMP coatings, while not quite matching PVDF's long-term fade resistance, still offer excellent durability, hardness, and resistance to abrasion at a more economical price point. You might also encounter Polyester coatings, which are more budget-friendly but generally offer less resistance to fading and chalking over time, making them more susceptible to visible wear.
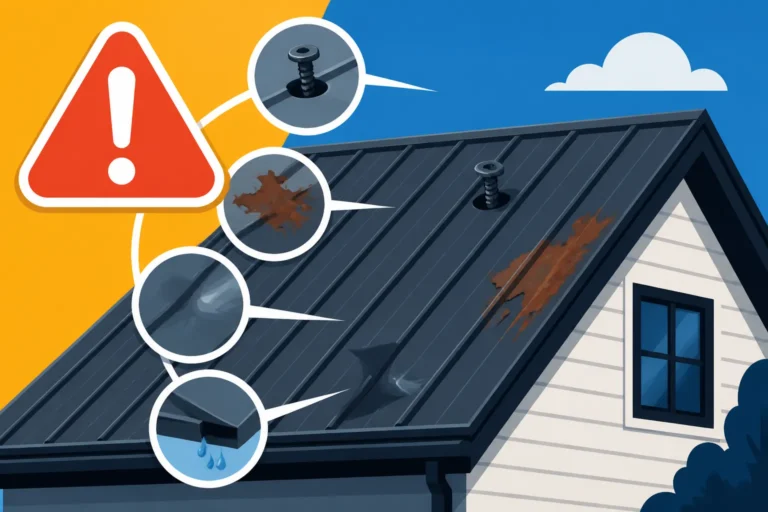
A scratch that penetrates these paint layers exposes the galvanized or Galvalume steel beneath. This isn't just a cosmetic issue; it's a potential breach in your roof's primary defense against corrosion. If left untreated, moisture and oxygen can get to the steel, leading to rust, which can compromise the integrity of the panel over time. This is why addressing scratches promptly, especially deep ones, is crucial for preserving your metal roof's lifespan.
Impact of Scratches Beyond Aesthetics
While a scratch can certainly be an eyesore, its implications stretch far beyond mere aesthetics. Ignoring a scratch, especially one that has gone through the protective paint layer, can lead to much bigger problems for your metal roof down the line. It's not just about how good your house looks from the curb; it's about protecting your investment.
The most significant concern with a deep scratch is corrosion. The vast majority of residential metal roofs are made from steel, which is prone to rust when exposed to moisture and oxygen. To combat this, steel panels are typically coated with a metallic layer, such as zinc (galvanized) or an aluminum-zinc alloy (Galvalume), before the paint is applied. This metallic layer provides sacrificial protection, meaning it corrodes instead of the steel. However, if a scratch penetrates both the paint and this metallic coating, it directly exposes the raw steel to the elements. Once rust sets in, it can spread, weaken the panel, and eventually lead to leaks. This is a primary reason why you should address any damage to avoid potential Metal Roof Leak Repair Guide scenarios.
Beyond structural integrity, scratches can also void or impact your roof's warranty. Most manufacturers offer extensive warranties that cover paint performance, such as chalking and fading, and sometimes even perforation due to rust. However, these warranties often have clauses stating that damage from improper installation, lack of maintenance, or physical impact (like falling debris) is not covered. If a scratch leads to premature rust or paint failure, and it can be traced back to an unaddressed physical damage event, the manufacturer might deny a warranty claim. Always consult your specific warranty documents to understand the full implications. This is an important consideration when evaluating your overall Metal Roof Warranties: Workmanship vs Manufacturer.
Assessing the Damage: Not All Scratches Are Equal
Before you grab a paint brush and start dabbing, it’s absolutely essential to properly assess the scratch. Not all scratches are created equal, and rushing into a repair without understanding the extent of the damage can do more harm than good. A superficial scuff requires a very different approach than a deep gouge that’s exposed the metal.
Differentiating Between Superficial and Deep Scratches
The first step in any scratch repair is to determine its depth. This isn't always easy, as sometimes what looks like a deep scratch is just surface residue, and vice-versa.
Superficial scratches, often called scuffs or abrasions, typically affect only the top layer of the paint coating. You might see a change in sheen or a faint line, but the color beneath the topcoat remains consistent, and importantly, the underlying metallic coating (Galvalume, galvanized steel, or aluminum) is still fully protected. You can often test this by gently rubbing the area with a damp cloth; if the mark lessens or disappears, it’s likely superficial. These types of scratches are mostly an aesthetic concern and generally don't pose an immediate threat of corrosion. They might just need a light cleaning or a very thin coat of matched paint.
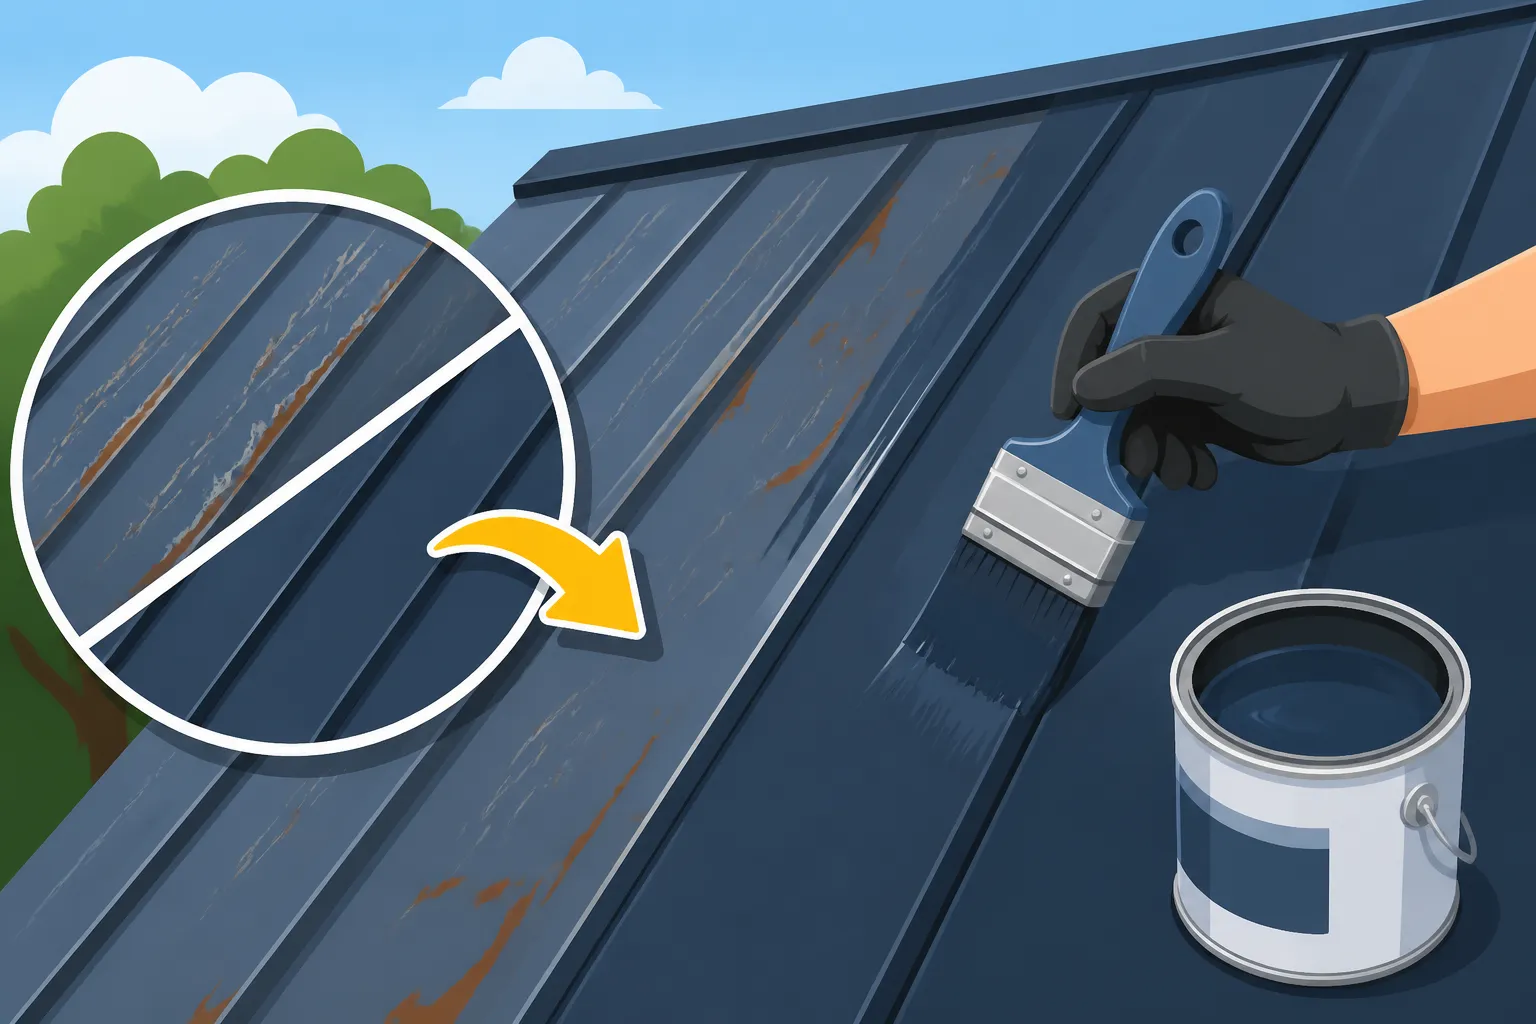
Deep scratches, on the other hand, have penetrated through the entire paint system, exposing the metallic coating underneath. You'll often see a silver or dull gray line where the scratch is, indicating the zinc or aluminum-zinc layer. If you can see a brownish or reddish tint, that’s an alarming sign that the scratch has gone all the way through the metallic coating and is exposing the raw steel, meaning rust has either started or is imminent. These scratches are not just cosmetic; they compromise the roof's protective layers and demand immediate attention to prevent corrosion and maintain your roof's lifespan. The color difference is usually quite stark, making them easier to identify.
Identifying the Underlying Metal Exposure
Once you’ve determined a scratch is deep enough to expose the underlying layers, identifying which layer is exposed is critical for selecting the right primer and paint. As we discussed, most residential metal roofs are steel with a metallic coating, but the type of metallic coating can vary.
If you see a shiny silver or matte gray color within the scratch, it’s most likely the Galvalume or galvanized coating. Galvalume is an alloy of zinc and aluminum, offering excellent corrosion resistance, while galvanized is primarily zinc. Both provide cathodic protection, meaning they sacrificially corrode to protect the steel underneath. A scratch exposing this layer means you still have some protection, but it’s a compromised area that needs sealing to prevent accelerated corrosion of this protective layer itself.
In some cases, especially with premium or coastal-specific roofs, the underlying metal might be aluminum. Aluminum roofs are inherently corrosion-resistant and don't rust like steel. A scratch exposing aluminum will still appear silver, but the risk of widespread corrosion is much lower. However, even aluminum needs touch-up to maintain its protective paint coating and prevent pitting or minor oxidation that can occur over time, particularly in harsh environments. Understanding the base metal is key to formulating a proper repair strategy, including selecting an appropriate primer for maximum adhesion and protection. To learn more about roof materials, check out our article on Metal Roofing Materials Compared: Steel, Aluminum, Copper & Zinc.
Safety First: Preparing for Roof Access
Before you even think about cleaning or painting, prioritizing your safety is paramount. Working on a roof, especially one that might be steep or wet, comes with inherent risks. Don’t cut corners when it comes to fall protection and general safety practices. A scratched roof isn’t worth a trip to the emergency room.
Always ensure you have the right equipment. This includes a sturdy ladder that extends at least three feet above the eave line for easy access. Make sure the ladder is placed on stable, level ground and properly secured. For steeper roofs, or if you're not comfortable with heights, a personal fall arrest system is non-negotiable. This typically involves a harness, a lifeline, and an anchor point securely attached to the roof structure. Even for seemingly minor repairs, it’s better to be overly cautious.
Proper footwear is also crucial. Choose shoes with soft, slip-resistant soles that won't scratch the roof surface themselves. Avoid hard-soled boots or anything with deep treads that could potentially damage the panels. Consider the weather conditions; never attempt roof work in rain, strong winds, or icy conditions, as these drastically increase the risk of slips and falls. If you're unsure about any aspect of safely accessing your roof, or if the roof pitch is particularly challenging, it's always best to err on the side of caution and consult with a professional. Many homeowners find it worthwhile to hire an expert for any roof work, and services like Modernize can connect you with qualified local contractors.
| Scratch Type | Depth of Damage | Underlying Layer Exposed | Corrosion Risk | Recommended Action |
|---|---|---|---|---|
| Superficial | Only topcoat or clear coat | None | Very Low | Clean, polish (if applicable), light touch-up paint |
| Deep (Metallic) | Through paint, exposing metallic coating | Galvalume, Galvanized, Aluminum | Low to Medium | Clean, prime (zinc/aluminum primer), touch-up paint |
| Deep (Steel) | Through paint and metallic coating, exposing steel | Raw Steel | High | Clean, rust treatment (if needed), prime, touch-up paint |
Essential Tools and Materials for a Professional Touch-Up
Once you’ve assessed the damage and taken all necessary safety precautions, it’s time to gather your arsenal. Having the right tools and materials on hand will make the touch-up process smoother, more effective, and ensure a more professional-looking finish. Rushing this step often leads to subpar results and can even exacerbate the problem.
Gathering Your Supplies
A successful metal roof paint touch-up requires more than just a can of paint. You'll need a range of items for cleaning, preparation, application, and finishing. Start by organizing a sturdy bucket or caddy to carry everything safely up to the roof.
First, for cleaning, you'll need a mild detergent (like dish soap or a specialized roof cleaner) and clean water. A soft-bristle brush or sponge will be essential for gentle scrubbing. For surface preparation, especially if the scratch has any rust or rough edges, fine-grit sandpaper (around 220-400 grit) or a fine sanding block might be necessary. Make sure it's suitable for metal. You'll also need clean rags or microfiber cloths for wiping and drying. For the paint application itself, small artist brushes or specialized touch-up pens work best for precision. If you’re dealing with a larger scratch or multiple areas, a small foam roller might be suitable for an even finish, but for precision work, brushes are usually preferred. Don’t forget painter’s tape to mask off surrounding areas if you’re worried about accidental drips or overspray.
The most critical materials are the primer and touch-up paint. Ensure your primer is suitable for metal and adheres well to the specific metallic coating exposed (e.g., Galvalume or aluminum). The touch-up paint must be an exact color match and ideally the same type of coating (PVDF, SMP, etc.) as your existing roof. Many reputable metal roof manufacturers like McElroy Metal or Sheffield Metals offer small touch-up kits specifically formulated to match their panel colors and coatings. Using a mismatched paint won't just look bad; it could also have different durability characteristics.
Choosing the Right Touch-Up Paint
Selecting the correct touch-up paint is arguably the most crucial step for achieving an invisible and durable repair. It's not just about matching the color; it's about matching the coating type and sheen as closely as possible.
The absolute best source for touch-up paint is your original metal roof manufacturer. When your roof was installed, you should have received documentation specifying the brand, color code, and coating type (e.g., Kynar 500 in Charcoal Gray). Contacting the manufacturer or your original installer to procure a small bottle or pen of their approved touch-up paint is highly recommended. These paints are specially formulated to bond with their existing coatings and will have the closest match in color, sheen, and chemical composition, ensuring the repair ages gracefully with the rest of your roof. This helps preserve your Metal Roof Cost vs Metal Roof Lifespan ROI.
If, for some reason, the original manufacturer's touch-up paint isn't available, you'll need to look for high-quality, exterior-grade metal paint that specifically states compatibility with metal roofing and offers excellent UV resistance. When choosing a generic paint, focus on two key characteristics:
- Color Match: This is where it gets tricky. Bring a small, clean sample of your roof material (if possible, perhaps from a leftover scrap or a hidden area) to a specialized paint store. They might be able to custom-match the color, though matching the exact weathered shade of an existing roof can be challenging.
- Coating Type & Sheen: While you might not find an exact PVDF or SMP match in a generic store, look for paints with excellent exterior durability and a sheen that closely mimics your roof (e.g., low gloss, semi-gloss). Many industrial or automotive paints offer good UV resistance and adhesion to metal. However, always test a small, inconspicuous area first to ensure compatibility and appearance. Remember, if you use the wrong type of paint, it might peel or fade differently than the rest of your roof, making the repair even more noticeable in the long run.
Safety Gear You Can't Afford to Skip
I cannot stress this enough: safety is paramount when working on a roof. Even for a seemingly small task like touching up a scratch, neglecting proper safety gear can lead to serious injury. Think of it as a small investment in your well-being.
First and foremost, fall protection is a non-negotiable. If you're going to be more than a few feet off the ground, a personal fall arrest system should be in place. This includes a full-body harness, a shock-absorbing lanyard, and a secure anchor point. Even if your roof isn't particularly steep, a momentary lapse in balance can lead to a devastating fall. If you're uncomfortable setting up or using this equipment, or if the roof conditions are challenging, it's a clear sign to call a professional. Services like Modernize can help you find reputable local roofers who prioritize safety.
Beyond fall protection, consider these essential items:
- Gloves: Heavy-duty work gloves will protect your hands from sharp metal edges, paint, and cleaning chemicals.
- Eye Protection: Safety glasses or goggles are crucial to shield your eyes from debris, cleaning solutions, and paint splashes.
- Non-Slip Footwear: As mentioned before, choose shoes with soft, grippy soles that provide traction and won't mar the roof's surface.
- Long Sleeves and Pants: Protect your skin from UV exposure, scrapes, and chemical splashes.
- Hard Hat: While often overlooked for residential work, if there's any risk of falling objects (like tools or debris), a hard hat provides critical head protection.
- First-Aid Kit: Always keep a basic first-aid kit accessible on the ground in case of minor cuts or scrapes.
Never underestimate the dangers of working at height. If you have any doubts about your ability to perform the repair safely, do not hesitate to hire a qualified professional. The cost of hiring an expert is far less than the cost of a serious injury.
Step-by-Step Guide to Touching Up Metal Roof Scratches
Alright, you've done your homework, assessed the damage, and gathered all your safety gear and materials. Now it's time for the actual repair. Taking a methodical, step-by-step approach will give you the best chance at a lasting and inconspicuous touch-up. Patience and precision are your best friends here.
Cleaning and Preparing the Scratched Area
Proper preparation is the secret to any successful paint job, and touching up a metal roof scratch is no exception. Skimping on this step will inevitably lead to poor adhesion and a short-lived repair.
Start by thoroughly cleaning the entire area around the scratch. Use a mild detergent, like dish soap, mixed with water and a soft-bristle brush or sponge. Gently scrub away any dirt, grime, moss, or loose paint particles. If there's any oily residue, grease, or sticky sap, a degreaser formulated for painted surfaces can be helpful, but always test it on an inconspicuous area first to ensure it doesn't harm your roof's existing finish. Rinse the area thoroughly with clean water, making sure no soap residue remains.
Next, you need to ensure the surface is smooth and free of any rust. If you've identified any surface rust (a reddish-brown discoloration indicating exposed steel), it must be removed. Use very fine-grit sandpaper (220-400 grit) or a fine sanding sponge to gently abrade the rust away until you reach clean metal. Be careful not to over-sand or create new scratches. For any loose or flaky paint around the scratch, gently feather the edges with sandpaper so there's a smooth transition. After sanding, wipe the area clean again with a damp cloth to remove all dust and particles, then ensure it is completely dry before proceeding. Any moisture will prevent proper primer and paint adhesion. You can use a clean, lint-free cloth or allow it to air dry fully.
Applying Primer for Adhesion and Protection
Primer is often an overlooked but critical step, especially for deeper scratches that have exposed the bare metal or metallic coating. Think of primer as the foundation for your touch-up paint; it ensures optimal adhesion and provides an extra layer of corrosion protection.
Once the area is perfectly clean and dry, it's time to apply a high-quality metal primer. The type of primer matters. For steel-based roofs with Galvalume or galvanized coatings, look for a primer specifically designed for these metals, often containing zinc or rust-inhibiting properties. If your roof is aluminum, an etch primer or one formulated for aluminum adhesion is essential. Using the wrong primer can lead to peeling or poor bonding. Apply the primer in a very thin, even coat directly over the scratched area and slightly beyond its edges, using a small artist's brush. The goal is to cover the exposed metal, not to build up a thick layer.
Allow the primer to cure completely according to the manufacturer's instructions. This usually takes anywhere from a few minutes to several hours, depending on the product and environmental conditions. Rushing this step will compromise the adhesion of your topcoat. Some primers may recommend a light, fine-grit sanding (e.g., 600 grit) after drying to create a smoother surface for the topcoat, but this is often unnecessary for very small touch-ups. Always read the specific instructions on your primer can. A properly primed surface will provide a solid, uniform base for your touch-up paint, significantly improving the longevity and appearance of your repair, helping extend your Metal Roof Cost vs Lifespan Value.
The Art of Applying Touch-Up Paint
This is where the magic happens, but it requires a delicate touch. The goal is to apply just enough paint to cover the scratch without creating a noticeable blob or uneven texture.
Before you start, shake or stir your touch-up paint thoroughly. Paint pigments can settle, and proper mixing ensures an even color match. If using a touch-up pen, activate it according to the instructions. For bottled paint, dip a very fine-tipped artist's brush into the paint, wiping off any excess so you only have a small amount on the brush.
Now, with a steady hand, carefully apply a very thin coat of paint directly into the scratch. Don't try to fill the entire depth of a deep scratch in one go. Instead, build up the layers gradually. Use light, feathery strokes, following the direction of the scratch. The aim is to just cover the exposed primer or original paint, blending it as seamlessly as possible with the surrounding intact coating. For tiny chips or dots, a single dab might suffice. For longer scratches, several controlled strokes will be necessary.
Allow each coat of paint to dry to the touch (typically 15-30 minutes, but check your specific paint's instructions) before applying the next. Applying too much paint too quickly will lead to bubbling, unevenness, and a clumpy appearance. Depending on the depth of the scratch, you might need two or three thin coats to achieve full coverage and blend. Step back after each coat to assess the coverage and color match. The final layer should be as flush as possible with the surrounding paint. Remember, less is often more when it comes to touch-up paint; you can always add another thin layer, but it's much harder to remove excess without damaging the surrounding area.
Curing and Final Inspection
You're almost done! But the work isn't truly finished until the paint has had adequate time to cure, and you've performed a thorough final inspection. This ensures durability and reveals any areas that might need a tiny bit more attention.
Once you’ve applied the final coat of touch-up paint and it feels dry to the touch, it still needs time to fully cure and harden. This is different from simply being dry. Depending on the type of paint and ambient conditions (temperature and humidity), full curing can take anywhere from 24 hours to several days or even a week. During this curing period, it's crucial to protect the repaired area from moisture, dust, and any physical abrasion. If rain is expected, it might be wise to temporarily cover the area lightly, ensuring the cover doesn't touch the wet paint. Avoid walking on the roof or performing any other activities that could disturb the freshly painted section.
After the recommended curing time has passed, it’s time for a final inspection. Carefully examine the repaired scratch from various angles and in different lighting conditions. Check for:
- Complete coverage: Is the original scratch completely hidden?
- Color match: Does the touch-up paint blend well with the surrounding roof color? Keep in mind that new paint can appear slightly different from weathered paint, but it should be a close match.
- Texture and sheen: Is the repair relatively smooth and does its sheen match the rest of the roof? Minor texture differences are sometimes unavoidable, but a noticeable lump indicates too much paint was applied.
- Adhesion: Gently try to scratch the edge of the repaired area with your fingernail (be very gentle!). If the paint lifts easily, it suggests poor adhesion, likely due to inadequate cleaning or priming.
If you notice any imperfections, you might be able to very gently sand a high spot with extremely fine grit sandpaper (e.g., 1000-2000 grit wet-sanding) and reapply a tiny amount of paint, but this requires extreme caution to avoid damaging the original finish. For most minor touch-ups, a well-executed repair will be virtually unnoticeable from the ground, restoring both the aesthetics and protective qualities of your metal roof.
Pro Tips for Long-Lasting Metal Roof Paint Repairs
Touching up a scratch isn't just about following steps; it's about doing it right so the repair lasts. These pro tips will help you achieve a more durable and invisible repair, and also guide you on when to call in the experts.
Considering Professional Help for Extensive Damage
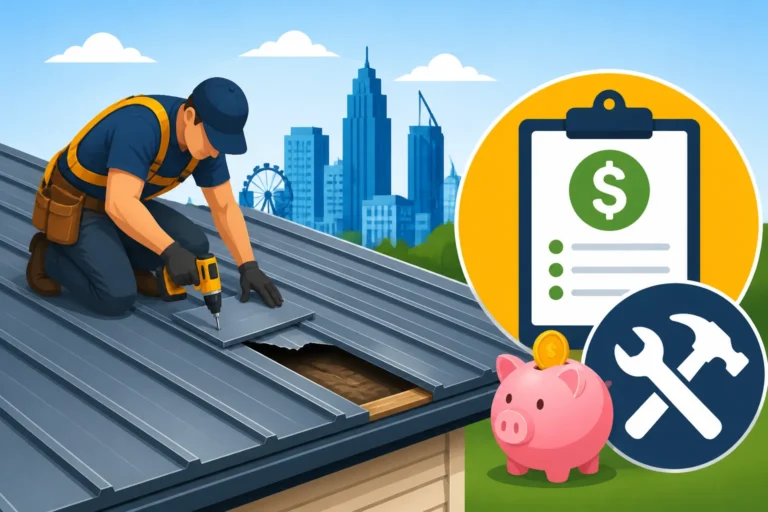
While minor scratches are definitely DIY-friendly, there comes a point where the damage is simply too extensive or complex for a homeowner to tackle effectively. Knowing when to call in a professional can save you time, money, and headaches in the long run.
If you're dealing with multiple deep scratches, large areas of exposed metal, or panels that are significantly dented or bent, a simple touch-up might not be sufficient. In such cases, a professional metal roofing contractor can offer more comprehensive solutions, such as panel replacement, larger-scale repainting, or specialized rust treatment. Attempting to repair widespread damage yourself often results in an uneven finish, mismatched colors, or, worse, inadequate corrosion protection that could lead to premature roof failure.
Professional roofers have access to specialized tools, industrial-grade paints, and techniques that aren't readily available to the average homeowner. They can also ensure the repair aligns with your roof’s warranty requirements and local building codes. If your roof has suffered significant damage from a storm, or if you suspect underlying issues beyond superficial scratches, contacting a professional is highly recommended. Platforms like Modernize can connect you with experienced, local metal roofing contractors who can accurately assess the damage and provide reliable repair or replacement options. This is especially relevant if you are considering a full Metal Roof Repair vs Replacement: How to Decide due to significant issues.
Regular Maintenance to Prevent Future Scratches
An ounce of prevention is worth a pound of cure, and this couldn't be truer for your metal roof. Regular maintenance plays a huge role in minimizing the risk of future scratches and keeping your roof in top condition.
One of the simplest yet most effective maintenance tasks is regular cleaning. Over time, dirt, leaves, and other organic debris can accumulate on your roof. When wind or rain moves this debris around, it can act like sandpaper, slowly abrading the paint finish. Periodically cleaning your roof with a soft-bristle brush and mild soap solution will remove these abrasive particles. Pay particular attention to areas under trees or near chimneys where debris tends to collect. Our Metal Roof Maintenance Guide offers more detailed cleaning advice.
Beyond cleaning, consider the surrounding environment. If you have overhanging tree branches, trimming them back can significantly reduce the risk of falling branches scratching your roof during storms. Keep an eye on any loose objects on or around your property that could become airborne in high winds. During any work performed on the roof, always take extreme precautions:
- Use soft pads or blankets under ladders and tools.
- Wear soft-soled shoes specifically designed for roof work.
- Avoid dragging anything across the roof surface; lift and carry items instead.
- Be mindful of abrasive materials that could accidentally come into contact with the paint.
Even small proactive steps can greatly extend the aesthetic appeal and protective life of your roof's paint finish.
Understanding Your Warranty and Touch-Up Implications
Your metal roof’s warranty is a valuable asset, protecting your investment for decades. Before you undertake any repair, even a small touch-up, it’s crucial to understand how it might impact your warranty. Neglecting this step could inadvertently void crucial coverage.
Most metal roof manufacturers provide warranties that cover paint performance against chalking, fading, and sometimes even rust perforation under normal conditions. However, these warranties often contain clauses regarding modifications or repairs by unauthorized personnel or with unapproved materials. If you use a generic, incompatible touch-up paint or if the repair is done poorly and leads to further issues, the manufacturer could argue that the problem stems from your repair, potentially voiding the warranty on that specific panel or even wider sections of your roof.
The safest approach is to use touch-up paint provided or explicitly approved by your roof’s manufacturer. When you perform a DIY touch-up, keep detailed records, including the date of repair, the specific products used (batch numbers if possible), and photos of the damage before and after. If you opt for professional help, ensure the contractor is experienced with metal roofing and uses manufacturer-approved methods and materials. Ask them about their own workmanship warranty and how their work aligns with your existing manufacturer’s warranty. Understanding these details can save you from costly disputes if a larger issue arises down the line. It's a key part of protecting your overall Metal Roof Cost: Complete 2026 Guide.
When to Consider a Full Repaint or Recoating
While touch-ups are great for isolated scratches, there comes a time when the overall condition of your roof's paint finish warrants a more comprehensive solution. Patching up individual spots indefinitely becomes impractical, and the benefits of a full repaint or recoating can far outweigh the cost and effort of continued spot repairs.
Signs of Widespread Paint Failure
Recognizing the signs of widespread paint failure is crucial for deciding if a full repaint is necessary. These issues usually manifest across a large portion of the roof, indicating the protective coating is nearing the end of its effective life.
One of the most common signs is chalking. This appears as a powdery, white residue on the paint surface, which you can often feel or see on your hands after touching the roof. Chalking is a natural degradation process where the binder in the paint breaks down due to UV exposure, releasing pigment particles. While some degree of chalking is normal over many years, excessive chalking indicates significant paint breakdown, leading to accelerated fading and reduced protection.
Another clear indicator is severe fading. If your roof’s color has significantly dulled, lightened, or changed tone across large areas, it’s a strong sign the pigments are degrading. Fading not only impacts curb appeal but can also reduce the roof's solar reflectivity, potentially leading to higher attic temperatures. Peeling or chipping paint is an even more urgent sign of paint failure. If paint is visibly flaking off, it means adhesion has failed, and the underlying metallic coating is directly exposed, making it highly vulnerable to corrosion. Lastly, if you see widespread surface rust that can’t be easily addressed with touch-ups, it means the entire protective system is compromised. Our guide on How to Tell If Your Metal Roof Needs Replacing can provide further context on when damage is too widespread for simple repairs.
Benefits of a Full Repainting Project
When these widespread signs of paint failure appear, a full repainting or recoating project can offer significant benefits, essentially giving your roof a new lease on life without the cost of a full replacement.
The most immediate benefit is a dramatic improvement in aesthetics. A fresh, vibrant paint job can make your entire home look brand new, boosting curb appeal and potentially increasing your property value. You can even choose a new color if you desire, completely transforming your home's exterior. Many modern roof coatings come in a wide array of colors and finishes, allowing for significant customization.
Beyond looks, a full repaint or recoating restores the protective qualities of your metal roof. High-performance coatings create a seamless, durable barrier against UV radiation, moisture, and environmental pollutants, preventing future chalking, fading, and most importantly, corrosion. This extended protection can significantly prolong the functional lifespan of your metal roof, potentially adding another 10-20 years of robust performance, depending on the coating system chosen. Look for high-performance coatings, especially those with reflective properties (often called "cool roof" coatings), which can help reduce your home's energy consumption by reflecting sunlight and lowering attic temperatures. Ultimately, a recoating is an investment that revitalizes your existing roof, protects it from further degradation, and defers the much higher cost of a full Metal Roof Repair vs Replacement: How to Decide by many years.
Disclaimer
Please note that this guide provides general information and recommendations for touching up scratched metal roof paint. While we strive for accuracy, individual results may vary based on your specific roof material, paint type, environmental conditions, and DIY skill level. Always refer to your metal roof manufacturer's guidelines and warranty information before performing any repairs. For extensive damage or if you are uncomfortable working on your roof, it is always recommended to consult with a qualified, licensed, and insured metal roofing professional. Safety should always be your top priority when working at heights.