Metal Roof Leak Repair Guide
Few things are more disheartening than spotting a water stain on your ceiling or, worse, a drip during a heavy rainstorm, especially when you've invested in a durable metal roof. You chose metal for its longevity, strength, and low maintenance, so a leak can feel like a real betrayal! But before panic sets in, know that most metal roof leaks are quite fixable, and often, the underlying cause isn't as catastrophic as it might seem. This comprehensive guide will walk you through everything you need to know about tracking down and effectively repairing those pesky metal roof leaks, getting your home back to being completely waterproof.
Understanding the Common Culprits Behind Metal Roof Leaks
Metal roofs are incredibly robust, but like any roofing system, they have vulnerabilities. Understanding why they leak is the first step toward a successful repair. It's usually not the metal panels themselves failing, but rather the points of connection or penetration that give way over time.
Fastener Failures and Worn Washers
This is hands down one of the most common reasons homeowners experience leaks with exposed fastener metal roofs. Think about it: every screw that holds your metal panels in place is a potential entry point for water.
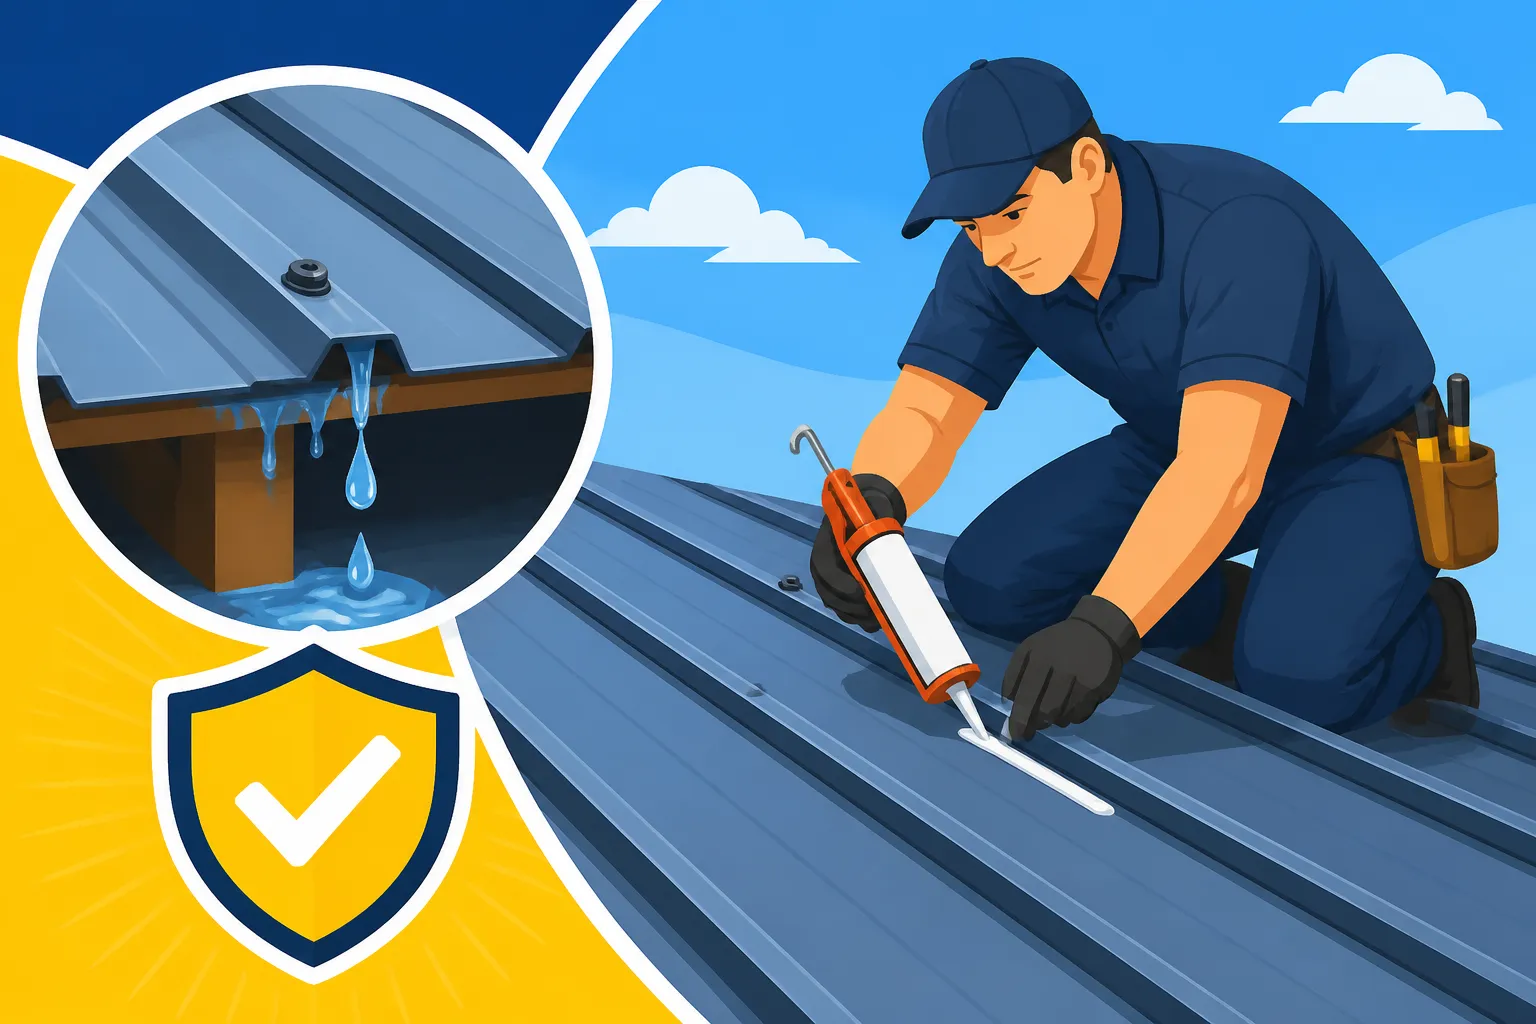
When fasteners are installed, they're typically driven through the metal panel and into the decking or purlins below. Each screw is equipped with a rubber washer, often made from EPDM (ethylene propylene diene monomer), which creates a watertight seal against the panel. Over time, these washers can degrade due to relentless UV exposure, extreme temperature fluctuations, and constant compression. They can crack, shrink, or become brittle, losing their elasticity and creating tiny pathways for water to seep in. We’ve all seen those tell-tale rust streaks running down a metal roof; often, that’s a clear sign that a screw head or its washer has failed, allowing water to sit and oxidize the fastener. Furthermore, improper installation can contribute significantly. If screws are over-tightened, the washers get crushed and lose their sealing capability immediately. If they're under-tightened, they don't compress enough to form a proper seal. Thermal expansion and contraction of the metal panels also exert constant stress on these fasteners, gradually wearing them down.
Seam Separation and Panel Damage
The way metal panels join together is crucial to a leak-free roof. With exposed fastener systems, panels often overlap, forming "lap seams" that are secured with screws and sometimes a butyl tape sealant. If this sealant fails or the screws loosen, water can easily work its way between the panels. For standing seam metal roofs, which are lauded for their superior leak resistance, issues are less common but can still occur. These systems feature panels with raised seams that are crimped or "locked" together, concealing the fasteners. If these seams aren't crimped properly during installation, or if the panels themselves are damaged (perhaps by an installer stepping incorrectly on a seam), water can find its way in.
Beyond installation issues, physical damage is another major cause of panel leaks. Hailstorms, falling tree branches, or even accidental damage from dropped tools during maintenance can dent, puncture, or deform metal panels. These deformations can create low spots where water pools, or compromise the integrity of the panel coating, leading to rust and eventual holes. Heavy foot traffic by uninformed individuals can also bend or separate panels, especially on thinner gauge metal, making your roof vulnerable. Even minor scratches can compromise the protective coating, inviting corrosion that eats through the metal over years.
Flashing and Penetration Problems
While the broad expanse of your metal roof panels is quite durable, it's the areas where the roof surface is interrupted that are most susceptible to leaks. These interruptions are known as penetrations or flashing points. Think about everything that pokes through your roof: chimneys, skylights, plumbing vents, exhaust fans, and even the edges of the roof where it meets walls or changes pitch. Each of these requires specialized flashing to create a watertight seal.
Flashing is essentially a waterproof barrier, typically made of metal, that directs water away from these vulnerable areas. Common flashing failures include improper installation—where the flashing isn't overlapped correctly, cut too short, or sealed inadequately—allowing water to wick underneath. Over time, the sealant used around flashing (such as caulk or roof cement) can dry out, crack, and pull away, creating gaps. Metal flashing itself can also corrode, particularly in areas with dissimilar metals, or become damaged by wind, hail, or debris. A common scenario we hear about is a homeowner noticing a leak appearing near a chimney after heavy rain; often, the culprit is deteriorated caulk or compromised counter-flashing that has pulled away from the masonry. Valleys, where two roof planes meet, are another notorious leak spot if the valley flashing isn't correctly installed or becomes clogged with debris. When considering what goes under a metal roof, proper underlayment and flashing are absolutely critical for these complex areas.
Essential Tools and Materials for Metal Roof Leak Repair
Before you even think about climbing up there, gathering the right tools and materials is paramount. Not only will it make the job easier, but it will also ensure your safety and the longevity of your repair. Skimping on preparation can turn a simple fix into a frustrating, repeat problem.
Safety Gear and Access Equipment
Safety first, always! Working on a roof, especially a metal one, carries inherent risks. Metal roofs can be incredibly slippery, particularly when wet or covered in morning dew, and even a slight pitch can become hazardous. You absolutely need proper safety gear. This includes a sturdy, appropriately rated ladder that extends at least three feet above the eave for easy access. Invest in a safety harness and rope system, properly anchored, especially if your roof has any significant pitch or is a multi-story home. Non-slip roofing shoes are a must; regular sneakers just won't cut it and can lead to dangerous slips. Gloves will protect your hands from sharp metal edges and sealants. Eye protection is also important to shield your eyes from debris, sealant splashes, or accidental contact with tools.
Consider your access. Do you have a stable roof hatch or do you need to rely solely on ladders? For larger roofs or complex repairs, you might even consider renting a boom lift or scaffolding, though this is usually reserved for professional jobs. Never try to undertake a repair in high winds, rain, or when the roof is icy. Patience is key; wait for clear, dry weather. If you’re at all uncomfortable with heights or the thought of walking on your roof, it’s always best to call a professional.
Sealants, Patches, and Fastener Replacements
When it comes to materials, quality makes a huge difference. For leaky screws, you'll need new fasteners. Look for self-tapping, self-sealing screws with robust EPDM washers. These are often slightly longer and have a larger head than standard screws, providing a better seal. If you have severely stripped screw holes, you might need oversized screws or even blind rivets.
For sealing gaps and small holes, a high-quality sealant is your best friend. There's a wide range available, but for metal roofs, you generally want something that’s UV-resistant, flexible, and has excellent adhesion to metal. Urethane sealants are very durable and flexible, making them great for metal-to-metal joints and flashing. Silicone sealants, especially high-grade neutral cure silicones, also offer good flexibility and UV resistance. Butyl-based sealants or tapes are excellent for creating resilient, long-lasting seals in seams or under flashing. Self-leveling sealants are fantastic for applying around vent pipes, as they flow into cracks and crevices on their own. Avoid cheap acrylic caulks; they will dry out and fail quickly.
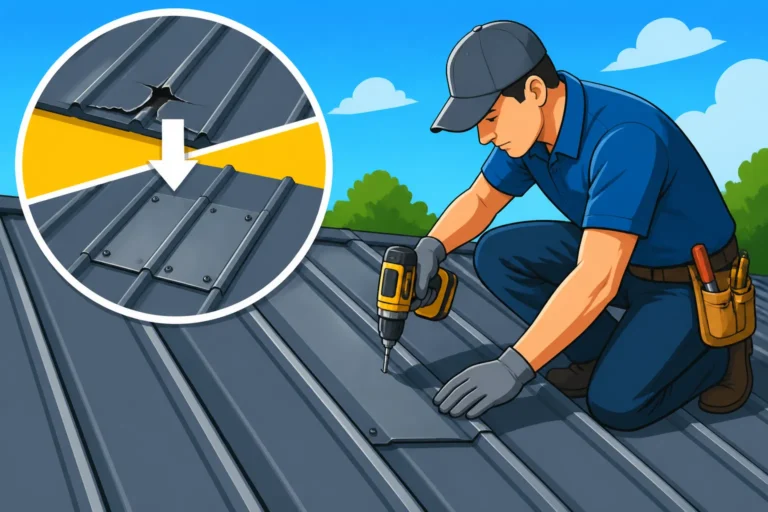
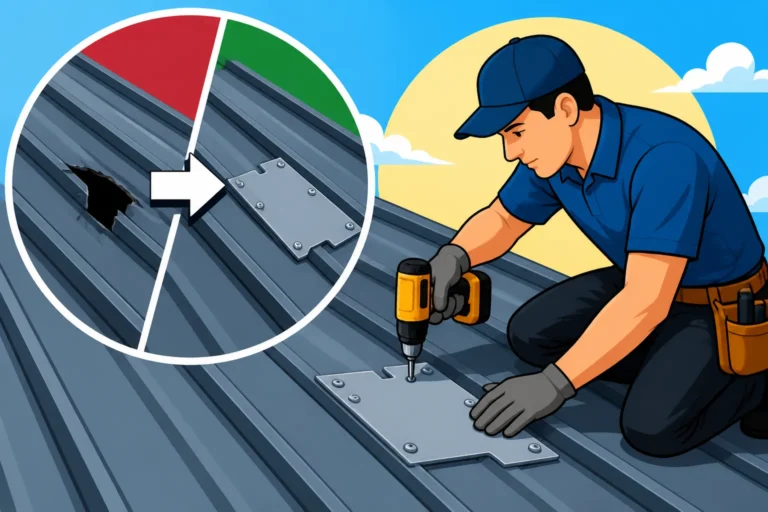
For larger holes or significant seam separation, you might need metal repair tape (often butyl-backed aluminum tape) or even small pieces of matching metal panel to create a patch. Always ensure your patch material is compatible with your existing roof to prevent galvanic corrosion.
Cleaning Supplies and Surface Preparation
This step is often overlooked, but it’s critical for any lasting repair. Sealants and patches simply won’t adhere properly to dirty, greasy, or wet surfaces. You'll need:
- Wire brush or stiff-bristled brush: To remove loose rust, paint flakes, or old sealant residue.
- Rags and sponges: For cleaning and drying.
- Degreaser or mineral spirits: To remove oil, grease, sap, or stubborn dirt. Denatured alcohol also works well for final wipe-down.
- Water hose: For rinsing thoroughly after cleaning.
The area you’re repairing must be impeccably clean and completely dry before applying any sealant or patch. If you seal over dirt or moisture, the bond will be weak and short-lived, leading to a recurring leak. Imagine trying to stick a band-aid to an oily, muddy knee—it simply won't work. The same principle applies to your roof. For detailed guidance on specific products, check out our guide on the "Best Sealant for Metal Roof Leaks".
Step-by-Step Guide to Identifying and Pinpointing Leaks
Finding the actual source of a metal roof leak can feel like detective work, as water has a cunning way of traveling laterally along panels or structural elements before finally showing itself indoors. Don't be fooled by the drip's location; the entry point could be many feet away!
Interior Investigation: Following the Water Trail
When you first notice a water stain on your ceiling or a drip in the attic, your initial instinct might be to look directly above it. However, water rarely drips straight down. It often enters the roof system, runs along rafters, purlins, or the underside of the decking, and then drips at the lowest point or finds an easy path through a light fixture or vent. This is especially true for metal roofs, where the panels and underlying structure can channel water quite a distance.
Start by going into your attic or crawl space with a powerful flashlight. Look for water stains on the underside of the roof decking, rafters, or insulation. Pay close attention to any discoloration, mold growth, or sagging insulation. You might see a faint, yellow-brown streak leading from the general area of entry down to where it’s manifesting inside your living space. If you find wet insulation, it's crucial to remove it carefully, as wet insulation loses its R-value and can harbor mold. Trace the path up the stained area as far as you can towards the roof deck. Use chalk or a marker to circle any suspicious spots you find, which will give you a better idea of where to focus your exterior inspection. Remember that a leak in a single spot can spread quite a bit, making the entire area appear damp.
Exterior Inspection: The Visual Clues
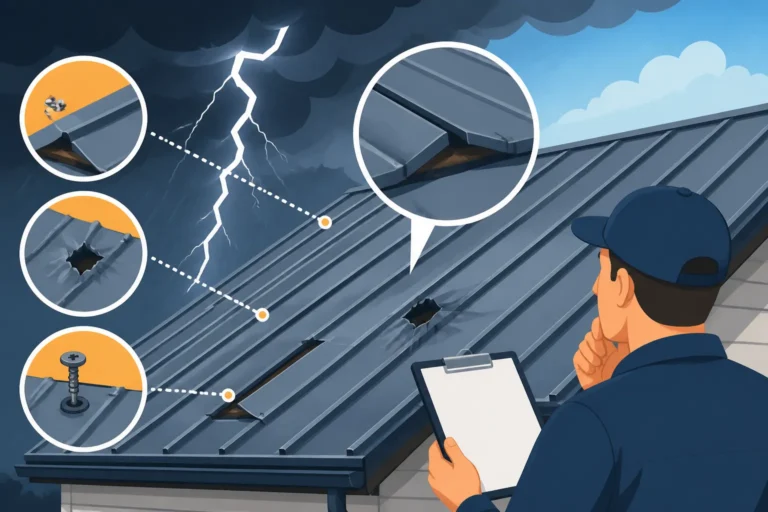
Once you have a general idea of the leak's vicinity from your interior search, it's time to brave the rooftop. But don’t just randomly wander around. Start with a systematic visual inspection from the ground using binoculars. Look for obvious signs of damage: missing fasteners, bent panels, noticeable dents, or areas where sealants appear cracked or missing around flashing. From the ground, you can often spot the most egregious issues without risking a climb.
When you do get on the roof (safely, with all your gear!), begin by focusing on the areas directly above your interior leak indicators. Systematically scan your roof, section by section. Pay close attention to all the potential leak points:
- Fasteners: Are any screws loose, missing, or rusted? Are the washers cracked or degraded? This is a common issue, and our guide "Why Is My Metal Roof Leaking Where the Screws Are" delves deeper into this problem.
- Seams: For exposed fastener roofs, check lap seams for separation or sealant failure. For standing seam, look for any unzipped or improperly crimped seams, or any foot traffic damage along the ribs.
- Flashing: Inspect all flashing around chimneys, skylights, vents, and valleys. Look for cracks in sealants, gaps, or signs of the flashing pulling away from the structure it’s meant to protect. Is the pipe boot around your plumbing vent cracked from UV exposure?
- Panel damage: Look for dents, punctures, or excessive scratching that might have compromised the panel's protective coating, especially in low-slope areas where water might pool.
- Debris: Clogged gutters, leaves in valleys, or debris around penetrations can cause water to back up and bypass flashing.
Take pictures of anything suspicious. These visual clues are often enough to pinpoint the problem.
Water Testing: Simulating Rain
Sometimes, even after a thorough visual inspection, the source of a leak remains elusive. This is where controlled water testing comes in handy. It requires patience and usually two people: one on the roof with a garden hose and one inside monitoring for drips.
Start by applying water below the suspected leak area and slowly work your way upwards. This helps isolate the problem. For example, if you suspect a leak near a chimney, start by wetting the roof surface a few feet below the chimney for several minutes. If no leak appears inside, move the hose to the sides of the chimney, then directly above it, and finally concentrate water on the flashing itself. Give it ample time (5-10 minutes per section) for the water to penetrate if there's a small crack or capillary action is involved.
The person inside should be positioned directly below the interior leak location, with a flashlight, ready to call out when a drip appears. As soon as water is seen, the person on the roof should stop the hose, note the exact location, and then confirm that was indeed the source. This methodical approach ensures you're not chasing ghosts. Remember that sometimes the leak is so small it only shows itself after prolonged exposure to water, mimicking a heavy, continuous rain.
Detailed Repair Techniques for Common Leak Scenarios
Once you've successfully identified the source of your metal roof leak, it's time for action. With the right tools, materials, and a bit of know-how, many common leaks can be effectively repaired by a diligent homeowner.
Fixing Leaky Fasteners
Leaky screws are the most frequent culprit for exposed fastener metal roofs. The good news is they’re often the easiest to fix.
- Preparation: First, thoroughly clean the area around the leaky screw. Use a wire brush to remove any loose rust, old sealant, or debris. Then, wipe it down with a degreaser or mineral spirits to ensure the surface is completely clean and dry.
- Replacement: The simplest solution is to replace the old, problematic screw with a new, slightly oversized or longer metal roofing screw. Choose one with a fresh, resilient EPDM washer. If the existing hole is still solid, drive the new screw directly into it, ensuring you don't over-tighten it, which can crush the washer. The goal is a firm, snug fit that compresses the washer without deforming it.
- For Stripped Holes: If the old screw hole is stripped and won't hold a new screw, you have a few options. You can use a larger diameter self-tapping screw (often one size up). Another effective method is to apply a dab of high-quality sealant directly into the stripped hole, then drive the new screw through it, allowing the sealant to fill the void and create a watertight plug around the new washer. For severe cases, or if you can't get a new screw to bite, you might consider using a blind rivet, then sealing over the rivet head and around its base with an appropriate roof sealant. Make sure whatever method you choose, you’re not just plugging the hole but also securing the panel adequately.
Sealing Gaps and Separated Seams
The approach to repairing seams depends on the type of metal roof you have.
-
Exposed Fastener Lap Seams: These are the horizontal or vertical overlaps where one metal panel sits on top of another. Over time, the sealant tape (often butyl) between these overlaps can degrade, or the screws holding them together can loosen.
- Clean: Carefully lift the edge of the upper panel just enough to clean out any old, deteriorated sealant and debris from the seam. This can be tricky and requires caution not to damage the panels further.
- Seal: Apply a continuous bead of high-quality, flexible sealant (like a urethane or butyl caulk) along the entire length of the seam, particularly on the lower panel where the overlap occurs. You can also re-apply a new strip of butyl tape.
- Secure: Carefully lower the top panel back into place and re-secure it, replacing any loose or compromised fasteners with new, properly sealed screws. For added security, especially if the original screws were widely spaced, you might add a few extra stitch screws (shorter screws designed to hold panels together at seams) along the lap, ensuring each has a good EPDM washer. Our article "How to Fix a Leaking Metal Roof Seam" offers more specific advice on this type of repair.
-
Standing Seam Panels: Leaks in standing seam panels are less common and often indicate a more significant issue like improper seaming during installation, panel damage, or clip failure (for mechanically seamed roofs).
- Minor Gaps: For very minor gaps or pinholes along a seam, a high-quality sealant applied carefully and tooled smooth can sometimes work as a temporary fix.
- Improper Seaming/Damage: If the seam is improperly crimped or unzipped, or if the panel itself is severely damaged (e.g., a deep dent or puncture), this usually requires specialized tools and expertise. Re-seaming a standing seam panel correctly without damaging it is a job best left to professionals. In some cases, a damaged panel may need to be entirely replaced, which is a complex process involving de-seaming adjacent panels.
Repairing Damaged Flashing and Penetrations
Flashing is designed to shed water, but when it fails, it can cause substantial leaks.
- Pipe Boots: These are rubber seals around plumbing vents that often crack and degrade from UV exposure.
- Remove Old Boot: Carefully cut away and remove the old, cracked rubber boot. You may need to cut around the pipe and gently pry up the flashing base if it's secured with sealant.
- Clean: Clean the pipe and the surrounding metal roof panel thoroughly, removing any old sealant residue.
- Install New Boot: Slide a new, appropriately sized pipe boot over the vent pipe. Ensure the base of the boot sits flush on the metal panel. Apply a continuous bead of high-quality, flexible sealant (like a urethane or self-leveling silicone designed for roofs) around the underside perimeter of the boot's base before setting it down.
- Secure: Fasten the new boot's base to the metal panel with approved metal roofing screws, making sure each screw has a proper EPDM washer. Apply a final bead of sealant around the top edge of the boot's base where it meets the panel to prevent water from wicking underneath.
- Chimney and Skylight Flashing: These complex areas involve multiple flashing components that can fail.
- Inspect and Clean: Carefully inspect all joints, corners, and sealant lines around the chimney or skylight. Remove any old, cracked caulk with a utility knife or scraper. Clean the metal flashing and surrounding roof surface.
- Re-seal: Apply a generous, continuous bead of high-quality urethane or silicone sealant to any gaps or compromised joints. Pay attention to the "counter-flashing" where it tucks into the mortar joints of a chimney; if this has pulled out, it needs to be reset and re-sealed.
- Patch/Replace: If a section of metal flashing is severely corroded, bent, or has holes, it may need to be patched with a compatible metal repair tape or even a custom-cut piece of metal, carefully integrated and sealed. For extensive damage, partial or full replacement of the flashing by a professional may be necessary. Our guide on "Metal Roof Flashing Repair" offers more in-depth strategies.
- Valley Flashing: Valleys are channels where two roof sections meet.
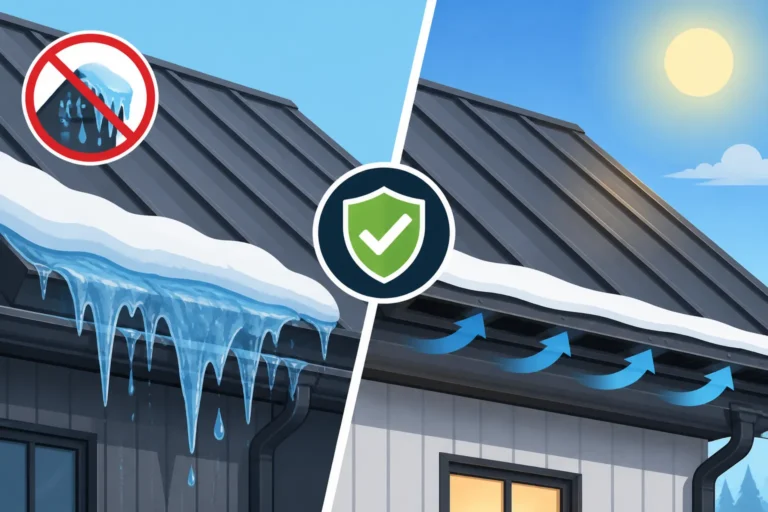
- Clear Debris: Often, valley leaks are caused by accumulated leaves, twigs, or ice dams that prevent proper water flow, causing water to back up under the panels. Thoroughly clean the valley.
- Inspect: Look for punctures, bent metal, or compromised sealant along the valley's edges.
- Repair: For minor issues, clean and apply a durable sealant. For physical damage or severe corrosion, patching with metal repair tape or a custom metal insert may be possible. Significant valley damage, however, often warrants professional intervention to ensure proper water diversion.
Advanced Leak Repair and When to Call a Professional
While many minor metal roof leaks can be tackled with DIY enthusiasm, there comes a point where the repair job crosses into advanced territory. Knowing when to put down the caulk gun and pick up the phone to call a professional can save you time, money, and potentially prevent more extensive damage.
Panel Replacement and Complex Damage
Replacing an entire metal roof panel is a much more involved process than swapping out a screw or resealing a pipe boot. It's usually necessary when a panel has:
- Severe Punctures or Tears: Large holes that can't be adequately patched, perhaps from a fallen tree limb or significant impact.
- Extensive Corrosion: If a large section of a panel has rusted through, indicating a failure of the protective coating, replacing the panel is the only long-term solution.
- Irreparable Deformation: Severe dents or bends that compromise the panel's ability to shed water or affect the integrity of the seams. While some oil canning is aesthetic, extreme deformation can lead to actual problems.
The challenge with panel replacement lies in several factors. First, finding a matching panel, especially if your roof is older, can be difficult. Metal panels from different manufacturers might have slight variations in profile or color, and even identical panels will look different due to weathering and fading of your existing roof. Second, the process of removing and replacing a panel often involves disassembling adjacent panels, particularly with hidden fastener (standing seam) systems. This requires specialized tools, precise measurements, and expertise to ensure the new panel integrates seamlessly and securely, maintaining the roof's watertight integrity. It's a job where a small mistake can lead to new leaks or even structural issues. For these reasons, panel replacement is almost always best left to experienced metal roofing contractors.
Professional Expertise and Specialized Tools
There are several compelling reasons to call in the pros:
- Complexity and Scope: If you have multiple leaks, particularly in difficult-to-access areas like steep pitches, multi-story homes, or complex roof designs with numerous valleys and dormers, a professional is your safest bet. Extensive leaks can indicate a systemic issue with the original installation or a major event, which requires a holistic assessment.
- Hidden Fastener Systems (Standing Seam): As mentioned, repairing or replacing components of a standing seam roof, like the clips or the panels themselves, often requires specialized seaming machines and knowledge that a DIYer simply won't have. Attempting a repair without the right tools can inadvertently damage the interlocked seams, turning a small leak into a much larger problem.
- Safety Concerns: If you’re not comfortable working at heights, dealing with a steep roof, or navigating tricky roof conditions (e.g., icy, wet, extremely hot), calling a pro is a non-negotiable safety measure. No repair is worth a serious injury.
- Undiagnosed Leaks: If you've tried your best to find the leak using water testing and visual inspection, but the source remains elusive, a professional has advanced tools like thermal imaging cameras or moisture meters that can detect hidden water intrusion or cold spots indicative of moisture behind walls or under the roof deck. They also have extensive experience with how water travels, making them better equipped to trace the true source.
- Warranties: Many metal roof manufacturers' warranties, and even some workmanship warranties from installers, can be voided if unauthorized or improper repairs are attempted. If your roof is still under warranty, it’s always wise to consult with a certified professional who understands these stipulations. You can find qualified and vetted metal roofing contractors through services like Modernize, which connects homeowners with experienced local professionals who are familiar with specific metal roofing systems. This can be a lifesaver when you're facing a tricky leak. Our guide on "How to Hire a Metal Roofing Contractor" provides excellent advice on finding the right pro for the job.
Understanding Warranties and Insurance Claims
Before embarking on any major repair, it's crucial to understand how your roof's warranties and your homeowner's insurance might come into play.
- Manufacturer Warranties: Metal roofing panels typically come with long manufacturer warranties (20-50 years, sometimes even lifetime) covering material defects, finish, and sometimes rust-through. However, these warranties usually have clauses about proper installation and often specify that repairs must be performed by certified or authorized installers to maintain coverage. A DIY repair, especially a complex one, could potentially void this valuable warranty.
- Workmanship Warranties: Your original installer likely provided a workmanship warranty (typically 5-10 years) covering their installation quality. If your leak is due to faulty installation (e.g., improperly driven fasteners, unsealed flashing), this warranty might cover the repair cost. Review your original contract carefully. Understanding "Metal Roof Warranties: Workmanship vs Manufacturer" is key here.
- Homeowner's Insurance: Leaks caused by sudden, accidental events like severe storms, hail, falling trees, or other perils typically covered by your homeowner's insurance policy may be eligible for a claim. However, leaks due to normal wear and tear, lack of maintenance, or poor installation are generally not covered. It's important to document the damage thoroughly with photos and notify your insurance company promptly. They will send an adjuster to assess the damage. Be aware that some policies may have a "cosmetic damage exclusion" for metal roofs, meaning they won't cover damage that only affects the appearance, not the function.
When in doubt about warranty or insurance implications, consult with your installer or insurance provider before starting significant repairs.
Preventative Measures and Maintenance to Avoid Future Leaks
An ounce of prevention is worth a pound of cure, especially when it comes to metal roof leaks. While metal roofs are famously low-maintenance, they aren't entirely maintenance-free. A proactive approach can significantly extend their lifespan and prevent those frustrating water intrusions.
Regular Inspections and Cleaning
Establishing a routine for inspecting and cleaning your metal roof is the most effective preventative measure.
- Seasonal Checks: Aim to inspect your roof at least twice a year, ideally in the spring after winter storms and heavy snow melt, and again in the fall after leaves have fallen. During these inspections, use binoculars from the ground first, then, if necessary and safe, carefully get on the roof.
- What to Look For:
- Fasteners: Check all exposed fasteners for looseness, rust, or degraded washers. These are often the first components to show wear. A slightly loose screw can easily be tightened before it becomes a leak source.
- Sealants: Inspect all sealant lines around flashing, vents, and skylights. Look for cracking, peeling, or areas where the sealant has pulled away from the metal. These are early warning signs that the waterproof barrier is compromised.
- Debris: Clear leaves, twigs, pine needles, and any other accumulated debris from valleys, gutters, and around chimneys or vent pipes. Clogged areas can cause water to pool and back up, leading to leaks.
- Panel Condition: Look for any new dents, scratches, or signs of localized corrosion. Address minor rust spots promptly before they spread or eat through the panel.
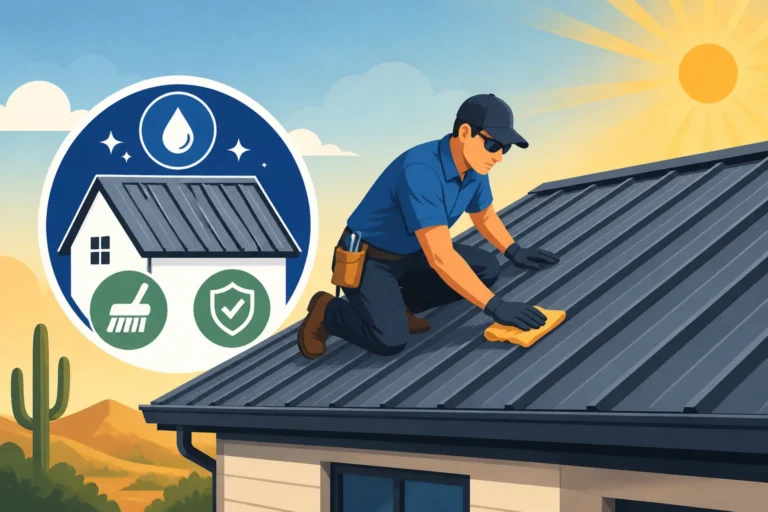
- Cleaning: Gently wash your metal roof occasionally, especially in areas prone to dirt buildup, moss, or mildew. A soft brush and a mild detergent solution, followed by a thorough rinse, can keep the surface clean and help you spot issues more easily. Avoid pressure washing, as it can damage coatings or force water into seams. Our detailed "Metal Roof Maintenance Guide" offers a comprehensive checklist for year-round care.
Proper Installation Practices
The foundation of a leak-free metal roof is proper installation. Even the highest quality materials will fail if not installed correctly.
- Choosing the Right Contractor: This cannot be stressed enough. Hire a contractor with proven experience specifically in metal roofing, not just asphalt shingles. Ask for references, check their licensing and insurance, and verify they are familiar with the specific type of metal roof system you're installing (e.g., standing seam, corrugated). A reputable contractor will understand critical installation details like proper panel overlap, fastener torque, and flashing techniques. Using a service like Modernize can help you find reputable contractors in your area who specialize in metal roofing.
- Underlayment and Decking: Ensure that appropriate underlayment is installed correctly beneath your metal roof. A high-quality synthetic underlayment or ice and water shield provides a crucial secondary barrier against moisture intrusion, especially in areas prone to ice dams or heavy rains. The roof decking must also be sound and properly fastened.
- Flashing and Sealing: Proper flashing installation is an art form. Make sure the contractor uses the correct type of flashing for each penetration and transition (e.g., step flashing, counter-flashing, valley flashing). All flashing should be integrated correctly to shed water away, not trap it. The right sealants, specifically designed for metal roofs and compatible with your panels, should be used sparingly but effectively, only where necessary, and applied to clean, dry surfaces. Our "Metal Roof Installation Process: Step by Step" guide highlights these critical installation considerations.
Upgrading Components and Materials
When it's time for a re-roofing project or if you're making significant repairs, consider investing in higher-quality components that can enhance your roof's leak resistance.
- Better Fasteners: While all metal roof screws come with washers, some high-end fasteners feature larger, more durable EPDM washers or specialized coating for enhanced corrosion resistance. If you’re dealing with chronic fastener leaks, upgrading to a superior screw system might be a worthwhile investment during a major repair.
- Continuous Sealant: For exposed fastener systems, some installers opt for a continuous bead of butyl mastic or tape along all lap seams before fastening, creating an extra layer of protection beyond the screw washers.
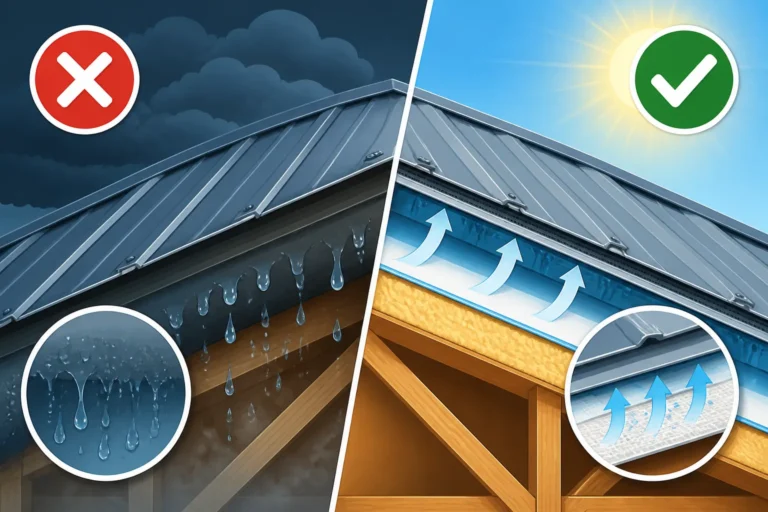
- Advanced Underlayment: If your current underlayment is basic felt paper, consider upgrading to a high-performance synthetic underlayment or a self-adhering ice and water shield in critical areas like valleys, eaves, and around penetrations. These offer superior protection against water penetration, acting as a robust backup in case the primary metal roof system is compromised. Our guide on "Metal Roof Underlayment and Ventilation Guide" provides more details on these options.
By combining regular vigilance, ensuring top-notch installation, and making smart material choices, you can significantly reduce the chances of ever encountering a metal roof leak, protecting your home for decades to come.
Common Metal Roof Sealants Comparison
Choosing the right sealant is crucial for a lasting metal roof leak repair. Here's a quick comparison of popular options:
| Sealant Type | Key Features | Pros | Cons | Best Use Cases |
|---|---|---|---|---|
| Urethane Sealant | Highly flexible, strong adhesion, paintable, durable | Excellent adhesion to metal, withstands extreme temperatures, long-lasting, versatile | Slower cure time, can be harder to tool neatly, some are not UV stable (check label) | Flashing, seams, metal-to-metal joints, around vents, minor holes |
| Silicone Sealant | Excellent UV resistance, flexible, good adhesion | Very long-lasting flexibility, resistant to weathering and UV, good for moving joints, easy to apply | Can be difficult to paint over, not all silicones adhere well to all surfaces, can attract dirt over time | Around pipe boots, skylights, chimneys, areas with high UV exposure |
| Butyl Sealant | Rubber-based, remains flexible and tacky, excellent waterproofing | Superior waterproofing, adheres well to many surfaces, very flexible, good for lap seams and patches | Can be messy to work with, typically not paintable, can squeeze out in hot weather | Lap seams, under flashing, sealing fasteners, temporary patches |
| Self-Leveling Sealant | Silicone or urethane based, liquid consistency, flows into crevices | Fills irregular gaps automatically, great for hard-to-reach areas, easy application around penetrations | Requires a relatively flat surface to flow correctly, can be messy if over-applied | Around pipe vents, small gaps in flat areas, irregular flashing junctions |
| Asphalt/Roof Cement | Tar-based, thick consistency, often fiber-reinforced | Cheap, readily available, good for temporary patches, adheres to most roofing materials | Becomes brittle with age, poor UV resistance, short lifespan, very messy, not recommended for metal | Emergency, very temporary fixes (avoid for metal if possible) |
When selecting a sealant, always check the product label for compatibility with your specific metal roofing material and ensure it's rated for exterior, roof-specific use with excellent UV stability.
Disclaimer
The information provided in this guide is intended for educational purposes only and should not be considered professional advice. While we strive to offer accurate and helpful content, metal roof repair can be complex and dangerous. Working on roofs involves inherent risks, including falls, electrical hazards, and material handling injuries. Always prioritize safety, use appropriate personal protective equipment, and adhere to local building codes and safety regulations. If you are uncertain about any repair, lack the necessary experience, or feel uncomfortable performing the work, it is strongly recommended to consult with or hire a qualified and licensed metal roofing professional. Attempting repairs without proper knowledge or tools may lead to further damage, void warranties, or result in serious injury.