How to Repair a Rusted Metal Roof
Discovering rust on your metal roof can be incredibly frustrating, especially when you chose it for its promised longevity and low maintenance. That ugly orange-brown discoloration isn't just an eyesore; it's a warning sign that your roof's integrity might be at risk. This comprehensive guide will walk you through everything you need to know about tackling rust on your metal roof, from understanding its causes to step-by-step repair processes and crucial prevention strategies, helping you restore your roof's beauty and extend its life.
Understanding Rust on Your Metal Roof: What Causes It?
It's a common misconception that all metal roofs are completely impervious to rust. While many are highly resistant, especially modern materials, rust can and does occur. Knowing why it happens is the first step in effective repair and prevention. You might look up at your roof and wonder how this could happen, given the investment you made. Trust me, you're not alone in that frustration.
Common Culprits: Why Rust Forms
Rust, or iron oxide, forms when iron or steel reacts with oxygen and water. Since many metal roofs are made from steel, they are inherently susceptible if their protective layers are compromised.
The type of metal your roof is made from plays a huge role in its rust resistance. For instance, a pure copper roof won't rust; it develops a beautiful green patina. Aluminum is also highly corrosion-resistant. But the vast majority of residential metal roofs are made from steel, which needs a protective coating. Think of it like a shield. When that shield is breached, rust can set in.
One of the biggest culprits is the failure of the protective coating. Most steel metal roofs come with a metallic coating, like zinc (galvanized steel) or a zinc-aluminum alloy (Galvalume steel), which acts as a sacrificial layer. On top of that, there's often a paint system, such as a Kynar 500 (PVDF) or SMP finish, which provides color and an additional barrier against the elements. If this paint system gets scratched, chipped, or simply wears thin over decades, the underlying metallic coating becomes exposed. If that metallic coating eventually wears away or is damaged, the raw steel is then exposed to moisture and oxygen, and boom—rust begins to form. This can happen due to simple age and weathering, but often it's accelerated by other factors.
Environmental factors can also play a huge, often underestimated, role. If you live near the coast, the constant exposure to salt spray can be incredibly corrosive. In industrial areas, airborne pollutants and acid rain can prematurely degrade coatings. Even heavy humidity, combined with prolonged wetness from inadequate drainage or shade, can create an ideal environment for rust to flourish once a protective layer is compromised. It’s like a slow, insidious attack on your roof, layer by layer.
Then there's the more straightforward issue of mechanical damage. A branch falling on the roof can scratch through the paint and metallic coating, exposing the steel. Walking on the roof improperly, installation mishaps, or even manufacturing defects can create tiny vulnerabilities that, over time, turn into noticeable rust spots. Even something as seemingly minor as failing Metal Roof Trim and Flashing Cost or incompatible fasteners can introduce points of corrosion.
Identifying the Severity of Rust Damage
Not all rust is created equal, and understanding its severity is crucial for determining the right course of action. You don't want to panic over a tiny surface speck if it's not a structural threat, but you definitely don't want to ignore something more serious.
The most common and least severe form is surface rust. This is typically a superficial discoloration that appears on the top layer of the coating or where the paint has been scratched. It often looks like a reddish-brown stain. While unsightly, it usually hasn't eaten through the metal itself. This type of rust might appear where metal filings from cutting panels during installation weren't properly cleaned off, or where a scratch exposed the steel, but the corrosion hasn't deeply penetrated. Think of it as a bruise, not a broken bone. If caught early, it's usually manageable with proper cleaning and sealing.
More concerning is penetrating rust, which indicates the corrosion has started to eat into the metal panel itself. This might manifest as deeper pitting, flaking, or even pinholes. Pinholes are tiny holes that go all the way through the metal, creating direct pathways for water to enter your home. This is where things get serious, as these areas are actively leaking or will soon start to. If you see water spots on your ceiling after a rain, it's a strong indicator that you might have penetrating rust issues up above.
For severe cases, the metal can become extensively corroded, leading to large areas of weakness, delamination of coatings, and significant structural compromise of the panel. At this point, you're looking at more than just a repair; you might be contemplating a full panel replacement or even a larger section of your roof. For insights into overall roof health, checking out our guide on Warning Signs Your Metal Roof Needs Attention can be very helpful.
Visually inspecting your roof is essential. Grab a pair of binoculars or, if you're comfortable and safe, get up on the roof (always taking proper safety precautions). Look for any areas of discoloration, bubbling paint, or peeling coatings. Pay close attention to seams, fasteners, and areas around chimneys or skylights, as these are common weak points. If you're unsure about what you're seeing or if it feels too risky to inspect yourself, it's always wise to call in a professional. A qualified metal roofing contractor can give you an accurate assessment of the damage and recommend the best path forward.
Essential Tools and Materials for Rust Repair
So, you've spotted the rust. Now what? Before you jump into fixing it, you need the right arsenal of tools and materials. Trying to tackle rust with the wrong products is like trying to fix a leaky faucet with duct tape – it might seem to work for a minute, but it won't last.
Gathering Your Supplies: From Cleaning to Coating
Effective rust repair starts with thorough preparation, and that means having the right cleaning agents and abrasive tools. First, you'll need to clean the affected area thoroughly. A good industrial-strength degreaser or cleaning solution is crucial to remove any dirt, grime, moss, or mildew that might be clinging to your roof. Sometimes, a gentle power washer can help, but be extremely careful not to damage the existing finish or force water under panels, especially with exposed fastener systems.
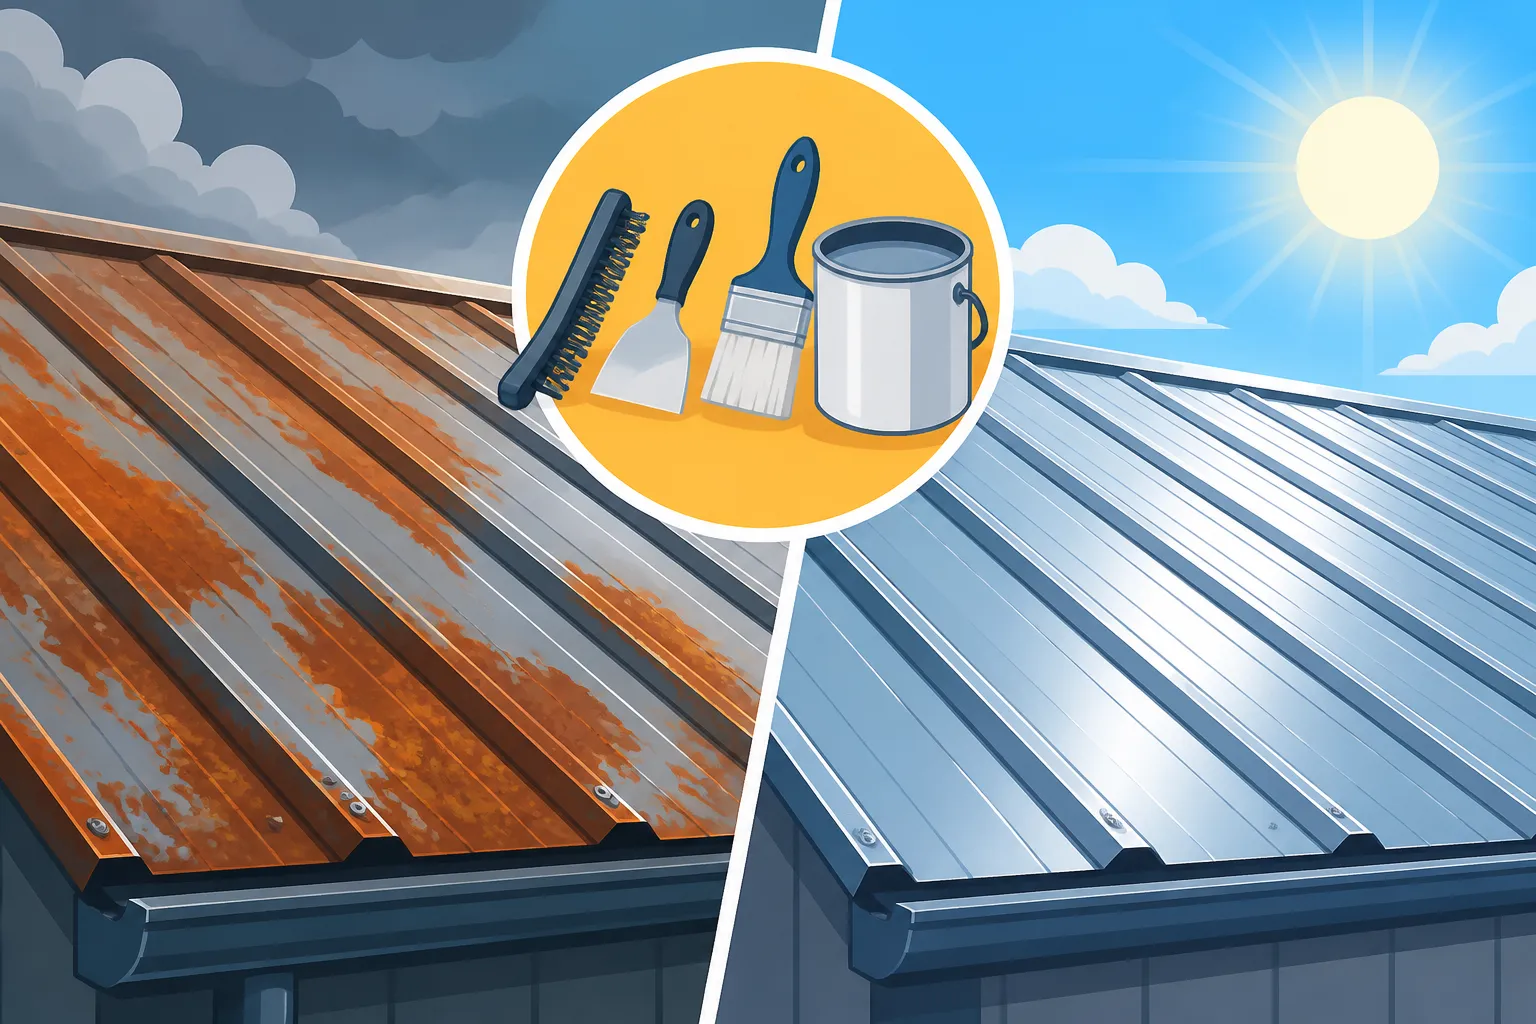
Once clean, it's time to tackle the rust itself. For surface rust, you'll want a sturdy wire brush, sandpaper (medium to fine grit), or even a sanding block. If the rust is a bit more stubborn or covers a larger area, an angle grinder with a wire wheel attachment can be incredibly efficient, but always use it with extreme caution and proper personal protective equipment. The goal here is to remove all loose rust and create a clean, dull surface for new coatings to adhere to. Don't forget rust-dissolving liquids or gels, which can be fantastic for intricate areas or deeper rust pockets, converting rust into a stable, paintable surface.
After the rust is removed, the next step is applying a rust-inhibiting primer. This isn't just any primer; it's formulated to bond with the metal and prevent new rust from forming. Look for primers specifically designed for metal roofing, often containing zinc or other corrosion-resistant properties. Some common ones include epoxy primers, which offer excellent adhesion and chemical resistance.
Finally, you'll need your topcoat. This could be specialized metal roof paint, often an acrylic or elastomeric coating, or a more advanced material like a liquid rubber or silicone coating. These topcoats provide UV protection, weather resistance, and color. Many come with reflective properties to help with energy efficiency. Make sure to buy enough for at least two coats, and often more for heavily affected areas.
Don't forget safety gear! This is non-negotiable. We're talking sturdy work gloves, eye protection (safety glasses or goggles), a dust mask or respirator (especially when sanding or grinding), and appropriate non-slip footwear. If you're working at heights, a safety harness and rope system are paramount. Falling off a roof is no joke.
Choosing the Right Repair Products for Your Metal Type
The metal your roof is made from significantly impacts the best repair products. What works for a galvanized steel panel might not be ideal for aluminum. Understanding these nuances will ensure your repair lasts.
For galvanized or Galvalume steel roofs, which are the most common, you'll generally want to stick with products specifically labeled for these materials. These coatings can react differently with various primers and paints. For instance, using an oil-based primer directly on new galvanized steel can cause adhesion issues, though this is less of a concern on aged, weathered surfaces or where the galvanization is already compromised by rust. Many manufacturers offer compatible primer and paint systems designed to work synergistically. Brands like Rust-Oleum or Sherwin-Williams offer robust lines of industrial-grade coatings that are often used in these situations.
If you have an aluminum roof, rust isn't typically the issue; rather, it's often galvanic corrosion or pitting. However, if rust appears on an aluminum roof, it's usually due to steel particles introduced from nearby construction or tools that have begun to rust on the aluminum surface. The approach here is similar to steel, but ensure primers and paints are compatible with aluminum to prevent further issues.
When selecting topcoats, consider your local climate. If you're in a sunny region like Florida, a highly reflective elastomeric coating will not only protect against rust but also help reduce cooling costs. If you're in an area with heavy rainfall, a durable, water-resistant acrylic or silicone coating might be best. The color also matters; lighter colors generally reflect more heat. The type of paint coating, such as PVDF (Kynar 500) or SMP, offers different levels of fade resistance and durability. For a deeper dive into the coatings and materials, our guide on Metal Roofing Materials Compared: Steel, Aluminum, Copper & Zinc provides excellent context.
Don't skimp on quality here. While it might be tempting to grab the cheapest can of paint, investing in high-quality, reputable products will save you headaches and repeated repairs down the line. Check product specifications for adhesion properties, rust inhibition, UV resistance, and flexibility to ensure they can withstand the expansion and contraction of metal roofing. If in doubt, contacting the original roof manufacturer for their recommended repair products is always a smart move.
Step-by-Step Guide to Repairing Surface Rust
Once you've diagnosed the rust and gathered your tools, it's time to get to work. Tackling surface rust quickly is essential to prevent it from escalating into more serious problems. This isn't just about making your roof look good; it's about preserving its long-term integrity.
Preparation is Key: Cleaning and Abrasion
Before any repair can begin, safety must be your absolute priority. Always wear your safety glasses, gloves, and a dust mask. If you're working on a sloped roof, ensure you have proper fall protection, such as a harness and lifeline. Remember, roofs can be slippery, especially with cleaning solutions or loose rust particles.
Start by thoroughly cleaning the rusted area and the surrounding region. Use a stiff-bristled brush or a pressure washer (on a low setting and with caution) to remove loose dirt, dust, and any organic growth like algae or moss. Follow this with a dedicated cleaner and degreaser. Apply it liberally, let it sit for the recommended time, and then scrub away stubborn grime. Rinse the area thoroughly with clean water, making sure all cleaning solution residue is gone. Any residue can interfere with the adhesion of your new coatings. Let the surface dry completely before moving on – patience is a virtue here.
Once clean and dry, it's time for mechanical rust removal. For light surface rust, a wire brush or medium-grit sandpaper (around 80-120 grit) should do the trick. Scrub or sand vigorously to remove all visible rust. You want to see clean, bare metal or the original metallic coating beneath. For more pervasive but still superficial rust, or if you're dealing with a larger rusted patch, an angle grinder with a wire wheel or a sanding disc will speed up the process significantly. Work carefully, applying even pressure, and ensure you feather the edges of the sanded area to blend it smoothly with the existing coating. The goal is to create a slightly rough, clean surface that the primer can really grip onto.
After abrading, thoroughly clean the area again, this time to remove all dust and rust particles. A shop vac is excellent for this, followed by wiping with a clean, dry cloth. You want the surface immaculate, free of any loose debris, before you apply anything else. This meticulous cleaning prevents any trapped particles from compromising the new coating's adhesion or causing future rust. Getting this part right is paramount; rushing it will lead to future frustrations.
Applying Rust Inhibitors and Protective Coatings
With a pristine, dry, and prepped surface, you're ready for the magic: applying your rust-inhibiting primer. This is the unsung hero of the rust repair process, forming a crucial barrier against future corrosion. Follow the manufacturer's instructions precisely for mixing (if required) and application. Generally, you'll apply the primer with a brush or roller, ensuring even coverage over the entire area where rust was removed, extending slightly beyond the edges onto the healthy coating. A thin, even coat is better than a thick, gloppy one. Allow the primer to dry completely according to the product's specifications. This often means several hours, so plan your day accordingly. You might need a second coat of primer, especially if the metal was heavily rusted.
Once the primer has fully cured, it's time for the topcoat. This is where your roof gets its renewed protection and aesthetic appeal. Again, read the product's instructions for mixing and application. Apply the first coat of your chosen metal roof paint or elastomeric coating. Use a high-quality brush or roller designed for smooth finishes. Aim for even coverage, making sure there are no missed spots or excessive drips. Depending on the product and the extent of the repair, you might need two or even three topcoats for optimal protection and color uniformity.
Allow each coat to dry thoroughly before applying the next. Rushing this step can lead to poor adhesion, bubbling, or a less durable finish. When applying the final coat, try to feather the edges to blend it seamlessly with the existing, untouched roof panels. This will make the repair less noticeable. Color matching can be tricky, especially on older roofs where the original color has faded. If exact matching is impossible, try to find a shade that blends well, or consider repainting an entire panel if the visible difference is too stark. If your roof's color has faded significantly, you might want to look into How to Repaint a Faded Metal Roof for a more extensive refresh.
A well-executed repair of surface rust will not only protect your roof but also significantly improve its appearance. This is a testament to the power of proactive maintenance, catching issues before they spiral into bigger, more expensive problems.
Addressing More Severe Rust Damage and Perforations
Sometimes, rust goes beyond a simple surface stain. When you're dealing with actual holes or significant metal degradation, the repair approach becomes more involved. It's at this point that many homeowners start feeling overwhelmed, but with the right steps, even these tougher challenges can be managed.
Patching Small Holes and Pinhole Leaks
Small holes and pinhole leaks, often the result of penetrating rust, are clear indicators that the integrity of your metal panel has been compromised. These aren't just cosmetic issues; they're direct pathways for water to enter your home, leading to potential leaks, rot in your decking, and even mold. Ignoring them is a recipe for disaster.
The first step is similar to surface rust repair: thoroughly clean and abrade the area. You need to remove all loose rust, dirt, and peeling paint from around the hole. For pinholes, gently sand around the opening to expose clean metal. For slightly larger holes, you might need to use a wire brush or even a small grinding tool to clean the edges of the perforation. Once clean, apply a rust-inhibiting primer to the exposed metal, just as you would for surface rust, letting it dry completely.
For very small pinholes (less than 1/8 inch), a high-quality, elastomeric sealant designed for metal roofs can often do the trick. Products like those from the Modernize line or similar industrial-grade sealants are formulated to bond well with metal, remain flexible, and withstand UV exposure and temperature fluctuations. Apply a generous bead of sealant directly over the pinhole, extending slightly beyond its edges. Smooth it out with a putty knife or your finger (wearing gloves!) to create a watertight seal.
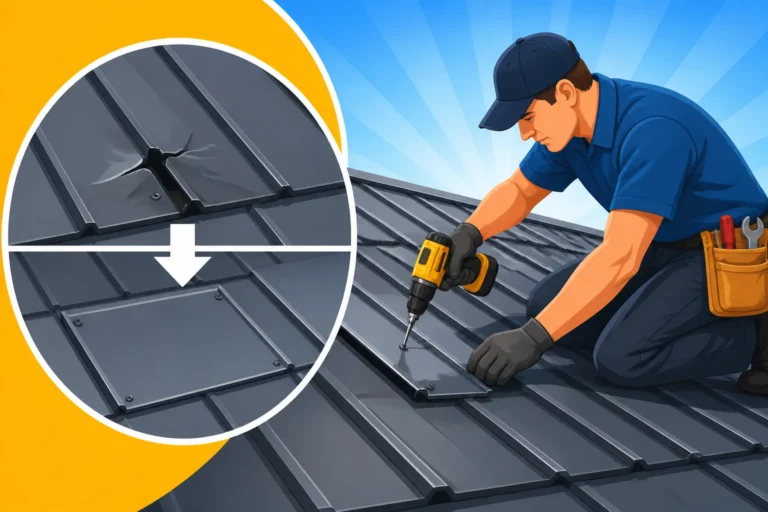
For slightly larger holes (up to about 1/2 inch), a sealant alone might not provide enough structural integrity. In these cases, you'll want to use a patching compound or a specialized metal roof repair tape in conjunction with a sealant. Many roofing supply stores carry peel-and-stick patches made from materials like EPDM or butyl rubber, sometimes reinforced with aluminum. Apply the primer, then press the patch firmly over the hole, ensuring good adhesion. Then, seal the edges of the patch with your elastomeric sealant for extra waterproofing. Some pros even cut a small piece of matching metal, prime it, adhere it with a strong construction adhesive, and then seal the perimeter. The key is creating a durable, flexible, and fully sealed barrier.
After patching, apply your rust-inhibiting primer and then the topcoat paint over the repair to match the surrounding roof. This not only protects the patch but also helps it blend in visually. The success of this repair hinges on impeccable surface preparation and using products specifically designed for metal roofing. For more general advice on fixing leaks, you might find our guide on How to Fix a Leaking Metal Roof helpful.
When to Replace Damaged Panels
There comes a point when repairing a rusted metal panel isn't just inefficient; it's unwise. Trying to salvage a severely compromised panel is like trying to patch a sieve – it might hold for a bit, but it’s destined to fail again, potentially causing more damage in the long run.
So, when do you cross that line from repair to replacement?
- Extensive Perforation: If you have multiple pinholes or large holes (over an inch or two in diameter) spread across a single panel, or if the metal itself is visibly flaking and crumbling, repair becomes a losing battle. The cost and effort of patching numerous spots often outweigh the cost of a new panel.
- Structural Weakness: If you can see or feel that the metal has lost its rigidity and is flimsy or soft due to corrosion, the panel is structurally compromised. Walking on such a panel can be dangerous, and it won't be able to withstand wind or snow loads effectively.
- Rust in Inaccessible Areas: If the rust is severe but located in an area that's extremely difficult to access and properly prepare for a patch (e.g., underneath overlapping panels, near complex flashing), a clean panel replacement might be the safer and more effective option.
- Cosmetic Issues Beyond Repair: While not directly a structural issue, if a panel is so extensively stained or corroded that a repair will result in an unacceptable aesthetic discrepancy, and you prioritize your home's curb appeal, replacement might be the best choice.
The process of replacing a single metal roof panel is usually best left to experienced metal roofing contractors. It involves carefully removing fasteners (which may require specialized tools, as discussed in How to Replace Metal Roof Screws and Fasteners), detaching the damaged panel without disturbing adjacent ones, and then sliding a new, matching panel into place. This can be complex, especially with standing seam panels where interlocking seams need to be carefully disengaged and re-engaged.
Matching the new panel to your existing roof can also be a challenge. Over time, even high-quality paint finishes can fade, so a brand-new panel might look noticeably different. A good contractor will try to source a panel with a similar finish and color, sometimes advising on strategic placement to minimize the visual impact. They can also ensure proper sealing and fastening of the new panel to prevent future leaks and issues.
Ultimately, deciding between repair and replacement often comes down to a cost-benefit analysis and the longevity you expect from your roof. For a comprehensive look at this decision, our article on Metal Roof Repair vs Replacement: How to Decide offers detailed guidance. Sometimes, biting the bullet and replacing a section or even the entire roof, especially if it's nearing the end of its projected How Long Do Metal Roofs Last? lifespan, is the most economical and stress-free long-term solution.
Preventing Future Rust and Extending Your Roof's Life
Successfully repairing rust is a victory, but it's only half the battle. The true win is preventing it from ever coming back. A proactive approach to maintenance and protection can dramatically extend your metal roof's life and save you from future headaches and repair bills. Think of it as an ongoing commitment to the health of your home.
Regular Maintenance and Inspection Practices
The old adage "an ounce of prevention is worth a pound of cure" couldn't be more true for metal roofs. Regular inspections and maintenance are your first line of defense against rust and other common metal roofing issues. Many homeowners install a metal roof and assume it's completely maintenance-free, only to be surprised years down the line. While they are low maintenance, they're not no maintenance.
Aim for at least one annual, and ideally two, inspections – once in the spring after winter's potential damage, and once in the fall before winter sets in. If you live in an area prone to severe weather, check your roof after every major storm. What are you looking for?
- Visual Cues: Keep an eye out for any new discoloration, scratches, chips in the paint, or dull spots that might indicate the protective coating is wearing thin. Look for standing water, which can accelerate corrosion.
- Debris Buildup: Leaves, branches, and other organic debris can trap moisture against your roof panels, creating prime conditions for rust. Regularly clean your roof, gutters, and downspouts to ensure proper water runoff. Blocked gutters can cause water to back up and sit on the roof's edge, leading to localized corrosion.
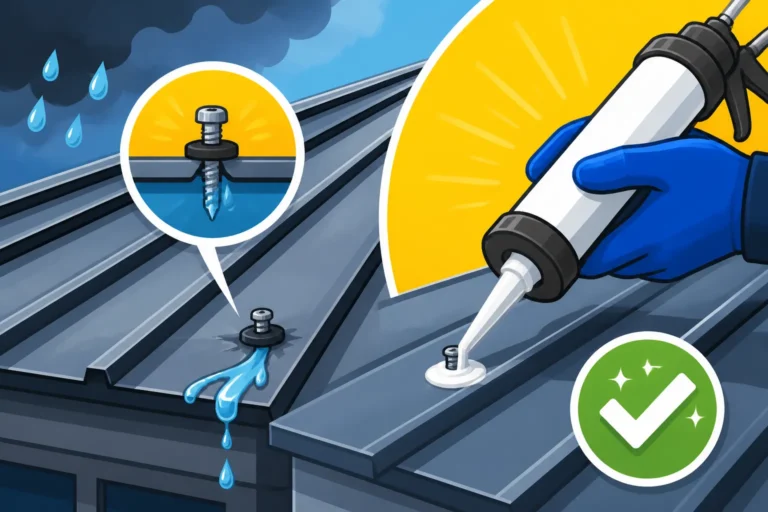
- Fastener Health: For exposed fastener roofs, check that all screws are tight and that their rubber washers are intact and not dried out or cracked. Failing washers are a common source of leaks and can expose the metal beneath to moisture, leading to rust. Our guide on Metal Roof Inspection: What to Check offers a detailed checklist.
- Sealant Integrity: Inspect all sealant joints around flashing, skylights, vents, and panel overlaps. Look for cracks, shrinkage, or signs of deterioration. Compromised sealants allow water infiltration, which can lead to hidden rust and leaks.
Addressing minor issues promptly is crucial. A small scratch noticed during an inspection can be touched up with paint before it ever has a chance to develop into a rust spot. A loose fastener can be tightened and its washer replaced for minimal cost, preventing a leak and potential corrosion. Catching these small problems early can prevent them from snowballing into significant repairs or even panel replacements. This continuous vigilance is a key factor in maximizing your roof's lifespan and its return on investment.
Proactive Measures: Coatings and Sealants
Beyond regular inspections, proactive applications of protective coatings and sealants can significantly bolster your metal roof's defense against rust and wear. Think of it as giving your roof an extra layer of armor.
One of the most effective proactive measures is periodic recoating of your entire roof, especially as it approaches middle age. While factory finishes like Kynar 500 are incredibly durable, even they will eventually show signs of wear and fading after decades of sun, rain, and hail. Applying a high-quality elastomeric or silicone roof coating can essentially give your roof a brand-new protective skin. These coatings are incredibly flexible, waterproof, and offer excellent UV resistance, reflecting solar energy and often providing superior rust inhibition.
These specialized coatings typically contain rust-inhibiting pigments and are designed to adhere strongly to existing metal surfaces. Companies like Sherwin-Williams and Nutech offer advanced coating systems that can rejuvenate an aging metal roof, extending its life by another 10-20 years. This process is far less expensive and disruptive than a full roof replacement and can even qualify for energy efficiency rebates in some areas. Our guide on Metal Roof Coating and Restoration Options provides a deeper dive into the types and benefits of these solutions.
Another area for proactive attention is the consistent maintenance of sealants and flashing. Even standing seam roofs, known for their hidden fasteners and minimal penetration, rely on sealants at crucial points. Regularly inspecting and re-applying or reinforcing sealants around chimneys, skylights, and valleys ensures these vulnerable areas remain watertight. This also prevents water from getting trapped in places where it could sit and cause rust, even on otherwise well-protected panels.
Finally, ensuring proper ventilation under your metal roof is paramount. Condensation forming on the underside of metal panels can lead to rust from within, especially if the underlayment isn't performing correctly. A well-designed attic ventilation system, often integrated with ridge vents and soffit vents, helps mitigate moisture buildup. Understanding the role of Metal Roof Underlayment and Ventilation Guide can prevent hidden rust issues from developing, protecting your roof from the inside out.
By combining diligent inspections, prompt small repairs, and strategic applications of protective coatings, you're not just reacting to rust; you're actively ensuring your metal roof remains a durable, beautiful, and long-lasting asset to your home for many, many years to come. For finding professionals to help with these preventative measures, online platforms like Modernize can connect you with qualified local contractors who specialize in metal roof maintenance and coatings.
Rust Severity and Repair Methods
Here's a quick overview of how to approach rust based on its severity:
| Rust Severity Level | Description | Recommended Repair Approach | When to Consult a Professional |
|---|---|---|---|
| Surface Rust | Minor discoloration, reddish-brown stains, no pitting/flaking. | Clean thoroughly with degreaser. Remove rust with wire brush or sandpaper. Apply rust-inhibiting primer. Apply 1-2 coats of matching metal roof paint. | If rust covers a very large area, if you're uncomfortable working at heights, or if the roof has a complex profile. |
| Moderate Rust | Deeper discoloration, some pitting, minor flaking, but no holes. | Clean thoroughly. Remove all rust with wire brush, sander, or grinder. Apply rust converter if needed. Apply 2 coats of rust-inhibiting epoxy primer. Apply 2-3 coats of matching metal roof paint or elastomeric coating, ensuring full coverage and feathering. | If pitting is extensive or deep, if rust appears in seams or complex flashing areas, or if you suspect it's progressing quickly. |
| Pinhole Leaks / Small Holes | Tiny holes (up to ~1/2 inch) through the metal, potential leaks. | Clean and abrade area around hole, remove all rust. Apply rust-inhibiting primer. For pinholes: Apply high-quality elastomeric sealant. For small holes: Apply metal patch (butyl, EPDM, or metal) with adhesive, then seal edges with elastomeric sealant. Prime and paint over repair. | Immediately, especially if active leaks are present. Patching large numbers of pinholes or larger holes requires skill to ensure a lasting, waterproof repair. Consider Metal Roof Repair vs Replacement: How to Decide if multiple perforations exist in one panel. |
| Severe Perforation / Structural Damage | Large holes, widespread flaking, metal is soft, delaminated, or crumbling. | Do not attempt extensive repair on a severely damaged panel. The panel has lost structural integrity. The most effective long-term solution is panel replacement. | Immediately. This level of damage often requires professional assessment and likely panel replacement by a qualified metal roofing contractor. They can also advise on underlying issues like decking damage. |
Disclaimer
Please remember that this guide provides general information for educational purposes. Metal roof repair can be dangerous and should only be undertaken by individuals with the necessary skills, experience, and safety equipment. Always prioritize your safety. If you are unsure about any step or uncomfortable working on your roof, it is highly recommended to consult a qualified and licensed metal roofing professional. They can properly assess the damage, recommend the best course of action, and ensure repairs are carried out safely and effectively according to local building codes.