Metal Roof Trim and Flashing Cost
When looking at a metal roof estimate, most homeowners focus on the broad price of the large steel or aluminum panels. However, a massive chunk of your total expenditure—and the key to keeping your home dry—comes down to metal roof trim and flashing. Without properly specified edge details, ridge caps, and valley liners, even top-tier panels will fail. This guide breaks down what trim and flashing cost, why they matter, and how to evaluate your quote properly.
Understanding Metal Roof Trim and Flashing
The Critical Role of Trim and Flashing in Water Shedding
Metal roofing panels are designed to cover large, flat expanses of a roof deck, quickly shedding water down the slope. However, no roof is a single, uninterrupted plane. Homes feature ridges, hips, valleys, gables, dormers, chimneys, and vent pipes. Every junction where two planes meet, or where the roof terminates at an edge, represents a potential path for water intrusion. This is where trim and flashing become the absolute frontline of your home’s defense against severe weather.
Trim and flashing serve two primary functions: moisture diversion and aesthetic closure. Water is opportunistic. Through capillary action, wind-driven rain, and ice damming, water can travel upward or sideways under the edges of metal panels. Trim components are engineered with specific bends, hemmed edges, and overlapping channels that lock out moisture and direct water toward your gutters. Beyond water management, trim covers the raw, cut edges of metal panels, providing a clean, finished appearance that ties the entire architectural design together.
Neglecting the quality or proper installation of these transition pieces often leads to severe water damage long before the metal panels themselves reach the end of their lifespan. While a panel might come with a multi-decade warranty, that warranty is completely rendered useless if water slips past a poorly folded sidewall flashing and rots out your plywood deck and structural rafters. Understanding these Hidden Costs of a Metal Roof starts with recognizing that trim work is where the true craftsmanship—and a significant portion of the material expense—actually lives.
Primary Metal Materials Used for Roof Trims
The material selected for your trim and flashing must match or exceed the durability and chemical composition of your main roofing panels. Installing flashing made from a lower-grade or dissimilar metal creates severe risks. The most common material choices include Galvalume steel, aluminum, copper, and zinc. Each material brings a unique balance of cost, flexibility, and resistance to environmental elements.
Galvalume steel, which features a sheet steel core coated with an alloy of aluminum and zinc, is the standard for most residential standing seam and exposed fastener installations. It offers exceptional strength, minimal thermal expansion, and great corrosion resistance at an accessible price point. Aluminum trim is heavily favored in coastal regions where airborne salt spray rapidly corrodes standard steel. Aluminum naturally forms an oxide layer that resists corrosion, though it expands and contracts more significantly than steel, requiring specialized fastener slots and allowances during installation.
Premium metals such as architectural copper and zinc represent the highest tier of flashing materials. Copper requires no paint, develops a protective patina over time, and can be hand-soldered on-site to create completely watertight, custom-molded transitions around complex historical masonry. Zinc offers similar longevity and self-healing properties. Regardless of the base metal, trim pieces are typically formed from sheets that are either 24-gauge or 26-gauge thick. Thicker 24-gauge trim resists oil canning and impact damage much better than flimsier 29-gauge utility trim, though it requires heavier machinery to bend and shape.
Custom Fabrication versus Prefabricated Profiles
When planning a metal roof project, contractors generally rely on two supply pathways for trim components: prefabricated stock profiles or custom brake-formed trim. Stock trim pieces are mass-produced in factory settings with standardized lengths, usually 10 to 12 feet, and predetermined bend angles such as standard 90-degree or 45-degree transitions. These factory profiles are cost-effective and readily available, making them popular for simple gable roofs or basic utility buildings.
However, residential architecture rarely conforms strictly to stock factory angles. Variations in roof pitch, irregular dormer intersections, thick stone siding, and custom skylight curbs frequently demand custom-bent flashing. To create custom pieces, installers use a specialized piece of equipment known as a portable sheet metal brake, either set up on the job site or inside a regional fabrication shop.
Custom brake-forming allows the installer to measure the exact, unique geometry of your roof and bend flat metal coil stock to mirror those precise dimensions. While custom fabrication increases labor expenses and requires a highly skilled artisan, it eliminates unsightly gaps, reduces reliance on heavy lines of exposed caulk, and provides a drastically superior seal. Choosing custom-formed flashing increases overall project expenses, but it remains one of the best investments you can make to guarantee long-term watertight performance on complex roof designs, especially when paired with a premium Standing Seam Metal Roof Cost investment.
Breakdown of Essential Trim and Flashing Types
Ridge Caps and Hip Caps
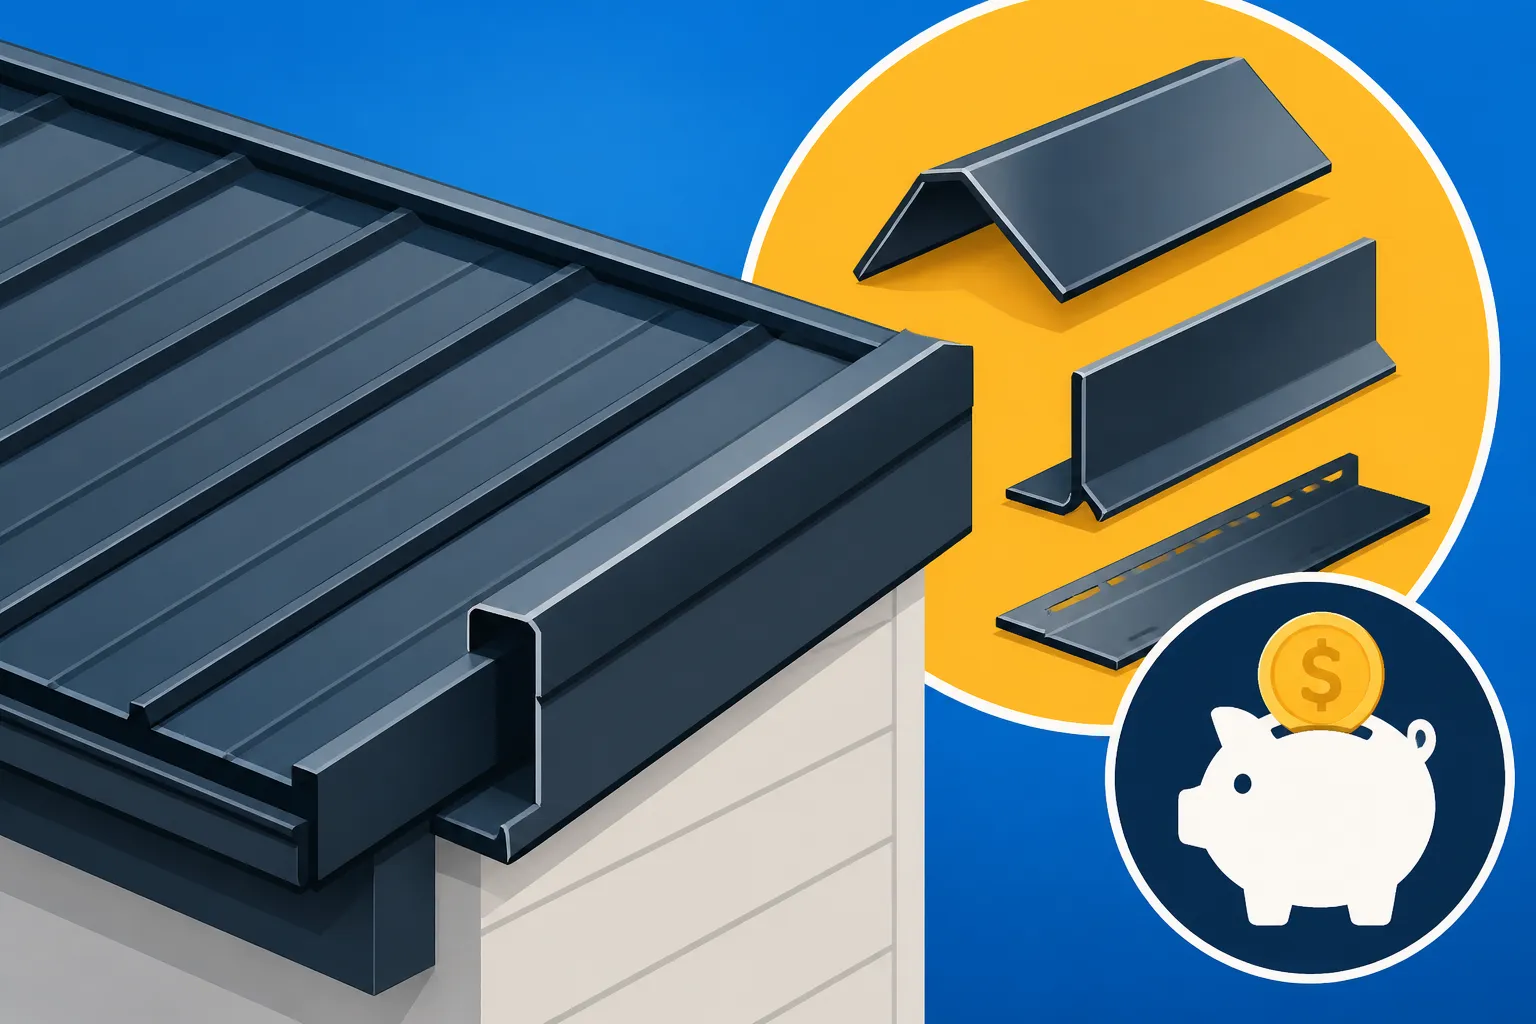
The ridge cap is the finished metal piece that covers the peak of a roof where two opposing roof slopes meet at the top. Hip caps perform a similar role along the sloping ridge where two roof sections intersect at an outside angle. Because these areas represent the absolute highest points of the structure, they are subjected to intense wind uplift pressures and severe thermal movement as rising heat exits the home and sunshine beats directly down on the apex.
Ridge caps come in two main structural varieties: standard solid ridge caps and vented ridge caps. Vented ridge caps feature micro-perforations or built-in mesh baffles that allow attic heat and moisture to escape while blocking rain, snow, and pest intrusion. Installing a vented ridge system requires precise trimming of the metal panels near the ridge line, followed by the application of foam closure strips, sealant tape, and specialized Z-closures to hold the assembly tight.
Because hip caps follow a diagonal line down the roof plane, fitting them requires meticulous angle cuts on every single intersecting metal panel. The cap itself must be locked tightly to the standing seams or securely fastened through foam closure strips to prevent wind from catching the underside and peeling the trim away during intense storms. The combination of specialized closure components, higher material volume, and intense labor makes ridge and hip capping one of the primary trim line items on any estimate.
Eave Trim and Drip Edges
Positioned along the lowest horizontal perimeter of the roof, eave trim—often called a drip edge—directs water running down the roof panels directly into your gutter system, completely bypassing the wooden fascia board and soffit assembly. Without functional drip edge flashing, surface tension can cause water to curl around the edge of the metal panel and run backward along the underside, soaking the fascia board, breeding wood rot, and destroying interior ceilings.
Eave trim for a metal roof is considerably more sophisticated than the lightweight aluminum drip edge used under asphalt shingles. On a standing seam roof, the eave trim features a hemmed hook at the bottom edge. The standing seam panels are folded over and hooked onto this offset cleat, creating a completely concealed, mechanical lock that allows the panel to expand and contract smoothly without relying on exposed screws.
In cold weather climates prone to snow accumulation, eave flashing plays a critical role in resisting ice dam formation. Installers lay heavy self-adhering membrane underlayments directly over the eave metal to form a dual barrier. Choosing high-performance synthetic or ice-and-water membranes is a critical step, and evaluating your overall Metal Roof Underlayment Cost alongside your eave flashing specs ensures your roof perimeter remains completely leak-free throughout freezing winter thaw cycles.
Valley Flashing and Sidewall Transitions
Roof valleys occur where two roof slopes meet at an inside angle, forming a channel that collects massive volumes of water from both sides of the structure. Because a valley acts as a high-velocity stream during heavy downpours, valley flashing must be exceptionally wide, durable, and smooth. Metal valley liners are formed with a raised center rib, often called a W-profile, which slows down rushing water and prevents rain from splashing sideways under the metal panels on the opposing side.
Sidewall and headwall flashings are used wherever a roof slope terminates against a vertical wall, such as a second-story wall, a chimney, or a dormer. Sidewall flashing runs parallel to the roof pitch, stepping up or tucking beneath the siding material to funnel water down toward the eave. Headwall flashing sits horizontally across the top of a roof section where it meets a wall.
To properly seal a sidewall transition, professional roofers utilize a two-part flashing system consisting of a base step/sidewall flashing and a counter flashing. The counter flashing is cut and embedded directly into a mortar joint or tucked tightly behind the exterior wall cladding. This overlapping technique relies on gravity rather than chemical sealants alone to divert water away from the junction, offering a permanent barrier against torrential rain.
Pipe Boots and Penetration Flashings
Every roof features functional penetrations, including plumbing vent stacks, exhaust fans, furnace flues, electrical mast pipes, and skylights. Each penetration breaks the continuous sheet of metal roofing and requires specialized flashing details to prevent leaks. The most common solution for small round pipes is a flexible pipe boot, manufactured from synthetic EPDM rubber or high-temperature silicone with a flexible aluminum collar base.
The installer slides the rubber boot over the pipe, shapes the aluminum collar to match the ribs or profile of the metal panel, and seals the base with heavy butyl tape and stainless steel stitch screws. While EPDM pipe boots are budget-friendly and easy to replace, they generally have a shorter life expectancy than the metal roof itself, requiring periodic inspection and washer maintenance over the decades.
For larger penetrations like brick chimneys, skylights, or HVAC curbs, flexible rubber boots cannot be used. Instead, installers must craft custom metal curb flashings, complete with an upstream water-diverter known as a cricket. A chimney cricket is a small, pointed metal structure built behind the high side of a chimney to split oncoming water flow and divert it around the sides of the brickwork. Building a custom chimney cricket requires advanced layout work and precision soldering, representing a distinct labor investment on the roofing quote.
| Flashing / Trim Type | Primary Function | Relative Material Cost | Installation Labor Intensity | Typical Lifespan |
|---|---|---|---|---|
| :— | :— | :— | :— | :— |
| Ridge Cap (Solid / Vented) | Seals apex peak; allows attic ventilation | Moderate | Moderate to High | Matches Roof (40–70 yrs) |
| Valley Flashing (W-Profile) | Channels heavy concentrated runoff water | High | High | Matches Roof (40–70 yrs) |
| Drip Edge / Eave Cleat | Directs water into gutters; locks panel edge | Low to Moderate | Moderate | Matches Roof (40–70 yrs) |
| Sidewall & Counter Flashing | Seals junctions where roof meets vertical walls | Moderate to High | High | Matches Roof (40–70 yrs) |
| Pipe Boot (EPDM / Silicone) | Seals small round plumbing / vent stacks | Low | Low to Moderate | 15–25 Years (Maintenance Item) |
| Custom Chimney Cricket | Diverts water flow around wide penetrations | High | Very High | Matches Roof (40–70 yrs) |
Key Factors Influencing Trim and Flashing Expenses
Roof Slope and Architectural Complexity
The physical design of your roof is the single greatest variable influencing how much trim and flashing you will need, as well as the total labor required to install it. A simple two-sided gable roof with zero dormers or hips requires only a basic set of trim pieces: eave drip edges, gable rake trims, and a single ridge cap along the peak. Material waste is low, installation speed is rapid, and the cost of trim represents a modest fraction of the total budget.
Conversely, a complex multi-gable roof featuring multiple dormers, valley intersections, stone chimneys, skylights, and varying pitches requires an enormous volume of specialized trim components. Every hip line, valley trough, and wall interface demands its own specific flashing assembly. Additionally, steep roof pitches—such as 8/12, 10/12, or 12/12 slopes—greatly complicate trim installation. Installers must work slower, set up extensive staging and safety ropes, and manually bend custom transition angles on site.
When estimating job complexity, roofers measure lineal footage rather than pure square footage. Two homes might both have 2,500 square feet of living space, but one home with complex Victorian architecture might require three times as many lineal feet of trim and flashing as a single-story ranch home. The additional trim pieces, closure strips, butyl tapes, and hand-folding labor dramatically adjust the overall investment required.
Metal Gauge Thickness and Paint Finish Quality
The underlying raw material specs directly dictate the baseline cost of raw trim coil stock. Metal trim is typically manufactured from 24-gauge or 26-gauge steel. In the metal roofing industry, lower gauge numbers represent thicker metal. A 24-gauge steel sheet is substantially thicker, stiffer, and more structurally rigid than a 26-gauge sheet.
Because 24-gauge trim uses more raw steel per foot, it naturally costs more to buy from the mill. However, its rigidity provides critical performance benefits: it resists warping during custom hand-bending, withstands heavy hail impacts without severe denting, and eliminates the unsightly wavy distortion known as oil canning. Cheaper 29-gauge utility metal, often used on agricultural sheds, is vastly cheaper upfront but bends easily under ice pressure and shows severe surface distortion over time.
Beyond gauge thickness, the chemical paint system applied to the trim metal dictates long-term color retention and price. Premium trim is coated with a Polyvinylidene Fluoride (PVDF) resin finish, widely marketed under trade names like Kynar 500 or Hylar 5000. PVDF coatings resist chalking, fading, and UV degradation for decades, maintaining an exact color match between your trim and main panels. Lower-tier Silicone Modified Polyester (SMP) finishes are less expensive but fade faster under intense sunlight, eventually causing trim pieces to look mismatched against the surrounding panels.
Labor Requirements and Precision Installation Steps
Installing metal roof trim is fundamentally different from nailing down asphalt shingles or snapping together vinyl siding. It is a precise, artisan trade that demands high mechanical aptitude, attention to geometry, and careful handling. A single miscalculated cut on a valley flashing or a poorly folded corner on a rake trim can easily result in an active leak that rots underlying framing timbers.
Precision trim installation involves numerous intricate steps:
* Measuring and field-cutting heavy gauge metal sheets with specialized offset hand snips or electric shears.
* Hemming raw cut metal edges manually to create stiff, smooth finished edges that prevent rust initiation.
* Applying high-grade butyl sealant tape and continuous beads of non-skinning polyisobutylene sealant along overlapping joints.
* Installing solid or vented neoprene closure strips designed to perfectly mirror the corrugated or standing seam panel profile.
* Cleating concealed starter strips to fascia boards without puncturing the exposed face of the primary water-shedding metal.
This meticulous, labor-heavy workflow means that the installer fee for trim and flashing work often exceeds the cost of the raw metal materials themselves. Calculating your expected Metal Roof Labor Cost involves accounting for these highly technical fitting hours, as top-tier metal contractors allocate a substantial portion of their total labor hours strictly to detailed edge and transition work.
Comparative Cost Overview and Material Profiles
Exposed Fastener Trims versus Hidden Fastener Systems
The overall style of metal roof system you select fundamentally changes how trim and flashing pieces are designed, manufactured, and attached to your home. The two primary residential categories are exposed fastener systems (such as corrugated or R-panel roofs) and hidden fastener systems (such as standing seam roofs).
Exposed fastener systems utilize trim profiles that overlap the top of the metal panel edges. Screws featuring heavy EPDM neoprene washers are driven straight through the face of the metal trim, through the panel, and into the roof deck below. Because these trims are simple L-shapes, Z-shapes, or wide ridge profiles secured with visible screws, they are fast to manufacture and relatively straightforward to install. This keeps both material costs and labor expenses low, making it a popular choice for budget-conscious homeowners considering options like a Corrugated Metal Roof Cost project.
Hidden fastener standing seam systems rely on far more sophisticated trim architecture. Standing seam trims do not rely on screws driven through the top surface of the panel. Instead, trims feature folded hems that hook onto continuous cleat strips or lock into folded panel seams. Expansion and contraction space must be engineered into every single trim junction. The installer must notch, fold, and crimp each metal hem by hand at gable edges, wall turns, and eaves. While hidden fastener trims cost considerably more in materials and demand double or triple the labor hours, they eliminate thousands of exposed screw holes, offering a sleek look and unmatched longevity.
Regional Weather Dynamics and Regional Pricing Variance
Geography plays a massive role in shaping flashing specifications, local building codes, and regional material pricing. Buildings constructed in hurricane-prone coastal regions face vastly different engineering requirements than homes situated in the high-altitude Rocky Mountains or sunny inland valleys.
In high-wind and coastal environments, local building codes mandate heavy-duty trim attachments. For instance, homes in coastal zones must use thicker gauge aluminum or stainless steel trim, spaced closer together with high-load fasteners and heavy-duty hurricane cleats to resist intense wind uplift forces. Understanding local regulatory drivers like What Drives Metal Roof Cost in Florida reveals how stringent product approvals, Miami-Dade high-velocity hurricane zone rules, and strict edge-metal testing requirements increase localized trim expenses.
Conversely, in heavy snow belts, flashing details must be engineered to resist massive snow loads, thermal movement, and sliding ice sheets. Installers must fit extra-wide valley flashing troughs, double-hemmed eave cleats, heavy ice-and-water underlayments, and integrated snow guards to prevent sliding snow from ripping ridge caps and vent flashings right off the deck. Exploring regional climate factors, such as What Drives Metal Roof Cost in Texas, highlights how intense summer UV exposure, sudden hail events, and heavy thermal expansion cycles demand specialized expansion joints and PVDF-coated trims to prevent premature seal failure.
How Trim and Flashing Impact Your Overall Roofing Budget
Avoiding Hidden Cost Surprises in Contractor Estimates
When reviewing bids from multiple metal roofing contractors, homeowners are often baffled by broad price discrepancies. A frequent cause for a surprisingly low bid is an unethical or inexperienced contractor cutting corners on the trim and flashing package. Cheaper bids often obscure missing line items, leaving you vulnerable to low-quality workmanship or unexpected change orders halfway through the project.
To avoid hidden cost surprises, closely inspect the detailed scope of work in every proposal. Ensure the quote explicitly details the gauge of the trim metal, the paint coating type, and the specific brand of sealant tapes and flexible pipe boots. Look out for red flags, such as a contractor proposing to reuse old metal flashings, using low-tier exposed fastener trim on a premium standing seam roof, or relying on heavy beads of cheap caulking rather than proper metal counter-flashing tucked into masonry joints.
A detailed, professional quote should separate material costs from installation labor and clearly state how complex penetrations—like chimneys, skylights, and sidewalls—will be flashed. Learning How to Read and Compare Metal Roof Quotes empowers you to verify that every contractor is bidding on an identical, high-performance trim spec rather than hiding low-quality components behind a shiny main-panel estimate.
Long Term ROI and Preventing Premature Leak Damage
While upgrading to premium 24-gauge trim, custom brake-formed wall transitions, and hidden-fastener cleats adds upfront cost to your roofing installation, it delivers extraordinary long-term return on investment. The overarching purpose of a metal roof is to provide a durable, 40- to 70-year protective shell over your living space. Skimping on flashing components jeopardizes that entire long-term timeline.
Water leaks originating from failed flashing rarely remain localized to the roof edge. Water sneaks beneath underlayments, pooling along wood sheathing, running down internal wall studs, destroying fiberglass insulation, and ruining drywall ceilings. Remediating internal water rot, structural timber replacement, and toxic mold cultivation can easily cost tens of thousands of dollars—far exceeding the modest extra cost of specifying top-grade flashing work during the initial build.
Furthermore, a professionally finished metal roof with crisp, color-matched, oil-canning-free trim dramatically enhances curb appeal. If you decide to sell your home in the future, prospective buyers and home inspectors will scrutinize transition details, chimney flashings, and ridge lines. Clean, professionally folded metal craftsmanship conveys exceptional building quality, preserving high resale value and validating your overall investment.
Repairing versus Replacing Damaged Flashing Components
Over the lifespan of a house, existing metal roof flashing may sustain damage from severe storms, fallen tree limbs, or improper foot traffic from third-party technicians like satellite installers or chimney sweeps. When a leak appears, homeowners face a critical choice: attempt localized flashing repairs or invest in replacing the affected flashing sections entirely.
Localized repairs generally involve clearing away debris, drying the area, replacing missing neoprene screws, and applying high-grade elastomeric polyisobutylene sealants over failing seams or damaged pipe boots. While caulking and patching small punctures can serve as a temporary emergency fix, sealants are inherently temporary maintenance items. UV radiation inevitably breaks down exposed chemical caulking over time, meaning a slathered-on patch will likely fail again within a few years.
Replacing damaged flashing correctly on a metal roof often requires unseaming or removing several surrounding metal panels to access the underlying attachment cleats and membranes. This is delicate, complex work. Attempting to pry open standing seams without specialized tools often ruins the adjacent metal panels, expanding the scope of the job. Consulting a dedicated guide, such as a Metal Roof Leak Repair Guide, helps you diagnose whether your flashing leak requires a simple boot swap or a professional panel-deconstruction and flashing replacement.
Frequently Asked Questions About Metal Roof Trim
Can You Reuse Old Metal Flashing During a Roof Replacement?
Reusing old metal flashing during a full roof replacement is strongly discouraged by reputable professional roofers and metal manufacturers alike. While old copper or thick steel flashing might appear visually intact from the ground, the process of tearing off surrounding roofing materials bends, warps, and stresses the old metal.
Furthermore, existing flashing will already contain old nail holes, dried sealant residue, and metal fatigue around previous bend lines. Installing a brand-new, multi-decade metal roof over old, compromised flashing creates a weak link in your water defense system. Reusing old components almost always voids the manufacturer’s warranty on your new panels, leaving you entirely unprotected if a leak develops down the road. Replacing all flashing with brand-new, matching trim guarantees that the entire roof system ages uniformly.
Why Is Custom Flashing More Expensive Than Stock Panels?
Custom flashing costs substantially more per square foot than standard flat roof panels due to the extensive manual labor, specialized equipment, and zero-tolerance precision required to fabricate it. Standard roofing panels are roll-formed rapidly by high-speed automated factory machines from large metal coils, producing hundreds of feet of uniform material per minute.
Custom flashing, by contrast, is crafted piece-by-piece by a skilled sheet metal technician. The roofer must carefully take manual field measurements of irregular angles on your roof, transport heavy sheet metal brakes to the site, mark cutting lines, and make multiple precise manual folds on every single strip. A single miscalculation renders the custom metal piece useless, leading to material waste. You are paying not just for raw metal, but for specialized metal-smithing expertise, field labor hours, and custom architectural fitment.
What Happens If Eave Flashing Is Missing or Incorrectly Installed?
If eave flashing is missing, incorrectly sized, or installed without a proper drip hook, rainwater running off the metal roof will not discharge cleanly into the gutters. Instead, surface tension causes water to cling to the underside edge of the panel, curling backward in a phenomenon known as capillary wick-back.
This backward-flowing water travels directly into the exposed wooden fascia boards, rafter tails, and soffit vents. Over time, persistent dampness causes unseen wood rot, attracts wood-boring insects like carpenter ants and termites, and fosters mold growth within your attic space. In winter climates, missing eave flashing allows meltwater to seep underneath the bottom edge of the metal sheets, freezing and expanding into destructive ice dams that lift panel edges right off the roof deck. Proper drip edge flashing is a non-negotiable requirement for a safe, dry home.
Disclaimer
This article is for general informational purposes only and does not constitute professional advice. Laws, prices and regulations vary by location and change over time. Consult a qualified professional for guidance on your specific situation.