Metal Roof Labor Cost
Staring at a roofing estimate can leave you feeling completely blindsided, especially when you notice that the price of trade labor rivals or even exceeds the cost of the raw metal panels themselves. If you are struggling to make sense of your installation quotes, you are not alone. This guide breaks down everything driving metal roof labor costs, helping you evaluate contractor bids, understand crew pricing, and avoid paying for unnecessary overhead.
Understanding Metal Roof Labor Cost: Breaking Down the Invoice
When you receive a detailed bid from a contractor, the total figure can feel arbitrary until you dissect the actual mechanics of a roofing invoice. Unlike basic home repairs where labor is an afterthought, metal roofing demands specialized trade skills, custom fabrication, and meticulous safety protocols. Labor charges reflect not just the hands physical on your roof, but the decades of collective expertise required to make a rigid material permanently watertight. Understanding how a crew turns raw steel coils or flat panels into a seamless weather barrier is the first step toward evaluating whether your quote is fair.
Labor vs. Material Ratio in Roofing
In traditional asphalt shingle roofing, materials often account for a massive chunk of the budget, while labor remains relatively low due to the speed of pneumatic nail guns and forgiving installation tolerances. Metal roofing flips this economic model entirely. Depending on the complexity of your home and the specific profile chosen, labor typically accounts for fifty to sixty-five percent of the total project invoice. This shift occurs because metal panels cannot simply be overlapped and nailed down at high speed; every cut, bend, seam, and fastener penetration requires calculated precision.
Consider the reality of working with sheet metal. If an installer miscalculates a valley cut on an asphalt shingle, they throw away a three-dollar shingle and grab another from the bundle. If a crew miscuts a custom twenty-foot standing seam panel, that entire sheet becomes scrap metal, wasting both expensive material and precious labor time. Contractors price their labor to cover the slow, deliberate pace required to ensure zero mistakes. When you look at your overall Metal Roof Cost Per Square Foot, remember that you are paying for surgical precision rather than raw assembly line speed.
Furthermore, the tools required to work with metal panels are significantly more specialized than standard construction equipment. Crews use portable roll-forming machines, mechanical pan-seamers, heavy-duty sheet metal brakes, and specialized metal shears. The operational overhead for these tools, combined with the higher worker compensation insurance rates required for specialized trade labor, naturally expands the labor line item on your estimate.
How Installers Calculate Labor Rates (Per Square vs. Per Hour)
Roofing contractors rarely bill residential homeowners on an hourly basis, as hourly billing creates unpredictable financial risk for both parties. Instead, the industry standard relies on “per square” pricing. In roofing terms, one square equals a ten-foot by ten-foot area, or one hundred square feet of roof surface. Estimators calculate the total square footage of your roof, adjust for slope and waste factor, and apply a standardized Metal Roof Labor Cost Per Square rate that covers all trade work from tear-off to final ridge cap installation.
When an estimator inspects your roof, they use this square unit as a baseline and layer on risk modifiers. For example, a simple, low-pitched ranch house might carry a baseline labor rate per square, but a two-story home with steep gables will incur “pitch pan” and “height” surcharges per square. These surcharges directly compensate the installation team for the extra time spent rigging safety lines, hoisting heavy materials, and moving cautiously across steep slopes.
Hourly billing usually only comes into play during field adjustments or unexpected repairs once the old roof is stripped away. If your contractor discovers rotted plywood decking or compromised rafter tails, that work is typically billed under an hourly rate plus materials clause clearly outlined in your change order agreement. Understanding these pricing mechanisms helps you evaluate whether a bid is built on transparent industry standards or vague, inflated estimates.
Why Metal Roofing Labor Costs More Than Asphalt Shingles
The transition from installing shingles to installing metal is similar to moving from basic carpentry to fine cabinetmaking. Asphalt shingles are flexible, easily cut with a simple utility knife, and designed to cover minor subfloor imperfections. Metal panels, by contrast, are completely unforgiving. A deck surface that bows slightly will cause flat sheet metal to warp, creating a unsightly visual distortion known as oil canning, or worse, causing structural seams to bind and leak over time.
To prevent these issues, metal roof installers must spend extensive labor hours preparing the roof deck before a single panel ever touches the house. They must verify that the plywood substrate is completely flat, lay down high-temperature synthetic underlayments, and carefully align chalk lines across the entire roof structure. Aligning metal panels requires constant measurement; if a crew starts off by just a quarter of an inch at the eave, that drift will compound into inches by the time they reach the opposite rake edge, ruining the roof’s geometry.
Additionally, managing thermal movement demands advanced field skills. Metal expands and contracts significantly as ambient temperatures swing between winter freezes and summer heat. Installers must understand how to utilize floating clip systems, elongated screw slots, and engineered trim overlaps that allow the metal to slide naturally without shearing its own fasteners or tearing open sealed flashing points. This level of physical science and craft mastery is why skilled metal roof mechanics command significantly higher hourly wages than standard labor hands.
SUMMARY OF LABOR DEMAND DRIVERS
| FACTOR | IMPACT ON LABOR OVERHEAD |
|---|---|
| Material Tolerances | Unforgiving cuts require slow, precise work |
| Thermal Expansion Prep | Custom clips and sliding trims add build time |
| Specialized Tooling | Roll-formers and hand-brakes demand expertise |
| Deck Flatness Requirements | Extensive furring or leveling prior to build |
| Height & Slope Risk | Rigorous OSHA harnesses and crane hoisting |
Key Factors That Drive Up Metal Roof Labor Costs
No two roofs are identical, and two houses with the exact same floor plan size can end up with vastly different labor quotes. The physical geometry of your house, the condition of the underlying structure, and the height of the eaves dictate how many worker-hours a job will consume. By evaluating the specific structural quirks of your home, you can pinpoint exactly what is driving your labor estimate up or down before ever signing a contract.
Roof Pitch, Slope, and Height
The pitch, or steepness, of your roof is one of the single largest variables in labor pricing. Pitch is expressed as a ratio of vertical rise over a twelve-inch horizontal run (for example, 4/12 or 8/12). Once a roof’s slope crosses a 6/12 threshold, walking on the surface without fall protection becomes impossible, and the movement of workers slows down dramatically. Crews must wear safety harnesses tied off to engineered anchor points, install walk-boards, and carefully haul materials up step-by-step.
| Gentle Pitch (4/12) | Steep Pitch (9/12) |
|---|---|
| Walking is easy. Panels lay down quickly. | Requires ropes, harnesses, and cautious movement. |
| Low Labor Risk | High Labor Risk |
Working on a steep slope also transforms simple tasks into labor-intensive hurdles. Carrying a twenty-foot sheet of steel up a ladder onto a 4/12 pitch roof takes two workers a couple of minutes. Moving that same panel onto a 10/12 pitch roof requires a multi-person rigging team or a dedicated boom crane operator, spiking the hourly labor overhead. The steepness forces crews to spend as much time managing safety logistics as they do actually fastening roofing material.
Stories of home height add another layer of complexity. Single-story homes allow crews to stage materials easily at perimeter ground level and walk panels right up to the eaves. Two- and three-story structures require material hoists, scaffolding, or extended boom lifts to deliver long metal panels to the ridge safely. Every extra story adds risk, setup time, and physical fatigue to the crew, which naturally translates to higher per-square labor rates on your invoice.
Architectural Complexity: Dormers, Valleys, and Skylights
A simple gabled roof with two flat, rectangular planes is a metal installer’s dream. The crew can establish their baseline chalk lines and rapidly install full-length panels end-to-end. However, if your home features dormers, hip valleys, intersecting rooflines, or multiple skylights, labor costs will increase quickly. Every break in a roof plane requires custom metal fabrication, flashing integration, and hand-bent metal hem seams.
When dealing with complex geometry, installers cannot simply cut panels on the ground and nail them down. Each junction point requires a meticulous process:
* Measuring the exact angle of the intersecting roof plane or wall junction in the field.
* Cutting the metal panel using specialized hand snips or electric shears to avoid scorching the paint coating.
* Bending a precise one-inch hem onto the cut edge of the panel using hand-seamers.
* Interlocking that hem into a custom valley pan or sidewall flashing channel.
* Applying high-grade butyl sealant tapes internally to guarantee a watertight bond.
A single skylight can add several hours of detailed labor to a project. The crew must fabricate a custom dead-valley pan above the skylight, craft step-flashing along the sides, and create a custom apron along the bottom to route rainwater around the structure. To understand the cumulative effect of these architectural details, read through our detailed breakdown on What Affects Metal Roof Cost: Gauge, Pitch, Complexity & Tear-Off.
Tear-Off and Substrate Preparation
Before a new metal roof can be installed, the old roofing system must be handled. While it is technically possible in some jurisdictions to overlay metal over existing materials, most reputable contractors strongly advocate for a complete tear-off down to the bare wood sheath. The manual labor involved in stripping off multiple layers of heavy asphalt shingles, removing old felt, pulling thousands of buried nails, and hauling the debris to a dump trailer is physically taxing, dirty, and time-consuming.
Once the substrate is exposed, labor does not immediately transition to metal installation. The crew must conduct a comprehensive inspection of the wood decking. Rotted plywood, sagging OSB, or split tongue-and-groove boards must be removed and replaced. If the roof deck is uneven, installers must shim rafters or lay down furring strips to build a perfectly flat plane. Ignoring substrate defects leads to visible oil canning and structural panel binding later, so skilled crews spend significant time securing the deck.
Finally, installing modern underlayment systems requires careful labor. High-performance metal installations demand self-adhering ice and water shields along eaves, valleys, and rakes, followed by premium high-temperature synthetic underlayment across the field. Rolling out, smoothing, and sealing these heavy, sticky membranes without wrinkles requires a coordinated crew, adding essential labor time that directly protects your home from hidden leaks.
Labor Costs by Metal Roof Profile and System Type
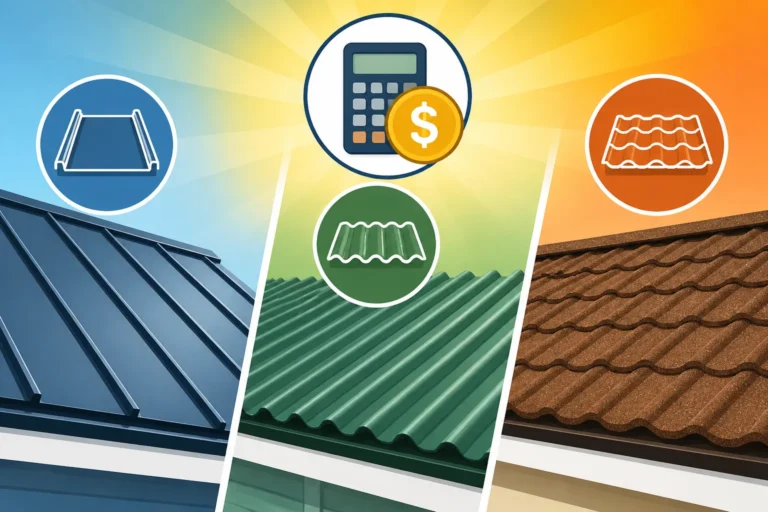
The specific type of metal roof profile you select heavily dictates the skillset, crew size, and time required for installation. Metal roofs generally fall into three distinct profile categories: exposed fastener panels, hidden fastener standing seam systems, and stamped specialty metal shingles or tiles. As you move up the spectrum of panel complexity, the labor hours required to complete the job multiply accordingly.
LOW LABOR
- Exposed Fasteners (Screw-Through)
- Standing Seam Snap-Lock (Concealed Clips)
- Mechanical Seam (Hand-Seamed)
- Metal Shingles/Tiles (Interlocking Grid)
HIGH LABOR
Exposed Fastener & Corrugated Panel Labor Needs
Exposed fastener systems—often referred to as corrugated panels, 5V Crimp, or agricultural panels—are the most straightforward metal roofs to install. In these systems, large panels are laid across the roof deck overlapping one another, and screws wrapped with neoprene washers are driven directly through the face of the metal into the framing or decking below. Because the fasteners remain exposed and there are few interlocking internal clips, installation moves relatively fast.
A standard residential crew can cover significant acreage in a single day with exposed fastener systems. Cuts are basic, panel overlap is forgiving, and trims are pre-manufactured to lap over the outside of the sheets. Because the skill threshold is lower compared to hidden fastener builds, general roofing crews can install these panels efficiently, keeping overall labor pricing closer to the lower end of the metal spectrum.
However, the lower initial labor cost carries a long-term trade-off. Because thousands of screws penetrate the exterior face of the panels, the crew must be extremely careful not to over-tighten or under-tighten the rubber washers. Over-tightening crushes the rubber gasket, leading to early UV failure, while under-tightening leaves a direct pathway for water leaks. Even with faster installation times, precision during the fastening process remains non-negotiable. If you are comparing lower-cost panel styles, review our guide on Corrugated Metal Roof Cost to evaluate the balance between upfront labor and long-term performance.
Standing Seam Metal Roof Labor Demands
Standing seam roofing represents the gold standard in residential metal performance, but it comes with a steep increase in labor demands. In a standing seam roof, the vertical ribs rise one to two inches above the flat deck, and all fasteners are completely concealed underneath the metal surfaces using specialized sliding clips. This design leaves no exposed screw holes on the surface, allowing the roof to withstand extreme weather and thermal movement indefinitely.
Installing a standing seam system requires an elevated level of craftsmanship. If you choose a snap-lock standing seam profile, the crew manually snaps each panel seam over the hidden clip track of the adjacent panel. If you opt for a mechanically seamed system, the installation process becomes even more labor-intensive:
1. Workers lay the panel and secure hidden clips along the leg every sixteen to twenty-four inches.
2. The adjoining panel is set over the clip, creating an unsealed vertical overlap.
3. A worker operates a motorized pan-seaming machine or manually uses heavy hand-seaming pliers to fold the metal legs together, creating a single-fold (90-degree) or double-fold (180-degree) locked seam along the entire run of the roof.
The meticulous nature of this work means progress is measured in a fraction of the square footage an exposed-fastener crew could cover in the same timeframe. The flashing details at the eaves and ridges cannot rely on surface screws; panels must be notched, folded, and hooked over continuous starter cleats by hand. To understand the financial commitment behind these engineered systems, check out our resource on Standing Seam Metal Roof Cost.
Stamped Metal Shingles, Tiles, and Specialty Panels
Stamped metal shingles, stone-coated steel tiles, and specialty metal slate panels offer the rugged durability of steel combined with the traditional aesthetics of slate, wood shake, or clay tile. However, these systems often carry some of the highest labor costs per square in the residential roofing market. Unlike long continuous panels that cover a large swath of space in a single pass, metal shingles are installed in small, individual interlocking pieces.
Installing a metal shingle roof requires an intricate puzzle-like assembly process. Workers must align each row, interlock top-and-bottom fold flanges, and drive concealed fasteners into every individual panel piece. If a single shingle is installed slightly out of square, that misalignment will telegraph across the entire roof, preventing subsequent rows from interlocking properly. This requires constant checking with chalk lines and level gauges.
Moreover, working around roof penetrations with metal shingles requires advanced metalworking skills. Installers cannot simply cut a clean hole in a large panel; they must cut, bend, and integrate individual shingle modules into custom-fabricated flashing surrounds. The labor hours invested in intricate wall step-flashings, valley junctions, and hip caps on a metal shingle installation can easily double the labor duration compared to standard panel jobs.
Material-Specific Labor Challenges and Craftsman Skill
The specific metal alloy selected for your roof heavily dictates how the installation crew handles the material on site. Steel, aluminum, copper, and zinc all possess distinct physical traits—such as memory, malleability, tensile strength, and thermal movement rates—that alter the required labor techniques. Hiring a crew that understands the nuances of your chosen metal is vital to avoiding structural failure or ruined paint finishes.
Steel and Galvalume: Standard Field Techniques
Galvalume and galvanized steel are the workhorses of the residential metal roofing industry. Steel panels offer excellent tensile strength and structural rigidity, making them relatively easy to handle on site without bending out of shape. However, steel presents specific labor challenges when it comes to cutting and field modification. Installers must never use high-speed abrasive saw blades or angle grinders to cut steel roofing panels.
| DO NOT USE: Abrasive Grinders | DO USE: Electric Shears / Cold-Cut Saw |
|---|---|
| Creates hot metal sparks | Shears metal cleanly without heat |
| Burns factory PVDF paint finish | Preserves protective Galvalume layer |
| Leaves raw edges that rust fast | Maintains manufacturer warranty |
When an abrasive blade cuts through steel, it generates intense frictional heat that scorches the protective PVDF (Kynar 500) paint finish along the cut line and burns away the self-healing zinc-aluminum Galvalume coating. Furthermore, microscopic hot metal filings spray across the roof deck, rusting almost overnight and pitting the surface of adjacent panels.
Professional crews must spend extra time using cold-cut power shears, nibblers, or manual sheet metal snips. Cutting panels by hand or with slow-speed shears requires significantly more labor time and physical effort, but it is the only way to preserve the material’s edge protection and protect your manufacturer warranty.
Aluminum Roofing in Coastal Environment Builds
Aluminum roofing is the material of choice for homes located along coastal saltwater environments due to its complete resistance to rust. However, aluminum presents a vastly different set of physical properties that installers must adapt to in the field. Aluminum is much softer and more pliable than steel, meaning panels can dent, twist, or stretch easily if handled carelessly by an inexperienced crew.
Workers walking across an aluminum roof deck must wear soft-soled, non-marking footwear and tread carefully along structural support lines to avoid bowing the metal field. Because aluminum expands and contracts at roughly twice the rate of steel during thermal cycles, crews must spend extra labor time setting floating clip clearances and cutting wider thermal expansion gaps inside trim channels.
In addition, fast-tracking the installation of aluminum trim requires careful hand skills. Because the metal lacks the high tensile memory of steel, over-bending a piece of aluminum trim can cause stress fractures in the metal or crease the surface paint finish. Crews working in marine environments must proceed at a measured pace, doubling down on isolation membranes to prevent galvanic corrosion wherever aluminum comes into contact with dissimilar metals or pressure-treated lumber.
Copper and Zinc: Custom Architectural Soldering & Bending
Copper and zinc represent the pinnacle of architectural metalcraft, often reserved for high-end residential estates or historic restorations. Installing these living-finish metals requires a master artisan skillset that goes far beyond standard modern roofing techniques. Panels are rarely delivered as simple pre-fabricated snap-lock sheets; instead, installers often custom-form panels on site from flat sheet coils using heavy manual bending brakes.
Copper installations frequently rely on traditional soldered seams rather than chemical sealants or rubber gaskets. To join copper valley pans, flat-seam decks, or chimney flashings permanently:
1. The artisan must mechanically clean and tin the copper edges using flux and wire solder.
2. The panels are interlocked with flat hand-bent seams.
3. The installer uses a heavy copper soldering iron (often gas-heated) to melt a 50/50 lead-tin or lead-free solder bar directly into the interlocked seam, fusing the metal into a single solid sheet.
Zinc presents even more rigorous environmental labor demands. Zinc becomes brittle in cold temperatures; if an installer attempts to bend a zinc sheet when the ambient air temperature is below 50°F (10°C), the metal can snap along the fold line. Crews must use hot-air heating guns to warm the metal before making precision bends in cold weather. The extreme skill, specialized tooling, and slow pace required for copper and zinc installations push labor costs into the top tier of construction trades.
Geographical and Seasonal Labor Price Variations
Where your home is located geographically plays a massive role in shaping your metal roof labor estimate. Local economics, trade contractor availability, municipal licensing requirements, and prevailing climate hazards all exert strong upward or downward pressure on trade labor rates. Understanding these regional variables helps explain why quotes for identical homes can vary drastically across state lines or even between neighboring zip codes.
Local Trade Markets, Licensing, and Insurance Overhead
Trade labor pricing directly reflects the local cost of living and contractor operational overhead. In high-cost urban metros, contractors must pay higher wages to attract and retain experienced sheet metal mechanics. Additionally, business overhead expenses—such as shop rent, vehicle commercial insurance, and state-mandated workers’ compensation insurance—are significantly elevated in densely populated regions.
Workers’ compensation insurance for roofing is notoriously expensive due to the inherent fall hazards associated with working at elevated heights. In states with stringent labor regulations and safety oversight, a contractor’s insurance policy can add tens of dollars to every hundred dollars paid out in payroll wages. Reputable, fully insured contractors must roll these heavy operational costs into their per-square labor rates to stay solvent and legal.
Licensing requirements also restrict contractor supply in certain regions. States that require extensive trade testing, master installer credentials, and heavy bonding naturally limit the pool of eligible roofing companies. While this regulatory barrier protects homeowners from unqualified pop-up operators, the reduced market competition combined with high administrative compliance overhead pushes local labor rates higher.
Weather Conditions, Climate Hazards, and Safety Protocols
Regional climate conditions mandate specific installation practices that add labor hours to a project. For instance, contractors operating in northern snow belts must build roofs capable of withstanding heavy snow accumulation, ice dams, and severe sub-zero thermal cycling. Installing ice and water shield membranes across the entire deck rather than just the eaves, adding snow guard systems, and hand-seaming ridge vents adds substantial labor time to northern builds.
Conversely, coastal and high-wind hurricane zones force installers to comply with stringent structural anchoring rules:
* Fastener spacing along panel legs must be tightened dramatically (e.g., placing clips every twelve inches instead of twenty-four inches).
* High-wind perimeter trim details require double-cleating and structural rivet stitching.
* Crews must apply high-grade polyurethane sealants along continuous panel overlaps.
Driving twice as many screws, setting custom wind clips, and navigating complex hurricane-code tie-downs requires significantly more time on the roof. If you live in an oceanfront market, review our guide on Cost to Replace Shingles With a Metal Roof to see how regional structural safety codes impact project scope.
Metro vs. Rural Installation Cost Realities
Homeowners in rural communities often encounter a unique labor cost dynamic. While local labor wages in rural regions may be lower on paper than in major metropolitan centers, the scarcity of specialized metal roofing contractors creates a supply-and-demand imbalance. If there are only two certified standing seam installation crews operating within a hundred-mile radius, those contractors can charge premium prices for their specialized skills.
| METRO REGIONS | RURAL REGIONS |
|---|---|
| + Elevated local living wages | + Lower local wage baselines |
| + High contractor overhead & insurance | – Scarcity of specialized trade crews |
| + Fierce competition keeps margins tight | + Heavy travel & staging fuel surcharges |
Travel time and logistics staging also drive up rural labor invoices. If a specialized sheet metal crew has to travel two hours each way to reach your homestead, the contractor will factor those windshield hours, fuel expenses, and crew lodging into your project’s labor line item. Paying for travel logistics is a common reality when hiring skilled artisans for custom residential builds outside major metro suburbs.
Seasonal timing creates further regional price swings. In northern states where winters are brutal, roofing contractors face a compressed working season from late spring through late autumn. Demand for installation slots during peak summer months hits extreme levels, allowing contractors to command top-dollar labor rates. Installing during shoulder seasons can sometimes yield scheduling advantages, provided the weather stays clear.
Comparative Overview of Metal Roofing Labor Demands
To evaluate contractor bids accurately, it helps to see how labor expectations line up across different system profiles, crew configurations, and installation complexities. The following table illustrates the typical operational differences you will encounter when reviewing proposals for various metal roofing options.
| Metal Roof System Profile | Fastener Style | Typical Crew Size | Labor Complexity | Pace of Work (Squares / Day) | Primary Labor Challenge |
|---|---|---|---|---|---|
| Exposed Fastener (Corrugated/5V) | Surface Screws | 3 – 4 Workers | Low to Moderate | 6 – 10 Squares | Precise washer torque; avoiding paint scratches |
| Standing Seam (Snap-Lock) | Concealed Clips | 4 – 5 Workers | Moderate to High | 3 – 5 Squares | Perfect panel alignment; hemmed eaves and valleys |
| Standing Seam (Mechanical) | Concealed Clips | 4 – 6 Workers | Very High | 2 – 4 Squares | Operating motorized seamers; intricate hand-crimping |
| Metal Shingles / Tiles | Concealed Screws | 3 – 4 Workers | High | 2 – 4 Squares | Interlocking grid geometry; complex flashing cuts |
| Custom Architectural (Copper/Zinc) | Soldered / Cleated | 2 – 3 Artisans | Master Level | 1 – 2 Squares | On-site metal brake folding; custom seam soldering |
Interpreting Labor Demands Across Systems
The data clearly demonstrates why a standing seam or custom copper quote looks drastically different from a corrugated metal estimate. As seam engineering shifts from simple surface screws to fully concealed interlocking clips, the daily production rate drops by more than half. A crew that can install ten squares of corrugated metal on a pole barn in a single day might only cover two or three squares on a mechanically seamed standing seam roof.
This drop in daily output directly correlates with higher total labor billing. When a five-person crew spends four full days on your roof instead of one and a half days, you are paying for three times as many individual worker-hours, plus extended safety equipment rentals, staging setups, and site management overhead. Understanding this production drop prevents sticker shock when evaluating higher-tier roof profiles.
When reviewing proposals, ask your estimator to specify the expected duration of the project and the size of the on-site crew. If two contractors offer wildly different labor costs for the exact same standing seam system, check if one crew is underestimating the time needed for detailed hand-crimping or planning to rush through critical eave-folding steps. For an in-depth look at contractor selection, read our overview on How to Hire a Metal Roofing Contractor.
Evaluating Unexpected Job-Site Contingencies
Even the most accurate labor estimate can expand once work begins on your roof. Unforeseen structural problems beneath old roofing layers can quickly trigger change orders that add labor hours to your final bill. Being aware of common job-site surprises allows you to set aside a realistic contingency fund before the first panel is removed.
Common labor-expanding contingencies include:
* Hidden Rotted Decking: Water leaks under old shingles often rot the underlying plywood or board sheath. Replacing structural sheathing requires stripping away large areas, installing new wood sheets, and re-securing rafter ties.
* Out-of-Square Framing: Older homes often settle over decades, resulting in roof planes that bow or lean out of square. Installers must spend significant labor hours building out furring strips or shimming rafter lines to create a flat plane for rigid metal sheets.
* Fascia and Rake Board Decay: Trimming out eaves requires solid fascia backing wood. If tear-off reveals rotted fascia boards, crews must stop metal panel work to rebuild the perimeter wood structures.
* Complex Chimney and Vent Repairs: Old masonry chimneys often feature crumbling mortar lines where flashing integrates. Mechanics must spend extra time cutting reglet grooves into stone or brick to properly tuck custom metal flashings.
Transparent contractors clearly define how contingent labor is handled in their written proposals. Look for explicit hourly rates for wood structural repairs and panel modifications spelled out in your contract upfront. Knowing these figures ahead of time prevents painful negotiations in the middle of a teardown.
How to Save on Metal Roof Labor Without Sacrificing Quality
While metal roof labor is inherently expensive due to the skill involved, you do not have to throw away money unnecessarily. Smart planning, clear communication, and strategic timing can help you trim labor overhead without pushing your installer to cut dangerous corners. Here is how to keep your installation budget under control while securing top-tier craftsmanship.
Timing Your Installation for Off-Peak Seasons
Roofing is a highly seasonal industry driven by weather patterns and homeowner purchasing trends. Late spring through early autumn represents the peak rush for most roofing contractors, resulting in packed installation schedules, tight crew availability, and firm labor pricing. If you reach out to a top contractor during their busiest summer month, you will likely pay top-tier labor rates.
| WINTER / EARLY SPRING | SUMMER / EARLY FALL |
|---|---|
| Low contractor backlog | Extreme peak demand |
| Flexible scheduling opportunities | Packed installation calendars |
| Potential labor rate discounts | Firm premium pricing |
| Crews focus on detailed single builds | Crews hurry between backlog jobs |
You can often secure better labor terms by scheduling your installation during late winter or early spring shoulder seasons, depending on your local climate. During slower periods, contractors are highly motivated to keep their core crews employed and may offer discounts on labor to keep projects moving. A crew that isn’t rushing to manage a massive summer backlog can also focus dedicated time and attention on your home’s custom details.
Keep in mind that winter installations require clear weather windows and proper cold-weather handling techniques, particularly for sealants and specialty coatings. Talk with prospective contractors in late autumn to see if scheduling your build during their typical slow season opens up room for price negotiation.
Streamlining Roof Prep Work and Decking Repairs
You can reduce field labor charges by eliminating unnecessary tasks before the contractor’s crew steps foot on your property. While you should never attempt critical sheet metal work yourself, taking care of basic ground-level site preparation saves the crew precious time and allows them to focus entirely on roof assembly.
Consider handling these preparation steps yourself:
1. Trim Overhanging Tree Branches: Prune back limbs within ten feet of your roofline to give installers unobstructed ladder access, clear hoisting corridors, and safe line-of-sight work zones.
2. Clear Ground Staging Areas: Move patio furniture, potted plants, lawn ornaments, and vehicles far away from the perimeter of your home so crews can position ladders, scaffolding, and dump trailers immediately.
3. Identify Power Outlets and Access: Ensure outdoor electrical outlets are working and accessible so workers do not lose time running extension cords inside your home or setting up generators.
4. Protect Attic Valuables: Cover items stored in your attic with dust tarps. The vibration from hammering and panel installation will drop old dirt, wood splinters, and small nails down into your top floor spaces.
Additionally, discuss your tear-off strategy with your contractor. In specific engineering scenarios where local building codes allow it and the existing substrate is structurally sound, installing metal over existing shingles using furring strip grids can save thousands of dollars in tear-off labor and landfill disposal fees. Read our comprehensive analysis on Tear-Off vs Metal Over Shingles: Cost Difference to weigh the pros and cons of this approach.
Navigating Quotes: How to Spot Overcharging vs. Fair Value
Securing multiple quotes is essential when shopping for a metal roof, but picking the lowest bid blindly is one of the most dangerous mistakes a homeowner can make. In metal roofing, an extraordinarily low labor estimate usually indicates an inexperienced crew that doesn’t understand the complex flashing details required to keep a metal roof watertight.
When reviewing multiple proposals, line them up side-by-side using our guide on How to Read and Compare Metal Roof Quotes. Look closely at how each contractor breaks down labor costs:
| SUSPICIOUS LOW BID | TRANSPARENT FAIR BID |
|---|---|
| Single lumped price line item | Explicit labor vs. material breakdown |
| Vague flashing descriptions | Detailed scope of eave/valley details |
| Unclear safety rigging allowances | Written crew safety & insurance proofs |
| No mention of deck inspection time | Contingency wood replacement rates listed |
| Excludes manufacturer warranty steps | Full manufacturer certification stated |
If a contractor offers a labor quote that is fifty percent lower than competing bids, ask them specifically how they plan to handle perimeter flashing, thermal expansion clip installation, and valley folding. A crew that intends to slap surface screws through standing seam panels or use cheap caulking instead of custom hemmed metal flashing will save labor time today, but leave you with severe structural leaks down the road.
Don’t be afraid to ask direct, targeted questions during the bidding phase. Review our curated list of Questions to Ask a Metal Roofing Contractor Before You Hire to vet potential builders thoroughly and ensure you are paying for true trade craftsmanship.
DIY vs. Hiring Professional Metal Roof Installers
The potential labor savings of installing a metal roof yourself can be extremely tempting, especially when looking at line items that run into thousands of dollars. However, metal roofing is widely considered one of the most demanding home improvement trades, carrying zero tolerance for amateur installation mistakes. Evaluating the true costs, safety hazards, and technical risks of a DIY installation is critical before committing to buying materials yourself.
The Hidden Tooling and Safety Costs of DIY
When homeowners calculate potential DIY savings, they often subtract the contractor’s labor quote from the project total and assume that difference remains in their bank account. This math ignores the significant capital investment required to purchase professional sheet metal tools and essential fall protection safety equipment.
ESSENTIAL DIY TOOLING & SAFETY INVESTMENTS
- Heavy-duty manual bending brake (or rental fees)
- Power sheet metal shears and nibblers
- Professional hand seamers, snips, and notchers
- Full OSHA-compliant harness, rope grab, and roof anchors
- Sturdy extension ladders and scaffold staging
- Specialized torque-limiting screw guns
Beyond purchasing physical tools, working on a roof carries severe safety risks. Falling from a roof eave can result in catastrophic injury or death. Professional roofing crews invest thousands of dollars in certified fall harness systems, safety lines, and ongoing training. They understand how to tie off anchor points into structural rafters safely and navigate steep pitches securely.
If you attempt a DIY build, you must purchase, set up, and correctly wear full fall restraint gear throughout the duration of the project. A single mistake made while handling a long, wind-catching metal sheet on a steep pitch can end in disaster. The cost of renting or buying safe staging equipment quickly eats away at perceived labor savings.
Craftsmanship Risks: Water Infiltration and Thermal Movement
The technical knowledge required to install a leak-free metal roof cannot be learned from a twenty-minute video tutorial. Sheet metal behaves dynamically on a structure. It expands when heated by the summer sun and contracts significantly during cold winter nights. If a DIY installer fixes panels down rigidly without accounting for this movement, the roof will quickly buckle, back out its own screws, or tear flashing points open.
Common amateur metal roofing mistakes include:
* Improper Washer Torque: Over-driving surface screws crushes rubber gaskets, inviting moisture leaks at every panel penetration. Under-driving leaves open gaps for wind-driven rain.
* Cutting Panels with Abrasive Saw Blades: Burning off the Galvalume finish along panel edges leads to rapid red rust corrosion along cut seams within months.
* Overtightening Trim Flashing: Nailing flashing trims down flat without leaving thermal hem clearance causes severe oil canning and torn sealants.
* Inadequate Underlayment Lapping: Failing to overlap membrane sheets correctly allows capillary action to pull water beneath the underlayment during heavy rain storms.
Fixing an improperly installed metal roof often costs significantly more than hiring a professional crew in the first place. If a DIY roof leaks internally, a professional contractor will usually refuse to repair minor sections, requiring a complete tear-off and rebuild to restore the structural integrity of your home.
When to Leave It to Certified Metal Roofing Crews
While installing a simple exposed-fastener roof on a small, single-story detached shed or lawn barn can be a manageable weekend project for an experienced DIY enthusiast, a residential living space should almost always be left to certified trade mechanics. The stakes involved in protecting your primary home’s framing, drywall, electrical systems, and personal belongings are simply too high to gamble on amateur craft skills.
Consider hiring a professional installer if:
* Your home features a complex roofline with dormers, hips, valleys, or skylights.
* You choose a standing seam, stone-coated steel, or copper roof system.
* The roof pitch is steeper than a gentle 4/12 walk.
* Your local building department requires engineered permit drawings and certified installer sign-offs.
* You want comprehensive workmanship and long-term manufacturer warranty protection.
Professional installers carry specialized trade insurance and offer dedicated workmanship warranties that protect you if leaks occur after heavy storms. Paying for skilled labor guarantees that your high-grade metal materials are transformed into a durable weather barrier designed to protect your home for decades to come.
Disclaimer
This article is for general informational purposes only and does not constitute professional advice. Laws, prices and regulations vary by location and change over time. Consult a qualified professional for guidance on your specific situation.