How to Replace Rubber Washers on Metal Roof Screws
That moment you spot a drip, or worse, a stain spreading across your ceiling, is enough to make any homeowner's heart sink. Often, with metal roofs, the culprit isn't a faulty panel, but something far smaller: the humble rubber washer under your roof screws. These unsung heroes eventually give out, leading to frustrating leaks. This comprehensive guide is here to walk you through exactly why those washers fail and, more importantly, how to confidently replace them, ensuring your metal roof stays watertight for years to come.
Understanding Why Rubber Washers Fail on Metal Roof Screws
It’s easy to overlook something as small as a rubber washer, especially when it’s doing its job perfectly, tucked away beneath a screw head on your roof. But these little components are critical, and understanding why they eventually fail is the first step toward preventing leaks and knowing when it's time for a fix. They endure a brutal existence, exposed to the elements day in and day out, and it's no wonder they don't last forever.
The Role of EPDM Washers in Metal Roofing
When we talk about metal roof screws, we're almost always referring to those equipped with EPDM washers. EPDM stands for Ethylene Propylene Diene Monomer, and it’s a synthetic rubber known for its exceptional resistance to weathering, ozone, and UV radiation. This makes it an ideal material for outdoor applications where flexibility and sealing capabilities are paramount. On a metal roof, the EPDM washer creates a watertight seal between the screw head and the metal panel, preventing water from seeping through the screw hole.
Think about it: every single screw driven into your metal roof creates a potential entry point for water. Without that resilient, flexible EPDM washer compressing snugly against the panel, rain, melting snow, and even condensation would find their way into your attic or living space. It also provides a bit of cushioning, allowing for the natural expansion and contraction of metal panels due as temperatures fluctuate throughout the day and seasons. This flexibility is crucial because rigid seals would crack and fail much faster under the constant movement of the metal. If you're curious about how these components fit into the larger picture, take a look at our guide on Metal Roof Components & Accessories Explained.
Common Causes of Washer Deterioration
Unfortunately, even EPDM isn't invincible, and a combination of factors contributes to its eventual breakdown. The primary enemy is relentless UV exposure from the sun. Over time, ultraviolet rays degrade the rubber, making it brittle and prone to cracking. This process is often accelerated in regions with intense sunlight, like Florida or Arizona, where roofs are constantly bombarded.
Temperature fluctuations also play a significant role. Imagine your roof in the summer, heating up to scorching temperatures, then cooling rapidly during an evening storm. In winter, it might freeze solid and then thaw. This constant expansion and contraction of the rubber washer, while designed to handle it, takes its toll, leading to material fatigue. Extreme cold can make the rubber less pliable, more susceptible to cracking under stress, while extreme heat accelerates the drying and hardening process.
Beyond the elements, improper installation is a surprisingly common culprit. Screws that are over-tightened can crush the washer, deforming it permanently and reducing its ability to seal effectively. Conversely, under-tightened screws won't compress the washer enough, creating an insufficient seal right from the start. Both scenarios drastically shorten the washer's effective lifespan. Chemical exposure from pollutants or harsh cleaning agents, though less common, can also contribute to deterioration. And, of course, simple age is a factor; even the best materials have a finite lifespan, typically 15-20 years for quality EPDM washers, though some can last longer if conditions are ideal.
Signs Your Washers Are Failing
Spotting failing washers before they lead to major leaks can save you a lot of headache and expense. The most obvious sign is, of course, a leak around the screw heads. If you've got water dripping, staining, or pooling in your attic or on your ceiling, and it seems to originate directly above where screws are located, failing washers are a prime suspect. It's frustrating to deal with, and if you're experiencing this, our Metal Roof Leak Repair Guide has even more detail.
Visually, you’ll start to see the washers themselves telling a story. Look for:
- Cracking or splitting: Fine lines appearing on the rubber, eventually turning into visible cracks.
- Shrinking: The washer may pull away from the screw head, leaving a gap where water can enter.
- Discoloration: The original black rubber might turn gray or white, indicating sun degradation.
- Crumbling or degradation: When touched, the rubber might feel brittle, flaking apart easily.
- Loose screws: While not directly a washer issue, a severely degraded washer won't provide the necessary friction, allowing the screw to loosen over time.
A proactive Metal Roof Maintenance Guide will often recommend periodic inspections, especially after severe weather, to catch these issues early. Take a pair of binoculars or carefully ascend your ladder to get a closer look. You might also notice a sheen of rust around the screw head, indicating that water has been sitting there due to a compromised seal.
Step-by-Step Guide to Replacing Metal Roof Screw Washers
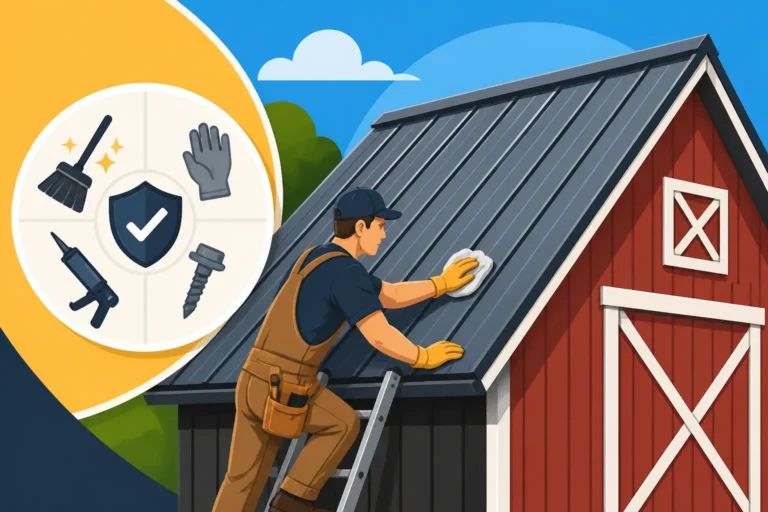
Replacing rubber washers on your metal roof screws might seem daunting, but with the right preparation and a methodical approach, it's a perfectly manageable DIY task for many homeowners. However, always prioritize safety, especially when working on a roof. If you're not comfortable with heights or roofing work, don't hesitate to call a professional. Many reputable contractors, easily found through services like Modernize, specialize in these types of repairs.
Gathering Your Tools and Materials
Before you even think about climbing that ladder, make sure you have everything you need laid out and ready. This isn't the kind of job where you want to be halfway through and realize you're missing a critical piece of equipment.
Here's your essential checklist:
- Safety Gear: This is non-negotiable. A sturdy ladder, fall protection harness (and a rope/anchor point), non-slip roofing shoes, and work gloves are paramount. Always have someone spot you on the ground. For more on safe practices, check out How to Walk on a Metal Roof Without Damage.
- Cordless Drill with Clutch: A variable-speed drill is crucial. The clutch setting will prevent you from over-tightening screws, which can damage the new washers or strip the screw holes.
- Appropriate Driver Bit: Make sure you have the correct bit for your metal roof screws (usually hex head or Phillips).
- New Metal Roof Screws with EPDM Washers: This is your primary replacement material. Do not reuse old screws. Purchase high-quality, self-tapping screws specifically designed for metal roofing, complete with pre-assembled EPDM washers. Ensure they match the gauge and length of your existing screws. You might even consider screws with specialized coatings for enhanced corrosion resistance.
- Wire Brush or Stiff Bristle Brush: For cleaning around the screw holes.
- Exterior-Grade Sealant or Caulk (optional but recommended): A good quality butyl or silicone sealant, compatible with metal roofing, can provide an extra layer of protection, especially for holes that might be slightly oversized or damaged.
- Small Pry Bar or Claw Hammer: For gently prying out old, stubborn screws if they don't easily unscrew.
- Empty Bucket or Pouch: To safely collect old screws and washers.
When selecting new screws, resist the urge to buy the cheapest option. Investing in high-quality fasteners from reputable brands like Atlas Fasteners or SFS intec will pay off in longevity and performance. Remember, these little components are protecting your entire home!
The Removal Process: Safety First!
Once your tools are gathered and safety gear is donned, you can begin the removal.
- Secure Your Ladder and Access the Roof: Make sure your ladder is on stable ground, extends at least three feet above the eave, and is properly angled. If possible, use a fall protection system.
- Locate the Damaged Screws: Systematically work across your roof, identifying all screws with deteriorated washers. It's often a good idea to replace all screws in a problematic section, even if some washers don't look terrible yet, as they are likely nearing the end of their lifespan too.
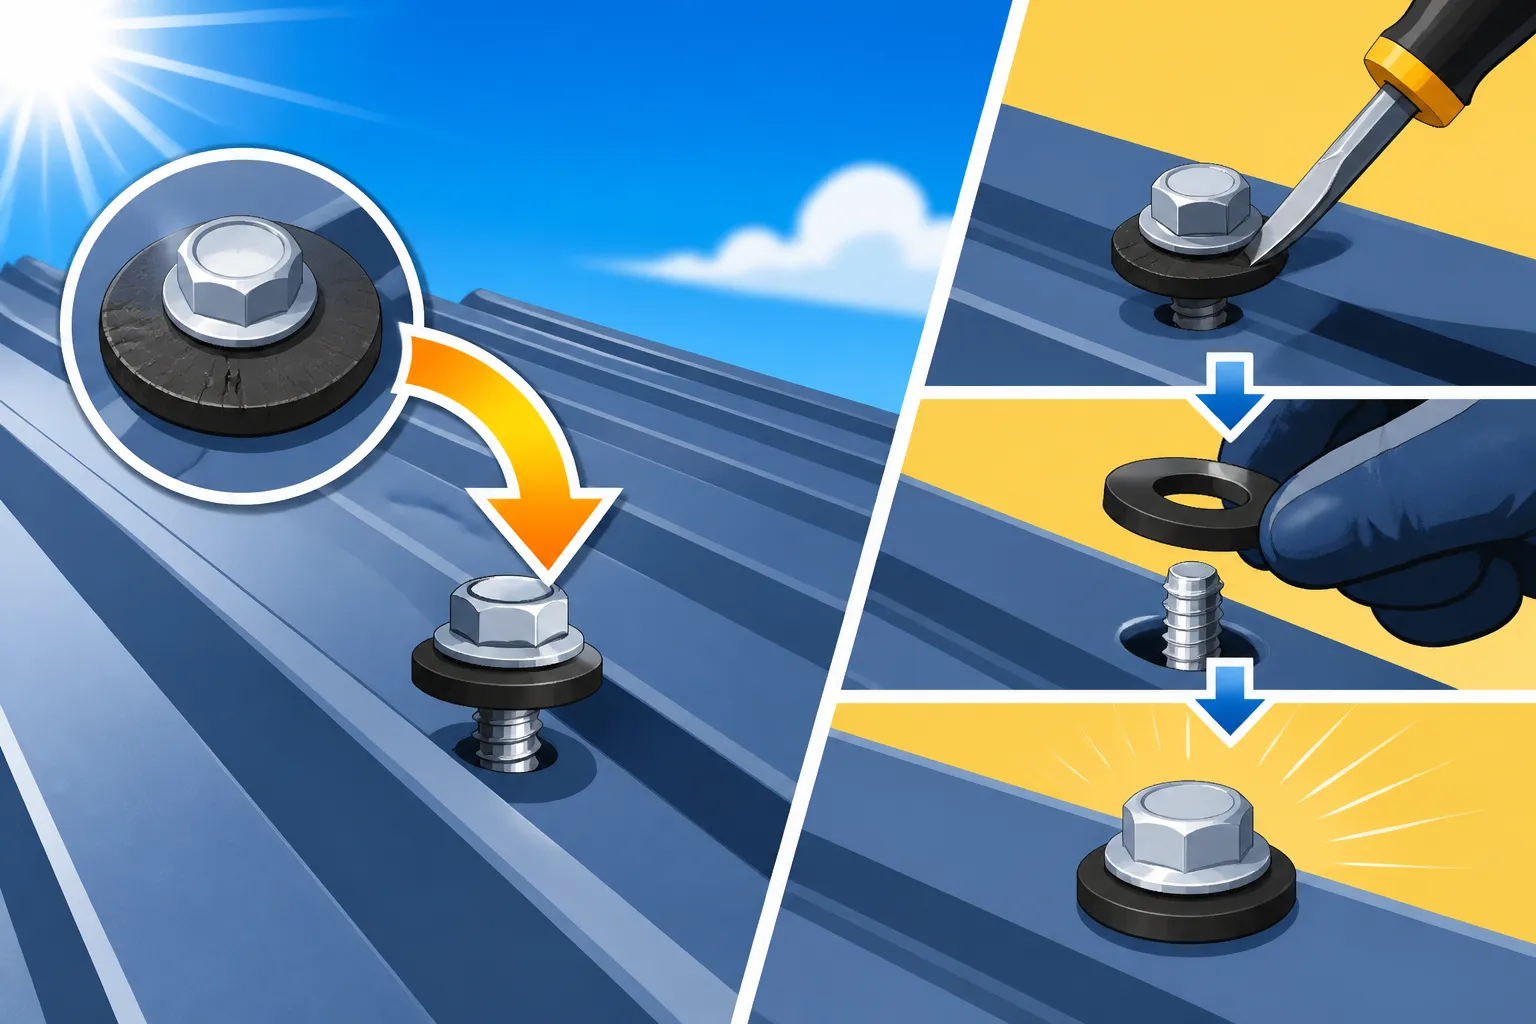
- Carefully Remove the Old Screw: Set your drill to reverse. Apply firm, steady pressure to the screw head and slowly back it out. Be careful not to strip the head, which can make removal much harder. If a screw is stuck or stripped, you may need to use a screw extractor or a small pry bar to gently lift the panel slightly around the screw to get leverage, but this should be done with extreme caution to avoid damaging the panel. Collect all old screws and washers in your bucket for proper disposal.
The key here is gentle precision. You don't want to accidentally slip and create a scratch or dent on your metal panel, which could lead to future issues. Remember, a steady hand and a cautious approach are your best friends on the roof.
Preparing the Hole and Installing New Screws
With the old screws out, it's time to get the roof ready for its new, watertight guardians.
- Clean the Area: Use your wire brush to thoroughly clean any debris, old sealant, or rust from around the screw hole. A clean surface is essential for the new washer to seat properly and form a good seal. Inspect the metal panel around the hole for any signs of damage, corrosion, or widening of the hole. If the hole is significantly enlarged, you might need to use a slightly larger diameter screw, or apply a generous amount of sealant to ensure a complete seal.
- Apply Sealant (if desired): If you're opting for an extra layer of protection, or if the original hole looks a bit rough, apply a small dab of sealant directly over the hole before inserting the new screw. Don't overdo it; a small bead around the hole or on the underside of the washer before installation is usually sufficient.
- Install the New Screw: Place the new screw (with its attached EPDM washer) into the cleaned hole. Set your drill to a low torque setting on the clutch. Begin driving the screw slowly and steadily. The goal is to compress the EPDM washer just enough so it squishes slightly and creates a visible bulge around the screw head, but without flattening it completely or deforming it.
This is where the clutch on your drill is your best friend. Start with a lower torque setting and gradually increase it if needed, until you achieve that perfect compression. An over-tightened screw will destroy the new washer, leading to premature failure, while an under-tightened one won't seal. It's a Goldilocks scenario: just right.
Post-Installation Checks and Tips
You've done the hard work, but a few final checks can ensure your repair is successful.
- Visual Inspection: From a safe vantage point, visually inspect all the newly installed screws. Look for consistent washer compression—a slight, even bulge around each screw head. There shouldn't be any gaps, and the washers shouldn't appear crushed or warped.
- Water Test (Optional but Recommended): If practical, you can perform a gentle water test. Use a garden hose to simulate rain over the repaired area. Observe from inside your attic or crawl space (if accessible) to ensure there are no new leaks. Don't use a high-pressure nozzle, as that could force water past even a good seal.
- Avoid Walking on Newly Installed Screws: While metal roofs are generally durable, it's wise to avoid stepping directly on newly installed or recently repaired areas for a short period, allowing any sealant to cure and the washers to fully seat. When you do need to walk on your roof, always step on the flat parts of the panels, never on the ribs or fasteners.
- Regular Maintenance: Incorporate periodic checks of your roof fasteners into your overall Metal Roof Maintenance Guide. Catching failing washers early is always easier and cheaper than dealing with significant water damage. Even if you've recently installed a new roof, regular checks are crucial for maintaining its longevity. After all, a metal roof is a significant investment, often lasting 40-70 years, as detailed in Metal Roof Lifespan: How Long Do They Last?, and proper maintenance is key to reaching that potential.
Choosing the Right Replacement Screws and Washers
You might think "a screw is a screw," but when it comes to metal roofing, that couldn't be further from the truth. The longevity and performance of your repair hinge heavily on selecting the correct, high-quality replacement parts. Skimping here is a classic false economy that will only lead to more headaches and costly repairs down the line.
Material Matters: EPDM vs. Neoprene and Coatings
We've already established EPDM as the gold standard for metal roof washers, and for good reason. Its inherent resistance to UV rays, ozone, and temperature extremes makes it far superior to other rubber compounds like neoprene for roofing applications. Neoprene, while good for some industrial uses, simply doesn't hold up as well under constant solar exposure and environmental stress, breaking down much faster. Always confirm that your replacement screws come with genuine EPDM washers.
Beyond the washer, the screw itself is critical. Most metal roof screws are made of carbon steel, which needs protection from corrosion. Here's where coatings come into play:
- Galvanized: A zinc coating provides basic corrosion resistance. It's a common and cost-effective option.
- Galvalume: A mixture of zinc and aluminum, offering superior corrosion resistance to plain galvanized. This is a popular choice for metal roofing panels themselves, and screws designed to match this performance are excellent. For instance, Galvalume Roof Cost Per Square Foot articles often highlight the material's durability.
- Ceramic or Polymer Coated: These advanced coatings, often colored to match your roof panels, provide excellent long-term corrosion resistance and UV protection. They typically cost a bit more but offer significantly enhanced durability, especially in harsh environments like coastal areas. Always look for screws explicitly rated for outdoor use and tested for longevity.
Choosing screws with robust coatings means the metal part of your fastener will last as long as, or even outlast, the EPDM washer, ensuring you're not replacing screws for different reasons too soon.
Gauge and Length: Getting the Fit Right
It's tempting to just grab any box of metal screws, but the gauge (thickness) and length of your screws are paramount.
- Gauge: Metal roof screws typically come in gauges like #9, #10, #12, or #14. Using a screw that is too thin (smaller gauge) for an existing hole might result in a loose fit and an inadequate seal, even with a new washer. If the original hole is slightly enlarged due to previous issues, stepping up one gauge size can sometimes provide a tighter fit, but this should be done judiciously. Generally, aim to match the original gauge.
- Length: The screw needs to be long enough to properly penetrate the metal panel and secure into the underlying purlins, battens, or decking. If your roof was installed over existing shingles, the screws would be longer to account for the extra layers. Using a screw that is too short won't provide adequate holding power, while a screw that is too long might unnecessarily protrude into your attic space or hit something underneath.
Before purchasing, remove one of your existing screws and measure its length (from the tip to the underside of the head) and diameter (or take it to a hardware store to match the gauge). This ensures a proper fit and maintains the structural integrity of your roofing system. Remember, a common issue like Metal Roof Screws Backing Out: How to Fix often stems from incorrect length or improper installation.
The Importance of Quality Brands and Suppliers
This is not the place to pinch pennies. Cheap, no-name brand screws often use inferior EPDM that degrades quickly or have weak coatings that rust within a few years. When sourcing your replacement screws, look for reputable manufacturers known for their roofing fasteners. Brands like SFS intec, Atlas Fasteners, and Sealtite are well-regarded in the industry for their quality and durability.
You might find these at specialized roofing supply stores rather than generic big-box hardware retailers, though some larger stores do carry quality options. Don't be afraid to ask for professional advice. A local roofing contractor or even a platform like Modernize, which connects homeowners with vetted professionals, can be an excellent resource for finding high-quality materials and knowledgeable installers if the DIY route feels too challenging. For bigger projects, understanding how to compare bids, like in How to Read and Compare Metal Roof Quotes, becomes essential.
Here’s a quick comparison of common screw issues:
| Issue | Probable Cause | Solution | Prevention |
|---|---|---|---|
| Cracked/Brittle Washers | UV degradation, extreme temperatures, age | Replace screw and washer; consider higher-grade EPDM | Regular inspections; choose quality EPDM washers from the start |
| Leaking Around Screw Head | Failed washer, over/under-tightened screw, enlarged hole | Replace screw and washer, use sealant, ensure proper torque | Correct installation; periodic checks for washer integrity |
| Screw Backing Out | Under-tightening, stripped substrate, panel movement | Replace with longer/larger gauge screw, re-anchor, use thread locker (if appropriate for substrate) | Proper torque during installation; correct screw length and gauge |
| Rust on Screw Head/Shaft | Coating failure, exposed steel, prolonged moisture | Replace with higher-grade coated screw (e.g., ceramic-coated, Galvalume) | Choose screws with superior corrosion-resistant coatings |
| Crushed Washer | Over-tightening during installation | Replace screw and washer, use drill with clutch set to correct torque | Proper installation technique; use a torque-controlled drill |
By being diligent about selecting the right replacement parts and installing them correctly, you're not just fixing a leak; you're extending the life of your entire metal roofing system and protecting your home from the elements.
Disclaimer
Please be aware that working on a roof can be dangerous. Always prioritize your safety by using appropriate fall protection, securing ladders, and, if you are not comfortable or experienced with roofing work, consider hiring a qualified and insured professional. This guide provides general information, and specific conditions may require different approaches. Always consult local building codes and professional advice for your unique situation.