How to Cut Metal Roofing Panels
There’s a unique dread that washes over you when you’re standing with a pristine, long sheet of metal roofing panel, knowing that one wrong cut can turn it into an expensive piece of scrap metal. Whether you're a seasoned DIY enthusiast or a homeowner just trying to understand the process, the act of cutting metal roofing panels is often perceived as daunting due to fears of jagged edges, wasted materials, and compromised roof integrity. This guide aims to demystify the process, equipping you with the knowledge, tools, and techniques to make clean, accurate cuts every time, saving you headaches and money.
Why Cutting Metal Roofing Panels is a Critical Skill and Challenge
The precise cutting of metal roofing panels is far more than just a matter of aesthetics; it's fundamental to the long-term performance and durability of your entire roof system. A poorly executed cut can lead to a cascade of problems, transforming a robust, long-lasting metal roof into a source of constant frustration and expense. Understanding why this step is so crucial helps underscore the importance of getting it right from the start.
The Frustration of Imperfect Cuts
Imagine spending a significant amount of money on beautiful, durable metal roofing panels, only to botch a cut and render a panel unusable. It’s not just the cost of replacing that single panel – which can be substantial, especially for specialized profiles or materials like copper – but also the lost time, the disruption to your project timeline, and the sheer irritation of a avoidable mistake. Homeowners often underestimate how unforgiving metal can be compared to more traditional roofing materials. Unlike asphalt shingles that can be trimmed or patched with relative ease, a miscut metal panel often means a complete redo for that section.
The frustration extends to the quality of the finish. A jagged, uneven cut can be a glaring eyesore, diminishing the curb appeal of your home. It’s a constant reminder of a corner cut or a misjudgment. Beyond the visual aspect, these rough edges are also prime spots for potential injury during installation or future maintenance. Furthermore, dealing with burrs – those sharp, often hidden metal fragments that remain after a cut – is another headache. They can scratch adjacent panels, damage flashing, or even cut through underlayment, creating weak points before the roof is even fully installed. It’s a situation where patience and precision truly pay dividends.
Beyond Aesthetics: Structural and Weatherproofing Needs
While a good-looking roof is certainly desirable, the most critical role of precise cutting lies in ensuring the structural integrity and weatherproofing capabilities of your metal roof. Each panel, especially in systems like Standing Seam Metal Roof Installation Process: Step by Step, is designed to interlock or overlap with its neighbors in a specific way to create a continuous, impenetrable barrier against the elements. If a cut isn't straight, isn't at the correct angle, or leaves too much or too little material, that perfect seal is compromised.
Consider the edges of your roof where panels meet the eaves, rakes, ridges, and valleys. These areas are incredibly vulnerable to water intrusion if the flashing and trim aren't fitted perfectly. An accurate cut ensures that your panels meet these critical components with the tight, consistent gaps necessary for proper sealing. This isn't just about preventing a drip here or there; it’s about preventing widespread water damage to your roof deck, attic, and home's interior. In climates with heavy rain, snow, or high winds, a tiny imperfection can quickly become a major leak point. The long-term performance of your roof, which includes its ability to withstand decades of harsh weather, hinges on the quality of these initial cuts. When you’re looking at your roof as a 50-year investment, that initial cutting precision becomes non-negotiable.
Understanding Different Types of Metal Roofing Panels and Their Cutting Nuances
Not all metal roofing panels are created equal, and neither are the techniques required to cut them effectively. The material, profile, and coating each present unique challenges and demand different approaches. Knowing these differences beforehand will save you from frustration and potentially damaging your expensive materials.
Standing Seam Panels
Standing seam metal roofing is renowned for its sleek appearance and exceptional durability, largely due to its hidden fasteners and raised seams that lock together. However, these very features make them somewhat unique to cut. The panels typically consist of a flat "pan" section and two raised "seams" or ribs that run vertically up the roof. When you're cutting across the width of a panel, you're not just cutting through a flat sheet; you're often encountering multiple layers of metal at the seams.
The primary challenge with standing seam is maintaining the integrity of the seams, especially if the cut needs to extend through a seam (for instance, at a hip or valley). You want a clean, straight edge without deforming the seam profile, which is crucial for interlocking with other panels or flashing components. Tools that generate excessive heat, like angle grinders, can warp these delicate seam profiles, making proper installation nearly impossible and potentially voiding manufacturer warranties. Furthermore, the goal is to leave a smooth, burr-free edge that won't interfere with the interlocking mechanism or pose a safety hazard. Because of the panel's design, you often need tools that can handle both the flat sections and the thicker, folded seams with equal precision without causing distortion.
Corrugated and Ribbed Panels
Corrugated, R-panel, and other exposed-fastener metal roofing profiles are popular for their robust strength, industrial aesthetic, and often more budget-friendly cost. These panels are characterized by their distinct wavy or ribbed patterns, which provide structural rigidity. Cutting these panels introduces a different set of considerations compared to standing seam.
The main challenge here is dealing with the undulations or ribs. When cutting across the width, you’ll be cutting through varying thicknesses and curves. This can make it difficult to maintain a straight line if your cutting tool isn't suited to the profile, or if you don't have adequate support for the panel. Distortion is a significant concern; tools that pinch or twist the metal can flatten the corrugations or ribs, which not only looks bad but can also affect how the panels overlap and shed water. You need to ensure that the cut matches the existing profile as closely as possible to maintain a consistent appearance and allow for proper overlapping and fastening. For instance, if you're cutting a long panel to size, you might need to make multiple passes with a smaller tool or use a tool that can navigate the contours without snagging. This is especially true for Corrugated Metal Roof Cost considerations, where material waste directly impacts the overall project budget.
Stone-Coated Steel Shingles and Tiles
Stone-coated steel roofing offers the aesthetic appeal of traditional shingles or tiles with the superior durability of metal. These panels are made from steel sheeting coated with an acrylic base, on top of which stone chips are adhered and sealed. While incredibly tough and attractive, this unique composition presents a distinct challenge when it comes to cutting.
The stone chip coating is highly abrasive. Using standard metal-cutting blades on these materials will quickly dull them, sometimes within just a few cuts. This means you'll either go through an exorbitant number of blades or end up with slow, rough, and potentially damaging cuts. Tools designed for masonry or abrasive materials are often more suitable, but even then, blade life can be an issue. The goal is to cut cleanly through the steel substrate without excessively chipping or damaging the stone coating around the cut edge. Excessive chipping can expose the steel underneath to the elements, potentially leading to rust and undermining the longevity of the panel. You also need to consider the dust generated – the stone chips create a lot of abrasive debris, so proper respiratory protection is non-negotiable, and cleaning up thoroughly after cutting is essential to prevent scratches on installed panels.
Essential Tools for Cutting Metal Roofing Panels
Choosing the right tool for the job is paramount when it comes to cutting metal roofing panels. Using an inappropriate tool can lead to inaccurate cuts, damaged materials, and even serious injury. Each tool has its strengths and weaknesses, making some more suitable for specific panel types or cut requirements.
Electric Shears and Nibblers: The Precision Masters
When it comes to making clean, cool cuts in metal roofing panels, electric shears and nibblers are often considered the gold standard, especially for professional installers. Unlike abrasive tools that generate heat and sparks, these tools essentially shear or punch through the metal, leaving a remarkably clean edge with minimal burring and no heat distortion.
Electric shears, much like heavy-duty scissors, glide through flat or mildly profiled panels with ease. They are fantastic for long, straight cuts where precision is key, such as trimming the length of a Standing Seam Metal Roof Cost panel or cutting the bottom edge square. They minimize the risk of scratching the panel's finish, which is a common concern with other tools. Nibblers, on the other hand, operate by punching out tiny crescents of metal, making them ideal for more intricate cuts, curves, and cutouts, such as around roof penetrations like vents or skylights. Imagine needing to cut a perfectly round hole for a plumbing vent through a panel – a nibbler can achieve this with impressive accuracy where a shear would struggle. Both tools are relatively quiet compared to circular saws or grinders, and they don't produce dangerous sparks, making them safer in many environments. While the initial investment might be higher, the clean cuts and reduced material waste often justify the cost, especially for larger projects or for contractors who routinely install metal roofs. Companies like Malco Products offer a range of specialized shears and nibblers designed specifically for various metal roofing materials and gauges.
Circular Saws with Metal-Cutting Blades: Power and Speed
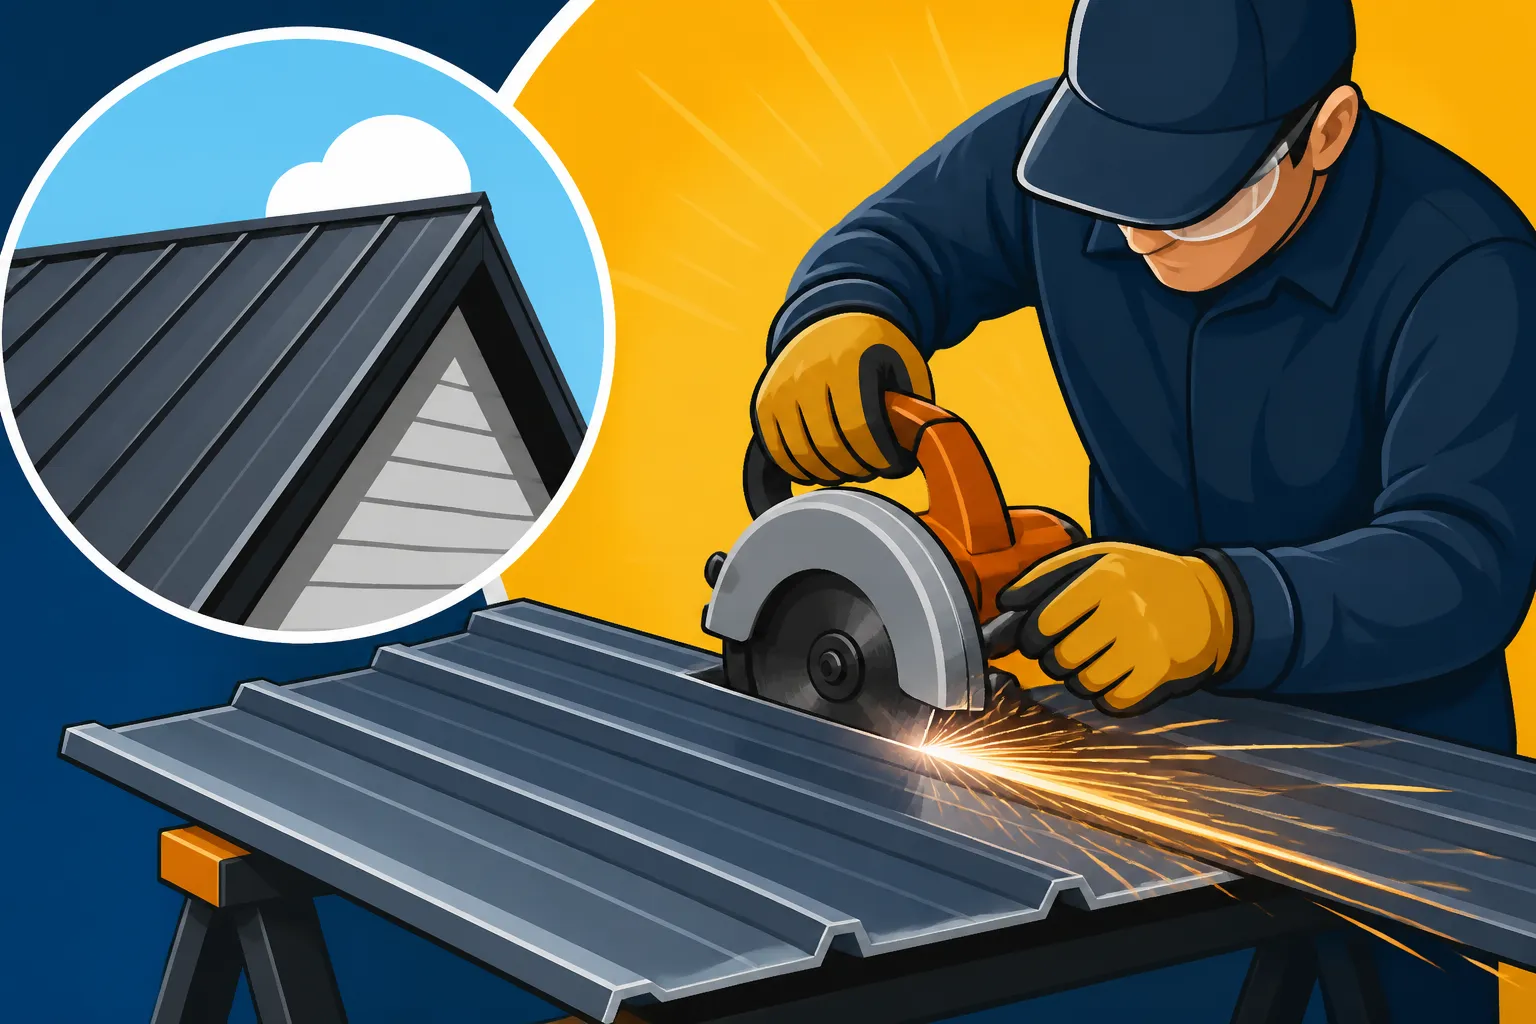
For contractors or DIYers who need to make fast, straight cuts through many panels, a circular saw fitted with a specialized metal-cutting blade is a powerful option. These blades are typically carbide-tipped and designed to cut through steel, aluminum, and other metals cleanly, often producing a minimal amount of heat and sparks compared to abrasive discs.
The key here is the type of blade. You absolutely cannot use a standard wood-cutting blade. Metal-cutting blades have a specific tooth geometry and a negative or low hook angle that allows them to slice through metal rather than tearing it. When used correctly, these saws can make incredibly fast and accurate long cuts, perfect for trimming the entire length of multiple R-Panel Metal Roof sheets. However, safety is paramount. The friction created still generates sparks and hot metal shavings, so full PPE (eye protection, hearing protection, heavy-duty gloves, and long sleeves/pants) is non-negotiable. Furthermore, supporting the panel properly is crucial to prevent vibration and ensure a straight cut. A sturdy work table and clamps are your best friends. These saws are not generally recommended for detailed or intricate cuts, and they can leave a small burr on the underside of the cut, which might need to be filed down.
Hand Snips and Aviation Shears: For the Finer Details
Sometimes, you don't need a heavy-duty electric tool or a powerful saw. For smaller adjustments, intricate detailing, or accessing tight spaces, a good set of hand snips or aviation shears is indispensable. Think of them as the precision instruments in your metal roofing toolkit.
Aviation snips come in three common types: straight-cut (yellow handle), right-cut (green handle), and left-cut (red handle). This color-coding refers to the direction the blade is offset, allowing you to make curved cuts in either direction or long straight cuts without the tool body interfering with the material. They are perfect for trimming flashing details, making small notches for fitting around obstacles, or cleaning up burrs left by other tools. Regular straight-cut snips are heavier duty and can handle thicker gauges for shorter, simpler cuts. While they require more manual effort, their control and maneuverability are unmatched for specific tasks. They produce no sparks, no heat, and are completely portable, making them ideal for on-the-roof adjustments. Every metal roofing installer should have a variety of these snips in their belt – they are invaluable for getting those perfect, nuanced finishes on a metal roof installation. You'll definitely want these when working on Metal Roof Trim and Flashing Cost details, as those areas demand meticulous craftsmanship.
Grinders and Jigsaws: When Other Tools Won't Cut It (But Be Wary)
While angle grinders and jigsaws can cut metal, they are generally not recommended as primary tools for cutting metal roofing panels, especially for prep work on the ground. However, there are very specific, limited scenarios where they might be considered, with significant caveats.
An angle grinder with a thin metal-cutting disc can be incredibly fast and powerful. It can slice through tough materials and multiple layers. The immense downside is the sheer amount of heat and sparks it generates. This heat can cause significant distortion or "oil canning" in the metal panels, especially thinner gauges or flat pan sections of standing seam panels. The sparks are a major fire hazard, and the abrasive action leaves a very rough, burred edge that requires extensive cleanup. More importantly, the heat can burn off protective coatings like Galvalume or paint, leaving the exposed steel vulnerable to rust and potentially voiding your warranty. For these reasons, grinders should only be considered for very minor, isolated cuts where aesthetics and warranty are less critical, such as cutting rebar, or in emergency situations where precision is secondary to speed, and always with extreme caution.
Jigsaws, fitted with appropriate metal-cutting blades, can make curved or intricate cuts that other tools can't. They are slower than nibblers but can handle thicker material in certain situations. The primary drawback is that the reciprocating action of the blade can vibrate the panel, potentially causing minor distortion or chipping of the paint finish, especially on thinner materials. Like circular saws, they also create metal shavings and can generate heat, albeit less than a grinder. A jigsaw might be a suitable last resort for a unique, complex curve if a nibbler isn't available or capable, but it requires careful technique, proper blade selection, and firm support for the panel to achieve a clean cut without damage.
Here's a quick comparison of cutting tools:
| Tool Type | Pros | Cons | Best Use |
|---|---|---|---|
| Electric Shears | Clean, cool cuts; no sparks; minimal burrs; fast for straight lines | Can struggle with complex curves; higher initial cost | Long, straight cuts; trimming panel lengths; reducing material distortion |
| Nibblers | Excellent for intricate curves and cutouts; no sparks; clean cuts | Slower for long straight cuts; leaves small waste chips | Cutouts for vents, pipes; intricate shapes; tight corners |
| Circular Saw (metal blade) | Very fast for long, straight cuts; powerful | Generates sparks and heat; potential for burrs; noisy; less precise for curves | High-volume, straight cuts across many panels; trimming roof edges |
| Hand Snips/Aviation Shears | Highly portable; no power needed; precise for small details | Slower; requires manual effort; limited to thinner gauges | Flashing details; notching; small adjustments; cleaning burrs |
| Angle Grinder (with caution) | Very fast and powerful; can cut through very thick material | High heat, sparks, burrs; coating damage; fire hazard; distortion | Emergency cuts; cutting structural steel (not ideal for panels) |
| Jigsaw (with caution) | Good for complex curves in thicker material | Can vibrate/distort thinner panels; slower; burrs | Unique, complex curved cuts where other tools fail |
Step-by-Step Guide to Safely and Accurately Cutting Metal Panels
Cutting metal roofing panels might seem like a dark art, but with a systematic approach and a focus on safety, anyone can achieve professional-looking results. It’s about breaking down the task into manageable steps and understanding the nuances of each one.
Safety First: Personal Protective Equipment (PPE)
Before you even think about marking a line or picking up a tool, you need to prioritize safety. Metal roofing work, especially cutting, involves sharp edges, potential projectiles, and powerful machinery. Neglecting PPE is a gamble you absolutely don't want to take.
First and foremost, eye protection is non-negotiable. Whether you're using electric shears, a circular saw, or even hand snips, tiny metal shards or burrs can become airborne. Safety glasses with side shields, or even a full face shield, will protect your vision from these hazards. Next, heavy-duty gloves are essential. The cut edges of metal panels are razor-sharp, and even the untouched edges can be surprisingly keen. Good work gloves, preferably leather or cut-resistant synthetic, will prevent nasty cuts and scrapes. You'll also want to protect your hearing. Power tools, especially circular saws and grinders, produce significant noise levels that can cause permanent hearing damage over time. Hearing protection, such as earplugs or earmuffs, is a must. Finally, wear long sleeves and pants made of durable material to protect your skin from sparks, hot metal shavings, and accidental contact with sharp edges. A sturdy pair of closed-toe boots, preferably steel-toed, will protect your feet from dropped tools or panels. Never wear loose clothing or jewelry that could get caught in moving parts of machinery. Taking these precautions might seem like overkill at first, but one close call will quickly make you a believer. This meticulous attention to safety is something any reputable contractor you might find through a platform like Modernize would emphasize.
Accurate Measurement and Marking
The old adage "measure twice, cut once" is absolutely critical when working with metal roofing. There's no pushing the material back together after a miscut! Precision at this stage will prevent costly errors and ensure a seamless installation.
Start by ensuring your tape measure is accurate and that you're reading it correctly. For longer panels, it’s often best to have a second person help hold the tape at one end to prevent sagging, which can lead to inaccurate readings. When marking your cut line, don't rely on a single point. Mark at least two, preferably three or more, points along the intended cut, then use a sturdy, straight edge (like a metal ruler, a chalk line, or a panel offcut) to connect them. A fine-tipped permanent marker, a grease pencil, or even a scratch awl (if the finish allows) works well for making visible, thin lines. Avoid thick markers that can lead to imprecise cuts. For very long cuts, a chalk line can be extremely useful. If you’re cutting angles, use a reliable speed square or a protractor to ensure the angle is spot on. Remember that metal panels expand and contract with temperature changes, so while minor, consider ambient temperature if you’re making extremely critical, tight-fitting cuts, especially for Metal Roof Underlayment and Ventilation Guide and flashing components. Always double-check your measurements against the actual roof section or adjacent panels before making the mark, and then again before making the cut.
Setting Up Your Workspace and Securing Panels
A chaotic or unstable workspace is an invitation for inaccurate cuts and safety hazards. Proper setup ensures efficiency, precision, and protection for both you and your materials.
Find a flat, stable surface for cutting. Sawhorses with a plywood or dimensional lumber top are often ideal, creating a large, secure platform. If you're cutting long panels, ensure you have support along the entire length to prevent the panel from bending, sagging, or vibrating during the cut. This is particularly important for thinner gauge metal or standing seam panels, where distortion can occur easily. Use clamps to firmly secure the panel to your work surface. A moving panel during a cut is not only dangerous but guarantees a crooked line. Place sacrificial material, such as scrap plywood or foam insulation, under the panel where you're cutting to protect your work surface and the underside of the panel from scratches or tool marks. This is especially important for finished panels where cosmetic damage is a concern. When cutting multiple pieces of the same length, consider creating a simple jig or stop block to ensure consistency without having to measure each piece individually. Finally, ensure you have plenty of clear space around your cutting area to move freely and safely, and keep a fire extinguisher nearby if you're using spark-producing tools like circular saws or grinders. A clean, organized, and well-supported setup is half the battle won.
Executing the Cut: Techniques for Different Tools
Now that you're geared up and your panels are marked and secured, it's time for the actual cutting. The technique you employ will depend entirely on the tool you've chosen for the job.
- Electric Shears: For electric shears, hold the tool firmly with both hands, if possible, and maintain a consistent speed. Start the cut slightly into the panel if you're trimming an edge, or at the marked line for an internal cut. Guide the shear along your marked line, applying steady, even pressure. Allow the tool to do the work; don't force it. Overlapping passes slightly if needed for very long cuts ensures continuity. Keep the blades clean and oiled as per manufacturer instructions.
- Nibblers: Nibblers are excellent for tight radii and intricate cuts. For internal cutouts, you'll often need to drill a pilot hole large enough to insert the nibbler's punch. Once the punch is through, slowly guide the tool along your marked curve or line. Small, controlled movements are key. Again, consistent speed and pressure are important. Take your time, especially on complex shapes, as rushing can lead to jagged edges or overcutting.
- Circular Saw (with metal blade): This tool demands respect due to its power and the sparks it generates. Ensure your blade is sharp and appropriate for the metal type and gauge. Set the blade depth just enough to cut through the material and perhaps a small bit of your sacrificial support. Start the saw before it contacts the metal, then slowly and steadily guide it along your marked line. Maintain a firm grip and let the blade speed do the cutting; avoid forcing the saw. Keep onlookers clear of the spark zone. For long panels, it helps to have someone gently support the waste piece as you cut to prevent it from binding the blade.
- Hand Snips/Aviation Shears: For hand snips, position the cutting blades just past your marked line and make a series of overlapping cuts, moving the snips forward with each squeeze. For curves, use the appropriate left- or right-cut snips and make small, controlled snips, rotating the panel slightly as you go. Avoid opening the snips too wide, as this can make the cut less controlled and more likely to distort the metal. Practice on a scrap piece first to get a feel for the tool.
Regardless of the tool, remember to keep the cutting line visible, move at a consistent pace, and always ensure the panel is fully supported throughout the cut to prevent sagging and distortion.
Common Challenges and Troubleshooting When Cutting Metal
Even with the right tools and a careful approach, cutting metal roofing panels can present its fair share of challenges. Anticipating these issues and knowing how to troubleshoot them will save you headaches and help you achieve a high-quality finish.
Avoiding Burrs, Scratches, and Distortion
These are the three most common frustrations when cutting metal, and they can significantly impact both the aesthetics and performance of your roof.
Burrs are the rough, sharp edges that remain after a cut, especially with tools like circular saws or grinders. They’re not just unsightly; they can scratch adjacent panels, snag on underlayment, and even compromise the seal of flashing. To minimize burrs, use the sharpest possible blades or shears and ensure you're cutting at the correct speed – too fast or too slow can worsen burring. After the cut, you might need to deburr the edges. This can be done with a small file, a deburring tool, or even fine-grit sandpaper, carefully smoothing the edge without removing the protective coating too aggressively.
Scratches are a major concern, especially on pre-painted or highly finished metal panels. They can occur from tools dragging across the surface, metal shavings piling up, or rough handling. To prevent scratches, always work on a clean, protected surface. Lay down blankets, cardboard, or foam insulation under the panels. When stacking panels, place cardboard or foam between them. Be mindful of metal shavings – they are abrasive and can easily scratch the finished surface if dragged. Clean up your workspace regularly. When using tools, ensure they don't rub against the panel's finished side unnecessarily. For instance, some circular saw bases have plastic guides to help prevent scratching.
Distortion, often manifesting as ripples, waves, or bending (sometimes called "oil canning"), is a common issue with thinner gauge metal, especially with tools that generate heat or apply uneven pressure. Using a grinder is a prime culprit for heat distortion. To avoid it, always use tools that generate minimal heat, like electric shears or nibblers. If using a circular saw, ensure your blade is sharp, and you're moving at a consistent, steady pace. Crucially, support the panel fully on both sides of the cut. A panel that sags or vibrates during the cut is far more likely to distort. For instance, when installing Metal Roof Components & Accessories Explained, especially those requiring custom cuts, avoiding distortion is paramount for proper fitting and aesthetics.
Dealing with Heat and Sparks
Tools that cut metal through friction, such as circular saws with abrasive blades or angle grinders, generate significant heat and sparks. This isn't just a comfort issue; it's a major safety and material concern.
The most immediate danger is fire. Sparks can easily ignite sawdust, dry leaves, insulation, or other flammable materials in your workspace or on your roof. Always clear the area of any combustibles before you start cutting. Have a fire extinguisher readily available and consider having a spotter watching for stray sparks. Protecting nearby finished surfaces (like walls, windows, or even already installed roof panels) from sparks is also important, as hot metal can burn or embed itself into paint or glass.
The heat itself can damage the metal panel. As mentioned, excessive heat can warp the panel or burn off protective coatings (like Galvalume, Galvanized, or paint), exposing the underlying steel to rust. This is a critical factor often overlooked in Metal Roof Installation Process: Step by Step, but it can severely shorten your roof's lifespan. To mitigate heat, use specialized carbide-tipped cold-cut blades on circular saws, which generate less heat than abrasive discs. For very tough or thick cuts, take breaks to allow the material and tool to cool. If working on already installed panels for repair or modification (which should be avoided if possible), consider using a wet rag to cool the cut area, but be extremely careful not to introduce water into areas that aren't sealed.
Maximizing Blade Life and Tool Maintenance
Tools are an investment, and proper care ensures they perform optimally and last longer. This is especially true for the specialized blades and mechanisms used in metal cutting.
Blade life is directly tied to the correct application and usage. Always use the right blade for the specific metal type and gauge you are cutting. Trying to cut thick steel with a blade designed for aluminum will dull it rapidly and could damage the blade or tool. Don't force the cut; let the blade's design and the tool's power do the work. Excessive pressure only generates more heat and wear. Keep blades clean; metal filings can build up in teeth, reducing effectiveness. For circular saw blades, consider cleaning them with a wire brush or specialized blade cleaner if they become gunked up. If a blade starts to dull, replace it promptly. A dull blade requires more force, produces more heat and burrs, and can be dangerous.
Tool maintenance extends beyond just the blades. For electric shears and nibblers, lubricate moving parts as recommended by the manufacturer. Keep vents clear of debris to prevent motor overheating. Regularly check cords for fraying or damage. For all power tools, inspect them before each use for any loose parts, cracked housings, or signs of wear. Store tools in a dry environment to prevent rust, especially for cutting heads. Clean off metal shavings and dust after each use. A well-maintained tool not only performs better but is also safer to operate. This diligent approach helps prevent unexpected breakdowns and ensures that your tools are ready for your next project, whether it's a DIY Metal Roof Installation: What to Know or a professional job.
Specialized Cuts and Considerations
While long, straight cuts are common, metal roofing projects often require more intricate and specialized cutting techniques. These complex cuts, found at roof transitions and around penetrations, are critical for both the aesthetics and, more importantly, the watertight integrity of your metal roof.
Cutting for Ridges, Hips, and Valleys
The areas where different roof planes meet – ridges, hips, and valleys – are the architectural highlights and simultaneously the most vulnerable points of any roof. For metal roofing, these areas demand precise, often angled, cuts to ensure panels fit snugly and maintain proper water shedding.
- Ridges and Hips: These are exterior angles where two roof planes converge. Panels running up to a ridge or hip will need to be cut at an angle to meet the ridge cap or hip flashing properly. The challenge is often determining the exact angle, which depends on your roof's pitch. Measure the angle carefully using an angle finder or by creating a template from scrap material. For standing seam, you’ll typically make a straight cut across the pan, but the seam itself might need to be trimmed or folded to accommodate the cap. For corrugated or ribbed panels, ensure the profile lines up to avoid an unsightly mismatch. Tools like electric shears or circular saws with metal-cutting blades are often used for these straight-line angled cuts, followed by hand snips for any fine-tuning or notching required by the specific flashing system.
- Valleys: These are interior angles where two roof planes meet, channeling significant amounts of water. Panels running into a valley need to be cut precisely along the valley line, often at a diagonal, to allow water to flow freely into the valley flashing and off the roof. An inaccurate cut here can lead to water pooling, leaks, and debris buildup. The angle of the cut will depend on the pitch of the adjoining roof planes. A common technique is to use a chalk line snapped from the peak to the eave to mark the valley center, and then offset lines for the cut edge of the panels. Electric shears are often preferred for valley cuts because they produce a clean edge without heat distortion, which is vital for proper sealing with the valley metal. For complex valley shapes or where multiple panels intersect, precision is paramount, sometimes requiring templates to be made on-site. The goal is to ensure that the panel edge is neatly trimmed back from the center of the valley to allow for optimal water flow and proper installation of Metal Roof Underlayment and Ventilation Guide and flashing.
Penetrations for Vents, Pipes, and Skylights
Any time you cut a hole in a metal roof for a vent pipe, chimney, or skylight, you create a potential leak point. The quality of your cut and the subsequent flashing installation are absolutely critical to ensuring your roof remains watertight.
- Vents and Pipes: These usually require round or square cutouts in the metal panel. For round pipe penetrations, a nibbler is often the ideal tool for creating a clean, circular hole. You'll typically drill a pilot hole first, then insert the nibbler and slowly work your way around the marked circle. For square or rectangular vent cutouts, an electric shear or a jigsaw with a fine-tooth metal blade can be used, again starting with pilot holes at the corners. The key is to make the hole just slightly larger than the penetration itself, allowing for the flashing boot or collar to fit snugly without being stretched or unduly compressed. The flashing will then seal around the pipe and be secured to the panel. It’s important to research the specific flashing system you’re using, as some require specific cutout dimensions.
- Skylights: Cutting for skylights is more involved, as it requires a larger, typically rectangular opening. This often means cutting through multiple panels and sometimes even the underlying roof deck. For the metal panels themselves, you'll mark out the exact dimensions of the skylight frame. Long, straight cuts will likely be made with a circular saw fitted with a metal-cutting blade, or electric shears for less sparks and heat. Corner cuts will need to be clean and precise, often finished with hand snips. Again, the goal is a tight, accurate opening that allows the skylight curb or flashing system to seat perfectly. Any gaps or unevenness will compromise the watertight seal. After the panel is cut, you will install the skylight flashing system, integrating it with the Metal Roof Installation Process: Step by Step to ensure layers shed water properly. Remember, any penetration dramatically increases the risk of leaks, so meticulous cutting and flashing are non-negotiable here. When dealing with complex roofing projects that involve multiple penetrations and intricate cuts, it can be incredibly helpful to leverage resources like Modernize to find experienced roofing professionals who specialize in metal roof installations. Their expertise can ensure these critical details are handled flawlessly.
Disclaimer
The information provided in this guide is intended for general informational purposes only and does not constitute professional advice. Metal roofing installation and cutting can be complex and dangerous. Always prioritize safety, consult manufacturer guidelines for your specific roofing materials, and adhere to local building codes. If you are unsure about any aspect of the process, it is strongly recommended to consult with a qualified and experienced metal roofing professional. Working at heights and with power tools carries inherent risks.