How Is a Standing Seam Metal Roof Installed?
The thought of upgrading to a standing seam metal roof for your home is exciting, promising durability and a sleek, modern look. But let's be honest, gazing up at those clean lines, you can’t help but wonder: how exactly do they get those panels up there, and what makes this type of installation so specific? It’s not like simply nailing down shingles, and the precision involved can feel a bit daunting to understand. This guide is here to demystify the entire process, walking you through the intricate steps of installing a standing seam metal roof, from the initial preparations to the final, gleaming finish.
Understanding Standing Seam Metal Roofing Before Installation
Before we dive into the nuts and bolts (or rather, the hidden clips and seams!), it's really helpful to grasp what sets standing seam apart from other roofing options. This isn't just another metal roof; it's a sophisticated system designed for maximum performance and curb appeal.
What Makes Standing Seam Unique?
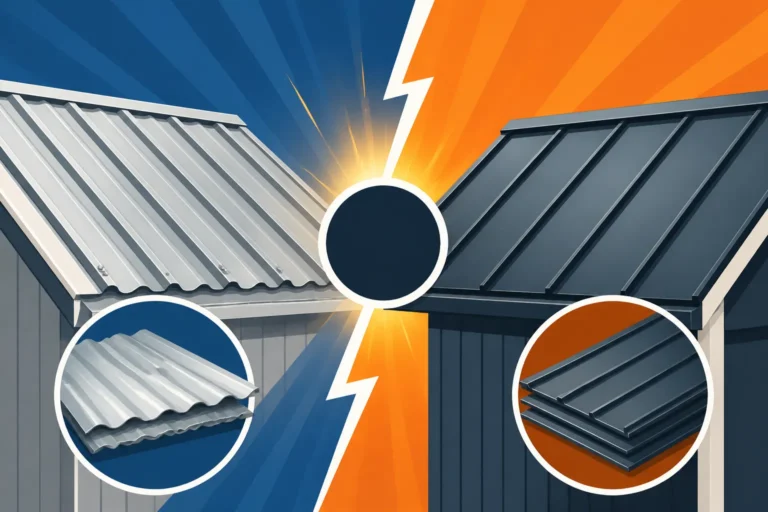
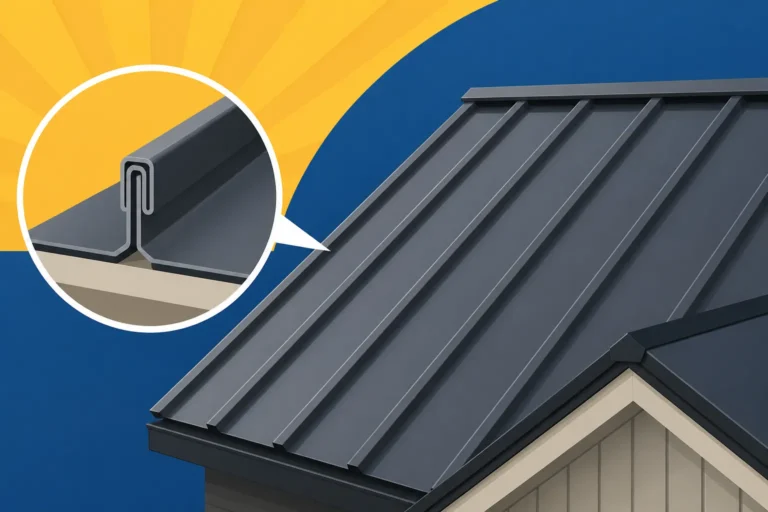
When people talk about standing seam, they're often envisioning those beautiful, continuous panels with raised seams that run vertically up the roof. Unlike traditional corrugated or R-panel metal roofs, which have visible screws holding them down (exposed fasteners), standing seam systems boast what are called "hidden fasteners." This is a huge deal, both aesthetically and functionally. From a visual standpoint, you get a much cleaner, smoother appearance that many homeowners find incredibly appealing, especially for modern or architecturally distinct homes.
But the hidden fasteners are more than just pretty. They’re a critical component in the roof's incredible longevity and weather resistance. By tucking the fasteners away underneath the panels, they're protected from direct exposure to rain, snow, UV rays, and temperature fluctuations. This dramatically reduces the chances of leaks around fastener holes, a common wear point on exposed fastener systems. Moreover, the design allows the metal panels to expand and contract freely with temperature changes without stressing the fasteners, which further prevents premature wear and tear. This thoughtful engineering is a big reason why many homeowners consider a standing seam roof a premium investment that pays off over decades. You can learn more about if an investment like this is worth it in our guide, Is a Standing Seam Roof Worth the Extra Cost.
Key Components of a Standing Seam System
A standing seam metal roof isn't just a collection of metal sheets; it's a carefully engineered system involving several specialized components that work together to create a robust, watertight barrier. Understanding these parts will give you a clearer picture of the installation process.
First, you have the metal panels themselves, which are typically roll-formed from steel, aluminum, copper, or zinc. The choice of material often influences the overall project cost and the roof's specific characteristics, such as corrosion resistance or aesthetic patina. For instance, knowing the differences can help you understand your options, so we’ve got a detailed resource on Metal Roof Cost by Material: Steel vs Aluminum vs Copper vs Zinc. These panels come in various widths and lengths, often custom-cut to fit your roof exactly, which minimizes seams and potential weak points.
Next are the clips, which are the unsung heroes of the hidden fastener system. These small metal pieces are fastened directly to the roof deck, and the standing seam panels then snap or are mechanically seamed onto them. The clips allow the panels to "float" slightly, accommodating thermal expansion and contraction without causing damage. There are different types of clips, including fixed clips and sliding clips, chosen based on the panel length and potential movement.
Underlayment is another absolutely crucial component. This protective layer is laid directly over the roof deck before the metal panels are installed. High-quality synthetic underlayment or ice and water shield provides an essential secondary barrier against moisture, enhances insulation, and offers a smooth surface for the metal panels to rest on. We often get questions about this, which is why our Metal Roof Underlayment and Ventilation Guide is so popular.
Finally, there's an array of trim and flashing pieces. These custom-bent metal components seal the edges, valleys, ridges, and penetrations (like chimneys, skylights, and vents) of the roof. They ensure that water is properly diverted and doesn't infiltrate the roofing system. Common trim pieces include gable trim, eave trim, ridge caps, and valley flashing, all precisely designed to interlock with the standing seam panels for a seamless, watertight finish.
The Step-by-Step Installation Process
Installing a standing seam metal roof is a precise and often meticulous process that requires skilled craftsmanship. It's not a job for just any roofer; experience with this specific system is key. Here's a breakdown of what a professional installation typically involves.
Roof Deck Preparation and Underlayment Application
The foundation of any good roof is a well-prepared deck. Before any metal panels even arrive on site, the existing roof (if it's a replacement) needs to be completely stripped down to the sheathing. This involves removing old shingles, nails, and any debris. The roof deck, usually plywood or OSB, is then thoroughly inspected for any damage, rot, or soft spots. Any compromised sections must be repaired or replaced to ensure a smooth, stable, and structurally sound surface. This meticulous preparation prevents future issues and ensures the longevity of your new metal roof.
Once the deck is clean and sound, the next critical step is applying the underlayment. This isn't an optional extra; it's a vital secondary layer of protection against moisture. While the metal panels themselves are incredibly waterproof, the underlayment acts as a last line of defense should any moisture somehow get past the primary metal layer. High-quality synthetic underlayment is preferred for metal roofs due to its durability, resistance to rot, and ability to withstand high temperatures that can build up under metal. In colder climates or areas prone to heavy rain, an ice and water shield is often applied along the eaves, valleys, and around penetrations to provide an even greater seal against water intrusion. This underlayment is rolled out smoothly, overlapping according to manufacturer specifications, creating a uniform barrier that also helps to cushion the metal panels. Proper underlayment ensures your roof's integrity for decades to come, and understanding your Metal Roof Underlayment Cost is an important part of planning.
Starter Strip and Panel Installation
With the roof deck prepped and underlayment down, the real work of installing the metal begins. The very first piece to go on is typically a starter strip or eave trim, which is installed along the lowest edge of the roof. This piece is critical because it provides a clean, secure edge for the first row of standing seam panels and helps direct water efficiently into your gutters. It must be perfectly straight and level, as it sets the alignment for the entire roof.
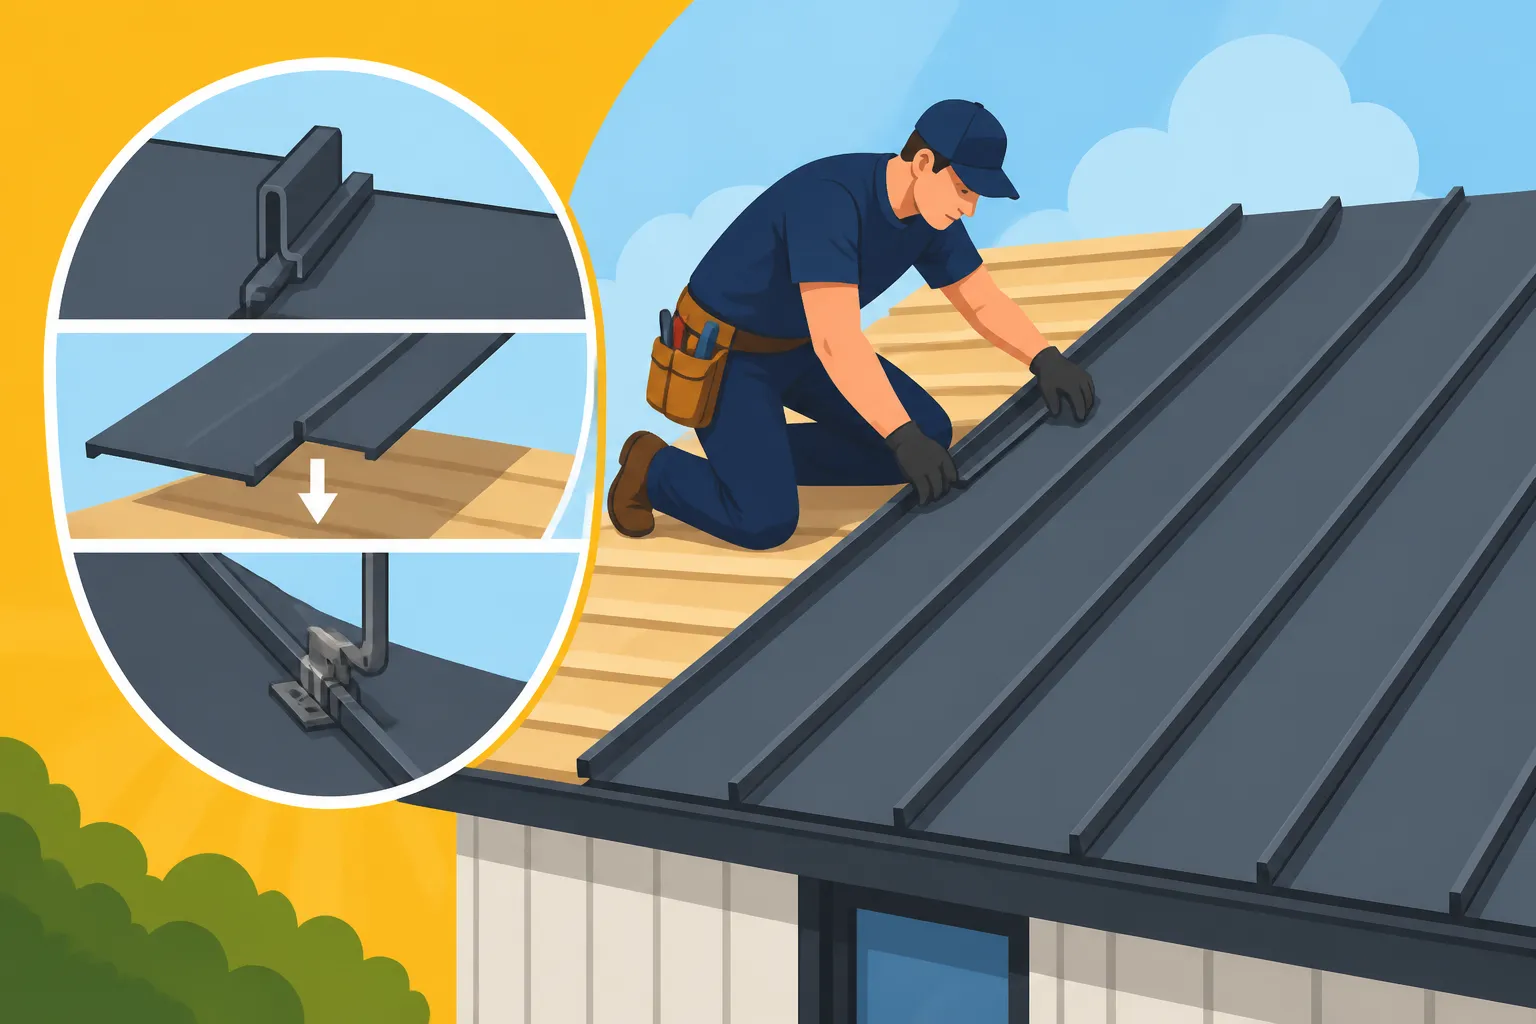
After the starter strip is in place, the crew will begin installing the main standing seam panels, usually starting at one end of the roof and working their way across. Each panel is carefully lifted into position, aligning its lower edge with the starter strip. The first panel is then secured to the roof deck using specialized clips. These clips are fastened with screws through pre-drilled holes, but critically, these fasteners are hidden beneath the raised seam of the panel itself. This is the hallmark of a standing seam system. The subsequent panel is then brought into place, its male leg interlocking with the female leg of the previously installed panel. This connection then either snaps together (snap-lock system) or is mechanically seamed (double-lock system) to form a watertight seal. The precision here is paramount; even slight misalignments can affect the entire roof's appearance and performance. Each panel must be checked for proper seating and alignment before moving to the next, ensuring a uniform and durable finish.
Seaming and Fastening the Panels
This is where the "standing seam" truly comes to life. Once the panels are interlocked, the method of securing them depends on the specific standing seam system chosen.
For snap-lock panels, the installation is relatively straightforward. As the name suggests, one panel’s edge is designed to snap securely into the previous panel’s edge and over the hidden clips. This creates a strong, self-locking connection. While still requiring precision, snap-lock systems are generally quicker to install and require fewer specialized tools. They are a popular choice for many residential applications due to their balance of ease of installation and aesthetic appeal.
Mechanically seamed panels, on the other hand, involve a more robust and weather-tight connection. After the panels are interlocked over the hidden clips, a specialized electric or hand seaming tool is used to literally fold and crimp the edges of the two panels together, creating a double-lock or single-lock seam. This process creates an incredibly strong, monolithic connection that is virtually impenetrable to water and highly resistant to wind uplift. It’s a more labor-intensive process, requiring experienced installers and specialized equipment, but it results in a roof with superior performance and durability, often preferred for very low-slope roofs or in extreme weather zones. Understanding the difference between these types can be helpful, which is why we suggest looking at our Standing Seam vs Snap-Lock Metal Roof guide. Regardless of the seaming method, the key takeaway is that all fasteners are completely concealed within these raised seams, protecting them from the elements and contributing to the roof's exceptional lifespan.
Flashing, Trim, and Finishing Touches
Once the main field of panels is installed, the focus shifts to ensuring every edge, intersection, and penetration is perfectly sealed and protected. This is where flashing and trim pieces come in, acting as the intricate details that complete the roof's watertight envelope.
Gable trim (or rake trim) is installed along the sloped edges of the roof where it meets the eaves, providing a clean, finished appearance and protecting the vulnerable edges of the panels. Ridge caps are then installed along the peak of the roof, covering the top intersection of the panels and providing ventilation if designed as a vented ridge. For internal angles where two roof planes meet, like in a "V" shape, valley flashing is custom-formed and installed to channel water efficiently down the roof. This is a particularly critical area for preventing leaks, so it requires careful measurement and sealing.
Any elements protruding through the roof, such as plumbing vents, chimneys, or skylights, require specialized pipe boots and custom flashing. These are typically made of rubber or metal, designed to tightly seal around the penetration and integrate seamlessly with the metal panels, preventing any water from seeping in. High-quality sealants are also used in conjunction with these trim pieces and flashing to ensure a completely watertight system. The exact type and placement of each piece are dictated by the roof's design, local building codes, and the specific manufacturer's instructions. When done correctly, these finishing touches not only complete the aesthetic appeal but also provide the long-term protection that standing seam metal roofs are known for.
Essential Considerations for a Successful Installation
While the installation steps are clear, there are several overarching factors that significantly impact the success and longevity of your standing seam metal roof project. Paying attention to these details can save you headaches and ensure your investment is truly worthwhile.
Choosing the Right Contractor and Materials
This is perhaps the most critical decision you'll make when getting a standing seam metal roof. Installing these systems requires a specific skill set and experience that not all roofing contractors possess. It's a specialized craft, far more intricate than installing asphalt shingles. You need a contractor who understands the nuances of metal expansion and contraction, precise panel alignment, and the correct seaming techniques for your chosen system (snap-lock vs. mechanical seam). Asking key questions about their experience with standing seam specifically, not just general metal roofing, is vital.
Don't be afraid to ask for references and look at examples of their previous standing seam projects. A reputable contractor will also be properly licensed, bonded, and insured, offering a strong workmanship warranty in addition to the manufacturer's warranty on materials. We delve into this in depth in our guide, How to Hire a Metal Roofing Contractor. Services like Modernize can be incredibly helpful in connecting you with vetted local professionals who specialize in metal roofing, ensuring you get quotes from experienced installers rather than generalists.
Equally important is the quality of the materials themselves. Discuss with your contractor the gauge of the metal (e.g., 24-gauge steel is common for residential standing seam), the type of metal (steel, aluminum, etc.), and the specific paint coating. High-quality coatings, like PVDF (Kynar 500), offer superior fade and chalk resistance, ensuring your roof looks great for decades. While cheaper materials might save a bit upfront, they can significantly reduce the roof's lifespan and performance. Investing in quality materials and a skilled installer ensures your metal roof lives up to its 50+ year potential.
Project Planning and Site Preparation
A smooth installation begins long before the first panel is laid. Thorough project planning is essential, starting with obtaining the necessary permits from your local building department. Skipping this step can lead to costly fines or even the requirement to remove newly installed work. Our guide, Do You Need a Permit for a Metal Roof?, can help clarify this process. The contractor should handle permit acquisition, as they are typically more familiar with the specific requirements in your area.
Site preparation involves several key aspects. Firstly, ensuring safe access for the crew and equipment is paramount. This includes clearing pathways, protecting landscaping, and potentially setting up scaffolding. Material delivery and staging also require careful thought. Long standing seam panels are often custom-fabricated and can be unwieldy; they need to be stored in a way that prevents damage and allows for efficient access during installation. This might mean temporarily taking up more yard space than you'd initially expect. Protecting vulnerable areas of your home, like windows and siding, from potential falling debris or tools is also a crucial part of site preparation. A good contractor will communicate these logistical needs clearly and take proactive steps to minimize disruption and protect your property throughout the installation process.
Weather Conditions and Installation Challenges
Metal roof installation is heavily influenced by weather. Ideal conditions are dry, calm days with moderate temperatures. High winds can be a significant hazard, making it dangerous to handle large metal panels and potentially leading to damage. Rain, of course, creates slippery surfaces and can introduce moisture into the underlayment or roof deck, which is precisely what you want to avoid. While some minor trim work might be possible in light drizzle, extensive panel installation should generally be avoided during precipitation. Extremely cold temperatures can also make metal brittle and harder to work with, while very hot temperatures can make the panels expand significantly, complicating alignment and seaming.
Even with ideal weather, certain challenges can arise during installation. One common aesthetic concern is oil canning, which refers to the visual waviness or distortion in flat metal panels. While largely aesthetic and not a structural defect, it can be minimized through careful material handling, proper substrate preparation, and using specialized panel designs. You can find more information about it in our article, What Is Oil Canning and How to Prevent It. Another challenge can be ensuring proper roof ventilation underneath the metal, which is crucial for preventing condensation and maintaining energy efficiency. A skilled installer will address these potential issues proactively, using their expertise to navigate the unique demands of standing seam metal roofing. Finding a contractor through a service like Modernize can help ensure you're connecting with professionals equipped to handle these complexities.
Standing Seam Panel Types: Snap-Lock vs. Mechanical Seam
To help you visualize the differences we've discussed, here's a quick comparison of the two primary types of standing seam panel connections:
| Feature | Snap-Lock Standing Seam | Mechanically Seamed (Double-Lock) Standing Seam |
|---|---|---|
| Seam Method | One panel snaps over the other, covering clips. | Panels interlock, then are mechanically folded/crimped. |
| Installation | Faster, less specialized tools required. | Slower, requires specialized seaming tools and expertise. |
| Fasteners | Hidden clips, usually fixed or floating. | Hidden clips, often floating for thermal movement. |
| Weather Tight | Excellent, but relies on a strong "snap." | Superior, virtually impervious due to crimped seal. |
| Thermal Movement | Good, panels can float. | Excellent, robust clips and seam accommodate movement. |
| Aesthetics | Clean, modern look. | Very clean, slightly tighter, more refined seam. |
| Cost | Generally lower labor cost due to quicker install. | Higher labor cost due to specialized process. |
| Best Use | Most residential roofs, moderate slopes. | Low-slope roofs, high-wind areas, premium applications. |
Disclaimer
Please remember that this guide provides general information about standing seam metal roof installation. Specific practices, local building codes, and material requirements can vary significantly. Always consult with a qualified, licensed, and insured metal roofing contractor in your area for project-specific advice and estimates. They can assess your unique roof, recommend the best materials and installation methods, and ensure compliance with all regulations.