Metal Roof Snow Load Requirements
When winter blankets your home in a fresh layer of snow, it's natural to gaze up at your roof and wonder just how much weight it can truly bear. For homeowners with metal roofs, this concern can be even more pronounced, given the smooth surface often associated with these durable systems. The sheer volume and density of snow, especially after a heavy storm or an unexpected thaw-freeze cycle, can indeed be a significant stressor. This guide is designed to ease those worries by diving deep into metal roof snow load requirements, explaining the crucial factors, local regulations, and practical solutions to ensure your roof remains safe and sound throughout the colder months.
Understanding Snow Load Basics for Your Roof
Before we can even talk about metal roofs specifically, it's essential to grasp the fundamental concepts of snow load. This isn't just about the fluffy stuff; it's about the serious weight that accumulates on your roof over time, and understanding it is the first step to ensuring your home's structural integrity.
What is Snow Load and Why Does it Matter?
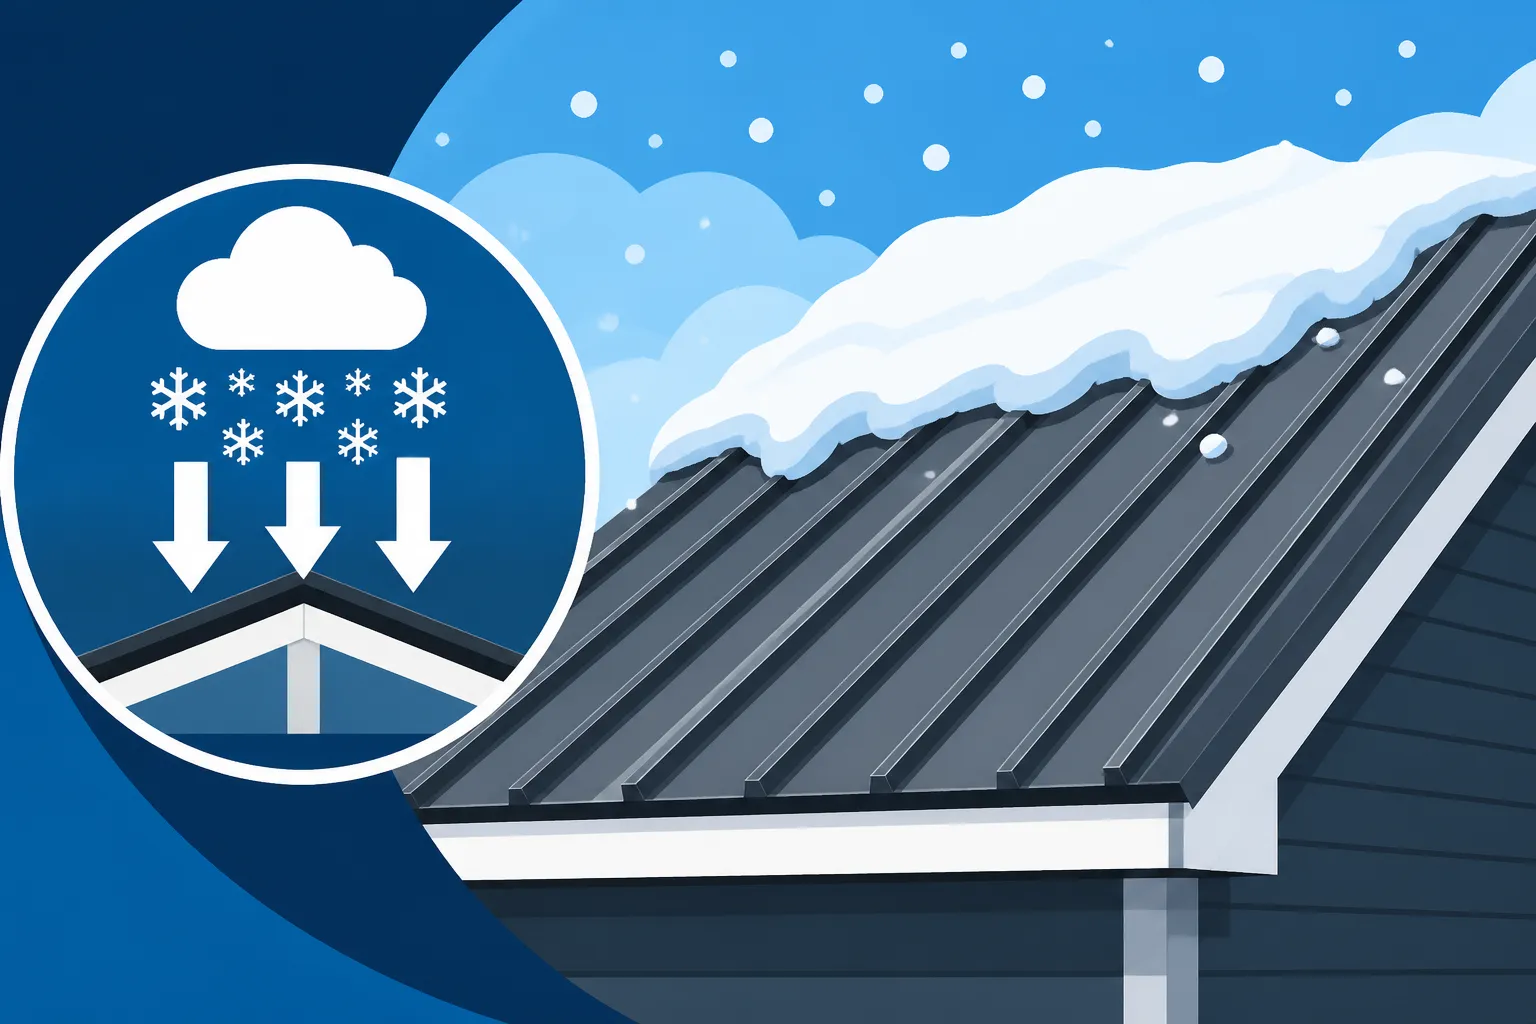
Snow load refers to the downward force exerted by the weight of accumulated snow and ice on a roof. It's not a static number; it varies dramatically based on geographical location, elevation, climate, and the specifics of each snowfall. Imagine a foot of light, powdery snow compared to a foot of dense, wet snow – the weight difference is staggering. Engineers and building codes take this very seriously because an improperly designed or built roof can buckle, collapse, or suffer severe damage under excessive snow.
This isn't just a hypothetical problem; real-world scenarios play out every winter. Homes in areas like the Sierra Nevada mountains in California or the Rockies in Colorado, for instance, are designed to withstand ground snow loads that can exceed 200 pounds per square foot (psf). Without robust construction and proper calculations, a structure simply wouldn't survive a typical winter season. Ignoring snow load requirements is essentially playing roulette with your most significant investment, potentially leading to catastrophic structural failure and immense financial and personal distress. It’s also crucial for insurance purposes; many policies require roofs to meet specific load capacities.
Types of Snow Load: Balanced vs. Unbalanced
Snow load isn't a uniform blanket across your entire roof. Understanding the different types helps illustrate why roof design is so critical.
Balanced Snow Load: This is the ideal scenario, where snow is distributed evenly across the entire roof surface. It's calculated based on factors like ground snow load, roof slope, and exposure to wind. While rarely perfectly balanced in reality, it serves as the baseline for structural design, assuming a uniform layer of snow. Think of it as a calm, continuous snowfall with no wind – the snow settles consistently from ridge to eave. Your structural engineer will calculate this "uniform" load for the main sections of your roof.
Unbalanced Snow Load: This is where things get more complex and potentially more dangerous. Unbalanced snow loads occur due to wind drifting, changes in roof elevation, or areas where snow can accumulate more heavily. For example, wind can pick up snow from one side of a ridge and dump it on the leeward side, creating a much deeper drift in one area. Similarly, snow can accumulate in valleys, around chimneys, or against taller parapet walls. These drifts can be significantly heavier than a balanced load, often creating concentrated stress points that must be accounted for in the structural design. A common example is the "snow drift" that builds up on the lower part of a multi-level roof where it meets a higher wall. This can easily double or triple the load in that specific area, requiring extra reinforcement in the framing underneath.
How Snow Density and Type Affect Load
Not all snow is created equal, and its density plays a massive role in how much weight it contributes to your roof. This is a common point of confusion, as a foot of fresh powder is far lighter than a foot of wet, heavy snow.
Powder Snow: Freshly fallen, light, and fluffy snow has a low density, often weighing only 3-5 pounds per cubic foot (pcf). While it might look impressive, a foot of this type of snow puts relatively little stress on your roof.
Wet Snow: This is the real troublemaker. When temperatures hover around freezing, snow can become saturated with water, making it incredibly dense and heavy. Wet snow can weigh anywhere from 12-21 pcf, sometimes even more if it's freezing rain mixed in. A foot of wet snow can easily weigh four or five times more than a foot of powder, posing a much greater risk to your roof's structure.
Ice: The absolute heaviest form of precipitation that can accumulate on a roof is ice. Whether it's freezing rain or melted snow that refreezes, ice weighs a whopping 57 pounds per cubic foot. Even a thin layer of ice can add substantial, dangerous weight. This is why issues like ice and water shield are so important for protecting your roof deck from meltwater.
Here's a quick comparison of approximate snow weights:
| Snow Type | Approximate Density (lbs/cubic foot) | Weight per 1 Foot Depth on 1 Sq Ft (lbs) | Equivalent Water Depth (inches) |
|---|---|---|---|
| Fresh Powder | 3 – 7 | 3 – 7 | 0.6 – 1.4 |
| Packed/Old Snow | 8 – 15 | 8 – 15 | 1.6 – 3 |
| Wet/Heavy Snow | 15 – 20+ | 15 – 20+ | 3 – 4+ |
| Ice | 57 | 57 | 11.5 |
This table really highlights how quickly snow can become a serious weight concern, especially the wet or icy varieties. The takeaway here is that you can't just look at depth; you need to consider the type of snow that has fallen and if any melting and refreezing has occurred.
How Metal Roofs Handle Snow Differently
Metal roofs are renowned for their durability and longevity, but their unique characteristics mean they interact with snow in ways distinct from traditional asphalt shingles or tiles. Understanding these differences is key to proper snow management.
The Advantage of Smooth Surfaces and Heat Transfer
One of the primary benefits of a metal roof in snowy climates is its smooth, low-friction surface. Unlike granular asphalt shingles that tend to hold onto snow, metal panels allow snow to shed much more easily. This can significantly reduce the cumulative snow load on the roof. As soon as the sun comes out or even a slight temperature increase occurs, the thermal conductivity of metal helps warm the roof surface. This subtle warmth, often combined with the slick finish, causes the bottom layer of snow to melt and lose its grip, allowing the entire mass to slide off in large sheets.
This natural shedding mechanism means that, in many cases, a metal roof might maintain a lower average snow load over the winter compared to other roofing materials. This passive snow removal is a huge advantage, as it often eliminates the need for manual shoveling, which can be dangerous and time-consuming. However, this very advantage also introduces a unique set of challenges that homeowners must be prepared for, namely the sudden release of large snow masses.
Potential Concerns: Snow Slides and Ice Dams
While shedding snow is a positive, the sudden release of a large snow mass from a metal roof can pose significant dangers. This phenomenon, often referred to as a "snow slide" or "snow avalanche," can occur without warning. Imagine several hundred pounds of snow and ice detaching and plummeting to the ground below. This can damage landscaping, crush cars, injure people or pets, and block essential egress points like doorways and emergency exits. This is precisely why Snow Guards and Winter Metal Roof Issues are not just an accessory, but a critical safety feature in areas with significant snowfall.
Another concern, particularly with insufficient attic ventilation or fluctuating temperatures, is the formation of ice dams. Ice dams occur when heat escapes from the house into the attic, warming the roof deck and melting the snow above. This meltwater then runs down the roof until it reaches the colder eaves, where it refreezes, creating a barrier of ice. Subsequent meltwater backs up behind this barrier, forming a "dam" that can force water under your metal panels and into your home, causing significant water damage to ceilings, walls, and insulation. Even though metal roofs shed snow well, ice dams can still form if the conditions are right, creating a distinct risk for Metal Roof Leak Repair Guide scenarios. Proper insulation and ventilation are vital to prevent this.
The Role of Roof Pitch in Snow Shedding
The angle, or pitch, of your roof plays a crucial role in how effectively a metal roof sheds snow. Generally, the steeper the pitch, the more readily snow will slide off.
- Steep Pitches (7/12 and above): Roofs with a steep pitch are highly effective at shedding snow. The gravitational pull is stronger, and even a slight melting at the interface allows snow to release easily. In very cold climates, however, snow might accumulate for longer periods before sliding, as ambient temperatures might not rise enough to initiate the melt. These roofs often need robust snow retention systems to control the slide.
- Moderate Pitches (3/12 to 6/12): Most residential metal roofs fall into this category. These pitches still shed snow well, especially with solar exposure, but the risk of sudden, large snow slides is higher compared to very steep roofs. This is where snow guards become almost indispensable to break up the snow mass into smaller, safer chunks.
- Low Pitches (below 3/12): Metal roofs on very low-slope applications (e.g., carports, some commercial buildings) will hold onto snow for longer periods, similar to flat roofs. The angle isn't sufficient for natural shedding, meaning the full snow load will be sustained by the structure. For these roofs, calculating the maximum snow load and ensuring the structure can handle it is paramount. Also, drainage becomes a critical consideration to prevent ponding once the snow does melt. Understanding Metal Roof Underlayment and Ventilation Guide is especially important for low-slope roofs to prevent water infiltration.
Calculating Snow Load Requirements for Your Home
Determining the exact snow load your roof needs to withstand is a complex process that combines local data with specific roof characteristics. It's not something to guess at; accurate calculations are essential for safety and compliance.
Factors Determining Local Ground Snow Load
The foundation of any snow load calculation is the local ground snow load. This value is derived from historical weather data and represents the maximum expected weight of snow on the ground in a particular geographical area, often with a 50-year recurrence interval. Building codes, like the International Building Code (IBC) or specific state codes such as the Florida Building Code, typically provide tables or maps that indicate the minimum design ground snow load for different regions.
- Geographic Location: This is the primary factor. Mountainous regions, such as those found in Colorado, Utah, or the Pacific Northwest, will have significantly higher ground snow loads than coastal areas in the southern U.S.
- Elevation: Within a given region, higher elevations almost always correlate with increased snow accumulation and, therefore, higher ground snow loads. A town at the base of a mountain will have a different requirement than a cabin near the summit.
- Local Climate Data: Beyond just averages, local engineers and code officials consider extreme snowfall events, snow density data, and historical records of heavy snowfalls that have tested existing structures.
- Exposure to Wind: Open, windy areas might experience less ground snow accumulation due to drifting, while sheltered areas might see more. However, wind also creates unbalanced roof snow loads, as mentioned earlier.
For example, a home in Aspen, Colorado, might need to design for ground snow loads upwards of 120 psf, while a home in Richmond, Virginia, might only need to account for 20-30 psf. These figures are usually found in local building codes or can be obtained from your local building department.
Converting Ground Snow Load to Roof Snow Load
The ground snow load is a starting point, but your roof's actual design load, known as the "design roof snow load," is different. Several factors modify the ground snow load to account for how snow interacts with a roof.
The conversion typically involves a formula that looks something like this:
Pf = Ce * Ct * Is * Pg
Where:
- Pf: Design flat roof snow load (the load on a perfectly flat roof, before considering pitch)
- Ce: Exposure Factor (accounts for wind exposure: sheltered, partial exposure, full exposure)
- Ct: Thermal Factor (accounts for heat loss from the building: heated, unheated, cold roof)
- Is: Importance Factor (accounts for the building's use: residential, essential facility, etc.)
- Pg: Ground Snow Load (from local codes)
Once the flat roof snow load (Pf) is determined, the actual pitched roof snow load (Ps) is calculated using a Roof Slope Factor (Cs). Steeper roofs shed snow more efficiently, so the load is reduced.
Ps = Cs * Pf
The Roof Slope Factor (Cs) decreases as the roof pitch increases. For very steep roofs (e.g., above 7/12 or 8/12), Cs can be as low as zero, meaning the code assumes all snow will slide off. However, this is where Snow Guards and Winter Metal Roof Issues become crucial for safety.
This entire calculation process is why it's absolutely vital to work with a licensed structural engineer or an experienced architect when designing or significantly renovating a roof in a snowy climate. They will perform these calculations precisely, ensuring your roof meets or exceeds the local requirements. They will also consider special conditions like snow drifts, eaves, and unbalanced loads. You'll often find these requirements under the Metal Roof Building Codes Explained section of your local jurisdiction.
Consulting Local Building Codes and Professionals
Navigating building codes can be overwhelming, but for something as critical as snow load, it's non-negotiable. Every municipality and state will have specific requirements, often adopting a version of the International Building Code (IBC) or a state-specific variant.
- Local Building Department: Your first stop should always be your local building department. They can provide you with the exact ground snow load for your address and clarify any specific local amendments to the building codes. They can also tell you what permits are needed for a metal roof installation, especially if it involves structural changes.
- Licensed Professionals: Do not attempt to calculate design snow loads yourself unless you are a qualified engineer. Engage a licensed structural engineer or an architect who has experience with snow load design in your specific climate. They have the expertise to interpret codes, perform accurate calculations, and ensure your roof's framing and overall structure are adequately designed. This is especially important for metal roofs, where the installation method and panel type (e.g., standing seam vs. corrugated) can influence load distribution.
- Reputable Roofing Contractors: When seeking estimates for a metal roof, ask potential contractors if they are familiar with local snow load requirements and if they work with structural engineers as part of their design process. A trustworthy contractor will emphasize compliance and safety. You can ask them about their experience with Metal Roof Building Codes Explained during your initial consultations.
It's tempting to cut corners to save money, but the structural integrity of your roof is not the place to do it. The cost of preventing a snow-related structural failure pales in comparison to the cost of repairing or rebuilding your home after a collapse.
Designing for Snow: Structural Considerations and Reinforcement
A metal roof designed for snowy conditions isn't just about the panels themselves; it's about the entire underlying structure. Proper framing, robust connections, and thoughtful layering are all essential to withstand the relentless weight of winter.
Proper Framing and Truss Design
The skeleton of your roof – the trusses and rafters – is the primary component responsible for supporting the snow load. In areas with significant snowfall, these structural elements must be designed with greater strength and often closer spacing than in regions with lighter loads.
- Engineered Trusses: Many modern homes utilize pre-engineered roof trusses, which are custom-designed for the specific span, pitch, and anticipated loads (including snow, wind, and dead load from the roofing materials). When ordering trusses, the engineer specifies the design criteria, including the required snow load. It is imperative that these specifications are accurately communicated and adhered to during manufacturing and installation.
- Rafter Spacing and Size: For conventionally framed roofs, the size and spacing of rafters (e.g., 2x8s, 2x10s, 2x12s) are critical. A structural engineer will determine the appropriate dimensions and spacing (e.g., 16 inches on center vs. 24 inches on center) based on the span and the calculated snow load. Larger dimensions and closer spacing provide greater strength and deflection resistance.
- Bearing Walls and Foundations: The forces from the roof's snow load are ultimately transferred down through the walls to the foundation. This means the entire structural system, from the roof deck down to the footings, must be capable of handling the maximum anticipated loads. Weak points anywhere in this load path can lead to failure.
If you're converting an existing roof to metal, especially if it's an older home, it's absolutely crucial to have a structural engineer assess the existing framing. They can determine if the current structure is sufficient for the added weight of a metal roof (which can be lighter or heavier depending on the metal profile chosen, but requires careful consideration) and the local snow loads. They might recommend reinforcing existing rafters or adding new structural members.
Essential Fasteners and Connections
The strength of your roof isn't just in the size of the wood; it's in how everything is securely connected. Fasteners, brackets, and connectors play a vital role in transferring loads and preventing structural members from pulling apart under stress.
- Hurricane Ties and Straps: While often associated with wind resistance, these metal connectors also enhance the integrity of the roof structure by securing rafters and trusses to wall plates and preventing uplift or separation. In snowy regions, they contribute to the overall rigidity, helping the roof resist the complex forces exerted by snow, including unbalanced loads.
- Shear Blocking and Bracing: Proper blocking between rafters or trusses prevents twisting and buckling, especially under heavy, uneven loads. Diagonal bracing can also add significant stiffness to the roof plane, distributing loads more effectively.
- Roof Deck Fastening: The type and density of fasteners used to attach the roof sheathing (plywood or OSB) to the rafters or trusses are also important. The sheathing itself contributes to the diaphragm action of the roof, helping it resist shear forces from snow and wind. The Metal Roof Installation Process: Step by Step outlines how critical these foundational elements are to a long-lasting, resilient roof.
These details might seem minor, but they are crucial for a roof that can reliably handle years of heavy snowfall. Don't let a contractor skimp on these essential structural connections.
Underlayment and Vapor Barrier Considerations
While not directly contributing to the structural strength against snow load, proper underlayment and vapor barriers are critical for protecting the roof deck and interior from moisture damage, which can be exacerbated by snow.
- High-Quality Underlayment: Beneath your metal panels, a robust underlayment acts as a secondary water barrier, protecting your roof deck from any moisture that might penetrate the primary roofing material. In snow-prone areas, a high-quality synthetic underlayment or ice and water shield is paramount. These self-adhering membranes seal around fasteners and provide superior protection against meltwater infiltration, particularly from ice dams or wind-driven snow. This is covered in detail in our guide on Metal Roof Underlayment and Ventilation Guide.
- Vapor Barriers: In colder climates, warm, moist air from inside your home can migrate into the attic and condense on cold surfaces, leading to mold, mildew, and wood rot. A properly installed vapor barrier on the warm side of your insulation prevents this moisture migration. This is especially important for metal roofs, as the panels themselves can get very cold, creating a prime surface for condensation if not managed properly.
- Ventilation: Good attic ventilation works hand-in-hand with insulation and vapor barriers. It helps maintain a cold roof deck, reducing the likelihood of ice dam formation, and allows any moisture vapor that does get into the attic to escape. Without adequate ventilation, even the best insulation can be compromised, leading to long-term problems. The guide on What Goes Under a Metal Roof? Layers Explained further explains these crucial protective layers.
These layers ensure that even if snow is sitting on your roof for extended periods, or if you experience melt-freeze cycles, your home's interior remains dry and protected from the elements.
Managing Snow on Your Metal Roof: Practical Solutions
Once your metal roof is properly installed and designed to meet snow load requirements, proactive management becomes key to a safe and hassle-free winter. This involves controlling snow movement and knowing when and how to intervene.
The Importance of Snow Guards and Snow Retention Systems
As we've touched upon, one of the significant considerations with metal roofs in snowy regions is the potential for sudden, uncontrolled snow slides. This is where snow guards and retention systems become not just recommended, but essential safety features.
- Function of Snow Guards: Snow guards are devices installed along the roof's edge or at various points across the roof surface to hold snow and ice in place, preventing large, dangerous masses from sliding off. Instead, the snow melts slowly and evenly, or sheds in small, manageable pieces. They essentially maintain the "balanced snow load" for longer and control the shedding process. You'll typically find them above entryways, walkways, driveways, and lower roof sections.
- Types of Snow Guards: There are several types to consider:
- Pad-Style Snow Guards: These are individual "pads" or "cleats" attached to the roof panels. They come in various designs and are usually spaced out in a pattern to create friction and break up snow.
- Pipe-Style Snow Fences: These systems consist of one or more horizontal pipes supported by brackets attached to the roof. They create a continuous barrier, ideal for controlling large snow masses on steeper, longer roof slopes.
- Gutter Mount Snow Guards: These are less common for metal roofs but can be used in certain situations to prevent snow from sliding directly into gutters, protecting them from damage.
- Installation Considerations: The placement and number of snow guards depend on factors like roof pitch, snow load, panel type, and eave length. It's crucial that they are installed correctly and securely to the roof's structural components, not just to the metal panels themselves. Incorrect installation can render them ineffective or even damage the roof. Our guide on How to Install Snow Guards on a Metal Roof offers a detailed look at proper installation techniques. Brands like S-5! and Sno-Gem are well-known for their robust snow retention systems that clamp onto standing seam panels without penetrating the metal.
Properly designed and installed snow retention systems are vital for protecting people, property, and even the roof's gutters and other accessories from damage.
Safe Snow Removal Practices (or When to Call a Pro)
While a metal roof often sheds snow naturally, there might be times when manual snow removal is necessary. This could be due to an exceptionally heavy snowfall, an ice storm, or if snow accumulation starts to approach the roof's design load limit.
- Assessing the Need for Removal: Before considering removal, evaluate the snow depth, density, and local weather forecasts. Is the snow incredibly heavy and wet? Is more snow expected? Are there signs of structural stress (e.g., sagging ceilings, sticking doors)? If in doubt, err on the side of caution and consider removal.
- DIY Safety Precautions (if applicable): If you decide to tackle it yourself, extreme caution is paramount.
- Never work alone.
- Use proper safety equipment: a sturdy, stable ladder, a safety harness, fall protection, and non-slip footwear are essential.
- Use appropriate tools: a roof rake with a long handle can remove snow from the ground, or a plastic shovel if on the roof. Avoid metal shovels that can scratch or damage the metal panels.
- Clear snow evenly: Remove snow from all areas of the roof gradually to avoid creating dangerous unbalanced loads. Don't just clear one section entirely.
- Watch for power lines and overhead hazards.
- Be aware of snow sliding: Even with snow guards, clearing can sometimes trigger a slide in other areas.
- When to Call a Professional: For most homeowners, especially with steep pitches, significant snow accumulation, or ice buildup, hiring a professional snow removal service is the safest option. These companies have specialized equipment, trained personnel, and the necessary insurance to perform the job safely and effectively. They understand the nuances of Metal Roof Snow Slides: Dangers and Prevention and how to mitigate risks. They can also perform a thorough Metal Roof Inspection: What to Check to ensure no damage occurred during the storm.
Attempting to remove snow from a roof yourself can be incredibly dangerous, leading to serious injury or damage to your home. When in doubt, call in the experts.
Preventing Ice Dams and Associated Damage
Ice dams are a persistent problem in snowy climates, and while metal roofs can sometimes exacerbate them due to efficient shedding and melt-freeze cycles, they are largely preventable through good building science.
- Ensure Adequate Attic Insulation: The root cause of most ice dams is heat loss from the living space into the attic. A well-insulated attic minimizes this heat transfer, keeping the roof deck cold. This prevents snow from melting prematurely, allowing it to accumulate and shed naturally when the entire roof warms. Pay particular attention to sealing air leaks (e.g., around light fixtures, exhaust fans, attic hatches) that allow warm air to bypass insulation.
- Install Proper Attic Ventilation: Even with good insulation, some heat will inevitably transfer to the attic. Proper ventilation, typically through a combination of continuous soffit vents and ridge vents, allows cold outside air to enter the attic, circulate, and exit, keeping the attic space and roof deck temperatures consistent with the outdoor air. This airflow helps dissipate any accumulated heat. For more on this, refer to our guide on Metal Roof Underlayment and Ventilation Guide.
- Seal Air Leaks in the Ceiling: Beyond insulation, air sealing is critical. Cracks around chimneys, plumbing stacks, electrical wiring, and dropped ceilings can all act as pathways for warm, moist air to enter the attic. Sealing these gaps with caulk or expanding foam significantly reduces heat loss and prevents ice dam formation.
- Consider Heat Cables (with caution): In persistent problem areas where other prevention methods aren't feasible or sufficient, self-regulating heat cables can be installed along the eaves and in gutters to melt pathways for water to drain. However, these are energy-intensive and should be considered a last resort, not a primary solution. They also require proper installation to avoid creating new problems or fire hazards.
Preventing ice dams is a multi-faceted approach focusing on reducing heat loss and maintaining a consistently cold roof deck. It’s an investment that pays off by protecting your home from potentially severe water damage.
Common Misconceptions and Expert Advice
There's a lot of information, and sometimes misinformation, floating around about metal roofs and snow. Let's clear up some common myths and share some expert perspectives to help you navigate winter with confidence.
Metal Roofs and Snow Slides: Separating Fact from Fiction
It's a common image: a huge sheet of snow suddenly crashing down from a metal roof. While this can indeed happen, it's not an inherent flaw of metal roofs, but rather a predictable behavior that needs to be managed.
The Fact: Yes, metal roofs are very efficient at shedding snow, and this shedding can occur in large, sudden masses. This isn't "faulty" behavior; it's a natural consequence of the smooth, low-friction surface and the metal's thermal properties. The potential for a sudden snow slide is a real and serious safety concern that must be addressed.
The Fiction (or Misconception): That all metal roofs will automatically create dangerous snow slides, or that snow guards aren't necessary if your roof has a low pitch. Also, the idea that a steep pitch guarantees snow will never accumulate. While a steep pitch helps, snow can still sit for periods, especially in deep cold, and then release suddenly.
Expert Advice: The solution isn't to avoid metal roofs in snowy climates, but to proactively install appropriate snow retention systems. As discussed in Snow Guards and Winter Metal Roof Issues, these systems are designed precisely to mitigate this very risk. A well-designed system will hold the snow back or allow it to shed gradually and safely, protecting anyone below. Think of it like seatbelts in a car – you don't stop driving because of potential accidents; you put on a seatbelt. Similarly, you install snow guards to manage the natural behavior of a metal roof with snow.
When to Worry: Signs of Excessive Snow Load
How do you know if your roof is struggling under the weight of snow? While modern roofs are built to code, extreme weather events can push them to their limits. It's crucial to recognize warning signs.
- Interior Signs:
- Visible Sagging: Look for noticeable sagging in ceilings, especially on the top floor. This is a critical indicator of structural distress.
- Cracks in Walls or Ceilings: New or expanding cracks, particularly around doorways or windows, can signal that the building frame is flexing under stress.
- Sticking Doors or Windows: If doors or windows that normally open and close smoothly suddenly become difficult to operate, it could indicate shifting in the house's frame.
- Popping or Creaking Noises: While houses make noises, persistent or loud popping, creaking, or groaning sounds coming from the attic or upper floors during a heavy snow event are a serious cause for concern.
- Exterior Signs (if safe to observe):
- Visible Bowing of Rafters or Trusses: If you can safely access your attic, look for any visible bowing or deflection in the roof rafters or trusses.
- Significant Deflection in Ridge Line: From the outside, if the ridge line of your roof appears to be sagging or bowing in the middle, it’s a major red flag.
- Cracks in Foundation or Exterior Walls: In extreme cases, excessive roof loads can even impact the foundation.
Expert Advice: If you observe any of these signs, evacuate the building immediately and call emergency services, your local building department, and a structural engineer. Do not attempt to go onto the roof or remove snow yourself if you suspect structural damage. This is when professional intervention is critical. Remember, timely Metal Roof Inspection: What to Check can often catch issues before they become critical.
Long-Term Maintenance for Snow-Prone Regions
A metal roof is a low-maintenance choice, but "low maintenance" doesn't mean "no maintenance," especially in areas with heavy snow. Proactive steps can ensure its longevity and performance through many winters.
- Annual Roof Inspections: Before winter sets in, arrange for a professional Metal Roof Maintenance Guide inspection. This check should look for:
- Any loose or missing fasteners.
- Damage to sealant or flashing around penetrations (chimneys, vents, skylights).
- Condition of snow guards – are they all intact and securely fastened?
- Condition of gutters and downspouts – clear of debris to ensure proper drainage when snow melts.
- Overall condition of the panels for any signs of wear or corrosion.
- Clear Gutters and Downspouts: This is paramount. Clogged gutters prevent meltwater from draining properly, leading to dangerous ice buildup and exacerbating ice dam issues. Make sure they are clear of leaves, branches, and other debris before the first snowfall.
- Monitor Attic Ventilation: Periodically check your attic to ensure that soffit vents aren't blocked by insulation and that ridge vents are clear. Good airflow is essential.
- Address Issues Promptly: Don't delay repairs. A small leak around a flashing can become a significant problem if left unaddressed when snow and ice are on the roof. Similarly, a damaged snow guard might lead to an uncontrolled snow slide. Prompt Metal Roof Flashing Repair can save you a lot of headache and expense down the line.
- Consider Coatings: For some metal roof types, especially those in very harsh environments, periodic recoating might be recommended to maintain the protective finish and enhance its lifespan. This is less about snow load and more about overall durability.
By combining robust initial design with vigilant maintenance, your metal roof will be an outstanding protector of your home, shrugging off even the harshest winter weather for decades to come.
Disclaimer
Please remember that this article provides general information and should not be considered a substitute for professional advice. Always consult with a licensed structural engineer, architect, or qualified roofing contractor and your local building department to determine the specific snow load requirements and structural design considerations for your particular property and location. Building codes and regulations vary significantly by jurisdiction.