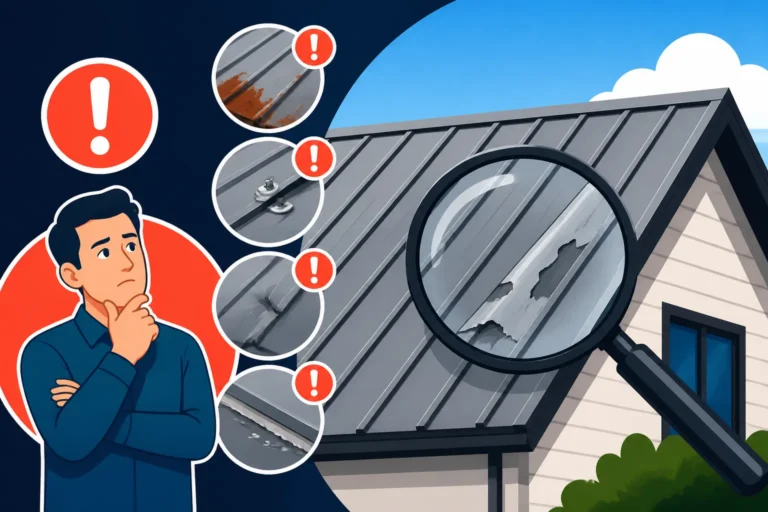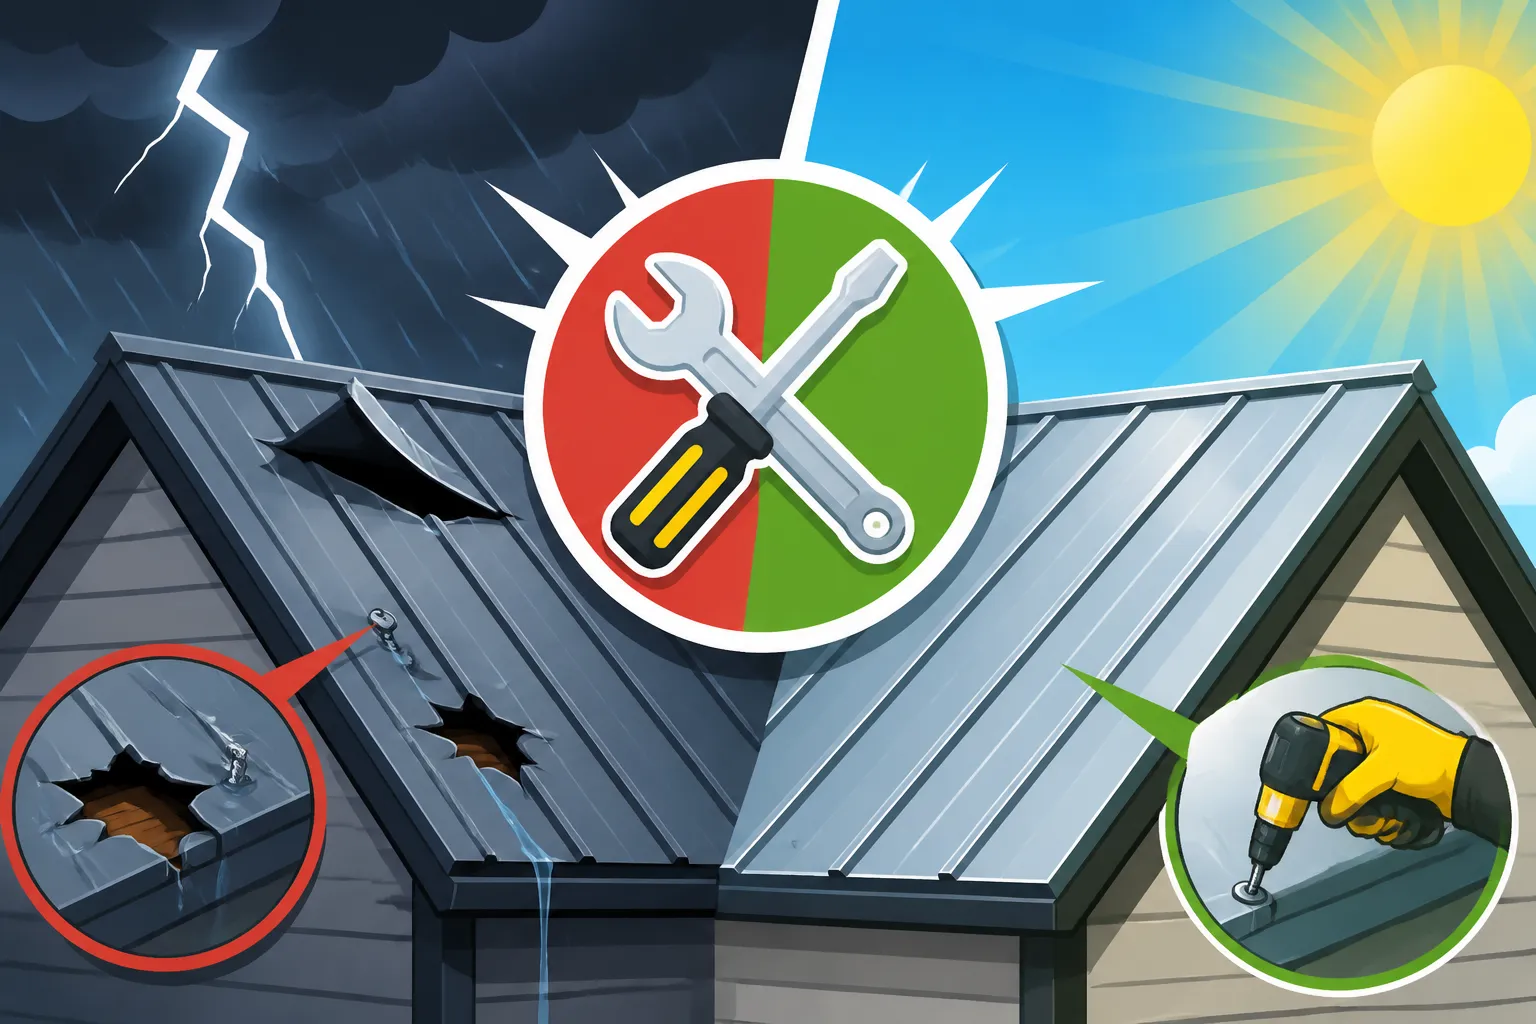
Emergency Metal Roof Problems and Quick Fixes
It’s a nightmare scenario for any homeowner: you’re safe inside during a wild storm, listening to the wind howl and the rain beat down, when suddenly you hear that unmistakable drip, drip, drip coming from above. Or perhaps you step outside after a particularly nasty hail shower and notice panels lifted, bent, or even missing entirely. Metal roofs are renowned for their durability, but even the toughest materials can face unexpected emergencies. When your fortress springs a leak or sustains visible damage, panic is a natural first reaction. This comprehensive guide is here to help you navigate those heart-stopping moments, offering immediate steps, temporary fixes, and crucial advice on when to call in the professionals, ensuring you can protect your home and minimize further damage.
Identifying Common Metal Roof Emergencies
When disaster strikes, the first step is always to understand what you're dealing with. Not all roof problems are created equal, and some require much more urgent attention than others. Being able to quickly identify the type of emergency will help you determine the best course of action and communicate effectively with professionals.
Sudden Leaks and Water Intrusion
This is arguably the most common and terrifying emergency. A sudden leak means water is actively entering your home, threatening your belongings, ceiling, walls, and potentially electrical systems. It's not just an annoyance; it's a structural and safety hazard that needs immediate containment.
Imagine a heavy downpour, and suddenly a dark stain appears on your ceiling, rapidly growing, or worse, water is actively dripping onto your floor. This isn't the slow, insidious leak that might develop over years; this is an urgent situation. The location of the leak inside your home doesn't always directly correspond to the leak point on your roof, especially with metal roofing systems where water can travel significant distances underneath the panels before finding an entry point. Common culprits for sudden leaks include storm damage that has compromised seams or fasteners, failed flashing around chimneys or skylights, or even debris puncturing a panel. The sheer volume of water during a storm can quickly overwhelm even a small breach, turning a minor issue into a major indoor flood. Your immediate goal here is to stop the water flow into your living space, even if it's just temporarily, to prevent widespread destruction.
Storm, Wind, and Hail Damage
Nature can be incredibly powerful, and while metal roofs are excellent at resisting severe weather, they aren't entirely impervious. High winds, heavy hail, and falling debris can inflict significant damage that compromises the integrity of your roof.
Think about the aftermath of a severe thunderstorm or hurricane. You might walk outside to find metal panels that are visibly lifted, bent, or even completely detached and strewn across your yard. These aren't just cosmetic issues; uplifted panels create large openings for water intrusion and can lead to a cascading failure if not secured quickly. Hail, especially large hailstones, can cause dents that, while often cosmetic on thicker gauges, can compromise coatings and lead to accelerated wear or even small punctures on thinner panels. Falling tree branches or other wind-borne debris can create gashes, punctures, or deform entire sections of your roof. In coastal areas or regions prone to tornadoes, the wind forces can be extreme, testing the limits of even robust installations. A compromised roof during or after a storm leaves your entire home vulnerable, making a swift response absolutely critical. For more in-depth information, check out our guide on Metal Roof Storm, Hail & Wind Damage.
Fastener and Seam Failures
Many metal roofing systems rely on fasteners and carefully sealed seams to keep water out. Over time, or due to extreme conditions, these critical components can fail, leading to leaks and structural vulnerabilities.
For exposed fastener systems, the screws that hold the panels down are equipped with rubber washers designed to create a watertight seal. With years of sun exposure, temperature fluctuations, and roof movement, these washers can degrade, crack, and lose their elasticity. When this happens, water can seep in around the screw, leading to drips inside your home. Similarly, fasteners can sometimes back out slightly, especially if not installed with proper torque or if the underlying decking is compromised. This not only creates a leak point but also reduces the roof's wind resistance. For concealed fastener systems, like standing seam, the issues are often with the seams themselves. While designed for superior watertightness, extreme thermal expansion and contraction, improper installation, or impact damage can cause seams to separate or compromise the sealant within them. These failures often manifest as insidious leaks that might only appear during heavy, prolonged rainfall or specific wind directions. Ignoring a few loose screws or a seemingly minor seam separation can quickly escalate into a larger water damage problem, highlighting the need for prompt attention.
Immediate Steps to Take During a Metal Roof Emergency
When you're faced with a sudden roofing crisis, your first reaction might be panic, but taking a few crucial steps immediately can make a significant difference in preventing further damage and ensuring your safety. Staying calm and methodical is key.
Prioritize Safety First
Before you do anything else, assess the situation for immediate dangers. Your personal safety and the safety of your family always come before property.
Is the storm still active? Are there high winds, lightning, or heavy rain? Never, ever attempt to go onto your roof or even near the exterior if hazardous weather conditions persist. Lightning strikes, sudden gusts of wind, or slippery surfaces make it incredibly dangerous. Are there downed power lines near your home or on your roof? Immediately contact your utility company and keep everyone far away from them. Is there extensive water intrusion near electrical outlets or fixtures inside? If so, you might need to turn off the power to the affected area at your main breaker box to prevent electrocution hazards. This is a crucial step that many homeowners overlook in the heat of the moment. Make sure children and pets are kept away from any areas with active leaks or damaged materials. If a large part of your roof has collapsed or is severely compromised, evacuate your home immediately and call emergency services. Even in less extreme cases, ensure the area with the leak is clear of anything valuable or electrical to minimize damage while you figure out the next steps.
Contain the Interior Damage
Once immediate safety is addressed, your next goal is to mitigate interior damage from water. Every minute water pours into your home, the damage spreads.
Grab buckets, large plastic bins, or even trash cans to catch the dripping water. Position them directly under the leak. If the leak is widespread, you might need multiple containers. For persistent drips that are splashing, consider placing a towel or old sheet in the bottom of the bucket to muffle the sound and prevent splashing onto floors or furniture. If water is pooling on furniture, move it to a dry area or cover it with waterproof tarps or plastic sheeting. For ceiling leaks, if the ceiling is bulging with water, you might need to carefully puncture a small hole in the center of the bulge with a screwdriver or awl to release the water into a bucket. This can prevent a larger, uncontrolled collapse of a waterlogged ceiling section. Be prepared for a rush of water if you do this. Lay down towels or old rags on the floor to absorb any overflow or splashes. The quicker you can contain the water, the less extensive the drywall, flooring, and personal property damage will be.
Document Everything for Insurance
Even if you're in a full-blown crisis, take a few moments to document the damage thoroughly. This will be invaluable when filing an insurance claim.
Use your smartphone or camera to take photos and videos of all the damage. Start with wide shots that show the overall affected area, then get close-ups of specific leaks, damaged panels, missing sections, and any interior water damage to ceilings, walls, or personal belongings. Don't forget to capture the date and time, if possible. Document the exterior damage as well – bent flashing, uplifted panels, missing screws, and any debris that caused the damage. If you have a drone, now's the time to use it for an aerial view, provided it's safe to fly. Make notes of when the damage occurred, what you observed, and any actions you took (like placing buckets or calling for help). The more evidence you have, the smoother your insurance claim process will be. Remember, insurers often require clear proof of damage directly caused by a specific event. Having a detailed record helps substantiate your claim and ensures you get the compensation you deserve.
Temporary Fixes for Urgent Metal Roof Leaks
When your metal roof springs a leak, especially during or immediately after a storm, a temporary fix can be a lifesaver. These aren't long-term solutions, but they can buy you precious time and prevent catastrophic interior damage until professional help arrives.
Tarping the Damaged Area
One of the most effective and common temporary solutions for a leaking roof is to cover the compromised section with a sturdy tarp. This creates a waterproof barrier over the damaged area, diverting water away from the leak.
To effectively tarp your roof, you'll need a heavy-duty waterproof tarp that is large enough to cover the entire damaged section and extend several feet beyond it in all directions, especially up the roof slope. You'll also need lumber (2x4s or 2x6s), heavy-duty screws or nails, and a ladder. Always prioritize safety. If the weather is still severe, or if you're uncomfortable on a ladder, do not attempt this yourself; wait for conditions to improve or call for emergency services. Once it's safe, climb onto the roof, carefully unroll the tarp over the damaged area, ensuring it extends well past the leak. You want the tarp to shed water over the leak, not into it. Roll the top edge of the tarp around a piece of lumber and screw or nail it into the roof decking or a sturdy fascia board just below the ridge, if possible. This secures the top and prevents wind from getting underneath. Then, secure the other edges by rolling them around additional lumber pieces and weighting them down or screwing them into the fascia or side eaves. If screws are used directly on the roof, ensure they go into a sturdy underlying structure and are properly sealed. The goal is to make the tarp taut and secure so it won't blow away in the wind and will effectively channel water down and off your roof. This method is often recommended for widespread damage or multiple leak points.
Applying Emergency Sealants and Patches
For smaller, more localized leaks, specialized sealants and patching materials can offer a quicker, though less robust, temporary fix.
These products are designed to adhere to metal surfaces, even if they are slightly wet, although a dry surface is always preferable for optimal adhesion. Keep an emergency roofing sealant, such as a high-quality asphaltic roof cement or a silicone-based sealant, on hand. Products like LePage PL 200 or Henry 209XR are often effective for urgent situations. For minor punctures or small cracks, a specialized metal roof repair tape, often butyl-backed with an aluminum surface, can also work wonders. To apply, first clear away any loose debris from the area. If the leak is from a loose fastener, try to gently tighten it if safe to do so, then apply a generous bead of sealant over the head and washer. For small holes or cracks in the panel, apply the sealant over the entire compromised area, ensuring it overlaps the undamaged metal by at least an inch in all directions. If using patching tape, clean the area as much as possible, cut a piece of tape larger than the hole, peel off the backing, and firmly press it over the leak, ensuring good contact. While these fixes can provide immediate relief, remember they are temporary. They can deter further water ingress but are not a substitute for a permanent repair by a qualified professional. For detailed methods, refer to resources like our How to Fix a Leaking Metal Roof guide.
Using Roofing Cement or Mastic
Roofing cement or mastic provides a thick, sticky, and waterproof barrier that can be effective for sealing small holes, cracks, and around protrusions on a metal roof.
This material is essentially a heavy-duty asphalt-based sealant, often reinforced with fibers for added strength. It comes in a thick consistency, usually in tubs or cartridges, and is applied with a trowel or caulk gun. Its thick nature allows it to fill gaps and create a robust, albeit temporary, seal. When you notice a small hole from a dropped tool or a minor seam separation, scoop out a generous amount of roofing cement and spread it evenly over the damaged area, extending a few inches past the edges. For larger cracks, you can embed a piece of reinforcing fabric or mesh into the mastic while it's still wet, then apply another layer over the top for added durability. The key is to create a seamless, waterproof patch that sheds water. While it can be messy to work with, its ability to conform to irregular shapes and its strong adhesion to metal makes it a valuable emergency tool. Be aware that it can be difficult to remove later, and its appearance might not be aesthetically pleasing, but in an emergency, functionality trumps looks. Ensure you use a product specifically designed for roofing applications and that it's compatible with metal.
Addressing Storm and Wind Damage Immediately
Storms bring a unique set of challenges to metal roofs, from the sheer force of wind attempting to lift panels to the impact of hail and debris. Knowing how to react swiftly can prevent minor damage from escalating into a full-blown structural crisis.
Securing Uplifted or Loose Panels
High winds are notorious for finding weak points in a roof and prying panels loose. An uplifted panel isn't just a leak waiting to happen; it's a dangerous projectile and a pathway for more extensive damage.
If you observe metal panels that are visibly lifted, flapping, or detached on one side, this is a critical emergency. Do not attempt to secure them if high winds are still present or if there's any risk of falling. Once conditions are safe, a temporary repair can involve carefully re-securing the panel. For exposed fastener systems, this might mean re-driving existing screws that have backed out, or adding new, slightly larger screws with oversized washers next to them, ensuring they penetrate solid decking or framing. Always use corrosion-resistant roofing screws with proper sealing washers. For standing seam systems, where panels are mechanically seamed or snapped together, an uplifted panel often indicates a failure in the clips or the seam itself. This is much harder to temporarily fix without specialized tools. A safer, more universal temporary solution for severely uplifted panels, regardless of the system, is to use heavy-duty construction adhesive or specialized metal repair tape to temporarily re-bond the flapping edges to the adjacent panels or roof deck. You can also try to secure the panel's edges by carefully driving screws through the panel and into the framing below, taking care to seal the screw heads with roofing cement or a thick sealant. Again, this is temporary. The underlying cause of the uplift needs professional assessment and repair to ensure long-term stability.
Patching Punctures and Tears from Debris
Flying debris during a storm – tree branches, garden furniture, or even parts of neighboring structures – can cause significant punctures, tears, or gashes in metal roof panels. These breaches are direct invitations for water.
After the storm has passed and it's safe to inspect, identify the location and size of any punctures or tears. For small holes (e.g., from a stray nail or small sharp object), a simple application of a high-quality roofing sealant or mastic, as discussed earlier, might suffice temporarily. Clean the area around the hole thoroughly, apply a generous amount of sealant, and feather the edges for good adhesion. For larger punctures or tears, especially those that look like jagged rips, you'll need a patch. A piece of similar metal roofing material, or even heavy-gauge aluminum flashing, can serve as an effective temporary patch. Cut the patch material to extend several inches beyond the damaged area in all directions. Apply a thick bead of construction adhesive or roofing mastic around the edges of the hole and to the underside of your patch. Carefully place the patch over the hole, pressing down firmly. For extra security, you can seal the edges of the patch with more mastic or specialized roofing tape. In some situations, temporary patches might need to be secured with a few self-tapping screws, always remembering to seal the screw heads to prevent new leak points. This approach aims to create a physical barrier over the breach, preventing water from getting through until a permanent repair can be made.
Dealing with Denting and Cosmetic Damage
Hailstorms, while often not immediately compromising the watertightness of a metal roof, can leave behind a pockmarked surface of dents. While many assume this is merely cosmetic, it's worth assessing quickly.
For thicker gauge metal roofs (like 24-gauge steel or heavier aluminum), hail dents are usually just cosmetic. The material is strong enough to resist puncture, and the paint coating typically remains intact. In such cases, the "immediate fix" is often just documentation for insurance purposes, as the functionality of the roof isn't compromised. However, for thinner gauge metal (like 29-gauge or lighter), particularly on exposed fastener systems, severe hail can sometimes compromise the coating or even create micro-fractures, which could lead to premature corrosion or localized leaks over time. If you suspect structural damage or coating breaches, a temporary fix might involve applying a clear, flexible sealant over the most severely dented areas that seem compromised, just to add an extra layer of protection against the elements. It’s a very temporary measure, primarily for peace of mind. For genuine aesthetic concerns, you would typically wait for a professional assessment after the emergency has passed. Often, insurers will categorize severe denting as cosmetic, but it’s still important to get it on record. Always consult with a roofing professional for a thorough inspection to determine the long-term implications and whether repair or replacement is recommended.
Dealing with Fastener and Seam Failures
Even the most robust metal roofs can experience issues with their fasteners or seams over time, leading to leaks and compromised integrity. These aren't always sudden disasters like storm damage, but they can quickly escalate if not addressed.
Retightening or Replacing Loose Fasteners
On exposed fastener metal roofs, the screws that secure the panels to the roof deck are critical. When these fasteners become loose or their washers degrade, they become prime candidates for leaks.
You might notice screws that are visibly backed out, or you might see rust stains streaking down from a screw head, indicating that water is getting past the seal. If it's safe to access your roof, this is a relatively straightforward temporary fix. You'll need a cordless drill with the appropriate driver bit for your roofing screws, and a supply of new, slightly larger diameter screws with integrated neoprene washers, or just replacement washers. Exercise caution on the roof, especially if it's wet or steep. First, attempt to gently tighten any existing loose screws. Be careful not to overtighten, as this can strip the hole or crush the washer, creating a new problem. The goal is snug, not tight enough to deform the metal. If the existing screw won't tighten or appears to be stripped, remove it and insert a new, slightly larger screw (e.g., going from a #10 to a #12 screw) into the same hole. The larger screw will create a fresh bite into the decking. Ensure the new screw has a durable, high-quality washer that compresses properly to form a watertight seal. If the washer on an existing tight screw looks cracked or worn, you can remove the screw, replace just the washer, and re-install the screw. Always apply a dab of exterior-grade silicone sealant over the newly tightened or replaced screw head for an extra layer of protection. This proactive step can prevent numerous leaks from developing. Learn more about preventing this issue in our guide on Why Is My Metal Roof Leaking at the Screws?.
Sealing Separated or Compromised Seams
For both exposed and concealed fastener systems, the seams where panels join are crucial for waterproofing. When these seams separate or the sealants within them fail, leaks are inevitable.
On exposed fastener roofs, panels often overlap at the seams, and these overlaps are secured with screws and sometimes a bead of sealant. If you see a gap in an overlap seam or dried, cracked sealant, clean the area thoroughly. Then, apply a generous bead of high-quality, exterior-grade silicone sealant (designed for metal roofing) or butyl caulk directly into the gap. Ensure the sealant fills the void completely and adheres well to both metal surfaces. For added protection, you can often apply a strip of self-adhering butyl tape over the entire seam after applying the caulk, pressing it down firmly. For standing seam roofs, where panels interlock, a separated seam is a more complex issue. If the interlock itself has opened, it's typically a sign of significant roof movement or improper installation. A temporary fix might involve carefully applying a high-quality, elastomeric sealant into the open seam, working it deep into the crevice. Products specifically designed for metal roof seams, like Geocel 2300 or SikaLastomer, are excellent choices as they maintain flexibility. This is a stop-gap measure; a truly separated standing seam often requires a professional to re-crimp or replace the affected panel. If you need more detailed guidance on sealing these critical areas, our article on How to Seal Metal Roof Seams and Laps provides further insights.
Repairing Flashing Failures Around Penetrations
Flashing is the metal trim installed around roof penetrations like chimneys, skylights, vents, and wall junctions. It's designed to divert water away, and its failure is a common source of leaks.
When flashing fails, it can be due to corrosion, improper installation, or storm damage that bent or tore it. You'll often see water stains appearing inside near a chimney, vent pipe, or skylight. A temporary repair involves cleaning the area thoroughly and identifying the exact point of failure. If the flashing has separated from a wall or penetration, apply a liberal amount of roofing mastic or a high-quality silicone sealant into the gap, ensuring it creates a watertight bond between the flashing and the adjacent surface. For small tears or holes in the flashing itself, you can use a metal patch, similar to patching a panel, secured with roofing cement or a strong adhesive, and then sealed around the edges. If the flashing is merely loose, you might be able to re-secure it with new roofing screws, remembering to seal the screw heads. For areas where flashing meets the metal panels, ensure any sealant lines are intact. If they’re cracked or deteriorated, carefully scrape out the old sealant and apply a fresh, continuous bead. Always check that water has a clear path to run off the roof and isn't being trapped by the temporary repair. Any temporary flashing repair should always be viewed as a bridge to a professional, permanent fix, as these areas are highly vulnerable.
Winter Emergencies: Snow, Ice, and Condensation
Metal roofs are fantastic performers in winter climates, shedding snow efficiently. However, heavy snow loads, ice dams, and excessive condensation can still pose significant, even emergency, risks if not managed correctly.
Addressing Heavy Snow Loads
While metal roofs are strong and typically shed snow, extremely heavy, wet snow, or prolonged snow accumulation, especially on low-slope roofs, can still create a dangerous snow load. This isn't just a threat to the roof but to the entire structure of your home.
Imagine several feet of heavy, wet snow piling up on your roof for days, potentially followed by freezing rain. This weight can be immense, far exceeding what lighter snow would impose. If you live in an area prone to significant snowfall, it's wise to understand your roof's snow load capacity. Signs of excessive snow load can include doors and windows sticking, new cracks appearing in drywall or ceilings, or visible sagging in the roofline from the interior (though this is rare with proper structural design). In an emergency situation where you fear your roof is overloaded, the immediate action is to call a professional snow removal service. Do not attempt to get on a snow-covered metal roof yourself. It is incredibly slippery and dangerous, and improper removal can damage the roof panels or even cause a sudden shift in weight, leading to structural failure. Professionals use specialized tools and techniques, often working from ladders or lifts, to safely remove snow in stages, preventing uneven weight distribution. If you need to assess your risk, consider looking into guidelines for Metal Roof Snow Load Requirements.
Tackling Ice Dams and Large Icicles
Ice dams form when heat from your home warms the roof, melting snow, which then refreezes at the colder eaves, creating a barrier. This can lead to water backing up under your roof panels, causing significant leaks and interior damage. Large icicles, while often beautiful, are also dangerous projectiles.
You'll see a thick ridge of ice at the edge of your roof, sometimes accompanied by giant icicles. The danger is not just the falling ice but the water trapped behind the ice dam. This trapped water can seep under your metal roof panels, especially if the underlayment or flashing isn't perfectly installed, leading to water intrusion into your attic and walls. The immediate, temporary solution is not to chip away at the ice dam with a hammer, as this can severely damage your metal roof and gutters. Instead, if safe, you can try to create channels through the ice dam to allow trapped water to drain using a hose filled with hot water or calcium chloride ice melt in pantyhose placed across the dam. Never use rock salt as it can corrode your metal roof. For large icicles that pose a direct danger to people or property below, use a long-handled tool to carefully knock them down from a safe distance, ensuring no one is underneath. The best long-term solution involves improving attic insulation and ventilation to prevent heat loss through the roof, which is the root cause of ice dams. For preventing these issues, exploring options like Snow Guards and Winter Metal Roof Issues is highly recommended.
Managing Severe Condensation Issues
While not always a sudden "emergency," severe and unchecked condensation under a metal roof can lead to significant water damage, rust, and mold growth, effectively creating its own kind of emergency over time.
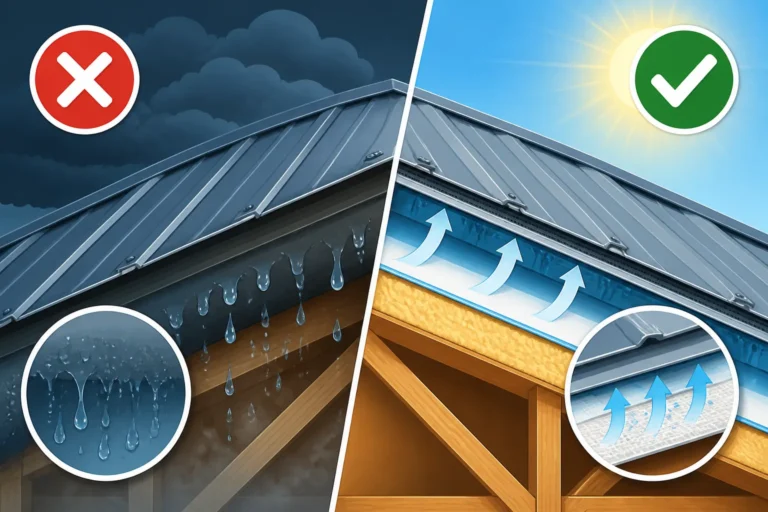
Condensation occurs when warm, moist air from your home rises into the attic and meets the cold underside of your metal roof panels. Without proper ventilation, this moisture condenses into water droplets, which can then drip onto your insulation, ceiling, and structural components. You might notice your attic insulation becoming damp or compressed, a musty odor, or even actual dripping water, especially in colder months. This is a silent enemy that can cause extensive hidden damage. An immediate fix is to ensure any attic vents (soffit, ridge, gable) are clear of obstructions like insulation or debris. If your attic is poorly ventilated, opening attic access doors or windows temporarily can help increase airflow and reduce humidity. Running exhaust fans in bathrooms and kitchens can also help reduce the amount of moist air rising into the attic. However, these are very temporary measures. The long-term solution requires a professional assessment of your attic's insulation levels, vapor barrier integrity, and ventilation system. Sometimes, a "sweating" metal roof can indicate the need for a secondary water barrier or a more robust underlayment. For a detailed dive into this problem, look at our How to Stop Condensation Under a Metal Roof guide.
When to Call a Professional: Beyond DIY
While temporary fixes can save your home in a pinch, there are many situations where a DIY approach is insufficient or simply too dangerous. Knowing when to pick up the phone and call a certified professional is a critical part of emergency preparedness.
Extensive Structural Damage
Some roof emergencies involve damage that goes far beyond a simple leak or a loose panel. If you suspect the structural integrity of your roof or home has been compromised, it's an immediate call to the experts.
This includes situations where a significant portion of your roof has been torn off by wind, where large trees have fallen directly onto your roof causing widespread collapse or severe deformation of the underlying decking and trusses, or if you notice visible sagging of your roofline from the exterior or interior. These are not problems that can be solved with a tarp and some sealant. An untrained eye might miss crucial signs of structural compromise, and attempting to walk on or tamper with a structurally unsound roof can lead to serious injury or further collapse. In these scenarios, you need experienced professionals who can safely assess the damage, shore up compromised sections, and plan for extensive repairs or even a full roof replacement. They have the expertise, equipment, and insurance to handle such complex and dangerous situations. Moreover, engaging a professional early can often streamline the insurance claim process, as their initial assessment carries significant weight.
Safety Concerns and Inaccessibility
If getting onto your roof, or even near the damaged area, poses a significant safety risk, then it's time to call in a professional. Your well-being is paramount.
This includes situations where the weather is still hazardous (high winds, lightning, heavy rain, or ice), where the roof pitch is extremely steep and you lack proper safety equipment, or if the damage involves downed power lines or compromised electrical systems. Professionals have specialized safety training, fall protection gear, and the right equipment (ladders, lifts, harnesses) to safely access and work on damaged roofs, even under challenging conditions. Furthermore, if the damage is located in an inaccessible part of your roof, such as a high peak or a section over a difficult-to-reach area, a professional will have the tools and experience to get there without risking life and limb. Don't let pride or a desire to save a few dollars put you in a dangerous situation. Services like Modernize can quickly connect you with qualified local roofers who can handle even the most challenging emergency repairs safely and efficiently.
Complex Metal Roof Systems
Modern metal roofs come in a wide array of profiles and materials, and some are much more intricate than others. If your roof features a complex design or a specialized material, professional expertise is usually necessary for repairs.
Think about a standing seam metal roof, for instance. While incredibly durable, its interlocking panels and concealed fasteners require specific tools and knowledge to repair or replace without compromising the system's watertightness. Attempting a DIY fix on such a system without the right understanding can easily create more problems than it solves, potentially voiding warranties and leading to expensive future leaks. The same goes for elaborate metal tile or shake profiles, or roofs made from materials like copper or zinc, which require specialized fabrication and installation techniques. Even the underlayment and ventilation systems can be complex, and improper repairs can lead to long-term issues like condensation or accelerated corrosion. A general handyman might not have the specific expertise for metal roofing, especially for complex systems. When faced with such intricate setups, seek out roofers who specialize in metal roof installation and repair. They understand the nuances of different profiles, materials, and fastening systems, ensuring any repair is done correctly and maintains the integrity of your high-performance roof. Our guide on How to Find a Standing Seam Roof Specialist might be helpful.
Navigating Insurance Claims
Dealing with insurance companies after a metal roof emergency can be a daunting process, especially when you're already stressed about the damage. Professionals can be an invaluable asset in this journey.
Many reputable roofing contractors have extensive experience working with insurance claims. They can provide detailed damage assessments and estimates that are formatted in a way that insurance adjusters understand and accept. They can also help you understand your policy, identify what damage is typically covered (like hail or wind), and even act as an advocate on your behalf during negotiations with your insurer. Some contractors will even directly communicate with your insurance company, saving you time and stress. When you're trying to prove the extent of the damage, especially for something like hail dents that might be deemed "cosmetic" but actually compromise the coating, having a professional's expert opinion is crucial. They can often spot subtle damage that an adjuster might overlook. Before settling with your insurance company, it's always wise to get a detailed quote from a qualified roofer. Platforms like Modernize can assist in obtaining multiple competitive quotes, which can be useful during the claims process. Remember, a well-documented claim supported by professional assessments increases your chances of a fair settlement.
Preventative Measures to Avoid Future Emergencies
An ounce of prevention is worth a pound of cure, especially when it comes to your metal roof. Taking proactive steps can significantly reduce the likelihood of facing future emergencies and extend the lifespan of your roof.
Regular Roof Inspections and Maintenance
Just like your car needs regular check-ups, your metal roof benefits immensely from routine inspections and maintenance. Catching small issues early can prevent them from spiraling into costly emergencies.
Schedule professional roof inspections at least once a year, preferably in the spring or fall, and after any severe weather event. A professional will know exactly what to look for: loose or compromised fasteners, failing sealants, damaged flashing around penetrations, signs of corrosion, or debris accumulation. They can identify minor wear and tear before it becomes a major leak source. Beyond professional checks, you can do visual inspections from the ground yourself. Look for any visible changes in the roof's appearance, such as lifted panels, excessive debris, or standing water. Clean your gutters regularly to ensure proper drainage, as clogged gutters can lead to water backing up onto the roof and exacerbating ice dam formation in winter. Keep tree branches trimmed away from your roof to prevent them from rubbing, scratching, or falling on the panels during a storm. Addressing these small items as they arise, often through simple re-sealing or tightening, can dramatically enhance your roof's resilience. Our Metal Roof Maintenance Guide offers more in-depth advice on keeping your roof in top shape.
Ensuring Proper Underlayment and Ventilation
The layers beneath your metal panels and the airflow within your attic play a surprisingly significant role in preventing emergencies, particularly those related to water intrusion and condensation.
A high-quality underlayment, typically synthetic or ice and water shield, acts as a critical secondary barrier to water. In an emergency where a panel is compromised, the underlayment can prevent water from immediately entering your home. Ensuring it's properly installed during initial installation or replacement is paramount. If you're considering a new metal roof, always opt for the best underlayment your budget allows. Equally important is proper attic ventilation. A well-ventilated attic allows warm, moist air to escape, preventing condensation from building up on the underside of your metal panels. This also helps in reducing attic temperatures in summer, which can extend the life of your underlayment and insulation. Poor ventilation is a common culprit behind chronic condensation issues that can lead to rot, mold, and premature corrosion of fasteners and the underside of panels over time. In cold climates, good ventilation is crucial to prevent ice dam formation. If your home experiences persistent condensation or heat buildup, consulting an HVAC or roofing professional about your ventilation system can avert future crises. Dive deeper into this topic with our Metal Roof Underlayment and Ventilation Guide.
Proactive Storm Preparedness
Living in an area prone to severe weather means taking proactive steps before a storm hits, not just reacting afterward. A little preparation can go a long way in protecting your metal roof and your home.
Before hurricane season or typical severe thunderstorm seasons, inspect your roof and surrounding property. Secure or bring inside any loose outdoor items that could become wind-borne projectiles. Trim any overhanging tree branches that could fall onto your roof. Clear your gutters and downspouts to ensure they can handle heavy rainfall. If you know a major storm is approaching, and it's safe to do so, conduct a quick visual check for any existing vulnerabilities like loose flashing or compromised sealants that could be exploited by high winds or heavy rain. Keep an emergency kit handy that includes tarps, bungee cords, duct tape, flashlights, and a first-aid kit. Knowing where your main water shut-off and electrical breaker box are located can be crucial in managing interior damage if water does get in. While metal roofs are excellent at resisting extreme weather, a little forethought can make a significant difference in minimizing damage and ensuring your family's safety during and after a storm.
When a Metal Roof Might Need Replacement
Sometimes, the damage is so extensive, or the roof has reached the end of its practical life, that temporary fixes and localized repairs are no longer economical or effective. Knowing when to consider a full replacement is important for long-term home protection.
Widespread Damage from Catastrophic Events
In the face of a truly devastating event, like a direct hit from a tornado, a hurricane with extreme winds, or a massive tree fall, your metal roof might suffer catastrophic, widespread damage.
If a significant percentage of your panels are missing, severely deformed, or the underlying roof deck and structural components are compromised across a large area, then a full replacement becomes the only viable option. Attempting to patch together a roof that has lost its structural integrity or has too many compromised points is often a false economy. The labor costs for numerous complex repairs can quickly approach or even exceed the cost of a new roof, and you’ll still be left with a patchwork roof that might not offer the same level of protection or warranty as a complete system. In these situations, your insurance company will often deem the roof a total loss, making replacement the logical next step. A professional assessment will confirm if the damage warrants a full replacement, and they can help you navigate the process of choosing a new system and coordinating with your insurer.
Persistent Leaks Despite Repairs
You've tried patching, sealing, and replacing fasteners, but your metal roof continues to spring leaks in different places, or the same leak reappears. This "whack-a-mole" scenario can be incredibly frustrating and expensive.
If you find yourself constantly calling for repairs, or if water intrusion is becoming a recurring problem despite multiple attempts at fixing localized issues, it's a strong indicator that the underlying problem is more systemic. This could be due to widespread aging of the roof system (e.g., all the fastener washers are degrading simultaneously), subtle installation flaws that manifest in various locations over time, or a general breakdown of the roof's waterproofing components due to age and wear. Sometimes, after a certain point, the cost and hassle of continuous repairs outweigh the investment in a new, fully warrantied metal roof system. A professional roofer can conduct a thorough inspection to determine if the roof has reached its point of diminishing returns for repairs. They can identify if the issues stem from the original installation, material fatigue, or widespread minor damage that makes isolated fixes ineffective. Understanding your Metal Roof Cost vs Lifespan Value can help you make an informed decision.
Age and Deterioration
Even though metal roofs are known for their exceptional longevity, they don't last forever. Over many decades, even the best materials can start to show signs of widespread deterioration that signal it's time for a full replacement.
Most metal roofs are warranted for 30-50 years, with some lasting even longer. However, factors like extreme weather exposure, improper installation, or lack of maintenance can accelerate wear. Signs of advanced age and deterioration might include widespread fading, chalking, or peeling of the paint coating; noticeable corrosion or rust development over large sections (especially on exposed fastener systems where paint has worn away); widespread oil canning that has progressed to structural weakness; or brittle or cracked sealants across most of the roof's seams and penetrations. While some cosmetic issues can be addressed with repainting or recoating, pervasive structural deterioration or widespread rust indicates a failing system. If your metal roof is approaching or has exceeded its expected lifespan and is exhibiting multiple signs of widespread wear, a replacement will provide you with renewed protection, improved energy efficiency (with modern coatings), and a fresh warranty, saving you from constant worries and repair bills in the long run.
Metal Roof Warranties and Insurance Considerations
Understanding your metal roof's warranty and how your homeowner's insurance policy handles claims is crucial, especially when facing an emergency. These agreements can significantly impact your financial burden during a crisis.
Manufacturer and Workmanship Warranties
When you invest in a metal roof, you typically receive two main types of warranties: a manufacturer's warranty covering the materials, and a workmanship warranty from the installer. Understanding what each covers is vital.
A manufacturer's warranty protects you against defects in the metal panels themselves, their coatings (e.g., fading, chalking, peeling), and sometimes against perforation from rust. These warranties often last 30-50 years or even more for high-end materials. However, they usually don't cover damage caused by improper installation, neglect, or acts of God (like severe storms). A workmanship warranty, provided by your roofing contractor, covers issues arising from the installation process, such as leaks due to incorrectly fastened panels, improper flashing, or poorly sealed seams. These typically range from 5 to 25 years. In an emergency, if the damage is due to a product defect, you'd contact the manufacturer. If it's due to a flaw in how the roof was put on, you'd contact your installer. It's imperative to review both warranties when your roof is installed and keep them in a safe place. Be aware that some warranties require professional installation by a certified contractor to remain valid. If you have questions about specific coverages, our article on Metal Roof Warranties: Workmanship vs Manufacturer can offer clarity.
Filing an Insurance Claim After Damage
Dealing with your homeowner's insurance company after a metal roof emergency can be a complex and often frustrating process, but it's a critical step in recovering from significant damage.
First, as mentioned earlier, thoroughly document all damage with photos and videos. This is your primary evidence. Next, contact your insurance provider as soon as possible to report the damage and initiate a claim. Be prepared to provide details about the incident (e.g., date of the storm, type of damage). Your insurer will typically send an adjuster to inspect your roof. It's highly recommended to have your chosen roofing contractor present during this inspection. They can point out subtle damage that an adjuster might miss, especially on metal roofs where hail dents might be deemed cosmetic but actually impact the coating or integrity. Be wary of "storm chasers" or contractors who pressure you to sign a contract before your insurance claim is settled. Get multiple estimates from reputable, local contractors, and ensure these estimates detail all repairs needed. Remember that your policy will have a deductible, and there might be exclusions for certain types of damage (e.g., some policies have "cosmetic damage exclusions" for hail on metal roofs). Understanding your policy well before an emergency can save you a lot of grief. Explore topics like Metal Roof Insurance Savings & Discounts or Metal Roof Hail Damage and Insurance Claims for additional insights into navigating insurance after a storm.
Disclaimer
The information provided in this guide is for general informational purposes only and does not constitute professional roofing or structural engineering advice. While we strive to provide accurate and helpful content, actual repair methods, safety precautions, and material recommendations should always be made by a qualified and licensed roofing professional. Attempting DIY repairs on a roof can be dangerous and may void your manufacturer's or installer's warranty. Always prioritize safety and consult with experts for any significant damage or emergency situation.