How Is a Corrugated Metal Roof Installed?
Getting a new roof can feel like a daunting project, especially when you start looking into specific types of materials and their installation processes. You might be feeling overwhelmed by the thought of understanding how a corrugated metal roof, with its distinctive wavy panels, actually gets put onto your home. Don't worry, you're not alone! This guide is here to break down the entire corrugated metal roof installation process, from the initial preparations to securing the final trims, giving you a clear roadmap of what to expect, whether you're tackling it yourself or working with a contractor.
Understanding Corrugated Metal Roofing Before Installation
Before we dive into the nitty-gritty of installation, it's really helpful to understand what corrugated metal roofing is all about. Knowing the basics will make the installation steps much clearer and help you appreciate why certain techniques are used.
What Makes Corrugated Unique?
Corrugated metal roofing stands out with its signature wavy or ribbed profile. This isn't just for looks, though; that unique shape actually adds significant strength and rigidity to the metal panels, making them much more durable than flat sheets of the same material and thickness. Typically, corrugated panels are made from steel, often galvanized or Galvalume-coated for enhanced corrosion resistance. You can also find them in aluminum, though that's less common for residential roofs. The undulating pattern allows for excellent water runoff and gives the roof a distinct, often rustic, aesthetic that many homeowners absolutely adore.
One of the biggest advantages of corrugated panels is their relatively straightforward installation compared to more complex profiles like standing seam. This simplicity can sometimes make them a more appealing option for DIY enthusiasts or those looking for a slightly more budget-friendly approach to metal roofing. If you're wondering about the overall investment, our comprehensive guide on the Corrugated Metal Roof Cost can provide more details.
Key Components You'll Need
Installing a corrugated metal roof isn't just about the panels themselves; it's a system of interconnected parts working together to create a durable, weather-tight covering for your home. You’ll need to ensure you have all the right pieces before you even think about climbing a ladder.
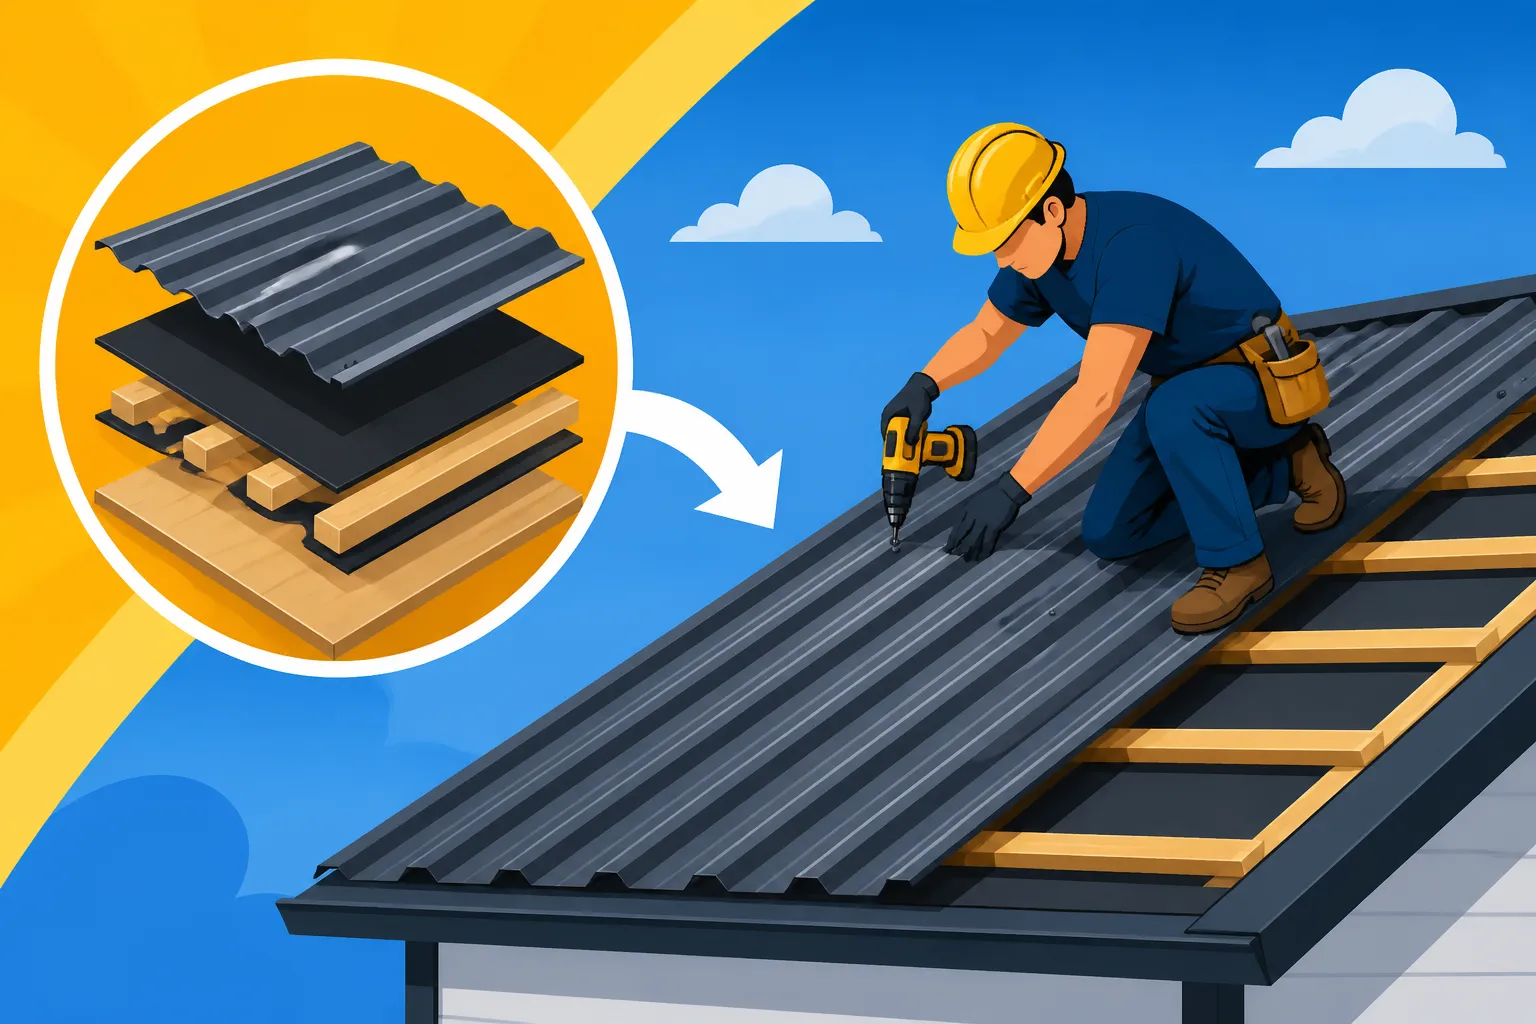
First and foremost, you'll need the corrugated metal panels. These come in various lengths and widths, and the specific profile (the depth and spacing of the corrugations) can vary between manufacturers. You'll also need a robust underlayment. This is a critical layer of protection that goes directly onto your roof deck before the metal panels are installed. It acts as a secondary water barrier, protecting your home if any moisture manages to get past the metal panels, which can happen with extreme weather or unforeseen damage. For a deep dive into this crucial component, check out our article on Metal Roof Underlayment and Ventilation Guide.
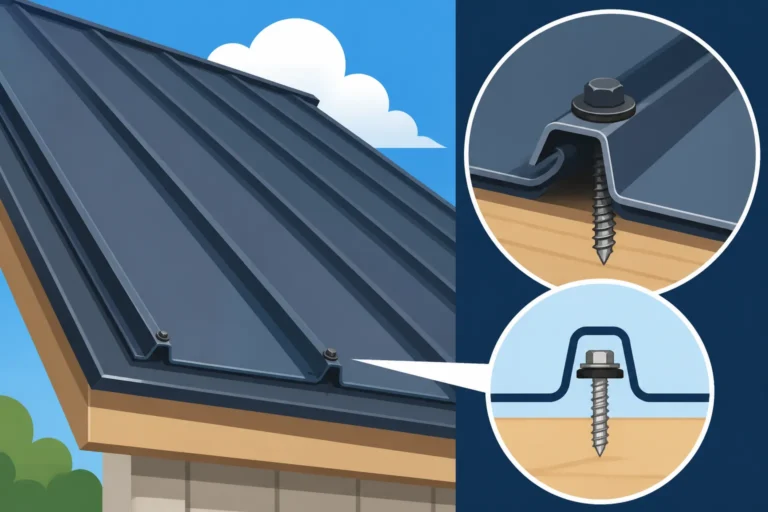
Fasteners are next on the list. For exposed fastener systems, which are typical for corrugated roofs, you'll use self-tapping screws with neoprene washers. These washers are essential because they create a watertight seal around the screw penetration, preventing leaks. The right screws are vital for the integrity of your roof, so understanding Metal Roof Fasteners and Washers Explained is very helpful.
Finally, you'll need various trim pieces and flashing. These are specialized metal components designed to seal and protect the edges, peaks, valleys, and penetrations of your roof. Think eave trim (at the bottom edges), gable trim (along the rake edges), ridge caps (at the very peak), and specialized flashing for chimneys, skylights, and vents. These components ensure a complete, weatherproof seal and a professional finish.
Step-by-Step Corrugated Metal Roof Installation Process
Alright, let's get down to business! Installing a corrugated metal roof is a multi-step process that requires careful planning, precision, and adherence to safety. While some adventurous homeowners might consider DIY Metal Roof Installation: What to Know, for most, it's a job best left to seasoned professionals. Either way, understanding the steps helps you oversee the project or execute it properly.
Preparing Your Roof Deck
Before any metal panel even touches your roof, the underlying structure needs to be ready. This isn't a step to rush through; proper preparation is foundational to a long-lasting roof.
Start with a thorough inspection and any necessary repairs of your existing roof deck. This means checking for any soft spots, water damage, or rot in the plywood or OSB sheathing. Any compromised sections need to be replaced. You want a solid, smooth, and dry surface for your new roof. If you're replacing an old roof, this is also the stage where the old material is typically torn off. However, in some cases, a metal roof can be installed over existing shingles, but that requires specific considerations and can impact the Cost to Replace Shingles With a Metal Roof.
Once the deck is sound, the next critical step is installing the underlayment. This synthetic or felt material is rolled out across the entire roof surface, typically starting from the eaves and working its way up to the ridge. Each row of underlayment needs to overlap the previous one according to the manufacturer's specifications to ensure proper water shedding. Ice and water shield might also be applied in vulnerable areas like eaves, valleys, and around penetrations, especially in regions prone to heavy snow and ice. This underlayment creates that essential secondary barrier, giving you peace of mind.
Laying the First Panels
This is where your roof starts to take shape! The way you lay your first panels sets the tone for the entire installation, so precision is key.
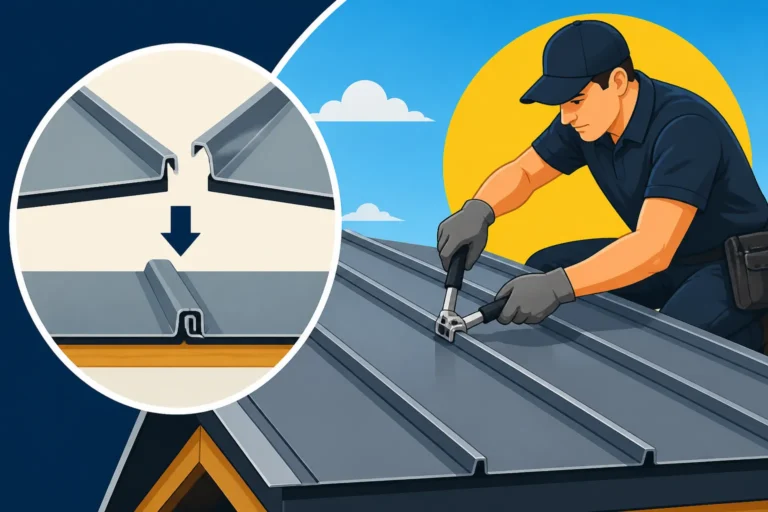
You'll usually start at one corner of the roof, often along the eave and gable edge. The very first panel needs to be perfectly square with the eaves and rake. Even a slight misalignment here can compound as you add more panels, resulting in a crooked roof by the time you reach the other side. This is why many professionals use guide strings or laser levels to ensure a perfectly straight line for the first panel. Once positioned, the first panel is secured using self-tapping screws with neoprene washers. These screws are typically driven into the flat "valleys" of the corrugated profile, rather than on the raised "ribs," to allow for proper water drainage and minimize the chance of leaks. The spacing and pattern of these screws are vital and should follow the manufacturer's guidelines, usually around every 12-24 inches along purlins or direct into the decking.
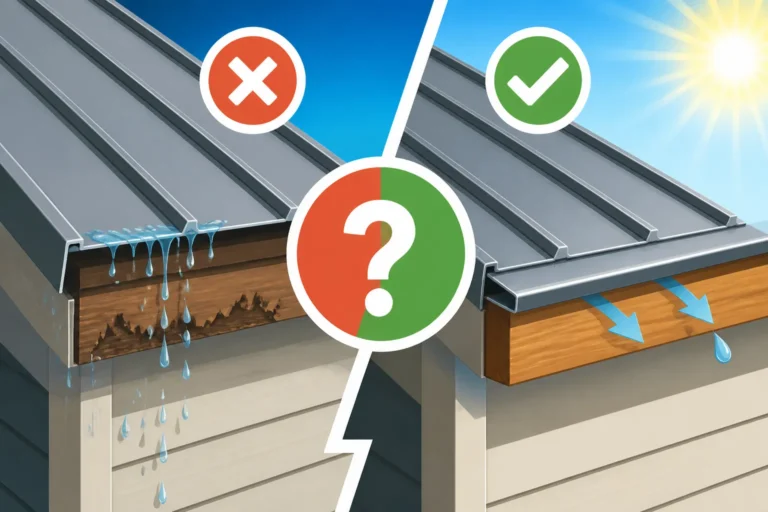
It's crucial to leave appropriate overhangs at the eave and gable ends, usually about 1 to 1.5 inches, to allow water to drip clear of the fascia and siding. This also integrates with your drip edge flashing, which should be installed before the underlayment along the eaves and often before the panels along the rake edges.
Overlapping and Securing Subsequent Panels
With the first panel down, you're ready to start building across the roof. This stage involves carefully overlapping and fastening each subsequent panel.
Each new corrugated panel will overlap the previous one, typically by one or two corrugations. This overlap creates a watertight seal. It's incredibly important to maintain this consistent overlap across the entire roof. In high-wind areas or on low-slope roofs, some installers might use a sealant bead or butyl tape within these overlaps to further enhance weatherproofing. As each panel is positioned, it must be aligned not only with the previous panel but also with the eaves, ensuring that your roof lines remain straight. After proper alignment, the panel is fastened down, again using those self-tapping screws with neoprene washers, following the manufacturer's recommended pattern and spacing. Consistency in screw placement is crucial not just for security but also for the aesthetic uniformity of your roof.
It's also important to consider thermal expansion and contraction. Metal roofs expand and contract with temperature changes. While corrugated panels with exposed fasteners are generally more forgiving in this regard than hidden fastener systems like standing seam, proper fastening still accounts for this movement. Over-tightening screws can deform the metal and inhibit movement, potentially leading to oil canning or even stress fractures over time. Experienced roofers understand this delicate balance.
Trimming and Finishing Edges
The final touches make all the difference, both in terms of aesthetics and, more importantly, weatherproofing. The trim and flashing pieces are what truly seal the envelope of your home.
Eave Trim (Drip Edge): This metal flashing is installed along the bottom edge of the roof. It directs water off the roof and into the gutters, preventing it from running down the fascia board. It's usually installed under the underlayment at the eaves and over the underlayment at the rake edges.
Gable Trim (Rake Trim): These pieces run along the angled edges of your roof (the gables). They cap off the ends of the corrugated panels, providing a clean, finished look and protecting the raw edges of the panels and the underlying roof structure from wind and water infiltration. Gable trim is typically installed after the field panels are in place, overlapping the outermost corrugation.
Ridge Caps: For the peak of your roof, ridge caps are essential. These inverted V-shaped pieces are installed over the joined edges of the panels at the ridge, creating a watertight seal and a neat finish. Proper ventilation components, such as a ridge vent, can also be integrated here to ensure good airflow within your attic, which is critical for your roof's longevity and your home's energy efficiency.
Valley Flashing: If your roof has valleys where two roof planes meet, specialized valley flashing is installed first, before any field panels. This W-shaped or V-shaped metal directs water flow down the valley, preventing pooling and leaks. The corrugated panels are then cut precisely to fit against the valley flashing, often with a sealant applied underneath to ensure a tight seal.
Penetration Flashing: Any protrusions through your roof, such as chimneys, skylights, and vent pipes, require custom flashing. This can involve pipe boots, step flashing, headwall flashing, and counter-flashing, all working in tandem to create a waterproof barrier around these critical areas. Ignoring these details is one of the most common causes of Metal Roof Leak Repair Guide. A reputable contractor will pay meticulous attention to these details. If you're looking for one, platforms like Modernize can help connect you with experienced professionals in your area.
Common Challenges and Best Practices
Installing a corrugated metal roof, while generally simpler than some other metal roof types, still comes with its own set of challenges. Knowing what to watch out for and adopting best practices can save you a lot of headaches (and potential leaks!) down the road.
Preventing Leaks and Water Infiltration
Leaks are probably the biggest fear for any homeowner or installer. The good news is that with corrugated metal, many common leak points are preventable with careful installation.
First, proper fastening is paramount. Those self-tapping screws with neoprene washers are your best friend. Ensure they are driven straight and to the correct torque – snug enough to compress the washer and create a seal, but not so tight that you strip the screw or deform the metal. Over-tightened screws are just as problematic as under-tightened ones. Secondly, consistent overlaps between panels are critical. Follow the manufacturer's recommendation, whether it's one or two corrugations. Any deviation can create a path for water.
Third, sealants and butyl tape should be used strategically, especially in critical areas like panel overlaps on low-slope roofs, around all flashing components, and at the ridge. High-quality exterior-grade sealants designed for metal roofing are a must. Finally, attentive flashing installation around every single roof penetration (chimneys, vents, skylights) is non-negotiable. These are historically the weakest points on any roof and demand expert attention. Don't skim on materials or time here, or you'll be asking yourself Why Is My Metal Roof Leaking Where the Screws Are or elsewhere far too soon.
Working with Different Roof Pitches
The slope or pitch of your roof significantly impacts how a corrugated metal roof performs and is installed.
Steep Pitches: On very steep roofs, corrugated metal offers fantastic water shedding. The main challenge here is safety for the installers. Working on a steep pitch requires specialized safety gear, including harnesses, ropes, and proper tie-off points. From an aesthetic perspective, the corrugations are more pronounced, and the panels can be quite long, making careful alignment even more important to prevent a "wavy" appearance along the eave or ridge. The fasteners on steeper roofs will exert less direct force against gravity, which can sometimes reduce stress on the screws, but proper tightening is still essential to prevent panel uplift in high winds.
Low-Slope Pitches: While corrugated metal is generally excellent for water shedding, very low-slope roofs (typically less than a 3:12 pitch) can present challenges. On these roofs, water moves slower, increasing the risk of pooling or capillary action drawing water through seams. For low-slope corrugated installations, contractors often use more aggressive sealing techniques at overlaps, such as applying a continuous bead of sealant or butyl tape, and may recommend panels with higher ribs or specific fastening patterns to mitigate leak risks. In some very low-slope scenarios, other metal roof profiles, like standing seam, might be a more suitable choice due to their hidden fastener systems and higher seams. You can learn more about this by exploring Metal Roof Cost on a Low-Slope Roof.
Ensuring Long-Term Durability
The beauty of a metal roof is its incredible lifespan, often 50 years or more. But like any investment, it benefits from a little care and attention.
Regular Inspections: Even though metal roofs are low maintenance, periodic inspections are a great practice. Twice a year – once in the spring and once in the fall – visually check your roof from the ground with binoculars, or if safe, from a ladder. Look for any loose fasteners, damaged washers, or signs of rust, particularly around penetrations. If you spot a problem, addressing it early can prevent minor issues from becoming major repairs.
Cleaning: Keep your roof free of debris like leaves and branches, especially in valleys and around chimneys. These can trap moisture and accelerate corrosion. A gentle rinse with a garden hose is usually sufficient, but for stubborn grime or mildew, a mild cleaning solution approved for metal roofs can be used. Avoid abrasive cleaners or high-pressure washers, which can damage the finish. If you need more guidance, our Metal Roof Maintenance Guide offers practical tips.
Addressing Minor Damage: If you notice a loose screw, tighten it. If a washer is cracked, replace it. Small scratches in the coating can be touched up with paint specifically designed for metal roofs to prevent rust. Proactive maintenance is key to unlocking the full potential lifespan of your corrugated metal roof. A good contractor, like those you might find through Modernize, can also provide post-installation maintenance advice or services.
Is DIY Right for You?
The idea of installing your own roof can be appealing, especially when you're thinking about saving on labor costs. But with something as critical as your roof, it's important to be brutally honest about your skills, time, and safety.
When to Call in the Pros
While corrugated metal can be a DIY project for those with significant construction experience, for the vast majority of homeowners, hiring a professional metal roofing contractor is the smartest and safest choice. This is especially true for roofs with:
- Steep Pitches: Working on a steep roof is incredibly dangerous. Professionals have the training, safety equipment, and experience to navigate these conditions safely.
- Complex Rooflines: If your roof has multiple valleys, hips, dormers, or numerous penetrations (chimneys, skylights), the complexity of cutting panels and installing flashing correctly increases exponentially. Errors here almost guarantee leaks.
- Warranty Concerns: Many metal roofing manufacturers offer warranties that are contingent on professional installation by a certified contractor. A DIY installation might void these crucial warranties. Understanding Metal Roof Warranties: Workmanship vs Manufacturer is vital.
- Time Constraints: Installing a roof is a time-consuming project. If you don't have several weeks to dedicate to the task, or if you need the project completed within a specific timeframe (e.g., before hurricane season), a professional crew can get it done efficiently.
- Lack of Specialized Tools: Beyond basic hand tools, metal roofing requires specialized shears, crimpers, and sometimes panel-forming equipment that most homeowners don't own. Renting these can be costly and still requires skill to operate.
A professional contractor not only brings expertise but also proper insurance and licensing, protecting you from liability if an accident occurs on your property. Platforms like Modernize can be a valuable resource for connecting with reputable, experienced metal roofing contractors in your area. You'll want to ask plenty of Questions to Ask a Metal Roofing Contractor Before You Hire to ensure you're getting the best.
DIY Considerations and Resources
If you are a highly experienced DIYer with a relatively simple, low-pitch roof and plenty of time, tackling a corrugated metal roof might be within your capabilities. However, you must prioritize safety above all else. This means investing in a robust safety harness, fall protection systems, and knowing how to use them correctly.
You'll also need to commit to a significant learning curve. Watch instructional videos, read manufacturer installation guides thoroughly, and perhaps even practice cutting and fastening panels on the ground before you get on the roof. Understanding every component and every step of the Metal Roof Installation Process: Step by Step will be your homework.
Consider the cost of tools, not just the panels themselves. You'll need good tin snips, possibly an electric shear for long cuts, screw guns, tape measures, chalk lines, and a robust ladder system. While saving on labor can be significant, the risks and demands of a DIY roof installation are substantial. Be realistic about your limits.
DIY vs. Professional Corrugated Metal Roof Installation
Here’s a quick comparison to help weigh your options:
| Feature | DIY Installation | Professional Installation |
|---|---|---|
| Cost Savings | Significant savings on labor costs. | Higher upfront cost due to labor. |
| Time Commitment | Extremely high; can take weeks or months. | Efficient; typically completed in days or a couple of weeks. |
| Skill & Experience | Requires considerable prior construction/roofing skills. | Expert knowledge and specialized experience. |
| Safety | Higher personal risk of injury. | Crews are trained and equipped for roof safety. |
| Warranty | May void manufacturer warranties; no labor warranty. | Manufacturer and workmanship warranties typically included. |
| Quality of Workmanship | Varies greatly based on individual skill. | Consistent, professional-grade finish. |
| Tools Needed | Requires purchasing or renting specialized tools. | Contractors bring all necessary professional equipment. |
| Permits & Codes | Homeowner responsible for understanding and securing. | Contractor usually handles permits and ensures code compliance. |
| Waste Disposal | Homeowner responsible for debris removal. | Contractor typically handles all waste disposal. |
Disclaimer
Please remember that this guide provides general information about corrugated metal roof installation. Building codes, safety regulations, and manufacturer specifications can vary significantly by location and product. Always consult with local building authorities and follow the specific instructions provided by your chosen metal roofing manufacturer. When in doubt, or for complex projects, always hire a licensed and insured professional metal roofing contractor.