How Do You Flash a Chimney on a Metal Roof?
Dealing with a chimney on a metal roof can feel like a daunting task, especially when you're thinking about potential leaks. The intersection of a durable, slick metal surface and a rigid, often uneven masonry chimney creates a prime spot for water infiltration if not handled perfectly. This guide will walk you through the intricate, yet crucial, process of properly flashing a chimney on a metal roof, ensuring your home stays dry and protected for decades to come.
The Unique Challenges of Chimney Flashing on a Metal Roof
Let's be real, a chimney is a huge penetration in your roof. On any roof type, it's a vulnerable spot, but when you introduce metal roofing, you add a whole new layer of complexity. It's not just about slapping some sealant on; it's about understanding material dynamics, water flow, and long-term durability. Homeowners often underestimate the precision required here, leading to frustrating leaks down the line.
The Dance of Expansion and Contraction
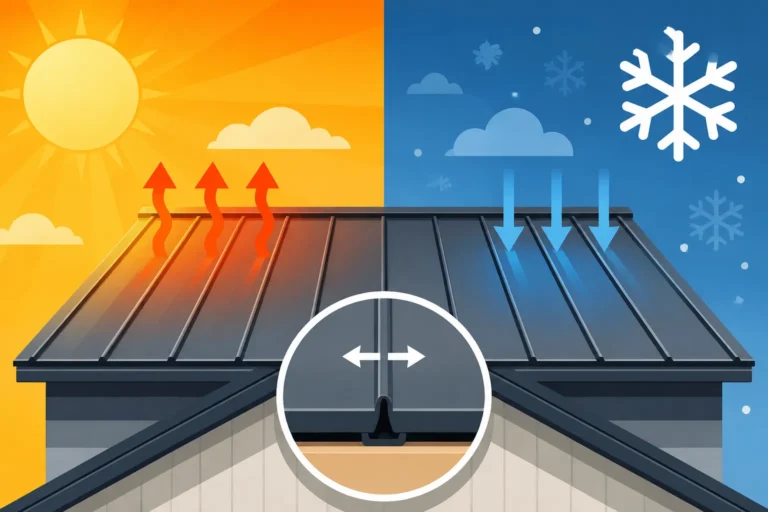
Metal roofs are fantastic for their longevity and resilience, but they have a secret life: they expand and contract with temperature changes. Think about a hot summer day followed by a chilly night—that metal roof panel is constantly shifting, ever so slightly. Now, imagine that panel butting up against a rigid, unmoving chimney made of brick or stone. This constant movement can stress flashing materials and compromise seals if not properly accounted for. Unlike asphalt shingles that have a bit more give, metal demands a more robust and flexible flashing system that can accommodate this "dance" without tearing or separating. It's a fundamental principle to grasp when considering How Metal Roofs Handle Expansion and Contraction.
Water Management Is Key
The primary goal of any flashing system is to direct water away from penetrations and down the roof slope. With a chimney, you have four sides where water can potentially sneak in. The area directly above the chimney creates a "dam" effect, where water can pool if there isn't proper diversion. Similarly, the sides and front of the chimney are direct contact points where even a tiny gap can become a major leak path. It's a constant battle against gravity and surface tension, and a properly installed flashing system is your strongest defense. Without careful attention to detail, even the smallest amount of moisture can find its way under your roofing and into your attic, causing untold damage over time. This is why understanding How to Prevent Leaks on a Metal Roof is so crucial.
Understanding the Components of a Metal Roof Chimney Flashing System
When it comes to flashing a chimney on a metal roof, you're not just dealing with one piece of metal. It's a layered system, each component playing a vital role in creating a watertight seal. If one part is compromised, the whole system can fail. Thinking about these components individually helps demystify the process and highlights why hiring an experienced professional, perhaps through a platform like Modernize, is often the best route for such a critical task.
The Essential Layers: Step Flashing and Apron Flashing
At its heart, chimney flashing relies on a series of metal pieces, meticulously cut and interwoven with the roofing material.
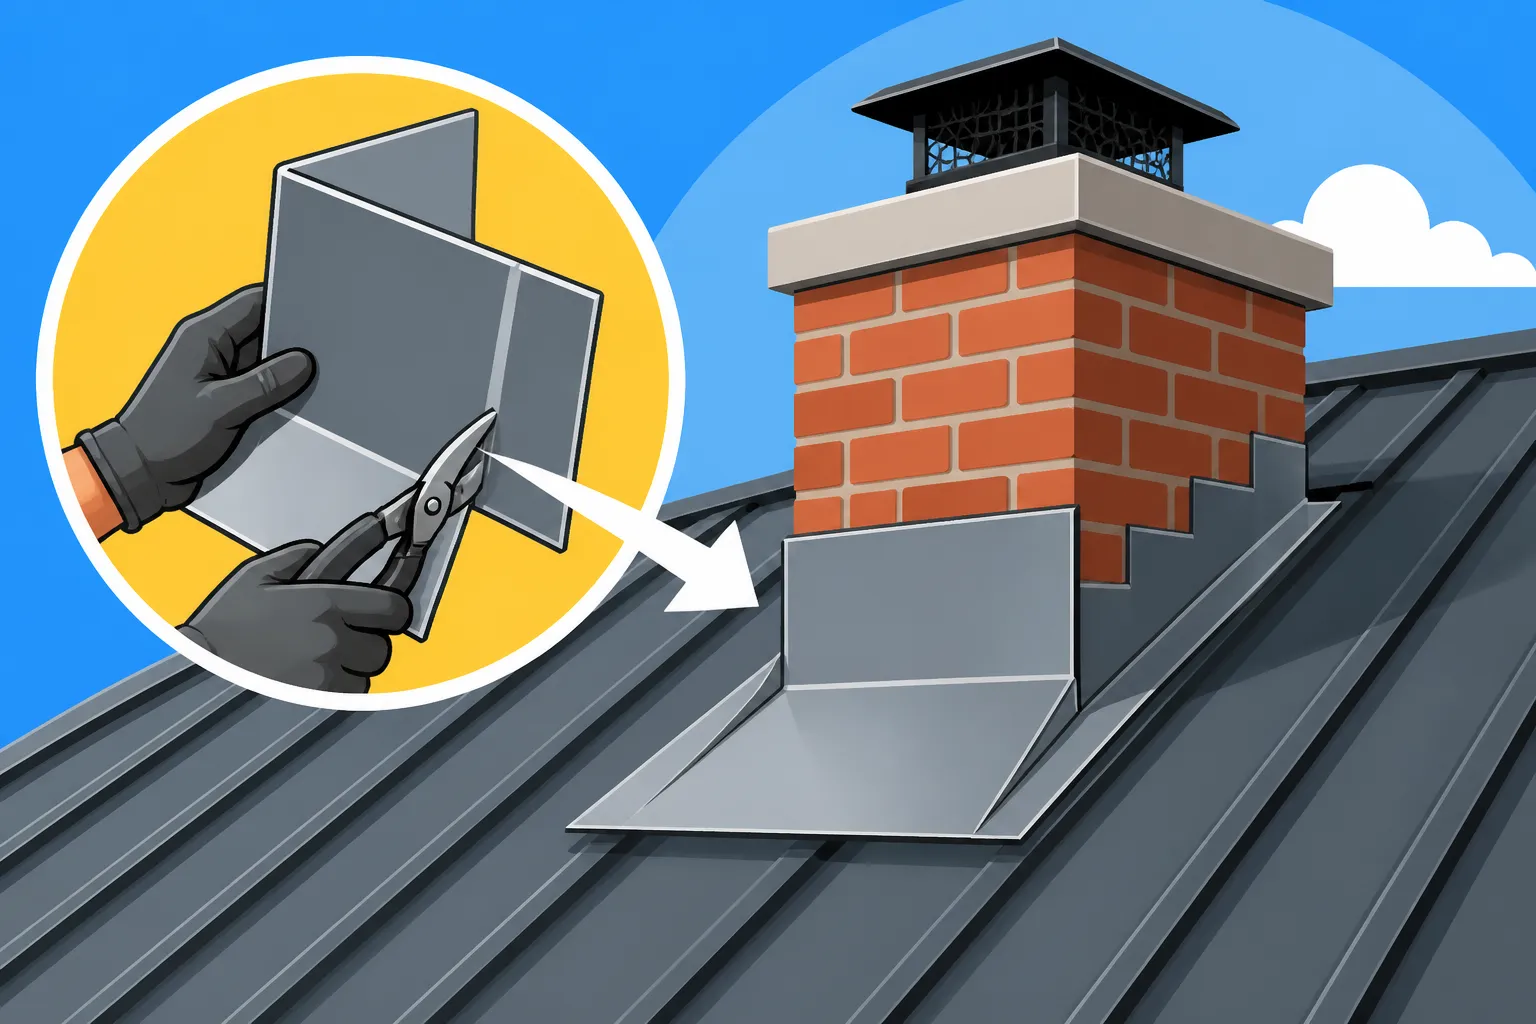
- Apron Flashing: This is usually the first piece you'll encounter on the downhill side of the chimney. It's a continuous piece of metal that extends up the face of the chimney and then flares out onto the roof. Its job is to capture all the water flowing down the roof and direct it around the chimney, away from the penetration. Think of it as a ramp for water. On a metal roof, this apron flashing will often be shaped to integrate seamlessly with the profile of your metal panels, either sitting on top of the ribs or snugly within the valleys.
- Step Flashing: This is where the "shingle" principle comes into play, even with metal. Step flashing consists of individual L-shaped pieces of metal that are installed in sequence along the side of the chimney. Each piece is bent at a 90-degree angle, with one leg extending up the side of the chimney and the other laying flat on the roof deck. Crucially, these pieces are interwoven with your metal roofing panels. So, one piece of step flashing goes down, then a metal panel overlaps it, then another piece of step flashing, and so on. This creates a shingle-like effect, ensuring that any water that gets under one piece of flashing is caught by the next piece below it, directing it back onto the roof surface. For chimneys on the slope, you'll need this on both sides.
Counter Flashing and Sealants: The Final Barriers
Once the base and step flashing are in place, you need the final touch—the protective cap that locks everything down and provides an additional layer of defense.
- Counter Flashing (or Cap Flashing): This is the magic touch that ensures longevity. Instead of just relying on the base and step flashing, counter flashing is installed into the mortar joints of the chimney. Essentially, a narrow groove (called a reglet) is cut into the chimney's mortar, and the top edge of the counter flashing is inserted into this groove. The counter flashing then bends down and overlaps the top edge of the step and apron flashing. This creates a critical barrier, preventing water from running behind the step or apron flashing and into your roof structure. It’s often done in multiple pieces, bent to fit the chimney’s contours and often “kicked out” slightly at the bottom to direct water away.
- Sealants: While flashing does most of the heavy lifting, sealants are crucial for filling in any tiny gaps, especially where the counter flashing meets the mortar joint. However, sealants should never be relied upon as the primary waterproofing method. They are secondary backups. The best sealants for metal roofs are high-quality, UV-resistant, and flexible, such as urethane or silicone sealants, which can withstand the expansion and contraction of the metal without cracking. Products like NovaFlex MR150 from Novagard are often recommended for their durability. Always ensure you're using a sealant designed for exterior use with metal and masonry. For more detail on what to use, check out Best Sealant for Metal Roof Leaks.
This table summarizes the main components:
| Flashing Component | Location | Primary Function | Materials Commonly Used |
|---|---|---|---|
| Apron Flashing | Downhill side of chimney | Directs water around the base of the chimney | Steel (Galvalume, Galvanized), Aluminum, Copper, Zinc |
| Step Flashing | Sides of chimney | Interwoven with roof panels to create a shingle-effect water barrier | Steel (Galvalume, Galvanized), Aluminum, Copper, Zinc |
| Cricket Flashing | Uphill side of chimney (optional) | Diverts water around larger chimneys to prevent pooling | Steel (Galvalume, Galvanized), Aluminum, Copper, Zinc |
| Counter Flashing | Mortar joints of chimney | Covers and protects the top edges of step and apron flashing | Steel (Galvalume, Galvanized), Aluminum, Copper, Zinc |
| Sealants | Seams, reglets, fastener points | Provides secondary waterproofing and flexibility | Urethane, Silicone (High-grade, UV-resistant) |
Understanding these parts helps you appreciate the complexity involved. When you get a quote from a contractor, they should be able to clearly explain how each of these elements will be addressed during your Metal Roof Installation Process: Step by Step.
Step-by-Step Guide to Flashing a Chimney on a Metal Roof
This isn't a DIY job for the faint of heart, or for someone who hasn't worked with metal roofing before. Getting this right is paramount to the integrity of your entire roof system. When considering a project of this magnitude, many homeowners use services like Modernize to find qualified, experienced metal roofing contractors who specialize in complex installations like chimney flashing.
Preparation is Paramount
Before a single piece of flashing is cut or installed, thorough preparation is essential. Skimping here will only lead to headaches later.
- Clear the Area: Start by ensuring the area around the chimney is completely clear of any old flashing, debris, or crumbling mortar. If you're replacing an old roof, a complete tear-off of old materials is often necessary around the chimney to get a clean slate. For an existing metal roof that needs re-flashing, carefully remove the surrounding panels and old flashing without damaging the good roof sections.
- Inspect the Chimney: This is a crucial step that often gets overlooked. Check the chimney masonry itself. Are there any loose bricks, crumbling mortar joints, or cracks that need repair? Flashing is only as good as the surface it's attached to. If your chimney has issues, they need to be addressed by a mason before flashing begins.
- Install Underlayment and Ice & Water Shield: Just like the rest of your metal roof, the area around the chimney needs proper underlayment. An additional layer of self-adhering ice and water shield is highly recommended in this critical zone. It offers a superior secondary waterproof barrier, wrapping up onto the chimney face by at least 6 inches where possible. This is a critical component of Metal Roof Underlayment and Ventilation Guide best practices.
- Cut the Metal Panels: The metal roof panels themselves need to be cut precisely to fit around the chimney. This usually involves custom cuts for the panels that butt up against all four sides of the chimney. Ensure there's a small gap (around 1/4 to 1/2 inch) between the metal panel and the chimney for thermal movement.
Installing the Base and Step Flashing
This is where the magic really starts to happen, creating the initial watertight seal.
- Install the Back Cricket (if necessary): For wider chimneys (generally anything over 30 inches wide across the slope), a "cricket" or "saddle" is essential on the uphill side. This is a small, peaked diversion roof structure built behind the chimney, designed to split the water flow and direct it around the chimney rather than allowing it to pool. It helps prevent debris buildup and standing water, which are prime causes of leaks. The cricket itself is then covered with metal flashing, matching your roof panels or a complementary material.
- Apron Flashing Installation (Downhill Side):
- Measure and cut your apron flashing. This piece needs to extend slightly beyond the chimney's width on both sides and lay flat on the roof for a good distance (typically 4-6 inches beyond the chimney's base, integrated with the roof panels).
- Secure the apron flashing to the roof deck using appropriate fasteners (e.g., roofing screws with neoprene washers), making sure fasteners are on the part that will be covered by the next layer of metal roofing or sealant.
- The vertical leg of the apron flashing should extend up the chimney face, ready for counter flashing.
- Step Flashing Installation (Sides of Chimney):
- Starting from the bottom of the chimney on one side, install your first piece of step flashing. One leg goes up the chimney, the other lays on the roof deck.
- Then, slide a metal roof panel into place, overlapping the horizontal leg of the step flashing.
- Fasten the metal panel according to its specific installation requirements.
- Install the next piece of step flashing, overlapping the previous piece and the new roof panel in a shingle-like fashion. Continue this pattern, working your way up the chimney on both sides, ensuring each step piece is correctly interlocked with the metal roof panels.
- Bend the step flashing slightly upwards against the chimney before installing the counter flashing, creating a small channel for water.
Applying Counter Flashing and Sealing
This is the capping step that makes the whole system truly robust.
- Cutting the Reglets: Using a grinder with a masonry blade, carefully cut a shallow, horizontal groove (reglet) into the mortar joints of the chimney, approximately 1-1.5 inches deep. This groove should be about 1 inch above the top edge of your step and apron flashing.
- Installing the Counter Flashing:
- Cut your counter flashing pieces to fit each side of the chimney, ensuring they overlap at the corners by at least 1 inch.
- Insert the top edge of each counter flashing piece into the pre-cut reglet in the mortar joint.
- Secure the counter flashing in place with lead wedges or masonry anchors, carefully crimping the lead to hold the flashing tightly.
- The counter flashing should extend down to overlap the step and apron flashing by at least 2 inches, ensuring a generous overlap. Some contractors, especially those specializing in complex details, might opt for a custom-bent continuous counter flashing that wraps around the entire chimney for an even cleaner, more robust look.
- Caulking and Sealing: Once all the metal flashing is in place, it's time for the final seal.
- Fill the reglets with a high-quality, flexible, and UV-resistant sealant, making sure it completely encapsulates the inserted counter flashing edge.
- Apply a small bead of the same sealant where the bottom edge of the counter flashing meets the apron and step flashing, just for added assurance, though the overlap should be the primary waterproof barrier.
- Review all fastener points, especially on exposed fastener systems, and ensure they are properly sealed with neoprene washers or appropriate sealant.
This detailed approach for your chimney is just one aspect of comprehensive Metal Roof Installation Process: Step by Step.
Common Pitfalls and How to Avoid Them
Even with the best intentions, mistakes can happen. Knowing what to look out for can save you a world of trouble and expense down the road. If you're working with a professional, make sure they address these points. A great resource for vetting contractors and asking the right questions is through services like Modernize, which can help connect you with experienced roofers in your area.
Incorrect Material Choices
Using the wrong materials for your flashing can lead to premature failure, regardless of how perfectly it's installed.
- Incompatible Metals: Never mix certain metals directly without a barrier. For example, copper flashing should not be in direct contact with steel or aluminum, as galvanic corrosion can occur, leading to rapid deterioration of the less noble metal. Always ensure your flashing material is compatible with your metal roof panels. Common choices for flashing include galvalume steel, aluminum, copper, and zinc, aligning with the main roofing material for compatibility. For more on materials, check out Metal Roofing Materials Compared: Steel, Aluminum, Copper & Zinc.
- Low-Quality Sealants: As mentioned earlier, sealants are secondary, but critical. Using cheap, rigid, or non-UV-resistant caulk will lead to cracking, shrinking, and failure within a few years. Invest in professional-grade urethane or silicone sealants specifically designed for outdoor metal and masonry applications.
- Thin Gauge Flashing: Don't let a contractor use flimsy flashing material. While your roof panels might be 24 or 26 gauge, sometimes thinner material is used for flashing to cut costs. Flashing needs to be robust enough to withstand weather, thermal movement, and potential impact. Ensure the flashing material is of an adequate gauge, preferably matching or exceeding that of your roof panels.
Rushing the Job or Skimping on Sealants
Patience and precision are your best friends when flashing a chimney. Any shortcut can turn into a long-term problem.
- Inadequate Overlap: Each piece of flashing (step, apron, counter) must have sufficient overlap with adjacent pieces and the roof panels. A general rule of thumb is at least a 2-inch overlap. If pieces are cut too short or not overlapped correctly, water can easily wick underneath. This is particularly important where the counter flashing covers the step and apron flashing.
- Poor Reglet Cut or Sealing: If the reglet cut into the chimney is too shallow, uneven, or not properly sealed, water will find its way behind the counter flashing. The sealant in the reglet needs to be pressed firmly into the joint, completely sealing the flashing edge within the mortar.
- Neglecting the Cricket: For larger chimneys, skipping the cricket on the uphill side is a recipe for disaster. Water will inevitably pool behind the chimney, leading to debris buildup, standing water, and eventual leaks. It’s a small extra step that provides significant long-term protection.
- Improper Fasteners: Using the wrong fasteners or over-tightening them can damage the flashing or the roof panels, creating new entry points for water. Always use appropriate roofing fasteners with integrated neoprene washers, and be mindful of proper torque. Over-tightening can crush the washer, while under-tightening leaves room for leaks.
- Ignoring Chimney Condition: As we talked about, the flashing is only as good as the chimney itself. If you flash a leaky, crumbling chimney, you've essentially put a band-aid on a gaping wound. Address any masonry issues first.
By being aware of these common pitfalls, you can better oversee your project or, more importantly, have informed conversations with the roofing professionals you entrust with your home. Ensuring this critical component of your roof is installed correctly will give you peace of mind for decades.
Disclaimer
Please note that this guide provides general information and recommendations. Metal roofing installation, especially complex details like chimney flashing, requires specialized skills, tools, and adherence to local building codes. Attempting this work without proper experience can lead to property damage, voided warranties, and personal injury. Always consult with or hire a qualified and licensed metal roofing professional for any significant roofing project.