Installing a Metal Roof Over Shingles
The thought of a full roof tear-off can be daunting, bringing with it images of messy debris, loud noises, and unexpected costs. Many homeowners dream of installing a durable, long-lasting metal roof but wonder if they absolutely have to go through the disruptive and expensive process of removing their existing shingles first. This comprehensive guide will walk you through everything you need to know about installing a metal roof directly over your current shingle roof, helping you understand if it's the right solution for your home.
The Big Question: Can You Even Do This?
It’s a common misconception that every roof replacement requires a complete tear-off. While removing old roofing material is often the standard, it's actually quite feasible, and often advantageous, to install certain types of metal roofing directly over an existing asphalt shingle roof. This practice, known as a "layover" or "re-roofing," can save you significant time, money, and hassle, but it's not a one-size-fits-all solution. There are specific conditions and requirements that must be met to ensure the success and longevity of such a project.
Understanding the "Why" Behind Layover Installations
The primary drivers for choosing a layover installation are usually cost and convenience. When you avoid a full tear-off, you immediately eliminate several expensive and labor-intensive steps. First, there's the cost of labor associated with removing thousands of pounds of old shingles. Roofing contractors spend valuable time and effort tearing off the old layers, which directly impacts your overall project budget. Second, the disposal of those old shingles isn't free. Landfill fees can be substantial, and the logistics of hauling away such heavy waste add another line item to your bill. By going over the existing roof, these costs are bypassed entirely.
Beyond the financial aspect, the convenience factor is huge. A tear-off project can be incredibly disruptive. Imagine days, or even a week, of loud hammering, dust, and debris around your home. Your yard becomes a staging ground, and your daily routine is inevitably impacted. A layover installation, on the other hand, is often quicker and cleaner. There’s no mountain of old shingles to dispose of, meaning less mess in your yard and a faster completion time. For homeowners with busy schedules or those who simply want to minimize intrusion, this can be a very appealing prospect. It also means less exposure for your home's interior during the roofing process, reducing the risk of unexpected weather damage.
When a Layover is Not an Option
While the idea of skipping a tear-off sounds great, it's crucial to understand that it's not always possible or advisable. The most significant limitation often comes from local building codes. Many municipalities and states have regulations regarding the number of roofing layers allowed on a structure. Typically, this limit is two layers – so if your home already has two layers of shingles, a third layer (even a metal one) will likely be prohibited. This is primarily due to weight restrictions and structural integrity concerns, which we'll delve into shortly.
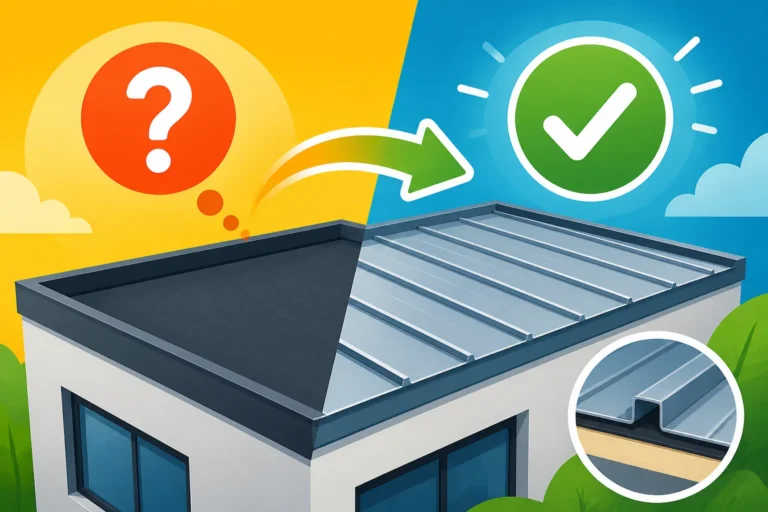
Another major deterrent is the condition of your existing shingle roof. If your current roof is severely damaged, sagging, has widespread rot, or shows signs of significant water infiltration, installing a metal roof over it is a recipe for disaster. The existing problems won't simply disappear; they'll be hidden beneath your new, expensive metal roof, potentially accelerating deterioration of the roof deck and supporting structures. A professional inspection is non-negotiable here. Furthermore, if your roof has a low slope, meaning it's relatively flat, certain metal profiles might not be suitable for a layover, as proper water shedding is even more critical. In such cases, a complete tear-off allows for thorough inspection and repair of the underlying structure, ensuring a solid foundation for your new metal roof.
Advantages of Installing Metal Over Existing Shingles
When the conditions are right, choosing a layover installation for your metal roof brings a host of compelling benefits. It's not just about saving a buck; it's about a smarter, often more efficient approach to upgrading your home's protection and aesthetics. For many homeowners, these advantages can tip the scales significantly in favor of skipping the tear-off.
Cost Savings on Labor and Disposal
Let's be real, cost is often the biggest factor in any home improvement project. Installing a metal roof over existing shingles can translate into substantial savings, primarily by cutting down on labor and waste management expenses. When a roofing crew doesn't have to spend days tearing off layers of old shingles, cleaning up the debris, and loading it into dumpsters, those labor hours are removed from your bill. This reduction in labor isn't just a small amount; it can significantly impact the overall Metal Roof Labor Cost. Think about it: a typical asphalt shingle roof can weigh several tons. Hauling that much material off your roof and then away from your property is a massive undertaking.
Beyond labor, disposal fees for construction and demolition (C&D) waste can really add up. Many landfills charge by weight, and old shingles are heavy. Avoiding these fees means more money stays in your pocket, which you can then allocate to higher-quality metal materials, specialized finishes, or other home improvements. For homeowners on a tighter budget, these savings can make the difference between a dream metal roof being affordable or remaining out of reach. It's smart economics, plain and simple, and one of the biggest draws of a layover project.
Reduced Project Timeline and Disruption
Nobody enjoys having their home turned into a construction zone. The noise, the constant presence of workers, and the general disruption can be a major headache. One of the most underrated benefits of installing metal over existing shingles is the significantly reduced project timeline. Without the tear-off phase, the entire installation process moves much faster. This means less time with loud hammering sounds overhead, less dust and debris floating around, and less impact on your daily life. A project that might take a week or more with a tear-off could potentially be completed in a few days with a layover.
Furthermore, a faster installation means less exposure for your home to the elements. During a tear-off, your roof deck is temporarily vulnerable to rain, wind, or sudden storms. While contractors take precautions, there's always a lingering worry. With a layover, the existing shingle roof acts as an immediate protective barrier, reducing the risk of interior water damage or other weather-related issues during the installation of your new metal roof. This peace of mind, combined with less overall hassle, makes the process much more pleasant for homeowners.
Added Insulation Benefits
Here’s a benefit that many homeowners don't immediately consider: installing a metal roof over existing shingles can actually enhance your home's energy efficiency. The layer of existing shingles, along with the air gap often created by the furring strips used in metal roof installations, can contribute to a secondary layer of insulation. This "dead air space" acts as a thermal break, slowing down heat transfer. In warmer climates, this means your home stays cooler in the summer as the sun's heat struggles to penetrate multiple layers. In colder regions, it can help retain heat, reducing your heating bills.
This extra layer can also help mitigate noise. While modern metal roofs are far quieter than their older counterparts, an additional layer underneath can further dampen the sound of rain, hail, or strong winds, making for a more peaceful indoor environment. The combination of improved thermal performance and enhanced sound dampening adds tangible value and comfort to your home, making the layover option more than just a cost-saving measure but an actual upgrade to your home's envelope.
Disadvantages and Potential Pitfalls
While the benefits of a layover installation are compelling, it's critical to approach this decision with a clear understanding of the potential drawbacks. Skipping the tear-off isn't without its risks, and being aware of these challenges upfront can help you make an informed decision and prepare for any eventuality.
Added Weight and Structural Concerns
Perhaps the most significant concern with installing a metal roof over shingles is the cumulative weight. While metal roofing itself is considerably lighter than traditional asphalt shingles, adding it on top of an existing shingle roof means your home's structure will be bearing the weight of two or more roofing systems. A typical asphalt shingle roof weighs about 2-4 pounds per square foot, and while a metal roof can be as light as 0.5-1.5 pounds per square foot, those extra pounds add up, especially on a large roof. If your home's framing wasn't designed to support such a load, or if it has already been weakened by age, water damage, or pests, this additional weight could pose a serious structural risk.
An experienced roofing contractor will always assess your roof's current condition and your home's structural integrity before recommending a layover. They'll look for signs of sagging, bowing, or other stresses that indicate a weak structure. In some cases, engineering analysis might even be required. Ignoring these structural concerns could lead to long-term issues, including roof deck deformation, ceiling cracks, or even catastrophic failure in extreme weather conditions. This isn't a step to be taken lightly; safety and structural soundness should always come first.
Concealed Issues and Future Problems
One of the biggest arguments against layover installations is what you can't see. When you install a new roof over an old one, any existing problems with the underlying roof deck, flashing, or ventilation are simply hidden. If there's wood rot, mold, pest infestation, or subtle water damage lurking beneath your shingles, it won't be addressed. Instead, these issues will continue to fester, potentially accelerating deterioration and leading to much more expensive repairs down the line. A new, high-performance metal roof might last 50 years or more, but the lifespan of the entire system is only as good as its weakest link – which could be a compromised deck or poor ventilation.
For example, if you have inadequate ventilation, trapping moisture between the old shingles and new metal roof can create an environment ripe for mold growth or accelerated rot of your roof decking. Even minor leaks that were previously undetected could cause significant damage before they become apparent through your new metal roof. A full tear-off offers a crucial opportunity for a comprehensive inspection of the roof deck, allowing for necessary repairs and upgrades to ventilation systems, ensuring a truly long-lasting and healthy roof system. This proactive approach can prevent future headaches and preserve the integrity of your investment.
Warranty and Insurance Implications
It's vital to check with both your metal roofing manufacturer and your homeowner's insurance provider regarding their policies on layover installations. Some manufacturers may void or limit their material warranty if the metal roof is installed over existing shingles, as they cannot guarantee the condition or stability of the underlying layers. They often specify installation requirements that assume a clean, properly prepared roof deck. If something goes wrong years down the line, and it's determined the issue stemmed from the underlying shingle roof, your warranty claim might be denied.
Similarly, your homeowner's insurance might have specific clauses. While metal roofs are often eligible for Metal Roof Insurance Savings & Discounts due to their durability and resistance to fire and wind, installing over shingles could complicate claims. Some insurers might consider the increased weight or the hidden vulnerabilities a higher risk, potentially affecting your premiums or coverage in the event of damage. It's always best to get these details in writing before committing to a layover project. Don't assume; verify. A quick call to your insurance agent and a thorough review of the manufacturer's warranty can save you a lot of grief.
Key Considerations Before You Decide
Deciding whether to install a metal roof over your existing shingles is a big choice, and it's not one to make lightly. Before you even think about calling a contractor, there are several crucial factors you need to evaluate. These considerations will not only help you determine if a layover is even feasible for your home but also ensure that you’re making the best long-term decision for your property and your wallet.
Assessing Your Existing Roof's Condition
This is perhaps the most critical step. You simply cannot put a beautiful, durable metal roof over a failing foundation. A thorough inspection of your existing shingle roof is absolutely essential. Look for:
- Number of Layers: As mentioned earlier, most building codes limit you to two layers of roofing. If you already have two layers of shingles, a layover is typically not allowed. You might be surprised to find a previous owner already did a layover installation.
- Structural Integrity: Are there any visible sags or dips in your roofline? This could indicate compromised trusses or rafters, which definitely require a tear-off and repair before any new roofing material goes on.
- Widespread Damage: If your shingles are severely curled, brittle, cracked, missing in large sections, or show signs of widespread rot or mold, a layover is a bad idea. These issues will only worsen under the metal roof, leading to premature failure of your entire roof system.
- Deck Condition: While you can't see the entire deck, look for signs of water damage from the underside of your attic. Stains, soft spots, or a musty smell are red flags. A compromised roof deck cannot adequately support a new metal roof, regardless of its lightness.
- Ventilation: Is your attic properly ventilated? Poor ventilation can lead to heat and moisture buildup, accelerating the degradation of both the old shingles and the new metal roof, as well as contributing to ice dams in colder climates. Ensure your existing system is robust, or plan for upgrades during the metal roof installation.
A qualified metal roofing contractor will conduct this assessment as part of their initial estimate. Don't skip this step, and don't try to hide problems, as they will inevitably surface later.
Understanding Local Building Codes and HOA Rules
Before any work begins, you must confirm that a layover installation is permitted in your specific area. Building codes vary significantly from one municipality to another, and what’s allowed in one city might be strictly prohibited just a few miles away. Many codes explicitly state the maximum number of roofing layers allowed, often due to structural concerns and fire safety. Failing to adhere to these codes can result in hefty fines, demands to remove the new roof, and complications with insurance claims. It’s crucial to contact your local building department or have your contractor confirm the specific requirements for your property. They are usually well-versed in Metal Roof Building Codes Explained.
Beyond municipal codes, if you live in a planned community, you also need to consult your Homeowners Association (HOA) covenants. HOAs often have strict rules regarding exterior modifications, including roofing materials, colors, and installation methods. Some HOAs may outright prohibit metal roofs, or they might have specific aesthetic guidelines that dictate the type of metal profile (e.g., standing seam only, no corrugated) or a limited palette of approved colors. Ignoring your HOA rules can lead to fines, legal battles, and being forced to remove or alter your new roof. Always get written approval from your HOA board before proceeding with any roofing project. For more details, you can explore resources like HOA Rules and Metal Roofs: What's Allowed.
Choosing the Right Metal Roof Profile for Layover
Not all metal roofing profiles are equally suited for installation over existing shingles. The best choices are typically those that allow for good airflow and minimize direct contact with the old shingle layer, which helps prevent moisture buildup and allows for expansion and contraction.
- Standing Seam Metal Roofs: These are often considered the premium choice for layover installations. Their raised seams and concealed fasteners provide excellent weather protection. More importantly, they are typically installed over a system of furring strips or a similar sub-framing, which creates an air gap between the metal panels and the old shingles. This air gap is crucial for ventilation and can further enhance the insulating properties. For detailed information on this profile, refer to Standing Seam Metal Roof Cost.
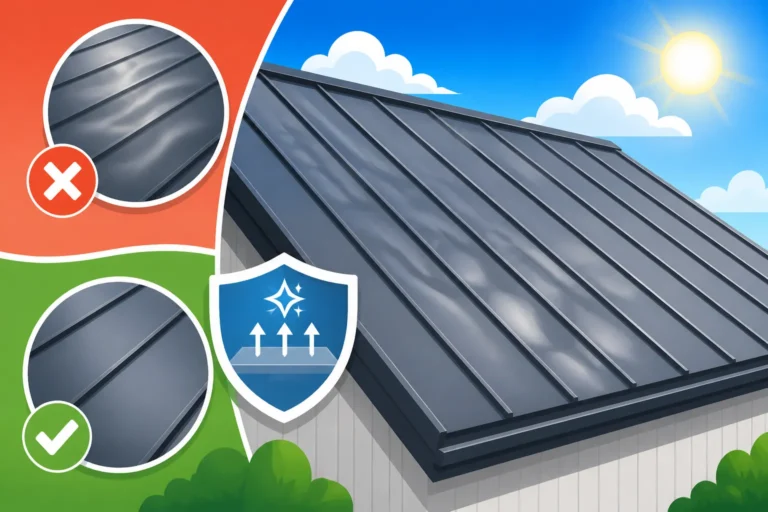
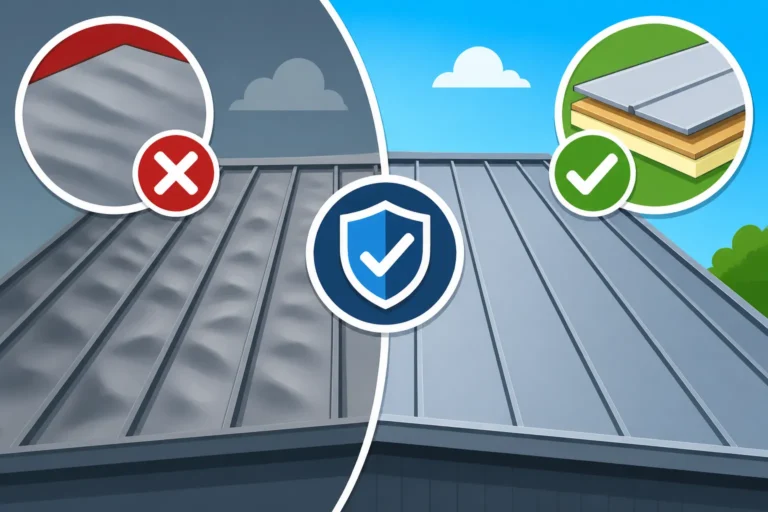
- Ribbed Panel or Corrugated Metal Roofs: While generally more affordable, these exposed fastener systems can also work. However, careful attention to the underlayment and ventilation details is paramount. Using furring strips is highly recommended to create that essential air space and to provide a flat, even surface for the panels, which prevents oil canning (a wavy appearance) that can occur if installed directly over an uneven shingle surface.
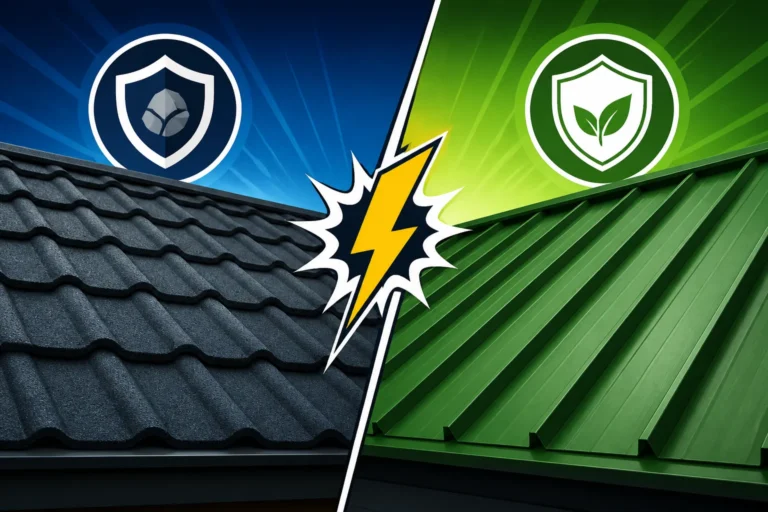
- Metal Shingles, Tiles, or Slates: These profiles are designed to mimic traditional roofing materials and can be installed over existing shingles, but they often require a very flat surface. They may also necessitate more elaborate underlayment systems to ensure proper drainage and prevent moisture from getting trapped.
The key is to select a system that allows for adequate drainage and ventilation, and ideally, creates a thermal break. Discuss the pros and cons of different profiles with your contractor, considering your roof's pitch, desired aesthetic, and budget. Remember, the goal is longevity and performance, not just covering up the old roof.
The Step-by-Step Process: How It's Done
Installing a metal roof over existing shingles isn't just about throwing new panels on top. It's a precise process that requires careful preparation and specific techniques to ensure the new roof performs as intended and lasts for decades. Understanding these steps can give you a better appreciation of the work involved and help you monitor your contractor's progress.
Preparing the Existing Shingle Roof
Even though you're not tearing off the old shingles, preparation is still a critical phase. The existing shingle roof needs to be as clean, flat, and secure as possible to provide a stable base for the metal.
- Thorough Cleaning and Debris Removal: First, the roof must be cleared of any loose debris, branches, leaves, or excessive grit. A leaf blower or a stiff broom can do the trick. You don't want anything trapped under your new roof that could cause bumps or deterioration.
- Repair and Secure Loose Shingles: Any loose, curled, or damaged shingles need to be either removed or firmly secured. Curled shingles can create an uneven surface, which can lead to oil canning or stress points on your new metal panels. A hammer and roofing nails can be used to flatten and secure any raised areas. If shingles are missing, those areas should ideally be patched or filled to maintain a consistent surface.
- Address Protrusions: Any existing vents, pipes, or other protrusions that will interfere with the new metal roof system must be carefully managed. Sometimes, these will be removed and replaced with new flashing designed for metal roofs; other times, the metal roof system will be custom-fitted around them. Ensuring a watertight seal around these elements is paramount. This initial preparation sets the stage for a smooth installation and prevents underlying imperfections from impacting the aesthetic and structural integrity of your new metal roof.
Installing Underlayment and Furring Strips
This phase is arguably the most crucial for a successful layover installation. It directly addresses the challenges of ventilation, moisture, and creating a flat surface.
- Synthetic Underlayment: After the existing shingles are prepared, a high-quality synthetic underlayment is rolled out over the entire roof. This layer acts as a critical secondary moisture barrier, protecting your roof deck from any potential water penetration that might bypass the metal panels, especially around fasteners or seams. Unlike traditional felt paper, synthetic underlayments are more durable, less prone to tearing, and resistant to mold and mildew. They are a non-negotiable component for Metal Roof Underlayment and Ventilation Guide. This barrier also helps protect against damage during installation.
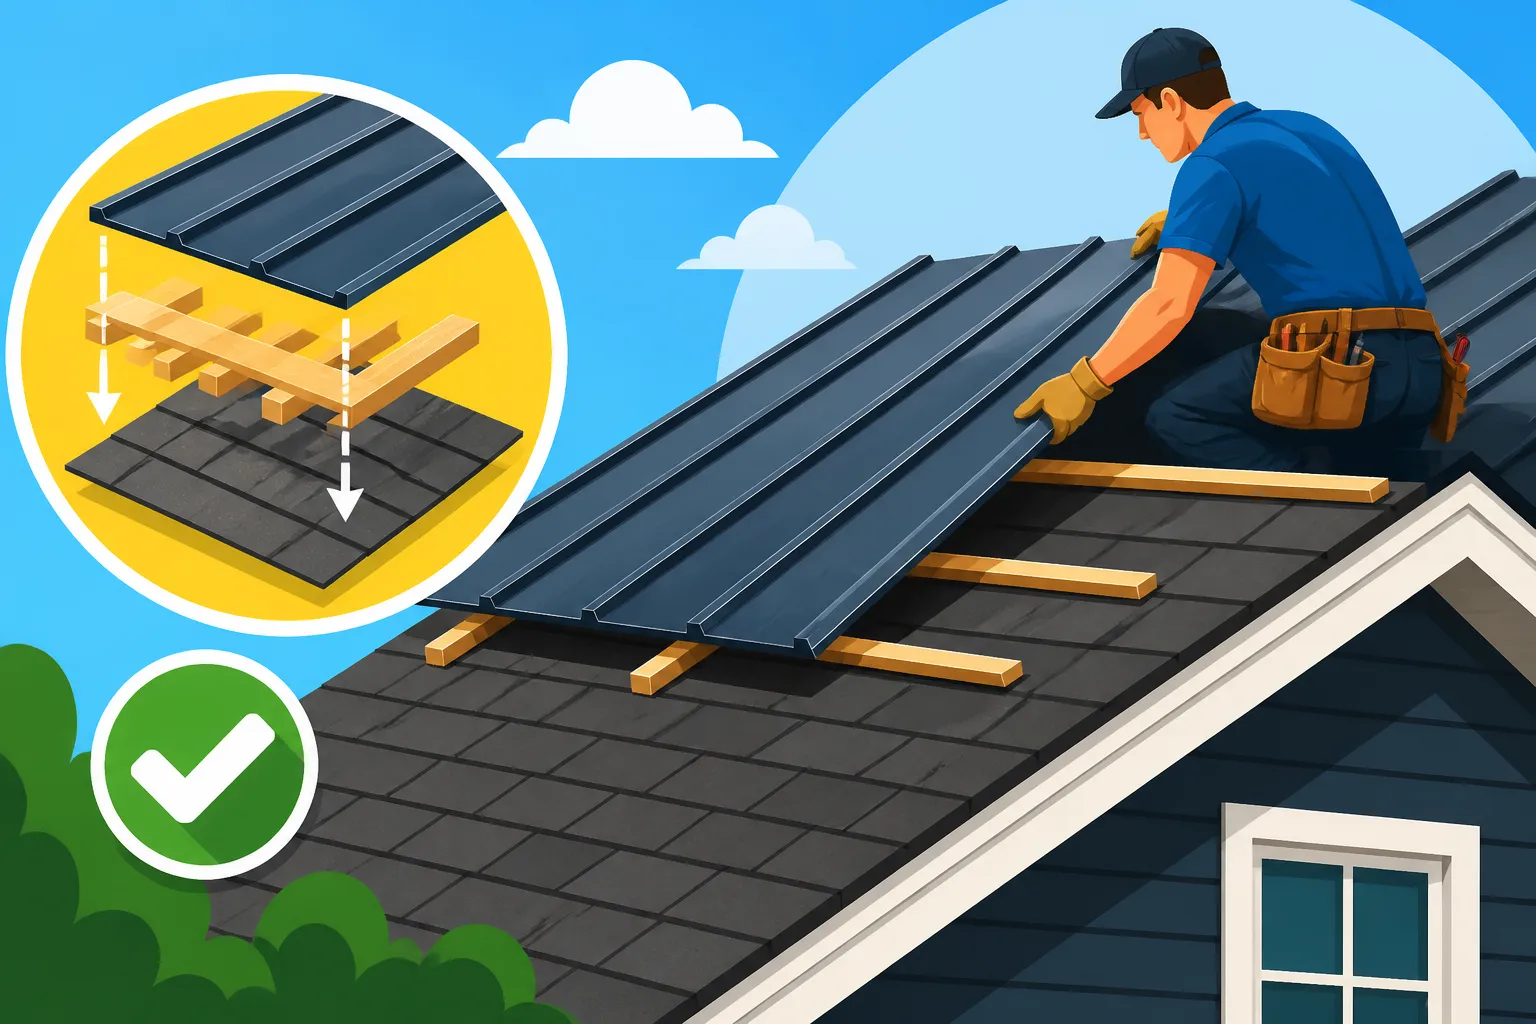
- Furring Strips (Purlins): This is where the magic happens for layover installations, especially with standing seam or ribbed panel systems. Furring strips (typically 1×3 or 2×2 lumber) are installed vertically or horizontally (depending on the metal panel profile and roof pitch) over the synthetic underlayment, secured into the roof rafters. These strips serve several vital functions:
- Creating an Air Gap: This gap promotes airflow, allowing moisture vapor to escape and preventing heat buildup, which is essential for both the longevity of the roof and the energy efficiency of your home. It also helps prevent condensation.
- Providing a Flat Plane: The furring strips create a level surface for the metal panels, smoothing out any minor imperfections or undulations in the existing shingle roof. This is critical for the aesthetic appeal and proper installation of long metal panels, preventing issues like oil canning.
- Secure Fastening: The furring strips provide a robust attachment point for the metal panels, ensuring they are securely fastened to the structural elements of your roof, not just into the old shingles. This significantly enhances the wind resistance and overall stability of the metal roof. For some specific profiles or if you’re concerned about the added cost, you might wonder, "Do You Need Furring Strips for a Metal Roof?" and the answer is generally yes for best results in a layover.
This combination of underlayment and furring strips is what truly differentiates a well-executed layover from a subpar job, ensuring your metal roof performs optimally for its extended lifespan.
Fastening the Metal Panels
With the preparatory layers in place, it's time for the actual installation of your chosen metal panels. This is where skilled craftsmanship truly shines.
- Panel Placement and Alignment: The metal panels are carefully lifted and positioned, starting from one edge of the roof (often the eave) and working across. Precision in alignment is key to ensuring a straight, uniform appearance and proper interlocking or seaming of the panels. Each panel must be checked for squareness before it's permanently fastened.
- Fastening Methods: The method of fastening depends on the metal roof profile:
- Standing Seam: These systems use concealed fasteners. Clips are typically attached to the furring strips, and the metal panels are then snapped or seamed over these clips, completely hiding the fasteners from view. This not only creates a sleek aesthetic but also protects the fasteners from UV degradation and moisture, significantly contributing to the roof's longevity and watertightness.
- Exposed Fastener Systems (e.g., Corrugated, R-Panel): These panels are directly screwed through pre-drilled holes into the furring strips below. High-quality, self-sealing screws with neoprene washers are essential to create a watertight seal around each fastener. Proper torque is important – overtightening can damage the washer, while undertightening can lead to leaks.
- Flashing and Trim: As the panels are installed, specialized flashing pieces are integrated around all roof penetrations (chimneys, skylights, vent pipes) and at the edges of the roof (eaves, gables, ridges). These components, along with trim pieces, are crucial for directing water off the roof and protecting vulnerable areas from leaks. This is a highly specialized part of the installation and requires an experienced hand to ensure everything is sealed correctly and aesthetically pleasing. The whole process is part of a detailed Metal Roof Installation Process: Step by Step.
Throughout the fastening process, quality control is continuous. Each panel, seam, and fastener is checked to ensure it meets the manufacturer's specifications and industry best practices, ensuring a durable, watertight, and attractive metal roof that will protect your home for decades to come.
Materials and Tools: What You'll Need
Successfully installing a metal roof over existing shingles requires not just skill but also the right materials and specialized tools. Understanding these components can help you evaluate quotes, discuss options with your contractor, and generally be more informed about your project. It’s not just about the metal panels; it’s about the entire system working in harmony.
Essential Metal Roofing Components
While the metal panels themselves are the star of the show, a metal roof system is a complex assembly of various components, each playing a critical role in its performance and longevity.
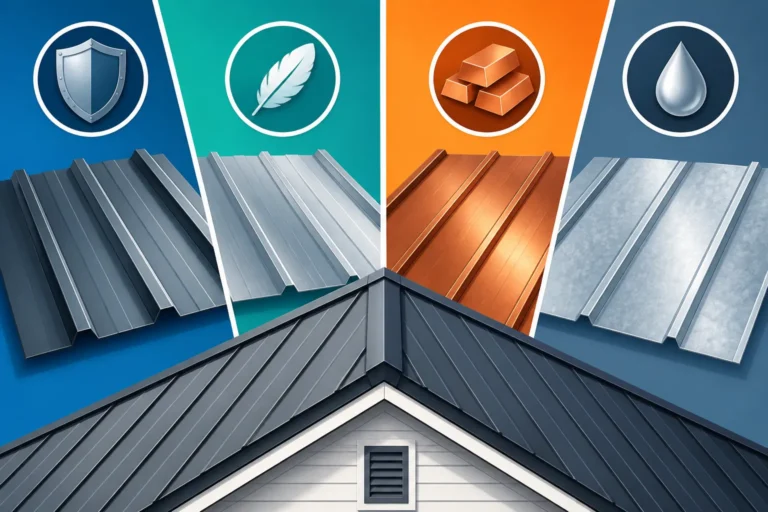
- Metal Panels: The most obvious component, these come in various materials (steel, aluminum, copper, zinc) and profiles (standing seam, corrugated, stone-coated, metal shingles). The choice of material and profile will significantly impact the look, durability, and cost of your roof. For example, Metal Roofing Materials Compared: Steel, Aluminum, Copper & Zinc offers a detailed look at the options. For layovers, as discussed, certain profiles like standing seam are often preferred due to their inherent design advantages in creating air gaps and hidden fasteners. The gauge of the metal, such as a 24 gauge or 26 gauge, also plays a role in durability and cost, with thicker gauges generally being stronger.
- Underlayment: A high-performance synthetic underlayment is crucial. This water-resistant or waterproof membrane is laid directly over the existing shingles (and often directly on the roof deck in tear-off situations) before any furring strips or metal panels go down. It acts as a critical secondary barrier against moisture and helps protect the roof deck during installation. It’s more resilient and durable than traditional felt paper, especially important when it’s part of a multi-layered system.
- Furring Strips (Purlins): Typically 1×3 or 2×2 lumber, these strips are installed over the underlayment and existing shingles. They create the vital air gap for ventilation, provide a flat surface, and serve as solid attachment points for the metal panels. Without them, it would be difficult to achieve proper ventilation, prevent oil canning, and securely fasten the panels.
- Fasteners: These are the screws or clips that hold the metal panels in place. For exposed fastener systems, self-tapping screws with durable, UV-resistant neoprene washers are used. For concealed fastener systems like standing seam, specialized clips are used to secure the panels, which are then seamed over, hiding the clips. The quality and type of fastener are paramount for preventing leaks and ensuring the roof's integrity, especially against wind uplift.
- Flashing and Trim: These are custom-bent metal pieces that seal off edges and transitions. This includes drip edge (at the eaves), gable trim (at the rake edges), ridge caps (at the roof peak), and flashing around chimneys, skylights, and vent pipes. Flashing is absolutely critical for preventing water intrusion at vulnerable points. Each piece must be correctly formed and installed to create a continuous, watertight envelope. These components are integral to a complete Metal Roof Components & Accessories Explained.
Each of these components, from the metal itself to the smallest screw, must be of high quality and appropriate for a layover installation to ensure your new metal roof performs optimally for its long lifespan.
Specialized Tools for Layover Projects
While many general construction tools are used, metal roofing, particularly a layover, requires some specialized equipment to ensure precision and efficiency. A skilled contractor will have all of these on hand.
- Metal Shears or Snips: For cutting metal panels to size or custom shaping around obstacles. Power shears are used for longer, straight cuts, while hand snips are for intricate details. Using the correct cutting tools is essential to avoid damaging the panel's coating and creating sharp edges.
- Seamers: For standing seam roofs, specialized seaming tools (either hand crimpers or motorized seamers) are used to mechanically fold and lock the panel seams together. This creates a strong, watertight, and aesthetically pleasing connection without exposed fasteners.
- Brakes and Hand Benders: Used to custom-fabricate or bend flashing and trim pieces on-site to perfectly fit the unique contours of your roof, ensuring a precise and watertight seal at all edges and penetrations. This is especially important for custom details or unusual roof geometries.
- Screw Guns with Clutch Settings: For exposed fastener systems, a high-quality screw gun with adjustable clutch settings is vital. This prevents overtightening of screws, which can strip the material or damage the neoprene washers, leading to future leaks.
- Measuring Tapes, Squares, and Chalk Lines: Precision is key in metal roofing. Accurate measurements and perfectly straight lines are essential for properly aligning panels and ensuring a visually appealing installation.
- Safety Gear: While not strictly "tools," appropriate safety equipment, including harnesses, fall protection, gloves, and eye protection, is absolutely mandatory when working on a roof, especially with sharp metal panels and at heights.
A contractor well-versed in metal roofing will not only have these tools but also the expertise to use them correctly, which is vital for the quality and longevity of your layover metal roof. If you're comparing bids, ask about the tools and techniques they plan to use for your specific installation; it can be a good indicator of their professionalism and experience.
Cost Implications of a Layover Installation
When you're considering a new roof, cost is almost always at the forefront of your mind. While metal roofs typically have a higher upfront cost than asphalt shingles, a layover installation can significantly alter the initial financial outlay. Understanding where you save money and where potential hidden costs might arise is crucial for budgeting and comparing bids. For a broad overview, you might look at Metal Roof Cost: Complete 2026 Guide.
Breaking Down the Savings
The primary reason homeowners opt for a layover installation is the direct cost savings. These savings are realized in two main areas:
- Reduced Labor Costs: A significant portion of any roofing project's budget is allocated to labor. When you eliminate the tear-off process, you cut out the hours (sometimes days) that a crew would spend removing old shingles, preparing the existing deck, and cleaning up the resulting mess. This translates directly into a lower labor bill. For a typical residential roof, this could easily save you thousands of dollars. The less labor intensive the job, the more competitive a contractor can be with their pricing.
- Eliminated Disposal Fees: Old asphalt shingles are heavy, and disposing of them incurs costs. Landfills charge tipping fees by weight, and then there's the expense of transporting large dumpsters full of debris. By leaving the old shingles in place, you bypass these charges entirely. Depending on your location and the size of your roof, these disposal fees can range from hundreds to over a thousand dollars.
- Faster Project Completion: While not a direct monetary saving, a shorter project timeline means less disruption to your household, potentially saving you from needing to take extra time off work or deal with prolonged inconvenience. This indirect saving in time and stress is a valuable benefit for many homeowners.
These savings can make the initial investment in a durable, long-lasting metal roof more accessible, helping to offset the higher material costs compared to traditional roofing options.
Potential Hidden Costs to Watch Out For
Despite the obvious savings, it would be remiss to ignore potential hidden costs that can arise with a layover installation. Being aware of these ensures you’re not caught off guard.
- Unexpected Deck Repairs: Even with a thorough initial inspection, there's always a slight chance of discovering localized rot or damage to the roof deck once the old shingles are exposed in limited areas (e.g., around penetrations). If significant damage is found, those repairs will add to the cost, potentially necessitating a larger tear-off than initially planned. This is less likely with a layover (since the deck isn't fully exposed), but if the contractor finds obvious issues, they must be addressed.
- Furring Strip and Underlayment Costs: While furring strips and high-quality synthetic underlayment are essential for a successful layover, they do add to the material and labor costs. Some homeowners might incorrectly assume that skipping the tear-off means minimal extra material, but these components are vital and represent a necessary investment. They are part of the detailed Metal Roof Underlayment Cost.
- Permit Fees and Inspections: You will still need a permit for a metal roof installation, even if it's a layover. The cost of a permit varies by municipality, but it's a mandatory expense. Additionally, depending on local codes, intermediate inspections may be required, which can add slight delays if not scheduled efficiently. For example, Do You Need a Permit for a Metal Roof? covers this in more detail.
- Increased Weight & Structural Reinforcement: In rare cases, if a structural engineer determines that your home's existing framing cannot adequately support the combined weight of the old shingles and new metal, you might face the unexpected cost of structural reinforcement. This is typically identified during the initial assessment, but it’s a possibility to keep in mind, especially for older homes.
- Warranty Exclusions: As discussed, some manufacturer warranties might be limited or voided for layover installations. While not a direct cost, it's a risk that could lead to significant expenses if future issues aren't covered, emphasizing the importance of clarifying warranty terms upfront.
A reputable contractor will provide a comprehensive quote that details all materials, labor, and potential contingencies. Always ask for a breakdown and clarify what is and isn't included to avoid surprises.
Finding the Right Contractor for Your Project
Choosing the right roofing contractor is paramount for any metal roof installation, but it becomes even more critical when you're considering a layover project. You need someone with specific expertise in this technique, not just general roofing knowledge. A good contractor will guide you through the process, ensure code compliance, and deliver a high-quality, long-lasting roof. Finding such an expert can feel like searching for a needle in a haystack, but with the right approach, you'll find a professional you can trust.
Vetting Expertise in Layover Installations
Don't just pick the first roofer you find in an online search. Metal roofing, and specifically layover installations, requires a specialized skill set that not all general roofing contractors possess. Here's what to look for:
- Specific Metal Roofing Experience: Ask them directly about their experience with metal roofs. How many have they installed? What types of profiles? A contractor who primarily installs asphalt shingles may not have the nuanced understanding of metal expansion and contraction, flashing details, or proper fastening techniques required for metal.
- Layover Project Portfolio: Request to see examples of their past layover projects. Can they provide addresses or even connect you with previous clients who had metal roofs installed over shingles? Seeing their work firsthand or hearing testimonials can be incredibly reassuring. A contractor should be proud to showcase their specialized work.
- Manufacturer Certifications: Many metal roofing manufacturers offer certification programs for installers. These certifications indicate that the contractor has received specific training on the manufacturer's products and adheres to their installation guidelines, which often extends to layover methods. Look for contractors who are certified by reputable brands like McElroy Metal, Metal Sales, or Englert. This often means they're up-to-date on the latest techniques and product specifications.
- Understanding of Ventilation and Sub-Framing: A contractor experienced in layover installations will deeply understand the importance of furring strips and proper ventilation to create that crucial air gap. They should be able to explain why these components are essential and how they plan to implement them for your specific roof. If they brush off concerns about ventilation or insist on installing directly over shingles without furring strips, that's a major red flag.
- Knowledge of Local Codes: As we discussed, local building codes and HOA rules are critical. Your contractor should be intimately familiar with these regulations in your area and be able to guide you through the permit process. A great way to find experienced contractors who understand these unique needs is by using a service like Modernize, which connects homeowners with pre-vetted local roofing professionals who specialize in metal roofing.
Questions to Ask Potential Roofers
When interviewing contractors, come prepared with a list of pointed questions. This isn't just a friendly chat; it's an assessment of their expertise and professionalism.
- "How many layers of roofing do I currently have, and how will that impact my project?" (A good contractor will assess this early).
- "What type of underlayment do you recommend for a layover, and why?" (Listen for synthetic underlayment and explanations of moisture protection).
- "Will you be using furring strips or a similar sub-framing? Can you explain the benefits and how you’ll install them?" (Crucial for ventilation and a flat surface).
- "What specific metal roofing profiles are best suited for a layover on my roof pitch, and why?" (They should be able to explain the pros and cons of different options like standing seam versus ribbed panels).
- "How do you ensure proper ventilation is maintained or improved with a layover installation?" (This is vital for preventing condensation and extending roof life).
- "What is your approach to flashing and sealing around penetrations when installing over existing shingles?" (This is a common leak point if not done correctly).
- "Can you provide a detailed breakdown of the costs, separating labor, materials, permit fees, and disposal if any?" (Transparency is key).
- "What manufacturer warranties apply to the metal materials, and what is your workmanship warranty? Are there any exclusions for layover installations?" (Get this in writing).
- "Are you licensed, bonded, and insured for this type of work in [Your City/State]?" (Verify these credentials). Learn more about Metal Roof Contractor Licensing, Bonding & Insurance to understand what to look for.
- "Can you provide references from recent clients who had a metal roof installed over existing shingles?" (Always call references!).
By asking these detailed questions, you'll not only gauge their knowledge and experience but also their commitment to quality and transparency. A confident and knowledgeable contractor will welcome your inquiries and provide clear, comprehensive answers. Remember, choosing the right professional is as important as choosing the right materials. To help you in this process, resources like Modernize can help you compare quotes from local specialists who have experience with these specific types of installations.
| Aspect | Tear-Off Installation | Layover (Over Shingles) Installation |
|---|---|---|
| Old Roof Removal | Required; full removal of all existing layers | Not required; existing shingle layer(s) remain |
| Labor Cost | Higher due to removal, cleanup, and disposal | Lower due to elimination of removal and disposal phases |
| Disposal Fees | Incurred for old roofing materials | Generally eliminated |
| Project Timeline | Longer, includes removal phase | Shorter, often by several days |
| Structural Inspection | Full inspection of roof deck; easy to repair | Limited to visible areas; potential for hidden issues |
| Weight on Structure | New roof weight only | Combined weight of new metal + old shingles |
| Ventilation Assessment | Full access to deck for upgrades | Requires careful planning with furring strips for airflow |
| Warranty/Insurance | Typically standard | May have specific clauses or limitations; verify upfront |
| Potential for Hidden Issues | Minimal, as deck is fully exposed | Higher risk of concealing existing problems (rot, mold) |
| Added Insulation | None from old roof layers | Potential for enhanced insulation/thermal break and sound dampening |
Disclaimer
The information provided in this guide is intended for general informational purposes only and does not constitute professional advice. While we strive to provide accurate and up-to-date information, metal roofing practices, building codes, and material specifications can vary significantly by location and change over time. Always consult with a qualified and licensed metal roofing contractor and your local building department to determine the best approach for your specific property and to ensure compliance with all local regulations and safety standards. Neither the author nor the publisher will be held responsible for any losses, damages, or injuries resulting from the use of this information.