Do You Need a Drip Edge on a Metal Roof?
The thought of getting a new metal roof is exciting, full of promises of longevity and resilience. But then you start diving into the details, and terms like "drip edge" pop up, leaving you wondering if it's just another expense or a truly necessary component. It's frustrating to feel like you're navigating a labyrinth of jargon and regulations, especially when you just want to make sure your significant investment is protected. This guide is here to cut through the confusion and explain exactly why a drip edge is not just recommended, but often critical, for your metal roof.
Understanding the Drip Edge: More Than Just a Metal Strip
When you're planning a new metal roof, every component feels like it adds to the total bill, and it’s tempting to look for areas to trim costs. The drip edge might seem like a small, unassuming piece of metal, easily overlooked or dismissed. But as someone who's seen the long-term consequences, I can tell you it's one of those silent heroes that prevents a cascade of expensive problems down the line. It's not just a fancy trim; it's a fundamental part of your roof's defense system.
What Exactly is a Drip Edge and Its Core Purpose?
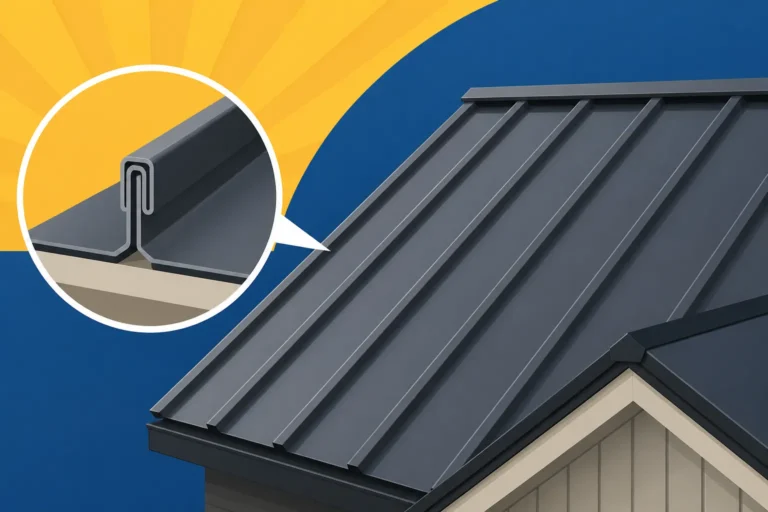
At its most basic, a drip edge is a non-corrosive metal flashing installed along the eaves and rake edges of your roof. It's usually made from materials like galvanized steel, aluminum, or copper, specifically chosen for their durability and resistance to the elements. Its design typically features a small flange that extends down and away from the fascia board. This seemingly simple extension serves a crucial purpose: to direct water runoff away from the roof’s edge and into the gutter system, or simply away from the home's structure if gutters aren't present.
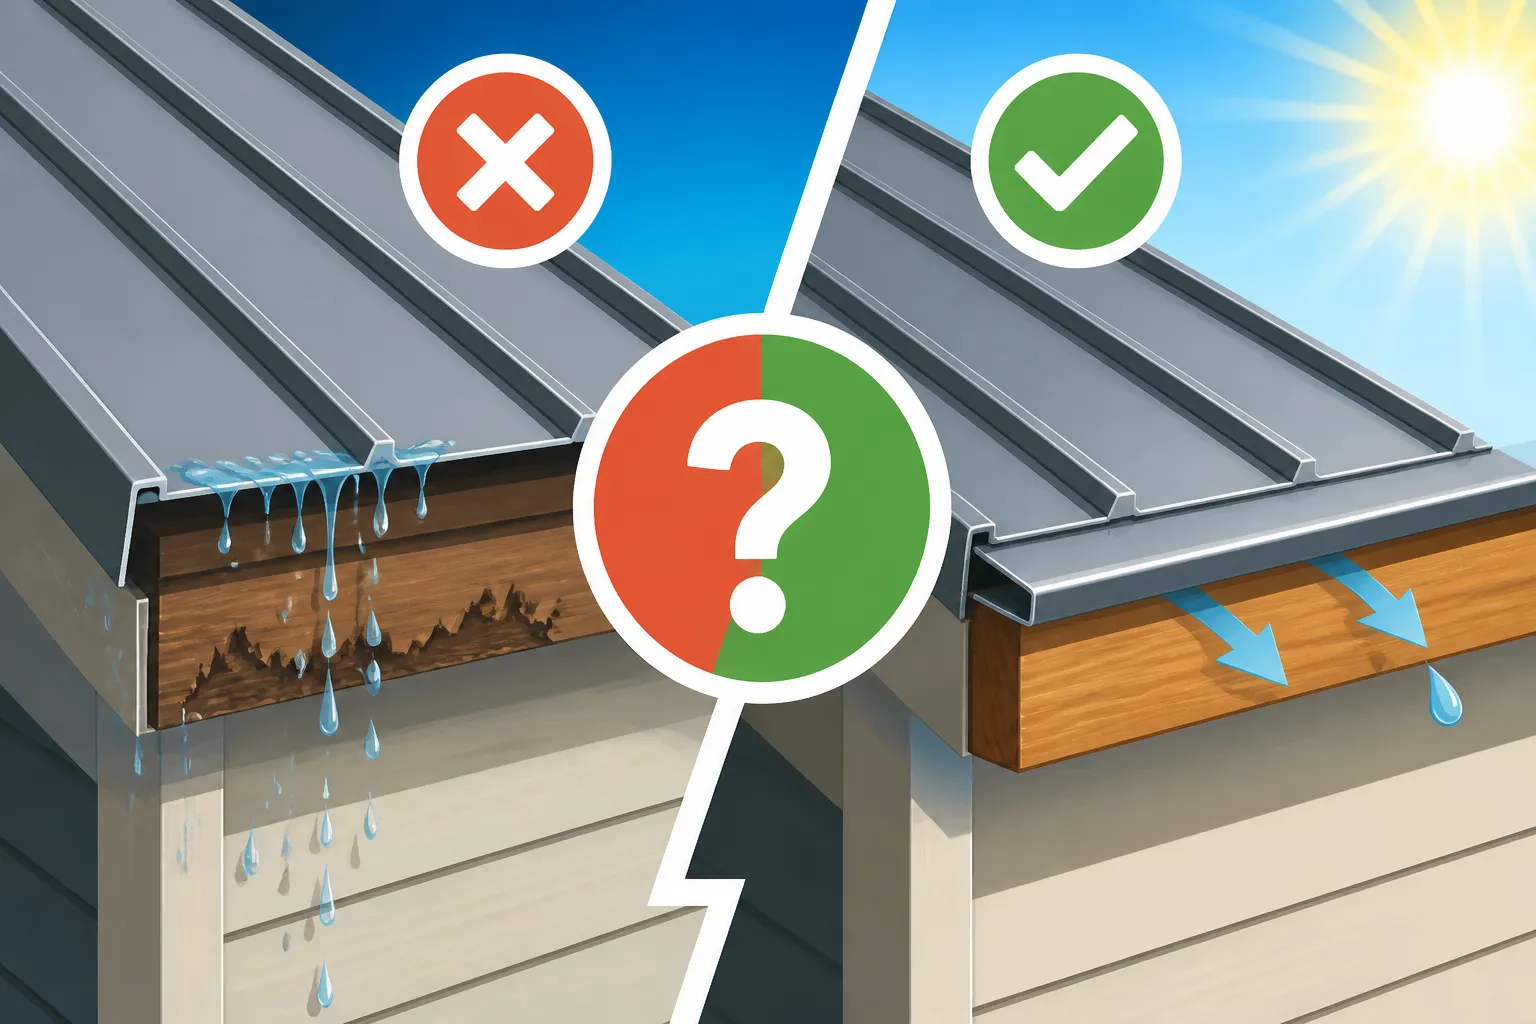
Think of it this way: your roof is shedding water, and without that small "drip" point, the water would cling to the underside of the roofing material due to surface tension. It would then wick its way back along the fascia board and potentially penetrate the roof's substructure. Homeowners often don't realize the critical role this plays until it's too late. I've heard countless stories from folks who had contractors convince them it was an optional add-on, only to face extensive rot years later. The initial savings quickly get dwarfed by the repair costs. For a comprehensive look at all the parts, check out our guide on Metal Roof Components & Accessories Explained.
The Hidden Vulnerabilities Without a Drip Edge
Skipping the drip edge is like leaving a tiny, yet critical, gap in your home's armor. Over time, that tiny gap becomes a gaping wound, leading to serious and costly structural damage. Water is relentlessly persistent, and it will find any path to cause trouble.
The most immediate and common issue is fascia rot. The fascia board, which runs horizontally along the edge of your roof, is typically wood. When water repeatedly wicks back behind the gutter or drips directly onto it, the wood absorbs moisture. This constant dampness creates a perfect breeding ground for mold, mildew, and eventually, wood rot. Once the fascia begins to rot, it compromises the attachment point for your gutters, leading to sagging gutters or even complete detachment during heavy rains.
Beyond the fascia, the absence of a drip edge can lead to water intrusion into your home's soffit and, even worse, into the attic or wall cavities. This can damage insulation, create structural weakening, and lead to unsightly water stains on interior walls or ceilings. In severe cases, it can even affect your home’s foundation over many years by consistently saturating the soil directly adjacent to the house. Many homeowners are surprised at how such a small element could lead to such widespread problems, often underestimating the sheer volume of water a roof sheds during a storm. This is why paying attention to details like this can greatly impact your Metal Roof Lifespan: How Long Do They Last?.
Why Metal Roofs Absolutely Benefit from Drip Edges
Metal roofs are known for their incredible durability and their ability to shed water efficiently. This very efficiency, however, makes a drip edge even more important. Unlike asphalt shingles that have a somewhat textured surface where water can momentarily linger, metal panels are slick. Water zips off them quickly, and without a proper drip edge, that fast-moving water can easily be driven back under the roof edge by wind or simply adhere to the underside due to surface tension.
Directing Water Flow Away from Critical Areas
Imagine a heavy downpour hitting your pristine new metal roof. The water, unhindered, races down the smooth panels. Without a drip edge, much of that water, especially at the eaves, can cling to the underside of the roof deck or run directly down the fascia. This creates a relentless cycle of wetting and drying that rapidly degrades the underlying wooden components and the top edge of your wall sheathing.
A drip edge acts as a meticulously designed barrier, literally "breaking" the surface tension of the water. Its extended lip ensures that all runoff is propelled outward and downward, clearing the fascia and the vulnerable transition point between the roof and the wall. This is especially vital for metal roofs because the seamless nature of many metal panels means water has fewer places to go except off the edge. Different profiles of drip edges are designed for specific needs: an L-style might work for rake edges, while C- or T-style profiles are common for eaves, particularly when working with gutters. Some specialized F-style drip edges are designed to slide directly under the roofing material for a cleaner finish and enhanced protection. Understanding these differences is key to preventing future leaks and damage. Our guide on How to Prevent Leaks on a Metal Roof offers more insight into these preventative measures.
Enhancing the Durability of the Entire Roof System
A drip edge isn't just about water management; it's a crucial player in the overall structural integrity and longevity of your metal roof system. It provides an additional layer of defense that shores up some of the most vulnerable parts of your roof.
Firstly, it protects the edge of your roof decking. The plywood or OSB sheathing that forms the base of your roof is highly susceptible to moisture damage. A drip edge ensures that water never directly touches or wicks into these exposed edges. This protection extends to your roof's underlayment, which is the waterproof barrier laid directly over the decking. By keeping water from creeping underneath, the drip edge helps the underlayment do its job more effectively, preventing it from deteriorating prematurely due to constant moisture exposure. For more on this critical layer, see our article on Metal Roof Underlayment and Ventilation Guide.
Secondly, a drip edge can provide valuable protection against wind uplift. During high winds, particularly in coastal areas or regions prone to severe storms, strong gusts can get underneath the edge of the roof panels. A properly installed drip edge creates a more secure, sealed edge, making it much harder for wind to pry up the roofing material. This is a significant factor in ensuring your metal roof stands up to the elements, contributing to its reputation for resilience. While it’s a relatively small part, its contribution to the overall robustness of your metal roof system is undeniable, adding years to its effective life and helping to maximize your Metal Roof Cost vs Lifespan Value.
Specific Scenarios Where Drip Edges Are Crucial (and Often Mandated)
While the practical benefits of a drip edge are clear, sometimes practicality isn't enough to convince everyone. That's where regulations, warranties, and even insurance companies step in. In many cases, a drip edge isn't just a good idea; it's a non-negotiable requirement. Ignoring these mandates can lead to expensive complications down the line, including voided warranties or denied insurance claims.
Building Codes, Warranties, and Insurance Requirements
It might surprise you how many local and state building codes explicitly require the installation of a drip edge, especially for metal roofs. These codes are put in place to ensure minimum safety and structural standards, protecting homeowners from shoddy construction and future liabilities. For instance, in high-wind zones or areas prone to hurricanes, like much of Florida, the building codes are particularly stringent, often mandating specific drip edge materials and installation methods to resist uplift and water penetration. Always check your local jurisdiction's specific requirements, as they can vary significantly. Our guide on Metal Roof Building Codes Explained can help you navigate this complex topic.
Beyond legal requirements, failing to install a drip edge can have significant warranty implications. Most reputable metal roof manufacturers design their systems with the assumption that all standard components, including drip edges, will be properly installed. If a problem arises that can be linked to water intrusion at the eaves or rake due to a missing drip edge, the manufacturer may very well deny your warranty claim. This could leave you on the hook for thousands of dollars in repairs that you thought were covered. Similarly, insurance companies are becoming increasingly aware of the importance of robust roofing practices. While a drip edge might not always be directly mentioned for a discount, its absence could lead to issues with claims for water damage or wind damage, as it demonstrates a lack of adherence to best practices.
Drip Edges with Existing Gutters vs. No Gutters
A common misconception is that if you have gutters, a drip edge isn't necessary. This couldn't be further from the truth! Gutters are designed to collect and channel water away from your foundation, but they don't fully protect the fascia and the very edge of the roof deck from water wicking back. In fact, a properly installed drip edge works in perfect harmony with your gutters. The drip edge directs water off the roof and into the gutters, preventing it from seeping behind the gutter system itself, which is another common source of fascia rot. Without a drip edge, water can easily flow past or behind the gutter, defeating much of its purpose and exposing your fascia to constant moisture.
When there are no gutters present on a home, the importance of a drip edge becomes even more pronounced. In this scenario, the drip edge is the only component actively ensuring that water sheds clear of your home's exterior walls and foundation. Without it, water would flow directly down the siding, staining it, causing paint to peel, and saturating the soil around your foundation. Over time, this can lead to serious issues like basement leaks, foundation cracks, and landscape erosion. So, whether you have a robust gutter system or no gutters at all, a drip edge remains an indispensable element for protecting your property.
Choosing and Installing the Right Drip Edge for Your Metal Roof
Selecting and installing the correct drip edge isn't just a matter of slapping on any old piece of metal. There are considerations for material, profile, and installation technique that directly impact its effectiveness and the overall performance of your metal roof. Getting it right ensures maximum protection and peace of mind. Many homeowners find it overwhelming to sort through the options, which is why working with experienced professionals is often the best route.
Material and Profile Considerations
When choosing a drip edge, the material should ideally complement your metal roof and local climate. Common materials include:
- Galvanized Steel: This is a popular and cost-effective option, offering good corrosion resistance due to its zinc coating. It's robust and widely available.
- Aluminum: Lightweight and highly resistant to rust, aluminum drip edges are an excellent choice for coastal regions where salt air can be a concern. They are often a bit more expensive than galvanized steel but offer superior longevity in harsh environments.
- Copper: For high-end or historic homes with copper roofing, a matching copper drip edge provides unparalleled beauty and durability, developing a unique patina over time. It's the most expensive option but offers exceptional lifespan.
- Galvalume: Similar to galvanized steel but with a coating of aluminum and zinc, offering enhanced corrosion resistance.
The profile of the drip edge is also important. Different shapes are designed for specific applications:
- L-Style: Simple and effective, often used on rake edges (the sloped sides of the roof).
- C-Style or T-Style: Features a wider flange that extends further onto the roof deck, providing robust protection for eaves, especially when gutters are present. The "kick-out" on these profiles is designed to project water further away.
- F-Style (or Gutter Apron): Often preferred for re-roofing projects or when installing over existing shingles. Its design allows it to slip under the roofing material and extend into the gutter, creating a smooth transition.
The best choice for you will depend on your specific roof type, local weather conditions, and aesthetic preferences. Platforms like Modernize can connect you with experienced metal roofing contractors who can guide you through these choices, ensuring you select a drip edge that provides optimal performance for your specific metal roofing material. They'll know the ins and outs of materials like those discussed in our Metal Roofing Materials Compared: Steel, Aluminum, Copper & Zinc article.
Best Practices for Installation
Proper installation of a drip edge is paramount. Even the highest quality material and perfect profile won't protect your home if it's installed incorrectly. The sequence of installation is crucial:
- Underlayment First (for Rakes): On the rake edges of the roof, the drip edge is typically installed over the underlayment. This allows any wind-driven rain that gets past the roof panels to shed off the underlayment and over the drip edge.
- Drip Edge First (for Eaves): Along the eaves (the horizontal bottom edges), the drip edge is usually installed under the underlayment. This ensures that any water that gets under the roof panels or on top of the underlayment runs over the drip edge and into the gutters.
- Overlapping: When installing multiple pieces of drip edge, they should overlap by at least a few inches to ensure a continuous water barrier.
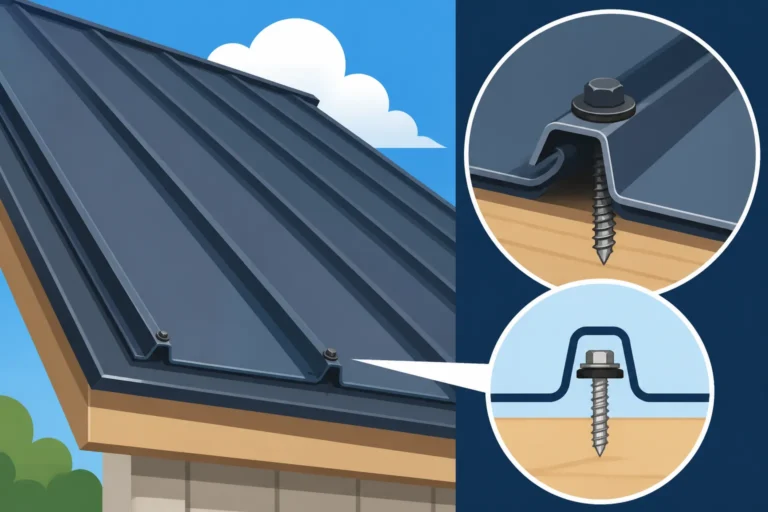
- Fastening: Drip edges are typically fastened with roofing nails or screws, ensuring they are securely attached to the fascia board and the roof decking. The fasteners should be spaced appropriately, usually every 12 inches.
Common mistakes include not overlapping properly, using the wrong type of fasteners, or installing the underlayment in the wrong sequence relative to the drip edge. These errors can compromise the entire system, leading to leaks and damage. This is why professional installation is highly recommended for metal roofs. A certified contractor understands the nuances of each component and how they interact to create a watertight and durable system. Reputable companies found through services like Modernize will ensure your drip edge is installed according to manufacturer specifications and local building codes, integrating seamlessly with your new metal roof. For more details on the process, refer to our Metal Roof Installation Process: Step by Step guide.
Here's a quick reference for common drip edge profiles:
| Drip Edge Profile | Typical Application | Key Features | Benefits |
|---|---|---|---|
| L-Style | Rake edges, sometimes eaves | Simple, straight angle, small hemmed edge | Basic protection, directs water straight down, good for rake finishes |
| C-Style (D-Style) | Eaves, especially with gutters | Wider flange, larger hemmed edge, often with a slight kick-out | Excellent water diversion into gutters, protects fascia and decking |
| T-Style | Eaves, larger roofs, higher pitches | Wider deck flange, larger kick-out, often more robust | Superior water flow control, stronger protection against wind uplift |
| F-Style (Gutter Apron) | Re-roofing over existing shingles, specific panel types | Upper flange slides under roof material, lower flange extends into gutter | Smooth transition, hides raw edges, optimal for certain retrofits |
Disclaimer
Please note that this guide provides general information about metal roofing. Building codes, regulations, and best practices can vary significantly by location and specific product. Always consult with a qualified, licensed metal roofing contractor and your local building authority for advice tailored to your specific project and geographical area. This information is not a substitute for professional advice.