Can You Install a Metal Roof Yourself?
Many homeowners dream of tackling big projects themselves, often seeing a shiny new metal roof as the ultimate DIY challenge and a huge money-saver. But the reality of installing a metal roof is far more complex and demanding than a weekend warrior project might suggest, leading to unforeseen costs, delays, and even safety hazards. This guide will walk you through the nitty-gritty of DIY metal roof installation, exploring the skills, tools, and knowledge required, the actual process involved, and ultimately help you decide if it's a realistic endeavor for your home or if calling in the pros is the wiser choice.
The Allure and Reality of DIY Metal Roofing
It's completely understandable why the idea of installing your own metal roof is so appealing. Who doesn't want to save a significant chunk of change and have the satisfaction of saying, "I built that"? But it's also a project where the devil is truly in the details, and overlooking them can turn your dream into a costly nightmare.
Why Homeowners Consider DIY
The biggest motivator for most homeowners considering a do-it-yourself metal roof installation is, without a doubt, the potential cost savings on labor. Professional installation can easily account for 40-60% of the total project cost, so cutting that out seems like a no-brainer on paper. Imagine shaving thousands off the price tag of a new roof! This financial incentive often overshadows the inherent difficulties and risks involved.
Beyond the money, there's a deep sense of accomplishment that comes with building or fixing something substantial on your home. For some, it's about having complete control over every aspect of the project, ensuring it's done exactly to their specifications. You might be a seasoned DIYer with a knack for home improvement, and a metal roof feels like the next logical step in your skill development. However, it's crucial to distinguish between general home improvement and specialized roofing work, especially with a system as precise as metal.
Many homeowners also perceive metal roofing as relatively simple to install compared to, say, intricate tiling or complicated framing. They might watch a few online videos, see large panels being laid down, and think, "I can do that!" This perception often stems from seeing only the final stages or simplified demonstrations, not the meticulous prep work, the precise cuts, the challenging flashing details, or the sheer physical endurance required.
The Harsh Realities: What Most People Overlook
While the idea of saving money is powerful, the reality of DIY metal roofing introduces a whole host of challenges that are often underestimated. First and foremost, there are the immense physical demands and inherent dangers. You'll be working at significant heights, often on steep and slippery surfaces, carrying heavy, awkward panels, and using power tools. A fall from a roof can result in serious injury or worse, and even minor slips can damage expensive materials. This isn't just about being careful; it requires proper safety gear, training, and a deep respect for gravity.
Then there's the issue of specialized tools and skills. While you might have a good collection of general tools, metal roofing often requires specific equipment like specialized shears, nibblers, or panel benders that most homeowners don't own. Even if you rent or buy them, knowing how to use them proficiently to achieve professional-grade results takes practice. Furthermore, the skills extend beyond just cutting and screwing; you need an understanding of roof geometry, thermal expansion and contraction, proper sealing techniques, and how to integrate components like vents and skylights seamlessly.
The time commitment is another major factor often overlooked. What might take a professional crew a few days or a week could easily stretch into several weeks or even months for a DIYer, especially if you're working evenings and weekends. This prolonged exposure leaves your home vulnerable to weather if the roof isn't properly sealed at each stage, and it can disrupt your daily life significantly. Remember, a leaky, unfinished roof can cause more damage than it saves in labor costs.
Finally, navigating permit and building code compliance can be a massive headache. Most jurisdictions require permits for roof replacement, and inspections are mandatory. Trying to pass these inspections without a deep understanding of local codes and best practices can lead to costly rework or, worse, a stop-work order. It's not just about getting the roof up; it's about getting it up correctly and legally. You should always check if you need a permit for a metal roof installation in your area before starting any work.
Essential Skills, Tools, and Knowledge You'll Need
Successfully installing a metal roof is a precise craft, not just a brute-force task. It requires a specific set of skills, the right tools, and a solid understanding of metal roofing systems to ensure your roof is watertight, durable, and looks professional.
Critical Skills for a Successful Installation
At the top of the list is a strong foundation in basic carpentry and measurement. You'll need to accurately measure your roof dimensions, calculate material quantities, and make precise cuts, often at angles. Miscalculations can lead to wasted expensive materials, panels that don't fit, or an unprofessional appearance. Metal roofing relies on tight tolerances, so being off by even a fraction of an inch can cause problems down the line, especially with interlocking systems like standing seam.
Comfort with heights and an unwavering commitment to safety protocols are absolutely non-negotiable. This isn't just about being brave; it's about being methodical, using proper fall protection, securing ladders and scaffolding, and understanding the risks of working on sloped surfaces, particularly with potentially slippery metal panels. A single misstep can be catastrophic.
Attention to detail, particularly with flashing and sealing, is paramount. The panels themselves are durable, but most roof leaks occur at transition points: valleys, eaves, ridges, chimneys, and pipe penetrations. Understanding how to properly cut, bend, and seal flashing is a specialized skill that makes the difference between a leak-free roof and a constant headache. If you're not confident in this area, your DIY project is already at a significant disadvantage.
Finally, problem-solving on the fly is a skill that veteran roofers develop over years. No two roofs are exactly alike, and unforeseen obstacles—like uneven sheathing, unexpected structural issues, or misaligned framing—will inevitably arise. A DIYer needs to be able to assess these problems, research solutions, and implement them effectively without compromising the integrity of the roof.
Non-Negotiable Tools and Equipment
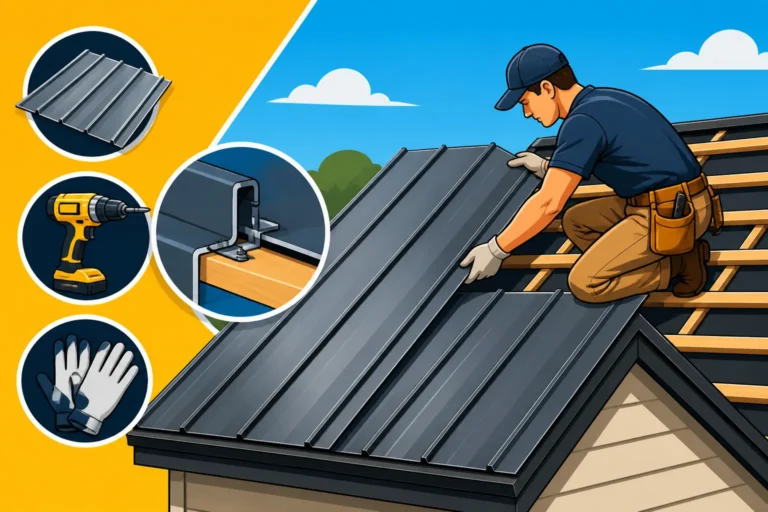
Don't even think about stepping onto a roof without the proper safety gear. This includes a sturdy safety harness and lifeline system, appropriate work boots with good grip, heavy-duty gloves, safety glasses, and hearing protection. Investing in this equipment is not an option; it's a necessity.
For cutting metal panels, you'll need specialized tools. Aviation snips are good for small cuts and detail work, but for long, straight cuts, you'll want electric shears or a metal cutting saw with a fine-tooth metal blade. For more complex shapes or penetrations, a metal nibbler is invaluable. Using an abrasive cut-off wheel or a standard circular saw blade can overheat and damage the metal's protective coating, leading to premature rust and voiding warranties.
Other essential tools include powerful cordless drills and impact drivers for fasteners, a high-quality caulk gun for sealants, measuring tapes, chalk lines, and a tin bender for custom flashing details. For handling long, heavy panels, especially on larger roofs, a panel lifter can be a lifesaver, making the job safer and more manageable than trying to muscle them into place with just human power. You'll also need secure scaffolding or robust ladders that extend well beyond the eave line for safe access and material staging.
Understanding Metal Roofing Systems
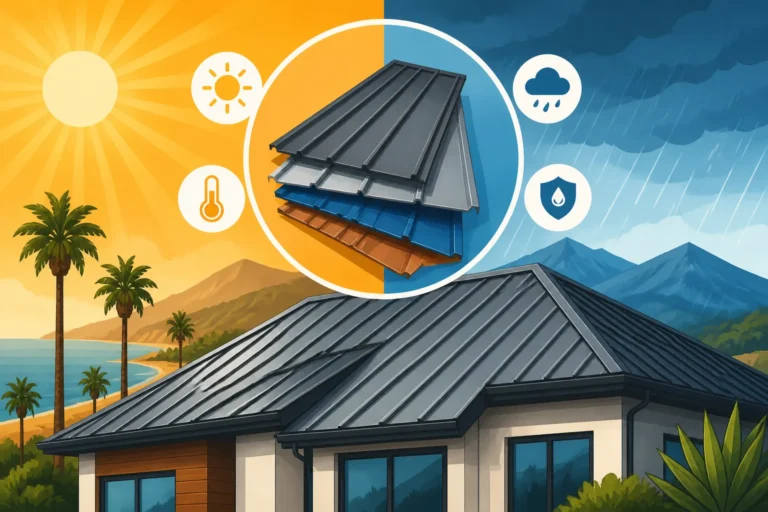
Before you buy a single panel, you absolutely must understand the different metal roofing types explained: profiles & panels available and which one is appropriate for your roof and skill level. Standing seam metal roofs, with their hidden fasteners and interlocking panels, offer superior weather protection but are more complex to install, requiring precise alignment and specialized seaming tools. Exposed fastener systems, like corrugated or R-panels, are generally more forgiving for DIYers but require careful attention to fastener placement and sealing to prevent leaks.
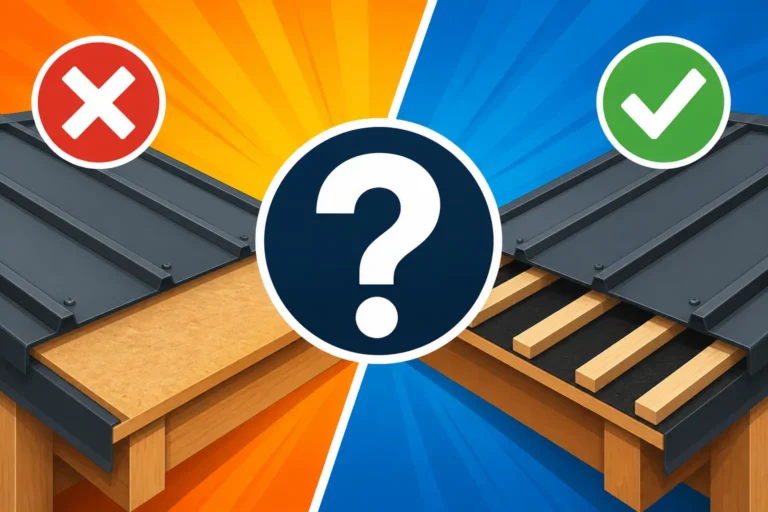
Beyond the panels themselves, you need to understand underlayment requirements. This protective layer beneath the metal panels provides a crucial secondary barrier against moisture intrusion and helps protect the metal from chemicals in the roof deck. Synthetic underlayments are commonly recommended for metal roofs due to their durability and ability to withstand high temperatures. You'll also need to grasp the nuances of metal roof gauges explained: 22, 24, 26 & 29, as the gauge affects the panel's rigidity and workability.
Most critically, a deep understanding of metal roof components & accessories explained, especially flashing techniques, is essential. This includes eave flashing (drip edge), rake flashing, valley flashing, and how to properly flash around chimneys, vents, and skylights. Each penetration requires a specific, multi-layered approach to ensure watertightness. If you get these details wrong, your beautiful new metal roof will become a sieve.
The Step-by-Step DIY Process: A High-Level Overview
Even for experienced DIYers, installing a metal roof is a multi-stage process that demands meticulous planning, careful execution, and a strict adherence to safety. Skipping steps or rushing through them is a recipe for disaster.
Planning and Preparation: Don't Skip This!
The planning phase is where you'll spend a significant amount of your upfront time, and it's time well spent. First, accurately measuring your roof is paramount. You need to account for pitch, valleys, hips, and penetrations to ensure you order the correct quantity of panels, trim, and accessories. Over-ordering can be costly, but under-ordering leads to delays and potential color inconsistencies if you have to order more later. Consider using an online metal roof cost calculator to help with material estimates.
Obtaining the necessary permits is a crucial, non-negotiable step. As we touched on earlier, most municipalities require a building permit for a roof replacement project to ensure it meets local building codes and safety standards. Skipping this can lead to fines, stop-work orders, and even problems when you try to sell your home. The permit process often involves submitting detailed plans and may require multiple inspections throughout the installation.
Next, you'll decide whether to tear off the old roof or install the metal roof over existing shingles. While installing a metal roof over shingles can save time and disposal costs, it adds weight to your structure and might not be permitted in all areas, especially if you already have multiple layers of shingles. Check local codes. If a tear-off is required, properly disposing of the old roofing material can be a substantial task.
Finally, setting up your job site safely involves more than just having a ladder. You'll need a clear, secure area for material delivery and storage, away from foot traffic or obstructions. Plan for proper fall protection systems, secure scaffolding, and ensure easy, safe access to all areas of the roof. Consider the weather forecast carefully; you don't want to be caught halfway through installation during a rainstorm.
The Installation Sequence: Key Stages
With planning complete, the physical work begins. The first critical layer is the underlayment application. This protective membrane goes directly over your roof deck (plywood or OSB) and acts as a secondary water barrier, shedding water that might penetrate the primary metal roof system. It also protects the metal from chemicals in the decking. Using a high-quality synthetic underlayment is highly recommended for metal roofs, as it can withstand the higher temperatures that metal roofs can reach compared to asphalt shingles. Consult a metal roof underlayment and ventilation guide for specifics.
After the underlayment is in place, you'll install the drip edge and various flashing components. The drip edge protects the edge of the roof deck and helps direct water into your gutters. Valley flashing, rake trim, and any other perimeter pieces are typically installed before the main panels to create a clean, watertight seal. Proper metal roof trim and flashing cost can be a significant part of the overall budget, but cutting corners here is a critical mistake.
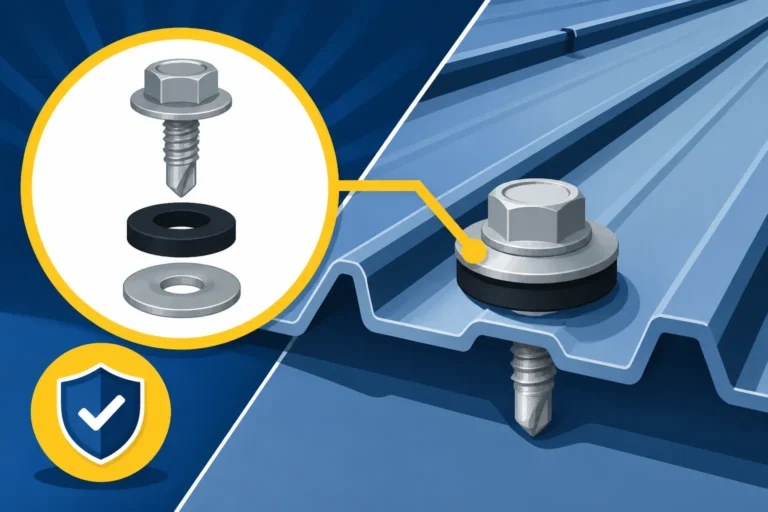
Then comes the exciting part: panel placement and fastening. This is where your precise measurements and cutting skills come into play. Panels must be aligned perfectly, often starting from one edge of the roof, ensuring they are square with the eaves. For exposed fastener systems, each screw needs to be driven with consistent torque, ensuring the washer seals properly without over-tightening. For standing seam, panels interlock, and fasteners are hidden, which looks cleaner but demands even greater precision during installation. The specific methods for how metal roof panels are attached will vary by system.
Finally, you'll install ridge caps, hip caps, and any other specialty trim pieces to complete the watertight seal. These cap pieces cover the exposed edges at the peaks and hips of your roof, tying the entire system together. Don't forget to seal all final penetrations, such as pipe boots around plumbing vents and seals around skylights, with high-quality, compatible sealants. This is the last line of defense against water intrusion.
Common Pitfalls and How to Avoid Them
Even with the best intentions, DIY metal roof projects can encounter significant issues. One of the most common pitfalls is leaks due to improper sealing or fastening. This can stem from screws being over-tightened or under-tightened, using incompatible sealants, or failing to properly flash around penetrations. To avoid this, follow manufacturer instructions meticulously for every component, use approved sealants, and double-check every fastener.
Another issue, particularly with wider, flatter panels, is oil canning. This refers to the visible waviness or distortion in the flat areas of metal panels. While often cosmetic, severe oil canning can sometimes indicate improper installation, such as panels being installed under tension or uneven substrate. To minimize this, ensure your roof deck is perfectly flat, order panels with stiffening ribs if available, and avoid over-tightening fasteners.
Damage during installation is also a frequent problem for DIYers. Metal panels can be easily scratched, bent, or dented if not handled carefully. Once damaged, the aesthetic appeal and protective coatings can be compromised. Always use protective coverings, never drag panels, and lift them with care. Even walking on a metal roof requires specific techniques to avoid damage.
Perhaps one of the most significant pitfalls, and one that often isn't realized until later, is warranty invalidation. Many metal roofing manufacturers require their products to be installed by a factory-certified or licensed professional installer for the full material warranty to remain valid. If you install it yourself, you might find that your long-term material warranty is significantly reduced or even voided, leaving you responsible for any material defects that arise down the road. This can completely negate any upfront cost savings you were hoping for.
DIY vs. Professional Installation: Weighing Your Options
Deciding between a DIY approach and hiring a professional comes down to a careful assessment of costs, risks, and your own capabilities. It's not just about the upfront price tag, but the long-term value and peace of mind.
The True Cost Savings: Beyond Material Prices
When you consider DIY, the immediate thought is "no labor costs." While technically true for your own time, the reality is that the "cost savings" can be quickly eroded by other factors. You'll still need to purchase all the materials, including the panels, trim, fasteners, underlayment, and sealants. Then there's the expense of specialized tools. Do you already own a metal shear, a panel lifter, or a quality fall arrest system? If not, buying or renting these can add hundreds or even thousands to your project cost.
The potential for costly mistakes is also very real. Mis-cuts, damaged panels, or improper installation leading to leaks can require re-purchasing expensive materials and re-doing work, often at a higher cost than if it had been done right the first time by a professional. Factor in the time value of money as well. What is your time worth? If you spend weeks or months on a project that a professional could complete in days, are you truly saving money when you account for lost personal time or potential lost wages? When you consider the metal roof labor cost, you're paying for speed, expertise, and efficiency.
Here’s a simplified breakdown to help illustrate the typical cost differences, though actual numbers vary wildly based on location, materials, and roof complexity.
| Factor | DIY Installation (Estimated) | Professional Installation (Estimated) |
|---|---|---|
| Material Cost | $8,000 – $15,000 (Same as Pro) | $8,000 – $15,000 (Same as DIY) |
| Labor Cost | $0 (Your time) | $6,000 – $12,000+ |
| Tool Rental/Purchase | $500 – $2,000+ | $0 (Included in contractor's overhead) |
| Permit Fees | $100 – $500 (Same as Pro) | $100 – $500 (Often handled by contractor) |
| Disposal Costs | $200 – $800 (If tear-off, can be DIY or hired) | $200 – $800 (Usually included in contractor's bid) |
| Contingency (Mistakes) | $500 – $3,000+ (Highly variable, often higher) | $0 – $500 (Contractor absorbs most mistakes) |
| Total Estimated Cost | $9,300 – $21,300+ | $14,300 – $28,300+ |
| Warranty | Often limited to material defects only, easily voided | Full material & workmanship warranties |
| Time Investment | Weeks to months | Days to 1-2 weeks |
| Expertise | Learning curve, potential for errors | Decades of combined experience, specialized skills |
As you can see, while labor is a huge chunk, the total cost difference isn't always as massive as initially perceived once other factors are considered. For a comprehensive overview, check out our guide on Metal Roof Cost: Complete 2026 Guide.
Warranty and Insurance Implications
This is where DIY metal roofing often hits a major roadblock. As mentioned, many metal roof manufacturers, especially for higher-end standing seam or specialty profiles, require installation by a "manufacturer-certified" or "licensed" installer for their full material warranty to be valid. If you install it yourself, even if you do everything perfectly, you might only be covered for obvious material defects, and not for issues arising from installation errors. This means if the roof leaks in 10 years because of a subtle installation flaw, you're entirely on the hook for the repair or replacement.
Professional contractors, on the other hand, typically offer a workmanship warranty in addition to the manufacturer's material warranty. This provides protection against leaks or failures caused by the installation itself, usually for a period of 5 to 20 years. This dual layer of protection offers significant peace of mind. Our guide on Metal Roof Warranties: Workmanship vs Manufacturer delves deeper into this crucial topic.
Furthermore, there can be insurance implications. If a future roof leak or damage occurs and your insurance company discovers it was a DIY installation without proper permits or adherence to codes, they might deny your claim or reduce your payout. While metal roofs are known for their durability and can even lead to metal roof insurance savings & discounts, these benefits are often contingent on professional installation that meets rigorous standards.
When to Call in the Pros (and How to Find Them)
There are definitely situations where hiring a professional is not just advisable, but absolutely essential. If your roof has a complex roofline with multiple valleys, hips, dormers, or skylights, the intricate cutting and flashing required are best left to experts. Steep roof pitches also significantly increase the danger and difficulty, making professional installation the safer choice. Similarly, if you're considering specialized materials like copper or zinc, which require unique fabrication and installation techniques, a DIY approach is strongly discouraged.
If you simply lack the time, physical ability, or the deep expertise required for such a demanding project, recognize your limits. A poorly installed metal roof will be a constant source of frustration and expense. Sometimes, the peace of mind that comes with knowing the job was done right by professionals is worth every penny.
When you do decide to call in the experts, don't just pick the first name you see. Start by looking for local contractors who specialize in metal roofing, as not all general roofers have the specific skills for these systems. Platforms like Modernize can connect you with pre-vetted contractors in your area, making the search much easier. Always get multiple quotes and verify licenses, insurance, and references. Don't be afraid to ask potential contractors about their experience with specific metal roofing systems, their safety protocols, and what kind of warranties they offer. Our guide on How to Hire a Metal Roofing Contractor provides an excellent roadmap for this process.
Ultimately, while the appeal of installing a metal roof yourself is strong, it's a project that demands a high level of skill, patience, and a deep understanding of complex roofing principles. For many homeowners, the risks and potential pitfalls often outweigh the perceived cost savings, making professional installation the safer, smarter, and ultimately more cost-effective long-term choice.
Disclaimer
The information provided in this guide is intended for educational purposes only and should not be considered professional advice. Metal roof installation is a complex and potentially dangerous undertaking. Always consult with a licensed and insured roofing professional and adhere to all local building codes and safety regulations before attempting any roofing project. DIY work may void manufacturer warranties and could lead to serious injury or property damage.