Metal Roof Installation Process: Step by Step
Embarking on a metal roof installation journey can feel incredibly daunting, like trying to assemble a complex piece of furniture with missing instructions. You know you want the long-lasting beauty and durability of metal, but the actual process, from initial planning to the final screw, can seem shrouded in mystery, leaving homeowners feeling anxious about unexpected issues or whether they’re getting quality work. This guide is designed to pull back the curtain, offering you a step-by-step walkthrough of what to expect during a professional metal roof installation, demystifying each phase so you feel confident and informed.
Preparation is Key: Setting the Stage for Success
Before any panels are even thought about, a successful metal roof installation hinges on meticulous preparation. This isn't just about showing up with tools; it's about understanding your specific roof, the materials, and all the local rules that govern construction. Skipping these foundational steps can lead to headaches, delays, and costly rework down the line, so it's absolutely crucial that your chosen contractor takes this phase seriously. Think of it as laying the groundwork for a marathon – you wouldn't just jump in without stretching and planning, would you?
Initial Assessment and Planning
Every roof is unique, much like every home, and a one-size-fits-all approach simply won't cut it with metal roofing. The initial assessment is where your contractor truly gets to know your roof's personality. This includes a thorough evaluation of its pitch (how steep it is), its existing condition, and any unique architectural features like dormers, skylights, or chimneys that will require special attention. They'll measure everything precisely, considering not just the total square footage but also the complexities of valleys, hips, and ridges. This detailed measurement is vital for ordering the correct amount of material and cutting down on waste, which can, in turn, affect your overall Metal Roof Cost: Complete 2026 Guide and timeline.
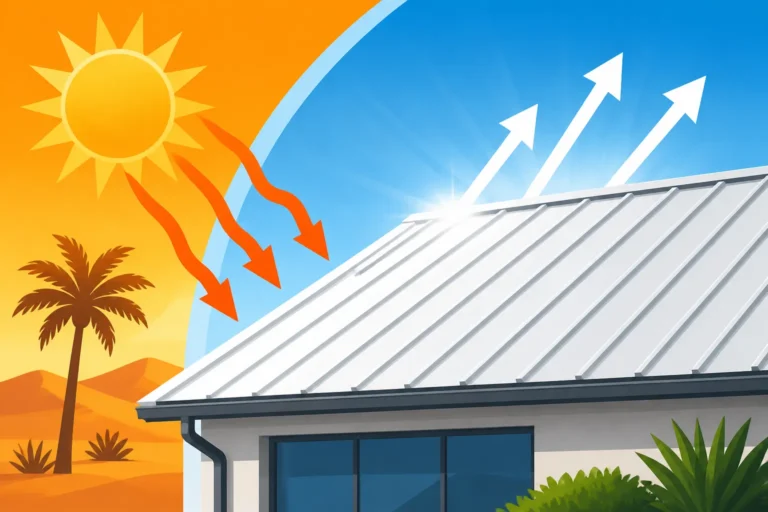
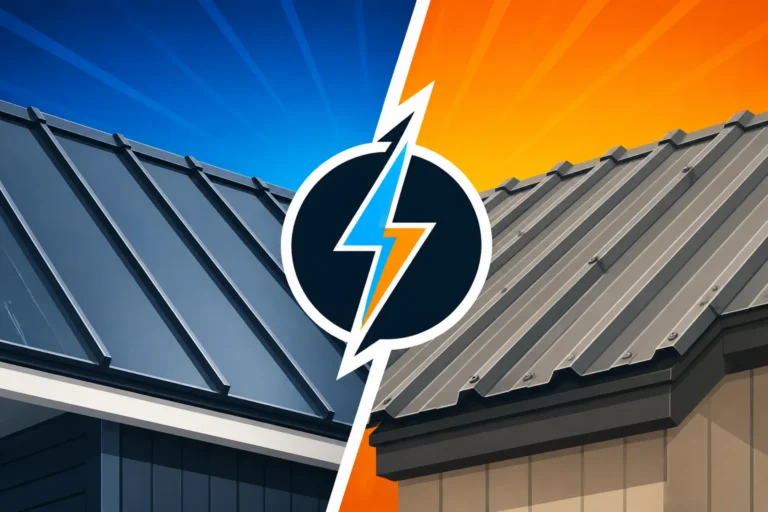
During this planning stage, a good contractor will also discuss your material choices in depth. Are you leaning towards steel, aluminum, copper, or zinc? Each has its own characteristics, aesthetic, and price point, impacting everything from the installation method to the lifespan. They'll also review different profiles, such as Standing Seam Metal Roof Cost, corrugated, or metal shingles, explaining how each interacts with your home's design and structural integrity. This is also where you'll finalize colors and coatings, ensuring the aesthetic vision for your home comes to life while also considering energy efficiency properties. A comprehensive plan minimizes surprises once the project is underway.
Material Delivery and Site Organization
Once all the planning is done and materials are ordered, the next step involves getting everything ready on-site. Metal roof panels, especially standing seam, can be quite long, often spanning the entire length of your roof slope. This means careful coordination for delivery. You can't just have them dumped on your lawn; they need to be stored in a way that protects them from damage, prevents warping, and keeps them dry until they're ready for installation. This often involves secure, level blocking, especially for larger bundles.
Beyond the panels themselves, there's a myriad of other components that need to be on hand and organized. We're talking about underlayment, fasteners, trim pieces, flashing, sealants, and safety equipment. A well-organized site isn't just about neatness; it's about efficiency and safety. When tools and materials are easily accessible and logically placed, the installation crew can work more smoothly, reducing the risk of accidents and ensuring that the project stays on schedule. It also speaks volumes about the professionalism of the contractor, showing that they respect your property and their own work process.
Permitting and Code Compliance
This is perhaps the least exciting, but undeniably one of the most critical, parts of the preparation phase: getting the necessary permits and ensuring everything complies with local building codes. You might be surprised at the variation in requirements from one municipality to the next, even within the same state. For example, Do You Need a Permit for a Metal Roof? will depend on your specific city and county regulations. Your chosen metal roofing contractor should be well-versed in these local ordinances and handle the permit application process for you.
Local codes dictate everything from the type of fasteners required to the proper ventilation systems and even the acceptable wind uplift ratings for your area. In places prone to hurricanes, like Florida, there are often stricter codes related to wind resistance, such as the High-Velocity Hurricane Zone (HVHZ) requirements. Ignoring these codes isn't just risky; it can lead to hefty fines, delays, and potentially requiring you to tear off newly installed sections of your roof. Always verify that your contractor has pulled the correct permits and is committed to adhering to all relevant building codes. This protects you, ensures the safety and longevity of your roof, and helps with potential insurance claims down the road.
Tear-Off or Overlay: Handling the Existing Roof
Once the planning is solid and the materials are on-site, the next big decision and process involves what to do with your current roof. This isn't a minor detail; it significantly impacts labor, cost, and the overall performance of your new metal roof. Homeowners often ask whether they really need to tear off their old roof, and the answer is rarely simple, depending on the current condition and local regulations.
Full Tear-Off: When and Why
A full tear-off means completely removing all existing roofing materials down to the structural roof deck. This might sound like more work, and frankly, it often is, but there are compelling reasons why it's the best approach in many situations. Primarily, it allows the installers to thoroughly inspect the roof deck for any hidden damage, rot, or structural issues that might be lurking beneath your old shingles or tiles. Catching and addressing these problems before installing a new metal roof is crucial, as metal roofs are designed to last for decades, and you don't want to trap problems underneath them.
Furthermore, a full tear-off ensures a perfectly smooth, stable substrate for your new metal panels. This is particularly important for standing seam metal roofs, where flatness helps prevent aesthetic issues like "oil canning" – a waviness that can appear in the panels if the underlying surface isn't perfectly even. While it does add to the labor cost and disposal fees, a full tear-off guarantees the optimal foundation, potentially extends the lifespan of your new roof even further, and often aligns better with certain manufacturer warranties and local building codes, especially if you have multiple layers of existing roofing already.
Installing Over Existing Shingles: Pros and Cons
Sometimes, it's possible and permissible to install a metal roof directly over your existing asphalt shingles. This is often an attractive option for homeowners because it can save on labor and disposal costs associated with a full tear-off. The process of Installing a Metal Roof Over Shingles can also be quicker since you're not spending days removing old materials. However, it's not a universal solution and comes with its own set of considerations.
One major benefit is the added layer of insulation and sound dampening that the existing shingles can provide. This can slightly improve energy efficiency and reduce rain noise. However, there are significant drawbacks. If your existing roof deck has hidden damage, installing over shingles means those problems remain unaddressed, potentially compromising the integrity of your new roof. Additionally, building codes in some areas might limit the number of roofing layers allowed, often to two. If you already have two layers of shingles, an overlay might not be an option. Finally, some metal roofing systems, particularly standing seam, benefit most from a flat, uniform surface, and the unevenness of old shingles can sometimes transfer through, leading to aesthetic imperfections. Your contractor should always assess if your existing roof is a suitable candidate for an overlay, ensuring it's in good structural condition and free of excessive dips or humps.
Disposal of Old Materials
Whether you opt for a full tear-off or an overlay where some materials are removed, proper disposal is a non-negotiable part of the process. Trust me, you don't want a mountain of old shingles sitting in your yard for weeks! Reputable contractors will include debris removal in their quote and handle it professionally. This typically involves using a large dumpster, often placed strategically to minimize disruption and protect your driveway.
The disposal process also highlights a growing trend towards sustainability. Many roofing materials, particularly asphalt shingles, are incredibly bulky and contribute significantly to landfill waste. Some progressive roofing companies, or their disposal partners, now offer recycling options for asphalt shingles, transforming them into aggregate for road construction. When discussing your project, it’s always worth asking your contractor, perhaps a company found through a service like Modernize, about their disposal practices and if they incorporate any eco-friendly options. This not only keeps your property clean but also ensures the project is completed responsibly.
Decking and Underlayment: The Foundation Beneath
After clearing the old roof (or preparing it for overlay), the next crucial phase is perfecting the sub-structure of your metal roof. This stage is all about creating a robust, watertight barrier that will serve as the true long-term protector of your home, even beyond the metal panels themselves. It’s the unsung hero of your roofing system.
Inspecting and Preparing the Roof Deck
With the old roofing materials removed, the bare roof deck is exposed, offering a prime opportunity for a thorough inspection. This is where your contractor meticulously checks for any signs of rot, mold, water damage, or structural weakness in the plywood or OSB sheathing. Damaged sections must be replaced, not just covered up. Think about it: a metal roof is a significant investment, often lasting 50 years or more. You wouldn't build a new house on a crumbling foundation, and the same principle applies here.
Any loose nails, protruding screws, or uneven spots on the deck also need to be addressed. These seemingly minor imperfections can create bumps or pressure points that could eventually affect the smooth, flat appearance of your metal panels, or worse, compromise their sealing. A level and clean deck is absolutely paramount for the optimal performance and aesthetics of your new metal roof. This attention to detail at the decking stage truly sets the foundation for a flawless installation.
Choosing the Right Underlayment
Once the deck is sound, the next layer is the underlayment, and this is far more important than many homeowners realize. It’s not just a thin sheet; it's a critical secondary barrier against moisture penetration, offering protection even if a metal panel were to be damaged or if condensation were to form beneath the roof. Our guide to Metal Roof Underlayment and Ventilation Guide dives deep into this topic, but here’s the gist: you have options, and the right choice matters.
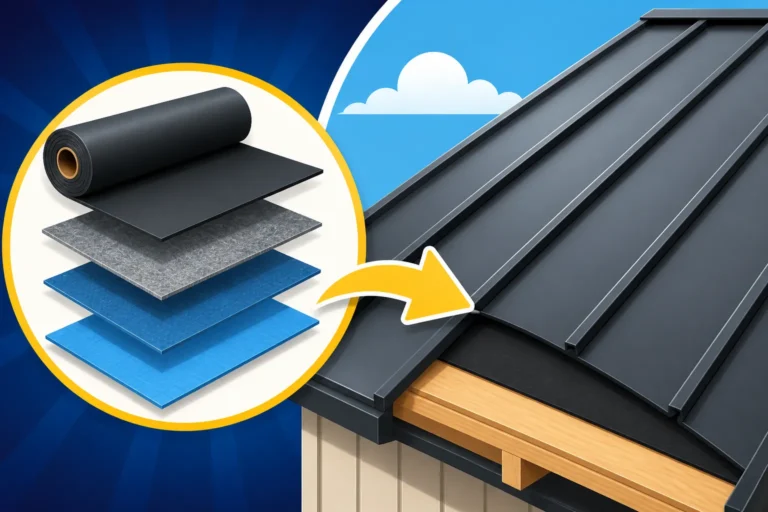
Traditionally, felt paper was used, but modern synthetic underlayments have largely taken its place. Synthetics are much more durable, tear-resistant, lighter, and don't absorb moisture like felt can. For high-performance metal roofs, especially standing seam, many contractors opt for a self-adhering ice and water shield. This sticky membrane creates a watertight seal directly to the roof deck, providing superior protection against ice dams and wind-driven rain, particularly in vulnerable areas like eaves, valleys, and around penetrations. The specific type and quality of underlayment chosen directly impact the longevity and weather resistance of your entire roofing system, so it's not an area to cut corners.
Here's a quick comparison of common underlayment types:
| Underlayment Type | Description | Pros | Cons | Typical Cost (per square foot, material only) |
|---|---|---|---|---|
| Asphalt Felt (15/30#) | Traditional tar-impregnated paper, comes in rolls. | Inexpensive, widely available. | Prone to tearing, absorbs moisture, can wrinkle. | $0.05 – $0.10 |
| Synthetic Underlayment | Woven polypropylene or polyester, lightweight, much stronger than felt. | High tear resistance, water-resistant, often permeable to allow deck drying. | Slightly more expensive than felt. | $0.15 – $0.30 |
| Self-Adhering (Ice & Water Shield) | Bitumen or rubberized asphalt membrane with a peel-and-stick backing. Seals around fasteners. | Superior waterproofing, seals around fasteners, excellent for low slopes. | Most expensive, can be tricky to install in hot weather. | $0.50 – $1.50+ |
Ice and Water Shield Application
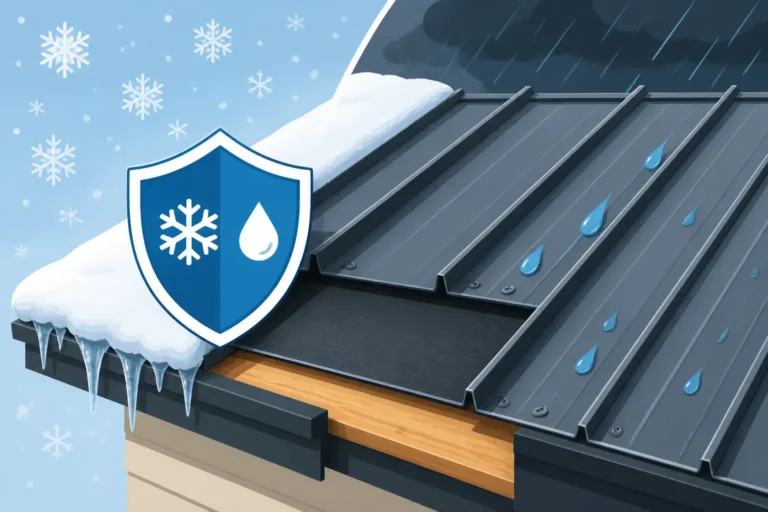
The application of ice and water shield is a critical step, especially in regions prone to heavy snow, ice dams, or intense rain. This specialized underlayment, often required by code in certain areas, is a rubberized asphalt product that creates a watertight seal to the roof deck. Unlike standard underlayment which is typically nailed or stapled down, ice and water shield has an adhesive backing that literally sticks to the roof deck. When fasteners penetrate it, the rubberized material self-seals around them, preventing any water infiltration.
Typically, it's applied along the eaves, extending at least 24 inches past the interior wall line, as this is where ice dams are most likely to form. It's also critical for sealing valleys, around chimneys, skylights, and any other roof penetrations where water is most likely to find its way in. The installation requires careful attention to detail, ensuring proper overlaps and a wrinkle-free application to maximize its effectiveness. This robust barrier offers an unparalleled level of protection against moisture, giving you significant peace of mind that your home is safeguarded against the elements for decades to come.
Flashing and Drip Edge: Protecting the Edges and Openings
The edges and penetrations of your roof are its most vulnerable points, the places where water loves to creep in. This is why proper flashing and drip edge installation is absolutely non-negotiable for a watertight metal roof. Think of them as the meticulously tailored seams and closures on a high-performance jacket, designed to repel water at every possible opening.
Installing Drip Edge and Eave Closures
The drip edge is a strip of metal installed along the perimeter of your roof, at the eaves and gables, designed to direct water away from the fascia board and into the gutters. Without it, water can run back along the underside of the roof deck, causing damage to the fascia, soffit, and even the wall structure over time. There are different profiles of drip edge, but their primary job is consistent: create a clean, protective overhang. It's often installed under the underlayment along the eave to ensure any water that gets past the first layer runs over the drip edge, and over the underlayment on the rake (gable) edges to shed water outward.
Eave closures, specific to certain metal panel profiles, are another vital component often installed at the bottom edge. For corrugated or ribbed panels, these are shaped to match the panel profile, filling the gaps that would otherwise be left open, preventing insects, rodents, and wind-driven rain from entering the attic space. These details might seem small, but they play a monumental role in the roof's overall performance and longevity, ensuring that every edge is sealed and protected.
Flashing Valleys and Wall Junctures
Valleys—where two roof planes meet at an internal angle—are notorious for collecting large volumes of water, and if not properly flashed, are prime locations for leaks. For metal roofs, valleys are typically protected with a continuous metal valley flashing, often a pre-formed piece of metal that extends up both slopes. This flashing is installed over the underlayment, but under the metal roof panels, creating a smooth, unobstructed channel for water to flow down the roof. The key is to ensure proper width, overlap, and sealing to prevent any water from bypassing the metal or penetrating the underlying structure.
Similarly, wall junctures—where a roof plane meets a vertical wall, like an addition or dormer—require diligent flashing. This typically involves counter-flashing, step flashing, and sometimes Z-flashing, all working in concert to divert water away from the wall and down the roof. Each piece is integrated carefully, often sealed with high-quality sealant, to create an impenetrable barrier. Getting these critical areas right is a hallmark of an experienced metal roofing crew.
Chimney, Skylight, and Vent Flashing
Roof penetrations like chimneys, skylights, and vent pipes are essentially holes in your roof, making them incredibly susceptible to leaks if not meticulously sealed. This is where specialized flashing techniques come into play. Chimneys, being large, require a multi-piece flashing system, often including a base flashing, step flashing, and counter-flashing. The counter-flashing is typically embedded into the mortar joints of the chimney itself, providing a durable, long-term seal that doesn't rely solely on surface sealants.
Skylights come with their own manufacturer-specific flashing kits that are designed to integrate seamlessly with various roofing materials, including metal. Installers must follow these instructions precisely to maintain the skylight's warranty and prevent leaks. For vent pipes, a combination of pipe boots (which fit snugly around the pipe) and specialized flashing ensures a watertight seal. Each of these penetrations demands a high degree of skill and precision, as any shortcuts here will almost certainly lead to frustrating and damaging leaks down the road. These components are part of the larger family of Metal Roof Components & Accessories Explained.
Panel Installation: Laying Down the Metal
This is the phase where your roof truly starts to transform, as the metal panels themselves are lifted and secured into place. It’s an exciting stage, but it requires extreme precision, careful handling, and an understanding of the specific type of metal roofing being installed, whether it’s standing seam, corrugated, or metal shingles.
Starting the First Panel
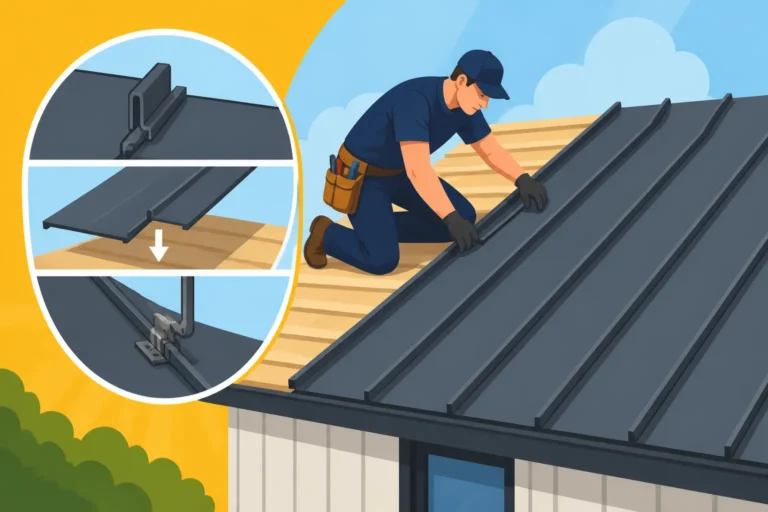
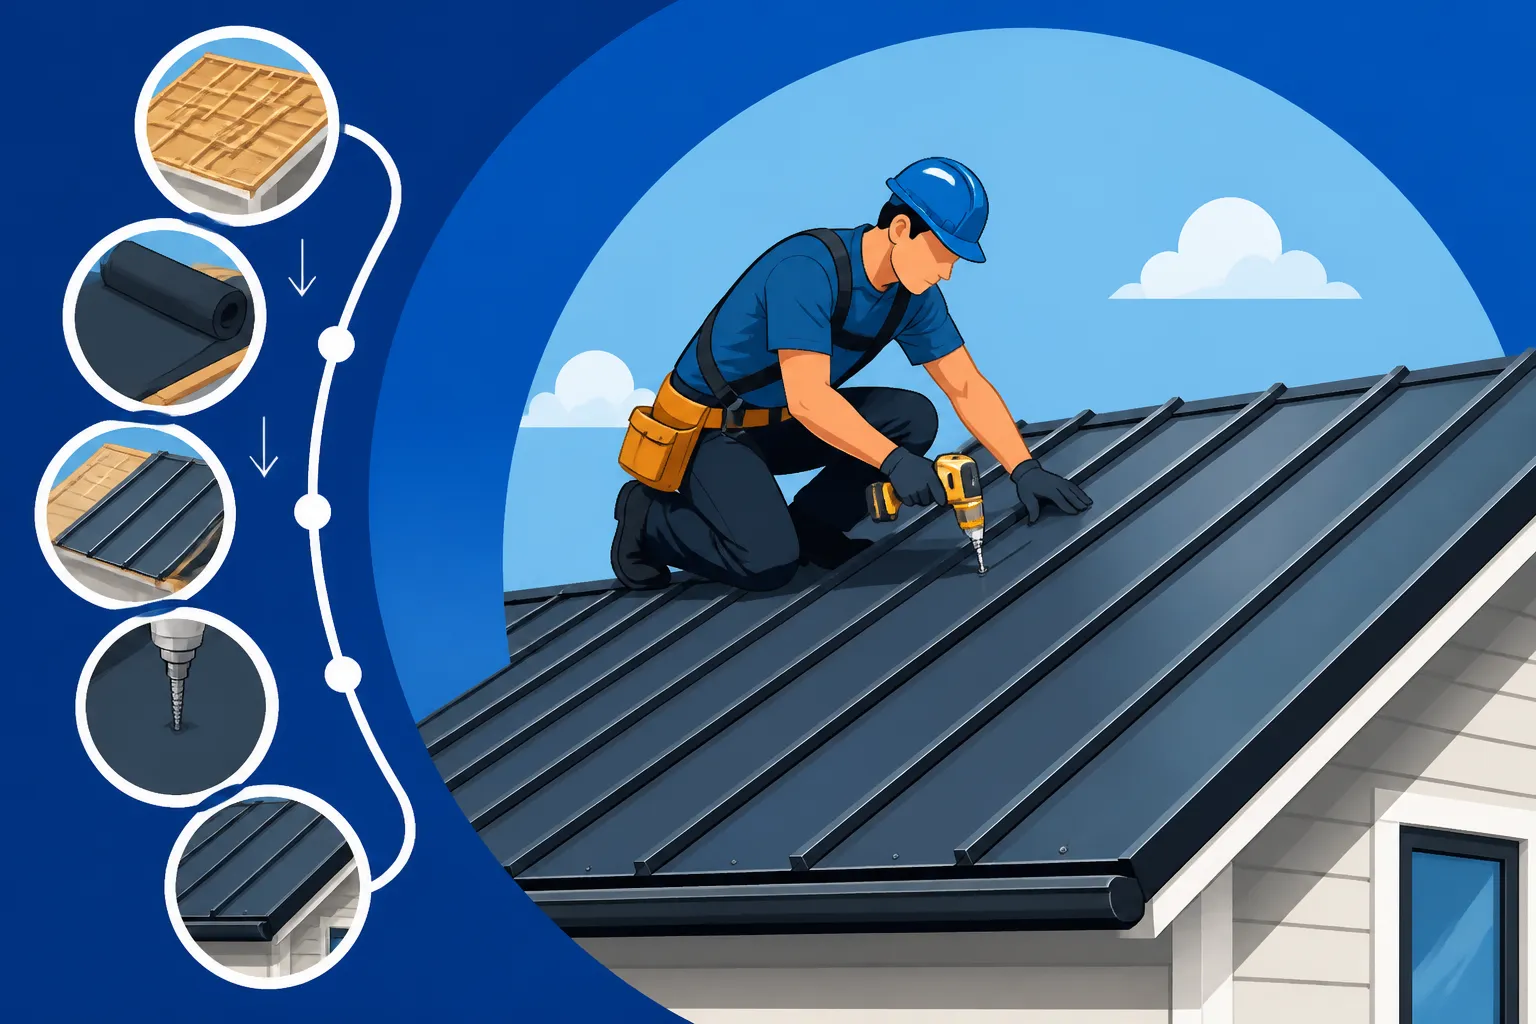
The very first panel laid down sets the tone for the entire roof, much like the first course of bricks on a wall. It needs to be perfectly straight, square, and aligned with the eaves and rake edge. Installers typically begin at one end of the roof (often the lowest point) and work their way across. For standing seam panels, specialized clips are usually used to attach the panel to the roof deck, leaving the fasteners hidden for a clean aesthetic and superior weather resistance. These hidden fasteners are one of the key advantages of a standing seam system, contributing to its incredible longevity and low maintenance.
For exposed fastener systems, like corrugated or R-panel, the screws will be visible. In this case, starting straight is still critical, but the precise placement of each screw is even more important to ensure a consistent, appealing look and proper sealing. Installers will often use chalk lines or laser levels to guide the initial panel placement, ensuring that the entire roof will look uniform and professional once complete. Rushing this initial step can lead to a crooked roof, which is not only unsightly but can also complicate subsequent panel installation and trim work.
Securing Panels and Fastener Types
The method of securing the metal panels varies significantly depending on the profile. For standing seam roofs, the panels are typically attached using specialized clips that are fastened to the roof deck, and then the next panel snaps over or is mechanically seamed onto the previous one, completely concealing the fasteners. This allows the metal to expand and contract freely with temperature changes, preventing stress and oil canning, and makes for a much cleaner, more durable finish. There are different types of standing seam systems, such as snap-lock and mechanically seamed, each with its own installation nuances.
Exposed fastener systems, common with corrugated, R-panel, and 5V Crimp profiles, use screws that pass through the metal panel and into the roof deck or purlins below. These screws have specialized washers (often made of EPDM rubber) that compress to create a watertight seal. The type, length, and placement of these screws are critical. Over-tightening can damage the washer and panel, while under-tightening can lead to leaks. Installers must be mindful of the correct spacing and ensure they hit the structural members below. Understanding Metal Roof Gauges Explained: 22, 24, 26 & 29 is also important here, as the gauge affects the panel's rigidity and how it interacts with fasteners.
Cutting and Finishing Panels
Inevitably, panels will need to be cut to size, especially at gable ends, valleys, and around dormers or other protrusions. This isn't a job for just any saw; specialized tools are used to cut metal cleanly and efficiently without damaging the protective coatings. Snips, electric shears, or nibblers are common tools. Abrasive cutting wheels, like those on angle grinders, are generally avoided for coated metal panels because the heat generated can burn the coating, exposing the raw metal and leading to premature rust.
Once cut, the edges of the panels, particularly those in valleys or around hips, often require specialized folding or shaping to ensure a clean fit and proper water shedding. This might involve hemming or bending the metal to create a drip edge or to interface cleanly with flashing. This finishing work demands a high level of craftsmanship and attention to detail. It’s where a good metal roofer truly shines, transforming raw panels into a beautifully tailored, watertight roof.
Ridge and Trim Installation: The Finishing Touches
With the main field of metal panels in place, the roof truly starts to take shape. The next critical stage involves installing the various trim pieces and the ridge cap, which not only complete the roof's aesthetic but also provide crucial protection at its highest and most exposed points.
Installing Ridge Caps and Hip Caps
The ridge of your roof, the very peak where two opposing roof planes meet, is a central feature that requires special attention. This is where the ridge cap comes into play. It's a pre-formed metal piece designed to cover the seam created by the converging panels, providing a weatherproof seal and a finished appearance. For optimal performance, especially with standing seam systems, the ridge cap is often installed with a gap underneath, combined with a ventilation system, to allow hot air to escape from the attic. This is a key part of your home's overall ventilation strategy, which is often discussed in our guide on Metal Roof Underlayment and Ventilation Guide.
Similarly, hip caps are used where two roof planes meet at an external angle, such as on hip roofs. These caps are also designed to cover the seam, creating a clean, consistent line down the hip. Like ridge caps, they must be properly fastened and sealed to prevent water intrusion. The aesthetics of the ridge and hip caps are crucial; they are highly visible and contribute significantly to the overall architectural appeal of your metal roof.
Gable Trim and Side Wall Flashing
Gable trim, also known as rake trim, is installed along the sloping edges of the roof where it extends beyond the wall (the gable ends). This trim provides a clean, finished edge to the metal panels, protecting them from wind uplift and preventing water from running underneath. It’s often a multi-piece system that cap the ends of the panels, offering a crisp, architectural line. The correct installation of gable trim is essential for the long-term integrity and visual appeal of the roof.
Side wall flashing is used where the metal roof panels abut a vertical wall, typically seen on dormers or where an addition ties into a larger structure. This flashing creates a waterproof seal between the roof and the wall, preventing water from seeping behind the siding or into the wall cavity. Often, step flashing and counter-flashing are used in conjunction, with the counter-flashing embedded into the wall itself (e.g., cut into the mortar joints of a brick wall or placed under the siding) to provide a robust, long-lasting barrier against moisture.
Sealing and Final Inspections
Once all the panels, trim, and caps are in place, the final step in the installation process is meticulous sealing and a thorough inspection. High-quality sealants, typically silicone or butyl-based, are applied at various junctions, overlaps, and around penetrations to ensure every potential water entry point is fully protected. These sealants are chosen for their durability, flexibility, and resistance to UV degradation, ensuring they hold up over decades.
After sealing, the installation crew will perform a comprehensive final inspection. This isn't just a quick glance; it's a detailed walkthrough to ensure every panel is properly secured, every seam is tight, every piece of flashing is correctly installed, and no fasteners have been missed or over-tightened. They'll also check for any minor cosmetic imperfections, like scratches or dents, which should be touched up with color-matching paint designed for metal roofing. This final inspection is critical for confirming the roof's integrity and ensuring it meets both the contractor's high standards and the manufacturer's warranty requirements. If you're working with a reputable contractor, like those you might find through Modernize, they will prioritize this final review to ensure your complete satisfaction.
Post-Installation: What Happens Next?
The installation of your stunning new metal roof isn't truly complete until the final details are handled. This involves not only tidying up but also ensuring you have all the necessary paperwork and understanding how to best care for your new investment. Don't let the excitement of a new roof distract from these crucial final steps.
Site Cleanup and Debris Removal
Once the last panel is secured and the final sealant applied, a professional roofing crew will undertake a thorough site cleanup. This means more than just tossing big pieces of scrap into a dumpster. It involves meticulously scanning the property for stray fasteners, metal shavings, and any other debris that could be a hazard or simply an eyesore. Many contractors use powerful magnets to sweep the lawn and driveways, ensuring no nails or screws are left behind that could puncture tires or harm pets.
This cleanup extends to any landscaping, bushes, or other areas that might have been affected during the installation. Tarps that were laid down to protect flower beds will be removed, and any displaced outdoor items will be returned to their original positions. A clean site isn't just a courtesy; it's a mark of a professional contractor who respects your property and understands that the job isn't finished until your home looks as good as new, or even better.
Final Walkthrough and Punch List
Before the crew packs up entirely, a final walkthrough with you, the homeowner, is essential. This is your opportunity to inspect the finished product up close, ask any lingering questions, and confirm that everything has been installed to your satisfaction and according to the agreed-upon contract. A reputable contractor will actively solicit your feedback during this walkthrough.
Any minor issues or adjustments that need to be made are noted on what's called a "punch list." This could be anything from a small scratch that needs touching up, a piece of trim that needs minor adjustment, or a question about a particular detail. Addressing these items promptly ensures that you are fully happy with the outcome before final payment is made. This collaborative review ensures transparency and accountability, giving you peace of mind in your new investment.
Warranty Registration and Maintenance Tips
A new metal roof comes with significant warranties, often covering the material itself for 30-50 years, and sometimes the paint finish for an equally impressive duration. There's also usually a separate warranty covering the contractor's workmanship. Understanding these warranties and ensuring they are properly registered is incredibly important. Your contractor should provide you with all warranty documentation and guide you through the registration process, as some material warranties require online registration within a specific timeframe after installation. Learn more about Metal Roof Warranties: Workmanship vs Manufacturer.
Beyond warranties, your contractor should also provide you with essential Metal Roof Maintenance Guide. While metal roofs are famously low maintenance, they aren't entirely maintenance-free. This might include recommendations for periodic inspections (perhaps annually), how to safely clean your roof (avoiding harsh chemicals or pressure washing), and what to look out for regarding potential issues like debris accumulation or sealant degradation. Knowing how to properly care for your metal roof will help maximize its lifespan and keep it looking fantastic for decades.
Disclaimer
Please remember that this guide provides general information about metal roof installation. Specific practices, codes, and recommendations can vary significantly based on your location, the type of metal roof system, and the individual contractor. Always consult with a qualified, licensed, and insured metal roofing professional for advice tailored to your specific project and local regulations. The information here should not be taken as professional advice or a substitute for expert consultation.