How Many Screws Per Sheet of Metal Roofing
One of the most common head-scratchers when you're planning a metal roof project isn't just picking the right material or color, but figuring out the nitty-gritty details like how many fasteners you'll actually need. It feels like a small thing, but getting the screw count wrong can lead to costly delays, structural issues, or even voided warranties. This guide is here to demystify the process, walking you through everything from panel types to local building codes, so you can confidently estimate your metal roofing screw requirements.
Understanding Metal Roofing Panels and Their Fastening Needs
When you think about metal roofing, it's easy to picture a single, monolithic "metal roof," but the truth is there's a huge variety of panel types, and each comes with its own unique fastening strategy. The way a panel is designed dictates where and how many screws it needs to stay put through thick and thin, literally.
Different Metal Roof Profiles and Their Screw Requirements
Not all metal roofs are created equal, and neither are their fastening methods. The profile of your chosen metal panel plays a colossal role in determining the number and type of screws you'll need.
-
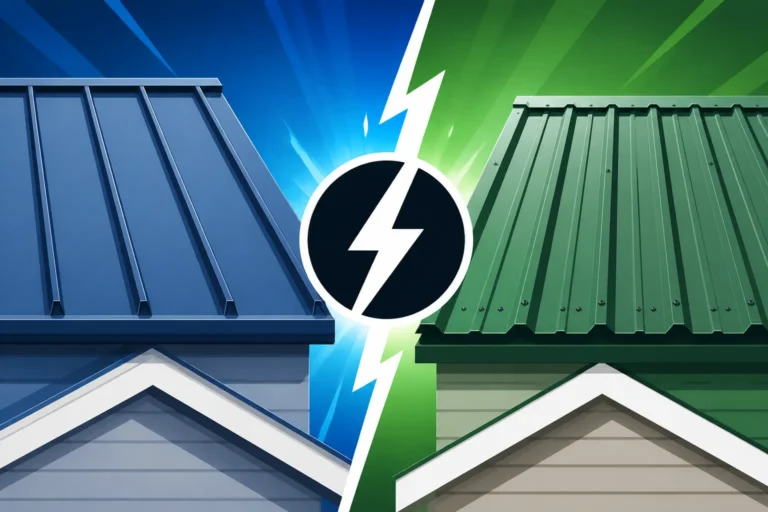
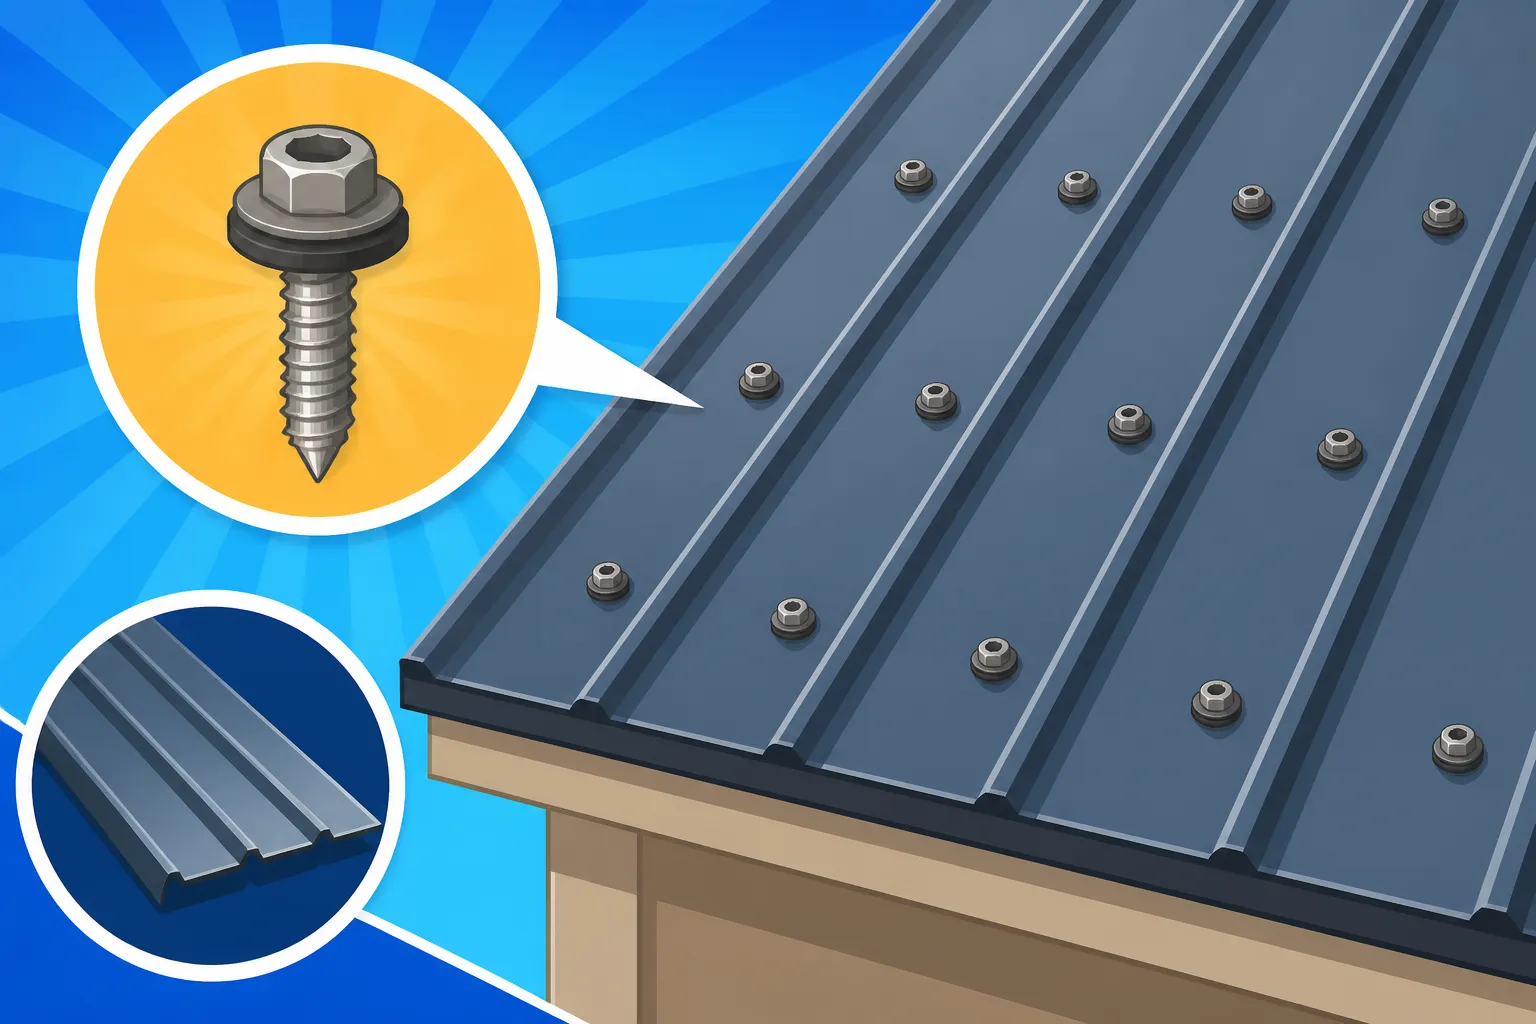
Exposed Fastener Panels: These are typically what most people think of when they imagine a metal roof on a barn or a workshop. Profiles like corrugated, R-panel, and PBR-panel feature ribs and valleys, and the screws go directly through the face of the panel, into the purlins or decking below. This means the fasteners are visible once the roof is installed. Because these screws are exposed, they require a gasket or washer to create a watertight seal. The number of screws per panel can vary significantly based on factors like panel width, rib spacing, and local wind codes. For instance, a standard corrugated panel might have screws every 12 to 24 inches along the purlins, and usually at every lap joint. If you're looking into specific types, you might want to read more about the differences between Standing Seam vs Corrugated Metal Roof.
-
Hidden Fastener Panels: These systems are designed for a much cleaner aesthetic, as the fasteners are concealed beneath the panel's surface. Standing seam roofing is the most popular example here. Instead of screws going through the panel face, the panels are typically secured by clips or cleats that are themselves screwed to the roof deck. The next panel then locks over these clips, hiding the fasteners completely. This design allows the metal to expand and contract more freely, reducing stress on the panels and fasteners. While you don't screw through the panel directly, you still need to account for the screws used to secure the clips. The clips are usually spaced at specific intervals along the length of the panel, typically every 12 to 36 inches, depending on the panel type, gauge, and wind uplift requirements. This means you’re calculating clips per lineal foot, rather than screws per square foot of panel face. Understanding How Much Does a Standing Seam Metal Roof Cost can help you budget for these systems, which generally have higher material and installation costs but offer superior longevity and aesthetics.
-
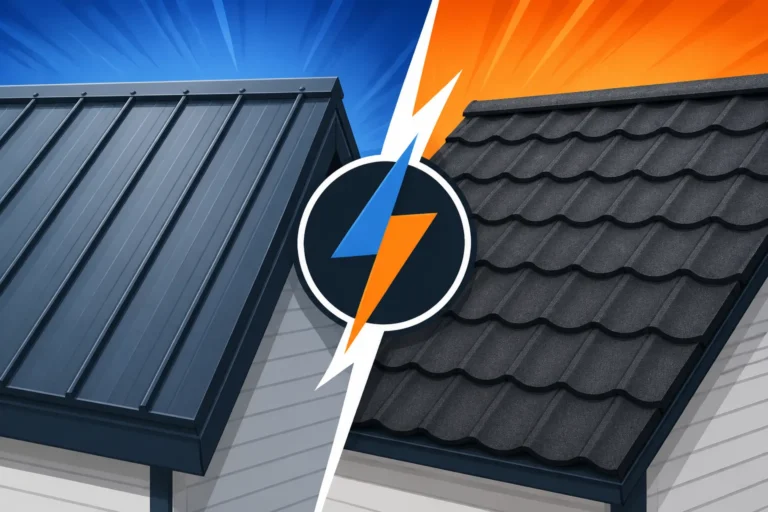
Metal Shingles and Tiles: These are designed to mimic traditional roofing materials like asphalt shingles, slate, or wood shakes, but with the durability of metal. Fastening for metal shingles can vary; some are interlocked and then nailed or screwed along an overlapping flange, much like a traditional shingle, while others might have clips. The exact method will be specific to the manufacturer's design. Because these are smaller, individual units, the "screws per sheet" concept shifts to "screws per shingle" or "screws per square" (a square being 100 square feet of roofing).
The Role of Gauge and Material in Screw Selection
It's not just the profile that matters; the actual composition and thickness of your metal panels also influence your fastener choices. This isn't just about structural integrity, but also about ensuring compatibility and long-term performance.
-
Metal Gauge: Gauge refers to the thickness of the metal. In general, a lower gauge number means a thicker panel (e.g., 24-gauge is thicker than 29-gauge). Thicker panels, like 24-gauge steel, are more rigid and may require fewer fasteners per linear foot compared to a thinner 29-gauge panel, especially in areas prone to high winds or heavy snow loads. However, the primary effect of gauge is on the strength of the panel itself, influencing how well it resists deformation and pull-out, rather than dramatically altering the basic fastening pattern. It's often recommended to match the fastener's material and coating to the roofing material to prevent galvanic corrosion, which is why understanding Metal Roof Gauges Explained: 22, 24, 26 & 29 is so crucial for durability.
-
Panel Material: Most residential metal roofs are made from steel or aluminum.
- Steel Panels (often Galvalume or galvanized steel) are robust and widely used. They typically require steel screws that are galvanized, zinc-plated, or coated with ceramic or other materials to resist corrosion.
- Aluminum Panels are lighter and inherently corrosion-resistant, making them ideal for coastal areas. However, aluminum is a softer metal, so installers must be careful not to overtighten screws, which could strip the panel or cause dimpling. For aluminum roofs, stainless steel fasteners are often preferred to avoid galvanic corrosion, which occurs when dissimilar metals come into contact in the presence of an electrolyte (like moisture). Using compatible screws prevents premature degradation of both the fastener and the panel.
Ultimately, the manufacturer's specifications for your chosen panel profile and material will provide the most accurate and reliable information regarding screw type and quantity. Always consult these guidelines before making any purchase or beginning installation.
Exposed Fastener Systems: The Nuts and Bolts (and Screws!)
Exposed fastener systems are popular for their cost-effectiveness and relatively straightforward installation, particularly on agricultural buildings, workshops, and many residential homes with a more rustic or industrial aesthetic. However, because the fasteners penetrate the roof panels, proper installation is paramount to prevent leaks and ensure longevity.
Standard Fastening Patterns for Corrugated and R-Panel Roofs
When you're dealing with exposed fastener panels like corrugated or R-panel (which is often seen on commercial buildings but also on homes for its robust look), there's a common rhythm to the fastening pattern. This rhythm ensures the panels are securely held against wind uplift, thermal expansion, and the general wear and tear of weather.
-
Through-Fastening: The most crucial aspect is that screws go through the metal panel and into the underlying purlins, battens, or solid decking. These panels have raised ribs and flat valleys. Typically, screws are placed in the valleys of the panels. Why the valleys? Because this is where the panel rests directly on the support structure, providing a solid connection. Screwing into the ribs can create air gaps and make it harder to achieve a watertight seal.
-
Lap Seams: Where two panels overlap side-by-side, creating a lap joint, screws are essential to bind them together and prevent moisture intrusion. These lap screws are often shorter and are installed on the high point of the overlap, or sometimes through a flat portion designed for fastening. A common recommendation is to place lap screws every 12 to 18 inches along the seam. This helps create a cohesive, single membrane that effectively sheds water.
-
Purlin/Decking Attachment: Along the length of the panels, where they cross over the structural supports (purlins or solid decking), screws are driven through the valleys. The spacing of these screws can vary, but a widely accepted standard is to fasten every other valley on each purlin. If you have a 36-inch wide panel with 9-inch rib spacing, that means you'll have four valleys. Screwing into two of those valleys at each purlin intersection provides ample hold. On gables and eaves, where wind uplift forces are strongest, it's common practice to screw into every valley. For a roof using Corrugated Metal Roof Cost as a reference, you'll find these fastening patterns are key to both cost and performance.
-
Perimeter Reinforcement: The edges of the roof, particularly the eaves, gables, and ridge, are more susceptible to wind uplift. Building codes often require increased fastening density in these areas. This might mean placing screws in every valley along the perimeter purlins or increasing the frequency of screws along the gables. Think of these areas as the "high-stress zones" of your roof, where extra reinforcement pays off in preventing costly damage.
Factors Influencing Screw Quantity in Exposed Fastener Systems
While there are standard patterns, the specific number of screws you’ll need isn't a fixed equation. Several critical factors come into play, significantly altering the required density of your fasteners. Ignoring these can lead to catastrophic roof failure, especially in extreme weather.
-
Wind Uplift: This is arguably the most significant factor. High wind speeds create negative pressure that tries to lift your roof panels right off the structure. Areas prone to hurricanes, tornadoes, or even just regular strong winds (like the coastal regions of Florida or the plains of Texas) will require a much denser fastening pattern than a sheltered home in a low-wind zone. Building codes in these areas often mandate specific uplift ratings, which translate directly into closer screw spacing or the use of more robust fasteners. For example, a standard screw spacing of 24 inches on center might be reduced to 12 inches on center in high-wind zones, sometimes even requiring screws in every valley along every purlin. This is a primary consideration when considering Metal Roof Wind and Fire Ratings Explained.
-
Roof Pitch (Slope): Steeper roofs generally experience less direct wind uplift force on their surface compared to low-slope roofs. However, very low-slope roofs (especially below a 3:12 pitch) might have different fastening requirements to ensure proper drainage and prevent water intrusion, even if the primary concern isn't wind. Conversely, extremely steep roofs can be harder to install and may require different techniques to ensure worker safety, but the actual screw density for panel attachment usually follows similar principles as moderately pitched roofs, with an emphasis on preventing panels from sliding.
-
Snow Load: In regions with heavy snowfall, the weight of accumulated snow can put immense downward pressure on the roof. While metal roofs are excellent at shedding snow, sometimes snow can build up. The fastening system must be strong enough to withstand this added downward force. While less direct than wind uplift, heavy snow loads might influence the choice of a higher gauge panel, which in turn could handle slightly wider screw spacing due to its inherent rigidity, or it might simply reinforce the need for reliable, deeply penetrating fasteners.
-
Geographical Location and Local Codes: This ties all the above factors together. Local building codes, like the Florida Building Code or specific county regulations, are tailored to the typical weather conditions of that area. These codes explicitly state minimum fastening requirements, often detailing screw type, length, and spacing for various zones on the roof (field, perimeter, corners). Always consult your local building department or a reputable roofing contractor, perhaps found through services like Modernize, to ensure your project meets all current regulations. Getting a permit is also a crucial step, and you can learn more about if Do You Need a Permit for a Metal Roof. Failing to adhere to these codes can result in significant fines, a requirement to redo the work, and complications with insurance claims.
Given these variables, a typical 3-foot wide exposed fastener panel might require anywhere from 12 to 24 screws per 10-foot length, depending on purlin spacing and wind load, plus additional lap screws. It's not a one-size-fits-all answer, emphasizing the need for careful planning and, ideally, professional guidance.
Hidden Fastener Systems: A Different Approach to Security
Hidden fastener systems, most notably standing seam metal roofs, offer a sleek, modern aesthetic and superior weather resistance compared to exposed fastener panels. Their design cleverly conceals the attachment points, creating a smooth, uninterrupted roof surface. This also means the calculation of fastener quantity shifts significantly from counting screws directly on the panel face.
How Standing Seam and Mechanical Seam Panels are Secured
The magic of hidden fastener systems lies in their ingenious method of attachment, which allows for thermal movement while maintaining an incredibly strong connection to the roof deck.
-
Clips and Cleats: The Unseen Heroes: Instead of screwing directly through the panel, standing seam panels are held in place by specialized clips or cleats. These metal components are first screwed or nailed to the roof substrate (plywood, OSB, or purlins). Each standing seam panel then has a female leg that locks over the clip, and a male leg on the adjacent panel then interlocks with the female leg, creating a "seam" that encases the clip. This method allows the panels to expand and contract with temperature changes without putting stress on the fastener holes, which is a major contributor to leaks in exposed fastener systems. These clips are vital to the structural integrity, and understanding Metal Roof Components & Accessories Explained can shed more light on their function.
-
Snap-Lock vs. Mechanical Seam: There are two main types of standing seam systems based on how the seam is formed:
- Snap-Lock Systems: These panels are designed with factory-formed male and female legs that simply "snap" together over the clips, often with an audible click. They are typically faster to install and require fewer specialized tools. The clips themselves are secured to the deck, and the panels then lock over them.
- Mechanical Seam Systems: These involve a two-step or even three-step process where the male and female legs are mechanically crimped or "seamed" together using a specialized seaming machine. This creates an incredibly robust and watertight seal. The clips are first fastened to the deck, and then the seaming process permanently locks the panel legs around the clips. This method is often preferred in high-wind or hurricane-prone areas due to its superior uplift resistance. For both types, the clips themselves are the elements that require direct fastening to the roof deck.
-
Fastening the Clips: The clips typically have multiple holes, often two or three, through which screws are driven into the roof deck. The number of screws per clip is generally consistent, so the main variable in fastener count is the number of clips required. These clips are usually placed at specified intervals along the length of each panel – for instance, every 12 to 24 inches on center. The manufacturer's installation guide will specify the exact spacing and type of fasteners (screws or nails) to use for the clips, depending on the panel material, gauge, and anticipated wind loads. It's crucial that these fasteners are appropriately sized and material-compatible to ensure the clips hold securely for the roof's entire lifespan.
Calculating Fastener Needs for Hidden Fastener Roofs
Since you're not putting screws directly through the panel, the calculation for hidden fastener systems like standing seam is less about "screws per sheet" and more about "clips per lineal foot of panel." This requires a slightly different approach to estimation.
-
Focus on Clip Spacing: The primary driver for fastener quantity in hidden fastener systems is the required spacing of the clips along the length of each panel. Manufacturers provide detailed specifications for this, usually in their installation manuals. This spacing can range from as little as 12 inches on center in extreme high-wind zones to 36 inches on center in calmer environments.
- Example Calculation: Imagine you have a roof that requires 20-foot long standing seam panels. If the clip spacing is specified at 24 inches (2 feet) on center, you would need (20 feet / 2 feet) + 1 = 11 clips per panel (the +1 accounts for the clip at the very end). If each clip requires 3 screws to secure it to the deck, then each 20-foot panel needs 11 clips * 3 screws/clip = 33 screws.
-
Perimeter and Corner Zones: Just like exposed fastener systems, hidden fastener roofs also require increased fastening density in the perimeter and corner zones of the roof. These areas experience greater wind uplift forces. Manufacturers will often specify tighter clip spacing (e.g., 12 inches on center instead of 24 inches) for the first few feet in from the eaves, gables, and ridge. This means you’ll need to calculate these zones separately with their higher clip-per-foot requirement.
-
Trim and Flashing Fasteners: Don't forget the extensive network of trim pieces and flashing that complete a metal roof system. Ridge caps, rake trim, eave trim, sidewall flashing, and valley flashing all need to be securely fastened. These components are typically attached with exposed screws, often self-tapping and color-matched to the trim. The quantity will depend on the lineal footage of each trim type. For example, a ridge cap might require screws every 12 to 18 inches on alternating sides. This is an important detail when estimating the total Metal Roof Trim and Flashing Cost.
-
Starter Strips and Underlayment: While not directly screws into the panel, remember that elements like starter strips for standing seam panels are often fastened with concealed screws or nails. Also, the critical Metal Roof Underlayment and Ventilation Guide requires its own fastening, usually with cap nails or staples, though this isn't typically factored into "screws per sheet of metal roofing."
By meticulously calculating the lineal footage of panels and all trim pieces, and applying the manufacturer's specified clip and screw spacing, you can arrive at a highly accurate estimate for your hidden fastener system.
The Criticality of Proper Fastener Selection and Installation
It's easy to think that a screw is just a screw, but when it comes to metal roofing, that couldn't be further from the truth. The long-term performance and watertight integrity of your entire roof system hinge on choosing the correct fasteners and installing them with precision. Skimping here is a classic "penny wise, pound foolish" mistake.
Why the Right Screws Matter: Material, Coating, and Washers
Choosing the correct screws for your metal roof is non-negotiable for durability and performance. It’s not just about holding the panels down; it’s about preventing leaks, rust, and premature failure.
-
Material Compatibility: The most common fasteners for metal roofing are made of steel, often carbon steel, but sometimes stainless steel. It’s vital to match the fastener material to the roofing panel material to prevent galvanic corrosion. For example, using standard galvanized steel screws on an aluminum roof can lead to corrosion of the aluminum over time due to electrochemical reactions. Stainless steel fasteners are generally more universally compatible but also more expensive. Conversely, using a lower-quality fastener on a premium metal roof can be a weakness in an otherwise strong system.
-
Corrosion-Resistant Coatings: Since fasteners are often exposed to the elements (even if hidden by clips, moisture can still reach them), they need robust corrosion protection. Common coatings include:
- Galvanization: A zinc coating that protects steel from rust.
- Ceramic Coatings (e.g., Kynar, Acrylic, Polyester): These are applied over galvanized or other treated steel fasteners and often come color-matched to the roof panels. High-quality coatings like Kynar (PVDF) offer excellent UV resistance and color retention, meaning your screws won't fade or rust before your roof does. Inferior coatings can chip or wear away, exposing the steel underneath to rust.
-
Self-Drilling vs. Self-Tapping:
- Self-drilling screws have a drill bit-like tip that drills its own hole and then taps the threads, all in one motion. This speeds up installation and is common for metal-to-metal connections.
- Self-tapping screws require a pilot hole to be pre-drilled, then they tap their own threads as they're driven in. While they may offer a slightly more secure fit, they add an extra step to installation. Most professional metal roof installers prefer self-drilling screws for efficiency, but always ensure the screw's drilling capacity matches the thickness of the metal it's penetrating.
-
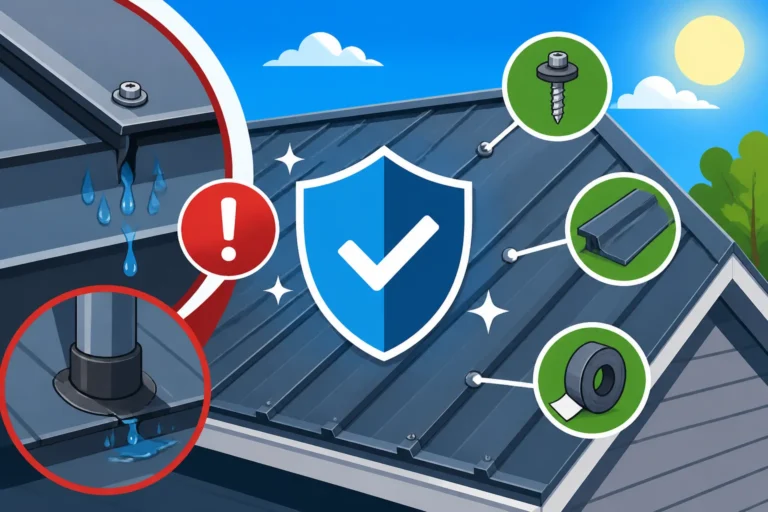
EPDM Washers: This is a crucial, yet often overlooked, component for exposed fastener systems. An EPDM (ethylene propylene diene monomer) washer is a synthetic rubber gasket located just under the head of the screw. When the screw is tightened, this washer compresses, creating a watertight seal around the penetration point. The quality of the EPDM is critical; cheap washers can degrade and crack under UV exposure, leading to leaks within a few years. Look for screws with high-quality, UV-resistant EPDM washers that maintain their elasticity over time. This detail is covered in greater depth in our guide on Metal Roof Fasteners and Washers Explained.
Common Fastening Mistakes and How to Avoid Them
Even with the right screws, poor installation can undermine the entire roof. Many metal roof leaks and failures are directly attributable to improper fastening techniques.
-
Overtightening Screws: This is perhaps the most common mistake with exposed fasteners. Overtightening can:
- Strip the hole: Especially in thinner metal panels or softer decking materials, an overtightened screw can ream out the hole, losing its grip.
- Damage the washer: It can crush and deform the EPDM washer beyond its ability to recover and seal, causing premature failure of the watertight seal.
- Dimple the panel: Applying too much force can create a dimple or depression around the screw head, creating a tiny basin for water to collect, potentially leading to leaks or cosmetic issues.
- Result: A compromised seal and a roof susceptible to leaks.
- Avoidance: Use a clutch-equipped drill and set the clutch to a low-to-medium torque setting. The goal is to compress the washer just enough to create a seal, with a small amount of the washer material visibly extruding around the screw head, but without crushing it flat. Some manufacturers even sell specialized drivers with depth gauges to prevent overtightening.
-
Undertightening Screws: The opposite problem, but equally detrimental. If a screw isn't tight enough:
- The washer won't seal: The EPDM washer won't fully compress, leaving a tiny gap where water can seep in.
- Panel uplift: The panel won't be securely anchored, making it more vulnerable to wind uplift and vibration, which can enlarge the screw hole over time.
- Result: Leaks and potential panel detachment.
- Avoidance: Ensure the screw is snug, and the washer is visibly compressed and sealed against the panel. A slight outward bulge of the washer is generally a good indicator of proper tension.
-
Incorrect Angle of Installation: Screws should be driven perpendicular (straight) to the roof surface. Driving them in at an angle can cause:
- Improper washer compression: The washer won't seat evenly, creating an incomplete seal on one side.
- Weakened connection: The screw's threads won't engage the purlin or decking material optimally, reducing holding power.
- Result: Leaks and a less secure panel.
- Avoidance: Use a steady hand and ensure the drill is held vertically or perpendicular to the panel's surface. A good installer will take care to maintain the correct angle.
-
Missing Support (Purlins/Decking): Accidentally driving a screw between purlins or into an unsupported section of decking is a major error.
- No holding power: The screw will not secure the panel, leaving it vulnerable to uplift and movement.
- Direct leak path: Without a structural member underneath, the screw creates a hole that serves as a direct path for water to enter the building.
- Result: Immediate leaks and a compromised roof.
- Avoidance: Mark the location of all purlins or framing members on the panels before installation. Use chalk lines or a string line to guide screw placement, especially for longer panels.
Proper installation requires skill, attention to detail, and often specialized tools. This is why many homeowners choose to hire professionals. You can find out more about How to Hire a Metal Roofing Contractor to ensure your investment is protected.
Calculating Your Metal Roof Screw Needs: A Practical Guide
Estimating the right number of screws for your metal roof project can feel like a daunting task, but by breaking it down methodically, it becomes much more manageable. This section will give you the practical tools to get a solid estimate, whether you're planning an exposed or hidden fastener system.
Step-by-Step Calculation for Exposed Fastener Panels
Let's tackle exposed fastener panels first, as they typically involve a higher screw count directly through the metal sheets. This method assumes you're installing over purlins or decking.
- Determine Panel Coverage Width: Most exposed fastener panels come in standard widths like 36 inches. However, the coverage width (the width after overlapping) is what truly matters for your calculations. For example, a nominal 36-inch panel might have a 34-inch coverage width.
- Calculate Number of Panels:
- Measure the total width of your roof area (gable to gable).
- Divide the total roof width by the panel's coverage width. Round up to the nearest whole number.
- Example: If your roof is 40 feet (480 inches) wide and panels cover 34 inches each: 480 / 34 = 14.11. You'll need 15 panels.
- Calculate Number of Purlin/Support Rows:
- Measure the length of your roof slope (eave to ridge).
- Determine your purlin spacing (e.g., 24 inches on center).
- Divide the roof length by the purlin spacing and add 1 (for the eave and ridge attachment points).
- Example: If your roof slope is 20 feet (240 inches) long and purlins are 24 inches on center: 240 / 24 = 10. You'll have 11 rows of attachment points (including eaves and ridge).
- Determine Screws Per Panel Per Purlin Row:
- This is where local codes and wind zones become critical.
- For standard conditions, a common approach is to screw into every other major rib valley. For a 36-inch panel with 9-inch rib spacing, you have 4 valleys. Screwing every other means 2 screws per panel per purlin row.
- For perimeter/corner zones, it might be every valley, meaning 4 screws per panel per purlin row.
- Let's assume a "field" fastening of 2 screws per panel per row for now.
- Calculate Screws for Field Panels:
- (Number of Panels) x (Number of Purlin Rows) x (Screws per Panel per Row)
- Example: 15 panels x 11 rows x 2 screws/row = 330 screws.
- Calculate Lap Screws:
- Number of panel laps = (Number of Panels – 1) x (Length of roof slope in feet)
- Lap screw spacing (e.g., 18 inches or 1.5 feet)
- Number of lap screws = (Number of Laps) x (Length of roof slope / Lap screw spacing)
- Example: (15 – 1) panels x 20 feet = 14 laps x 20 feet = 280 lineal feet of laps.
- 280 lineal feet / 1.5 feet/screw = 187 lap screws.
- Adjust for Perimeter/Corner Zones: This is an important step.
- Identify the lineal footage of perimeter and corner areas. Often, the first 3-4 feet in from eaves, gables, and ridges fall into these zones.
- Recalculate screws for these specific panels/rows using the higher density required by code (e.g., 4 screws per panel per row). Subtract the "field" calculation for these areas to avoid double-counting.
- Example: If the first and last panel rows (at eaves and ridge) require 4 screws per panel instead of 2: (15 panels x 2 rows x 4 screws/row) = 120 screws for perimeter rows. Original calculation for these 2 rows was 15 x 2 x 2 = 60. So, add 120 – 60 = 60 extra screws for these zones.
- Calculate Screws for Trim and Flashing:
- Measure total lineal footage of all trim pieces (ridge cap, rake, eave trim, sidewall flashing).
- Multiply by typical trim screw spacing (e.g., 12-18 inches on center).
- Example: If you have 40 feet of ridge cap and 40 feet of eave trim: 80 feet x (12 inches/1 foot) / 18 inches/screw = 80 feet / 1.5 feet/screw = 53 screws.
- Add a Buffer: Always add 10-15% extra for dropped screws, damaged screws, or miscalculations. This small buffer can save you a trip to the supplier in the middle of a project.
Here's a simplified table for typical exposed fastener screw spacing:
| Roof Area / Component | Typical Screw Spacing (On Center) | Notes |
|---|---|---|
| Panel Field (Purlins) | Every other valley (18-24 inches) | For standard wind zones |
| Panel Perimeter/Corners | Every valley (12-18 inches) | High wind uplift zones |
| Lap Seams (side-laps) | 12-18 inches along overlap | Binds adjacent panels |
| Ridge Cap | 12-18 inches (alternating sides) | Secures top trim piece |
| Rake Trim / Eave Trim | 12-18 inches | Secures edge trim |
| Sidewall/Endwall Flash | 12-18 inches | Secures wall transitions |
Remember, these are guidelines. Always defer to manufacturer instructions and local building codes for the most accurate and safe fastening schedule.
Estimating for Standing Seam and Accessories
Estimating for standing seam is a bit different because you're calculating clips, not face screws, and then converting clips to screws.
- Calculate Panel Lineal Footage:
- Number of panels (calculated as above, based on coverage width).
- Multiply by the length of each panel.
- Example: 15 panels x 20 feet long = 300 lineal feet of panels.
- Determine Clip Spacing: Refer to manufacturer specifications. This will vary based on panel gauge, material, and wind zone. Let's assume 24 inches (2 feet) on center for field clips, and 12 inches (1 foot) on center for perimeter zones (first 3-4 feet of panel length at eaves/ridges).
- Calculate Field Clips:
- (Total Panel Lineal Footage – Perimeter Zone Footage) / Field Clip Spacing
- Example: If 300 lineal feet total, and 3 feet at each end (eave/ridge) of each panel is perimeter (6 feet/panel x 15 panels = 90 lineal feet perimeter). So, 300 – 90 = 210 lineal feet field.
- 210 lineal feet / 2 feet/clip = 105 field clips.
- Calculate Perimeter Clips:
- Perimeter Zone Footage / Perimeter Clip Spacing
- Example: 90 lineal feet / 1 foot/clip = 90 perimeter clips.
- Total Clips: Field Clips + Perimeter Clips
- Example: 105 + 90 = 195 total clips.
- Screws Per Clip: Most clips require 2-3 screws. Use the manufacturer's recommendation.
- Example: If 3 screws per clip: 195 clips x 3 screws/clip = 585 screws for clips.
- Trim and Flashing Screws: This is calculated similarly to exposed fastener systems. Measure all lineal footage of trim and flashing (ridge cap, rake trim, sidewall flashing, transition pieces, etc.) and multiply by the appropriate screw spacing (usually 12-18 inches on center, exposed, color-matched).
- Add Buffer: Again, add 10-15% extra for waste or unforeseen needs.
This systematic approach, always referencing manufacturer guidelines and local codes, will ensure you have a much more accurate estimate for your metal roof project.
Beyond the Basics: Local Codes and Professional Advice
While understanding panel types and fastener patterns is critical, it's only part of the puzzle. The world of metal roofing is governed by local regulations and best practices, and navigating these complexities often requires expert guidance. Ignoring these aspects can lead to costly rework, denied permits, or even structural failure down the road.
Understanding Local Building Codes and Wind Load Requirements
This can't be stressed enough: local building codes are the bedrock of any successful roofing project. They are designed to ensure safety, durability, and compliance with regional environmental factors.
-
The Power of Local Ordinances: Every city, county, and state has its own set of building codes, which can vary significantly. These codes dictate everything from the minimum gauge of metal required, to the specific type of fasteners, and crucially, the fastening schedule (how many screws and where they go). For example, a home in a hurricane-prone area like Miami will have vastly different wind load requirements and fastening density rules than a home in a low-wind, non-seismic zone in the Midwest. These codes often reference national standards like those from the International Code Council (ICC) but then add local amendments. Always check with your local building department or a certified contractor to ensure your project complies with current regulations. This is a key part of understanding Metal Roof Building Codes Explained.
-
Wind Uplift and Zones: Building codes divide roofs into different zones based on their susceptibility to wind uplift:
- Field Zones: The main, central part of the roof.
- Perimeter Zones: Areas along the eaves and gables, typically within 3-4 feet of the edge.
- Corner Zones: The intersection of two perimeter zones, the most vulnerable areas.
Fastening requirements dramatically increase as you move from the field to the perimeter and especially into the corners. A panel that might need screws every 24 inches on center in the field could require screws every 6-12 inches in the corner zones. These increased densities are not suggestions; they are mandates to prevent the roof from peeling off in high winds. Many areas, particularly Florida, have very strict guidelines like the Florida Building Code (FBC) and High-Velocity Hurricane Zones (HVHZ) requirements, which necessitate specific product approvals and enhanced fastening schedules.
-
The Permit Process: Before you even start thinking about screws, you’ll likely need a building permit. The permit application often requires detailed plans, including the type of roofing material, the installation method, and the fastening schedule. A building inspector will review these plans and then conduct inspections during and after the installation to ensure compliance. If your fastening doesn't meet code, you could be forced to remove and re-install the roof, incurring massive additional costs and delays. Getting the permit correctly often starts with confirming if Do You Need a Permit for a Metal Roof?.
The Value of Professional Installation and Consultation
Given the complexity of codes, panel systems, and fastening techniques, it's clear that installing a metal roof is not a DIY project for the faint of heart. The value of professional installation cannot be overstated.
-
Expert Knowledge of Codes and Products: A reputable metal roofing contractor lives and breathes these codes. They know the specific requirements for your area, are familiar with the various metal panel systems on the market, and understand the nuances of each manufacturer's installation guidelines. They can help you select the right panels and fasteners that not only meet your aesthetic and budget but also comply with all local regulations and warranty requirements. Using a service like Modernize can help you find contractors in your area who are familiar with these specific requirements.
-
Proper Tools and Techniques: Professional installers have the specialized tools (e.g., proper clutch drills, seaming machines for mechanical seam systems, metal cutting tools) and the training to use them correctly. They understand how to properly tension screws, how to align panels to prevent oil canning, and how to detail flashing around chimneys, vents, and skylights to ensure a watertight seal. Their experience minimizes the risk of common installation errors, such as overtightening screws or incorrect panel alignment, which can lead to leaks and voided warranties. For a better understanding of the overall process, you can consult our guide on the Metal Roof Installation Process: Step by Step.
-
Warranty Protection: Many metal roof manufacturers offer comprehensive warranties on their products, but these warranties are often contingent on professional installation that adheres to their strict guidelines. DIY installation or installation by an unqualified contractor can void these valuable warranties, leaving you unprotected if an issue arises. A certified installer ensures your roof is installed to factory specifications, preserving your warranty and protecting your long-term investment.
-
Peace of Mind: Ultimately, hiring a professional provides peace of mind. You know the job will be done right, to code, and with the best possible materials and techniques. This saves you from potential headaches, unexpected costs, and the stress of a leaky or failing roof down the line. Investing in a high-quality metal roof is a significant decision, and entrusting its installation to experts ensures you reap all the benefits this durable, long-lasting roofing solution has to offer.
Choosing the right number of screws per sheet of metal roofing isn't just a mathematical exercise; it's a critical decision that impacts the safety, longevity, and performance of your entire roof system. By understanding the factors involved and leveraging professional expertise, you can ensure your metal roof stands strong for decades to come.
Disclaimer
The information provided in this guide is intended for general informational purposes only and does not constitute professional advice. Roofing projects can be complex and dangerous. Always consult with a qualified, licensed, and insured metal roofing contractor and your local building department to ensure compliance with all applicable building codes, regulations, and manufacturer specifications for your specific project. Relying solely on the information presented here without professional verification is at your own risk.