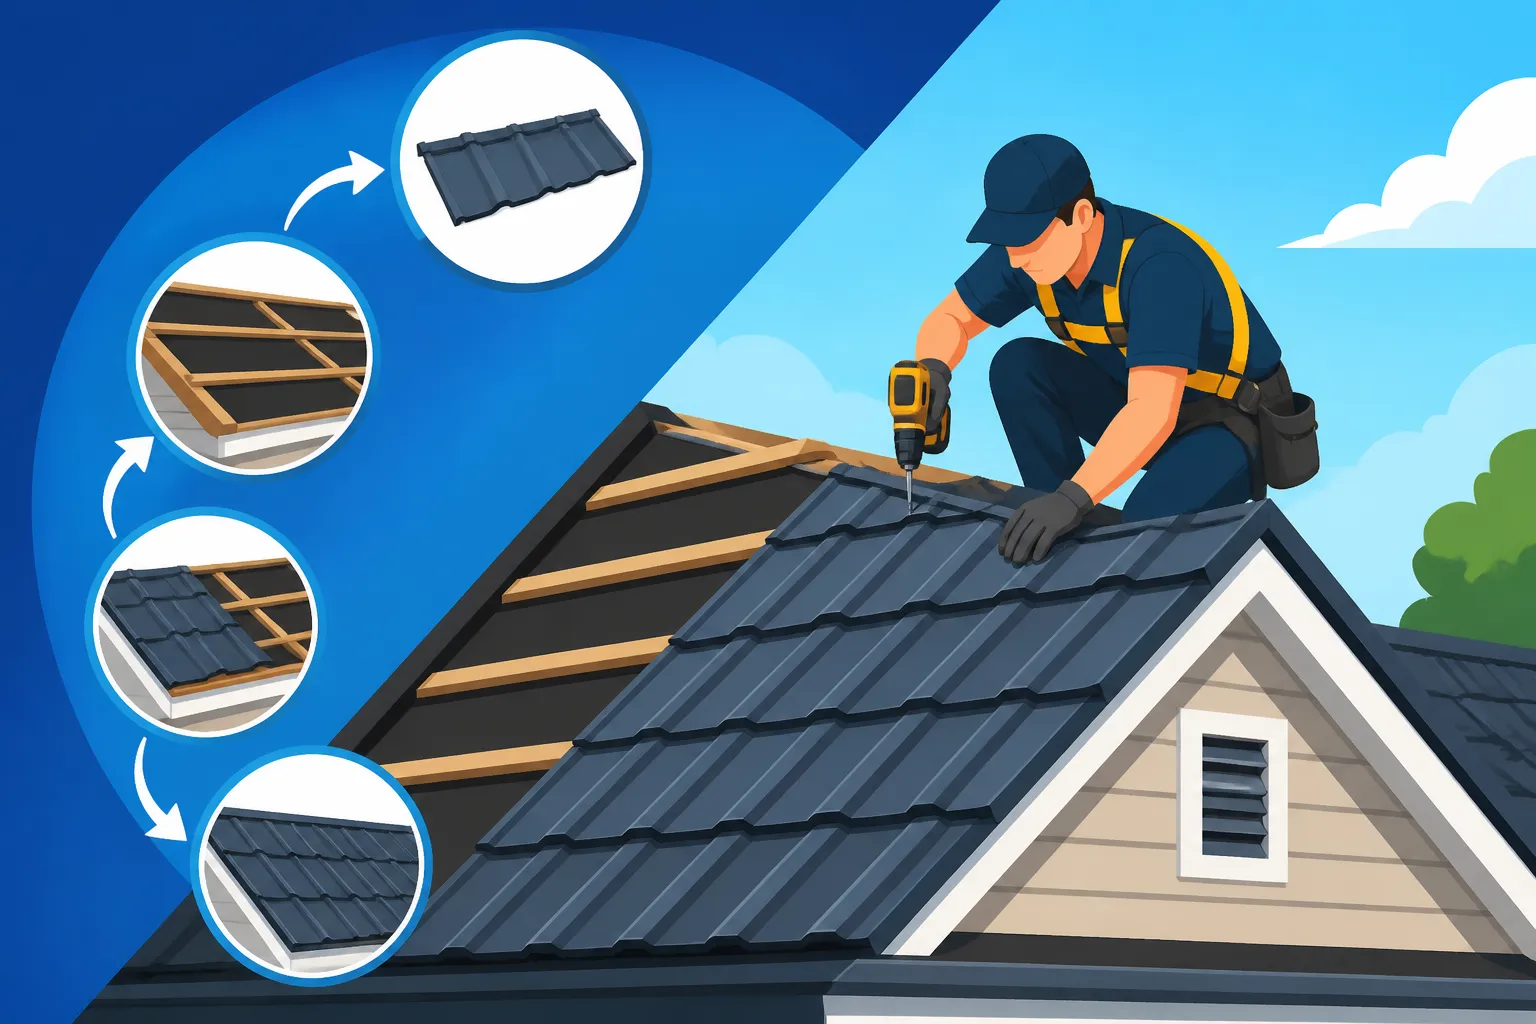
How Is a Metal Shingle Metal Roof Installed?
The thought of getting a new roof can feel incredibly daunting, especially when you're considering something as durable and long-lasting as a metal roof. Many homeowners worry about the complexity of the installation process, unsure if they're making the right choices or if their investment will truly pay off. This comprehensive guide aims to ease those concerns by breaking down exactly how a metal shingle metal roof is installed, helping you understand each critical step and what to expect from a professional installation.
Understanding Metal Shingles Before Installation
Deciding on a metal shingle roof is a fantastic choice for many homeowners, blending classic aesthetics with modern durability. But what exactly sets them apart, and what should you know before the installation begins?
What Makes Metal Shingles Different?
Unlike the long, continuous panels you might associate with standing seam or corrugated metal roofs, metal shingles are typically smaller, individual components. They're crafted to beautifully mimic the look of traditional roofing materials like architectural asphalt, wood shakes, or natural slate. This allows you to achieve that timeless curb appeal you love, all while enjoying the superior performance and longevity of metal. These shingles are commonly manufactured from robust materials such as steel, aluminum, or even more premium options like copper, and are finished with high-performance coatings that protect against the elements and ensure their color retention for decades.
The installation method for metal shingles really is a unique hybrid, combining the modularity of traditional shingle roofing with the precision engineering of advanced metal systems. Each metal shingle panel is designed with interlocking edges, creating a remarkably tight, weather-resistant seal across your entire roof. This interlocking feature is a crucial advantage; it makes the roof incredibly resistant to wind uplift, a common issue with traditional shingles, and offers a level of protection that large panel systems or basic asphalt shingles simply can't provide.
Their individual, modular nature can also be a significant benefit for roofs that aren't perfectly simple. If your home has a complex roofline with numerous valleys, dormers, or varying pitches, metal shingles can often offer a more tailored, custom-fit appearance without the extensive on-site bending and fabrication that some long-panel systems might require. However, don't let their smaller size fool you; installing them still demands an exceptional level of precision and careful attention to detail to ensure every shingle aligns perfectly and contributes to a fully weather-tight envelope.
Key Benefits and Considerations
One of the most compelling reasons homeowners choose metal shingles is their unparalleled durability and extended lifespan. While you might replace an asphalt shingle roof every 20 to 30 years, a high-quality, properly installed metal shingle roof can comfortably last 50 years or even longer. Imagine the peace of mind knowing your roof could easily outlast your mortgage! This incredible longevity means less worry about frequent repairs or replacements, and protection against common issues like rot, mildew, insects, and fire – benefits that traditional materials just can't match. Over the long haul, this often translates into substantial savings and a higher return on investment for your home. You can learn more about this by reading our article, Is a Metal Roof Worth It? ROI, Resale & Payback.
Beyond durability, energy efficiency is another huge win. Many modern metal shingles feature advanced "cool roof" coatings designed to reflect a significant portion of the sun's radiant heat away from your home. This reflection, rather than absorption, can dramatically reduce the heat load on your attic, leading to noticeable decreases in your air conditioning costs during those sweltering summer months. Picture a more comfortable indoor environment and lower energy bills – it's a win-win! Furthermore, their exceptional wind resistance, often rated to withstand hurricane-force winds of 130-150 mph, means they're a top performer in areas prone to severe weather events.
However, it's only fair to acknowledge that the initial upfront cost of a metal shingle roof is typically higher than that of traditional asphalt shingles. This is primarily due to the advanced materials used and the specialized skill and labor required for proper installation. While the long-term benefits and savings often make this investment worthwhile, it's an important factor to consider in your budget. When you're ready to explore options and get quotes, platforms like Modernize can connect you with experienced, local contractors who understand the nuances of these specialized installations. It's also worth noting that while metal shingles are incredibly tough, incorrect installation can lead to potential issues like leaks or "oil canning" – a slight wavy appearance in the panels – which underscores why choosing a truly expert installer is paramount.
The Pre-Installation Checklist for Metal Shingle Roofing
A successful metal shingle roof installation starts long before the first shingle is laid. Proper planning and preparation are absolutely crucial to ensure a durable and long-lasting result.
Assessing Your Existing Roof Structure
Before a single new material goes onto your roof, a thorough evaluation of the existing roof deck and underlying support structure is non-negotiable. While metal shingles are generally lighter than many traditional roofing materials like clay tiles, they still add significant weight compared to a worn-out asphalt roof. Installing a new, heavy-duty roof onto a compromised or weakened structure is a recipe for disaster. A diligent contractor will meticulously inspect your existing decking and rafters for any signs of rot, water damage, or structural sagging. Any areas of concern, such as soft spots or deteriorated wood, must be fully repaired or replaced to provide a solid foundation for your new metal roof.
This comprehensive assessment also helps determine the suitability of your current roof deck. Most metal shingle systems perform best when installed over a solid substrate, typically plywood or oriented strand board (OSB). This ensures a uniformly smooth and stable surface, which is essential for the precise interlocking of the metal panels. If your current roof has multiple layers of old asphalt shingles, a complete tear-off of all existing materials is almost always recommended. While it's technically possible to install some metal roofs over a single layer of shingles, for metal shingles, a clean, bare deck minimizes variables and allows for the most robust, long-lasting installation, preventing any hidden issues from lurking beneath your beautiful new roof.
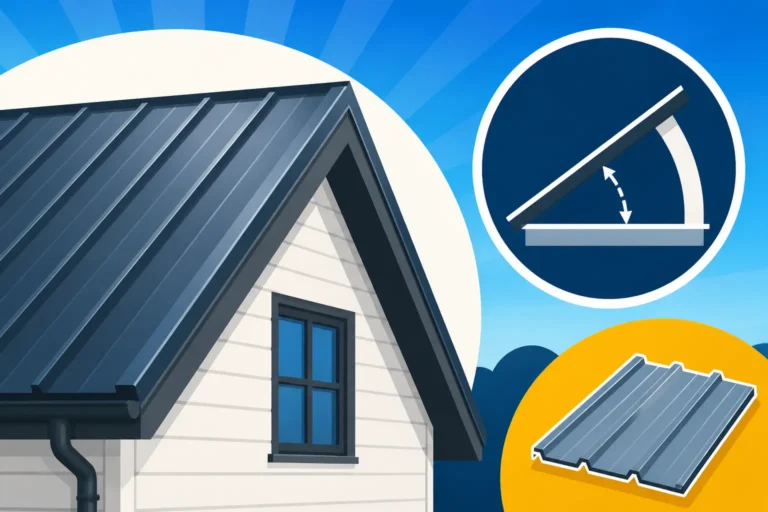
Don't forget to consider your roof's pitch. Metal shingles are versatile, but for extremely low-slope roofs (typically less than a 3:12 pitch, meaning a rise of 3 inches for every 12 inches of run), specialized considerations might be necessary. This could involve different types of metal panels designed for lower slopes or additional waterproofing membranes beyond standard underlayment to ensure optimal drainage and prevent any water intrusion. Your chosen contractor should be able to provide expert guidance on the best approach for your specific roof geometry, ensuring peak performance.
Gathering Materials and Tools
The precise nature of metal shingle installation requires a specific arsenal of materials and tools that go beyond what you'd typically see for a basic asphalt shingle job. First and foremost, you'll need the metal shingles themselves, along with all the complementary trim pieces: hip caps, ridge caps, gable flashing, and eave starter strips. These components are not just for show; they are vital for establishing a complete, weatherproof seal around the entire perimeter and features of your roof. Crucially, you'll need high-quality fasteners – typically corrosion-resistant screws with durable sealing washers – designed specifically for metal roofing to prevent leaks at every attachment point.
For the crucial under-layer, synthetic underlayment is overwhelmingly preferred for metal roofs over older felt paper options. Synthetic materials boast superior durability, tear resistance, and moisture protection, and can withstand UV exposure during the installation process much better. An ice and water shield will also be a critical inclusion, particularly in regions prone to freezing temperatures, applied along the eaves, in valleys, and around any vulnerable roof penetrations. Don't overlook the need for specialized sealants and closures to ensure every gap around vents, chimneys, or other protrusions is perfectly watertight.
On the tool side, expect professional installers to arrive with specialized metal shears or snips for precise cutting, and impact drivers equipped with clutch settings to ensure fasteners are installed with the correct torque without damaging the metal. While less common for pre-formed shingles, a metal brake might be used for custom flashing work. Most importantly, robust safety equipment, including harnesses, fall protection systems, and safety glasses, is absolutely mandatory on any professional job site. A reputable contractor, like those you can find through Modernize, will always prioritize safety and arrive with all the right gear to ensure the job is done both correctly and securely.
Permitting and Local Regulations
Navigating the bureaucratic maze of permits and local building codes can often feel like a tedious hurdle, but it is an absolutely essential step for any significant roofing project. Almost all jurisdictions mandate a building permit for roof replacement or extensive repairs. This critical step ensures that the work performed on your home adheres to local safety standards, structural requirements, and specified material qualities. Skipping this vital process can lead to significant fines, complicate future insurance claims, and even create major headaches when you eventually decide to sell your home.
Building codes often dictate precise requirements such as minimum wind resistance ratings, fire ratings, and proper attic ventilation standards. In areas frequently exposed to severe weather, like the coastal regions of Florida, there may be even more stringent requirements for specific attachment methods, official product approvals (like Miami-Dade NOA or Florida Product Approval), and the implementation of secondary water resistance layers. For example, Florida's building code is quite strict to ensure roofs can withstand hurricane-force winds. A skilled and experienced contractor will be intimately familiar with these local nuances and should manage the entire permit application process on your behalf. To dive deeper into what might apply to your area, you can explore resources like Metal Roof Permits and Codes by State.
Beyond official permits, homeowners' association (HOA) rules are another significant consideration. Many HOAs have very specific guidelines regarding approved roofing materials, acceptable colors, and even particular styles. Before you get too deeply invested in your metal shingle selection, it’s a smart move to meticulously review your HOA’s covenants. This proactive step ensures that your chosen metal shingle style and color will comply with their aesthetic standards, preventing potential disputes or the heartbreaking scenario of having to alter your beautiful new roof after installation. Addressing these details upfront can save you considerable stress and potential costs down the line.
Step-by-Step Metal Shingle Installation Process
Now that we’ve covered the groundwork, let’s walk through the actual installation of a metal shingle metal roof, step by careful step.
Preparing the Roof Deck
The very first hands-on step of the installation, right after any necessary removal of old roofing materials, is to ensure your roof deck is meticulously clean, completely dry, and structurally perfect. This involves removing every old nail, every speck of debris, and replacing any damaged sections of wood. Imagine this as preparing a pristine canvas for a masterpiece; a smooth, unblemished, and solid surface is the absolute foundation for the long-term performance and aesthetic appeal of your new metal shingle roof. Even minor imperfections on the deck can tragically telegraph through the new shingles, leading to an uneven appearance and potentially compromising their crucial interlocking features.
Once the deck is immaculate, the roofing crew will typically install a drip edge along the eaves (the lower edges of the roof) and the rake edges (the sloped edges). The drip edge is essentially a metal flashing component meticulously designed to direct any water runoff away from your home's fascia boards and directly into your gutters. This prevents water from sneaking behind the roofing material, which could otherwise lead to insidious water damage to your eaves and the underlying structure. It’s a seemingly small piece, but its role in the overall water management system of your roof is undeniably massive.
Following the drip edge, a critical layer of ice and water shield is applied. This self-adhering membrane is strategically placed, particularly along the eaves, within all valleys, and around any roof penetrations such as skylights or chimneys. It provides an indispensable extra layer of protection against water intrusion, especially vital in colder climates where ice dams can form, or during periods of relentless, wind-driven rain. It acts as a powerful secondary barrier, offering critical backup even if your primary metal shingles are somehow compromised, making it a cornerstone for a truly waterproof and resilient roof system.
Installing Underlayment and Drip Edge
After the initial meticulous deck preparation and the strategic placement of the ice and water shield, the next vital layer to go down is the underlayment. For metal roofs, the industry standard and preferred choice is almost always a high-quality synthetic underlayment, a significant upgrade from traditional organic felt paper. Synthetic underlayments are vastly superior in durability, offering incredible resistance to tearing, wrinkling, and mold growth, and they can bravely withstand prolonged exposure to harsh UV rays and adverse weather conditions during the construction phase. This layer creates an essential separation between the metal shingles and the roof deck, effectively mitigating condensation buildup and protecting against potential abrasion from the metal itself.
The underlayment is carefully unrolled horizontally across the roof, starting from the eave and methodically working its way upwards towards the ridge, ensuring each course overlaps sufficiently to effectively shed water. Each section is then securely fastened, typically with cap nails or staples, to hold it firmly in place. This systematic process constructs a continuous, protective membrane over your entire roof deck, shielding it from moisture. It’s crucial to remember that this underlayment serves as your ultimate line of defense should any water manage to breach the outer metal shingles, making its correct and meticulous installation absolutely paramount for a leak-free home.
Revisiting the drip edge for a moment, its precise installation sequence is key: it’s often installed before the underlayment along the eaves (to ensure water flows over it and into gutters), but over the underlayment along the rake edges (to protect the underlayment itself). This specific layering ensures that water is expertly guided off the roof and into your gutter system, meticulously preventing it from ever finding a path underneath your roofing materials. These seemingly minor details in layering are, in fact, the critical differentiators between a short-lived roof and one that stands resilient for decades.
Laying the First Course (Starter Strip)
The installation of your new metal shingle roof invariably commences with the careful placement of a specialized starter strip along the eaves. This component is not just an aesthetic detail; it’s specifically engineered to provide a robust and perfectly aligned base for the very first row of your main metal shingles. Its proper installation is crucial for ensuring a precise, watertight seal at the bottom edge of your roof. Without a meticulously installed starter strip, the integrity of the entire shingle system could be compromised from the outset, leading to vulnerabilities like wind uplift and potential water infiltration.
The starter strip is precisely aligned with the drip edge and then securely fastened to the roof deck, frequently using concealed fasteners to maintain a clean and uninterrupted visual aesthetic. While the exact installation method might vary slightly between different manufacturers, the fundamental principle remains constant: to establish a perfectly level, straight, and secure foundation. This initial step is the true cornerstone for the entire roof installation, and any misstep or deviation at this stage can unfortunately cascade through all subsequent courses, negatively impacting the overall integrity and the desired flawless appearance of the completed roof.
Accuracy is absolutely paramount during this foundational stage. Professional installers will often employ precise measurements and snap chalk lines to guarantee that the starter strip is installed with perfect straightness and parallelism to the eave. This meticulous attention to detail at the very beginning of the project yields immense dividends in the final outcome, ensuring that every subsequent row of metal shingles interlocks correctly and contributes to a uniform, professional, and structurally sound finish that will perform beautifully for years to come.
Installing the Main Shingle Panels
Once the starter strip is perfectly in place, the exciting process of installing the main metal shingle panels can begin. These sophisticated shingles are engineered to interlock seamlessly with one another, both horizontally and vertically, effectively creating a continuous, incredibly robust, and aesthetically pleasing surface. Installation typically progresses methodically from one side of the roof to the other, course by precise course, working steadily upwards towards the ridge. Each shingle is painstakingly positioned to engage flawlessly with the adjacent shingle's intricate locking mechanisms, ensuring a tight and secure fit.
A hallmark of most high-quality metal shingle systems is the use of concealed fasteners. This intelligent design means that the screws or clips that firmly anchor the shingles to the roof deck are entirely hidden by the ingenious overlapping design of the subsequent shingle or by specially designed locking tabs. This not only significantly contributes to the clean, streamlined aesthetic of the finished roof but, more importantly, dramatically enhances its weather resistance by minimizing exposed fastener points where water could potentially infiltrate. Proper torque and precise placement of these fasteners are critically important to avoid either over-tightening, which can distort or deform the metal, or under-tightening, which could lead to loose shingles that compromise the roof's integrity.
As the crew works across the roof, each shingle is rigorously checked for perfect alignment and a snug, secure fit before it is finally fastened. The modular nature of metal shingles does offer a practical advantage: individual panels that might suffer damage can sometimes be replaced more easily than large sections of a long-panel system, though this still requires specialized tools and the expertise of a professional. Different manufacturers, such as McElroy Metal or Metal Sales, offer a variety of metal shingle designs, each possessing its own subtle installation nuances. Therefore, strict adherence to the specific product’s guidelines and instructions is absolutely crucial to guarantee optimal performance and longevity. You can delve deeper into different options by exploring our guide on Metal Roofing Types Explained: Profiles & Panels.
Addressing Valleys, Hips, and Ridges
Roof valleys, those critical intersections where two roof planes meet, are inherently vulnerable areas that demand exceptionally meticulous attention during metal shingle installation. Pre-formed valley flashings, typically fabricated from the same durable metal as the shingles themselves, are installed first, meticulously laid over the underlayment. These specialized flashings are expertly designed to channel water efficiently and safely off the roof surface. The metal shingles are then cut with surgical precision to fit snugly along the edges of the valley flashing, ensuring proper overlap and a perfectly watertight seal, often augmented with high-performance sealants. Improper valley installation is a notorious source of roof leaks, emphasizing why this particular step can never be rushed or executed without utmost care.
Hips and ridges, which represent the highest points where roof planes converge, also necessitate the installation of specialized trim pieces. Ridge caps and hip caps are carefully installed after the main shingle panels are complete, providing both a robust protective finish and an aesthetically pleasing crowning touch. These caps frequently incorporate venting elements that are crucial for allowing proper attic ventilation, a vital component for the long-term health of your entire roof system and for maintaining an energy-efficient, comfortable home. These finishing pieces are securely fastened, ideally with concealed fasteners where feasible, or with exposed color-matched fasteners depending on the specific design, ensuring both security and visual harmony.
Intricate flashing work is also a non-negotiable requirement around any roof penetrations, which include chimneys, skylights, plumbing vents, or exhaust fans. These areas are intrinsically susceptible to leaks and demand custom-bent flashings, precisely fabricated to fit, and specialized sealants to create an impenetrable, watertight barrier. The overarching goal is to ensure that water always flows over the flashing and away from the penetration, never finding a path underneath it. This intricate and highly skilled work truly showcases the experience and meticulous craftsmanship of a professional metal roofing installer.
Finishing Touches and Cleanup
Once all the metal shingles are securely installed, along with every piece of trim and flashing, the roofing crew moves onto the final, crucial phase: the finishing touches. This stage involves a comprehensive, top-to-bottom inspection of the entire roof system to confirm that every fastener is correctly seated, all seams are properly sealed, and there are absolutely no stray pieces of debris or metal shavings left behind. Any exposed fasteners, particularly on trim components, might be precisely touched up with color-matched paint to ensure they blend seamlessly and invisibly with the rest of your beautiful new roof.
A particularly vital part of the cleanup phase, and a hallmark of a professional metal roofing company, is the thorough magnetic sweep of your property. Small metal shavings, screws, or other metallic debris left on the ground around your home can pose a significant hazard, potentially puncturing vehicle tires or causing injuries to curious pets and children. A powerful magnetic sweep effectively collects even the tiniest metallic fragments, ensuring your landscaping and surrounding areas are left safe and spotless after the installation. Many reputable contractors will also conduct a final walkthrough with you, the homeowner, to meticulously explain the work that has been completed and address any questions you might have about your new roof.
Finally, the comprehensive site cleanup extends to removing all discarded packaging, leftover materials, and every tool from your property. The ultimate objective is to leave your home and yard looking as immaculate as it was before the project began – or even better, with the striking addition of a brand-new, impeccably installed metal shingle roof. This unwavering attention to detail, from the initial rigorous deck preparation all the way through to the final magnetic sweep, is a defining characteristic of a truly high-quality and reliable metal roofing contractor.
Common Challenges and Best Practices
Even with the best materials and intentions, every roofing project can present unique challenges. Knowing what these are and how a professional contractor addresses them can give you immense peace of mind.
Dealing with Different Roof Pitches and Complexities
Not every home boasts a simple, single-pitch rectangular roof. Many residential structures feature intricate architectural designs with multiple gables, quaint dormers, various skylights, and often, varying roof pitches across different sections. While metal shingles inherently offer more adaptability than long, rigid metal panels when confronting these complex geometries, they still present their own set of challenges. Precisely cutting shingles to fit snugly around dormer walls or into uniquely shaped sections demands exceptional precision and meticulous measurement to maintain a consistent aesthetic and, crucially, to ensure proper interlocking and weatherproofing. These intricate cuts can also inevitably lead to increased material waste, a factor that should be transparently accounted for in your project's overall cost.
For roofs with very steep pitches, installers face heightened safety risks and additional logistical hurdles. The use of specialized scaffolding, intricate rigging systems, and an unwavering adherence to strict fall protection protocols become absolutely essential. The pace of work on such steep inclines might also be inherently slower, which can impact labor costs and extend project timelines. Conversely, for sections with very low slopes, while metal shingles can still be viable, careful consideration of water runoff dynamics and the potential for water ponding becomes paramount. In these specific scenarios, a continuous, robust membrane underlayment might be even more critically important, or alternative metal roofing profiles like standing seam panels might be recommended for optimal long-term performance and watertight integrity.
The paramount best practice here is to select a contractor with a proven, extensive track record in installing metal shingles on roofs that mirror the complexity of your own home. Don't hesitate to ask for examples of their previous work on homes featuring multiple valleys, hips, and numerous roof penetrations. Their true expertise will shine through in their meticulous approach to planning and their flawless execution, ensuring that even the most challenging sections of your roof are handled with precision, care, and an unwavering commitment to detail, culminating in a beautiful, durable, and leak-free finish. You can often find contractors specializing in these complex installations via networks like Modernize.
Ensuring Proper Ventilation and Water Management
Proper ventilation is not merely a recommendation; it is an absolute cornerstone for the health and longevity of any roof system, and metal shingle roofs are certainly no exception. An adequately ventilated attic space plays a crucial role in regulating both temperature and humidity levels within your home's roof structure. This regulation is vital for preventing a cascade of issues, including detrimental condensation buildup, the insidious growth of mold, and the premature degradation of roofing components and insulation. Without effective ventilation, even the most durable metal roof can suffer significant internal damage, silently undermining its performance and lifespan. Ridge vents, soffit vents, and sometimes specialized static or powered vents are all designed to work in concert, creating a continuous, healthy airflow that draws cooler, drier air into the attic while expelling hot, moist air.
Beyond merely preventing leaks, effective water management is fundamentally about channeling every drop of water efficiently and reliably off your roof. This intricate process encompasses the correct installation of drip edges, meticulously crafted valley flashings, and robust, well-maintained gutter systems. For metal shingles, ensuring that each individual interlocking panel sheds water cleanly over the one immediately below it is absolutely fundamental to its design and performance. Any minute misalignments or improper fastening can, unfortunately, create tiny, unseen channels where water can collect or seep, particularly during intense downpours or periods of strong, driving winds.
Best practices for metal shingle installation dictate a holistic and comprehensive approach. A truly professional contractor should not just focus on installing your shingles; they should also thoroughly evaluate your entire existing roof system, critically assessing your attic ventilation setup and the capacity of your gutter system, to ensure every component works in perfect harmony. They should be proactive in recommending solutions, such as the addition of more attic vents if needed, or the strategic installation of proper snow guards if you reside in a region prone to heavy snowfall. Consider how a comprehensive solution from a company found via Modernize could offer these holistic considerations for your home. You can dive deeper into topics like Metal Roof Underlayment and Ventilation Guide to really understand the critical 'why' behind these essential components and systems.
Comparison of Common Metal Shingle Materials
Choosing the right material for your metal shingles can impact cost, appearance, and performance. Here's a quick comparison of popular options:
| Feature/Material | Steel (Galvalume/Galvanized) | Aluminum | Copper | Zinc |
|---|---|---|---|---|
| Cost (Relative) | Moderate (most common choice) | Moderate-High (higher than steel) | High (premium investment) | High (premium investment) |
| Durability | Excellent (with advanced coatings like PVDF) | Excellent (naturally rust-resistant) | Superior (lasts centuries) | Superior (self-healing patina) |
| Weight | Moderate (similar to asphalt shingles) | Lightweight (ideal for older structures) | Heavy (requires strong support) | Heavy (requires strong support) |
| Corrosion Resistance | Excellent (zinc or aluminum coatings protect steel) | Excellent (naturally resistant, great for coastal) | Excellent (forms protective patina) | Excellent (forms protective, self-healing patina) |
| Appearance | Wide range of colors, textures, and profiles | Wide range of colors, textures, and profiles | Distinctive natural sheen, ages to green/blue patina | Unique matte gray, ages to blue-gray patina |
| Ideal For | Most climates, value-conscious homeowners | Coastal areas, lightweight needs, hail resistance | Historic homes, ultimate longevity, unique aesthetic | Architectural statements, extreme longevity |
| Recyclability | High (often contains recycled content) | High (infinitely recyclable) | High (valuable scrap) | High (valuable scrap) |
A metal shingle roof isn't just about throwing up some panels; it's a careful orchestration of meticulous preparation, precise installation, and an unwavering adherence to best practices. From the initial structural assessment of your home to the final thorough cleanup, every single step plays a vital, interconnected role in creating a durable, long-lasting, and aesthetically stunning roof that will stand as a resilient shield over your home for many decades to come. While the entire process is undeniably involved, understanding these crucial steps can profoundly empower you as a homeowner, enabling you to confidently oversee your project and ensure its resounding success.
Disclaimer
Please remember that this guide provides general information about metal shingle roof installation. Local building codes, manufacturer specifications, and the unique characteristics of your home may require different approaches. Always consult with a qualified, licensed, and insured metal roofing professional for specific advice and to ensure safe and compliant installation.