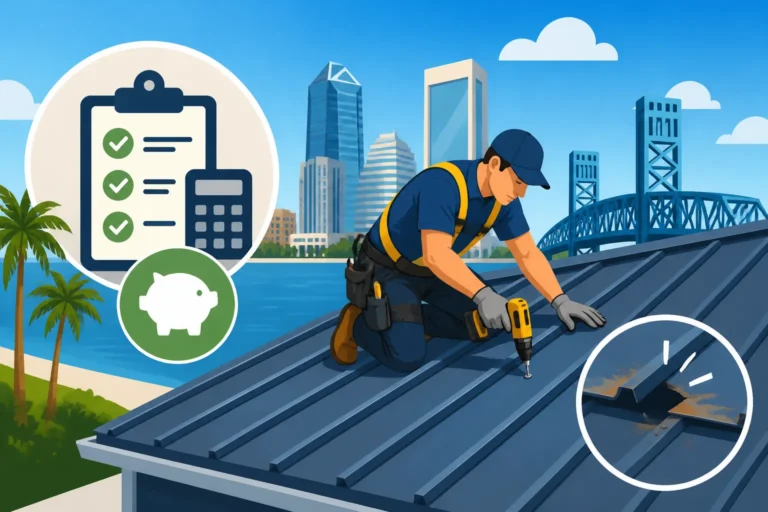
How to Install Snow Guards on a Metal Roof
That beautiful, sleek metal roof on your home is fantastic for shedding rain and lasting for decades, but when winter arrives, all that snow can become a real headache – or even a hazard! Many homeowners with new or existing metal roofs experience frightening, uncontrolled snow avalanches that slide off in a single, heavy sheet. This sudden release can damage gutters, smash delicate landscaping, block doorways, and, most critically, pose a serious risk to anyone caught underneath. This guide is all about understanding why those snow slides happen and, more importantly, providing you with a detailed walkthrough on how to install snow guards on a metal roof to protect your home and loved ones.
Understanding Snow Guards and Why They Matter
When you invested in a metal roof, you probably loved the idea of its durability, energy efficiency, and modern aesthetic. What often gets overlooked, however, is how efficiently that smooth, slick surface sheds snow. Unlike asphalt shingles that hold onto snow, metal roofs are designed to be slippery, allowing snow to release and slide off. While this is great for preventing heavy snow loads from accumulating, the uncontrolled release can create significant problems. That's where snow guards come in – they're not just an accessory, but a crucial safety and property protection component for any home in a snowy climate.
What Are Snow Guards?
At their core, snow guards are small, strategically placed devices designed to hold snow and ice on your roof, allowing it to melt gradually or release in smaller, safer amounts, rather than in one colossal dump. Think of them as tiny, strong fences or cleats that create friction and resistance against the downward slide of snow. They work by distributing the snow load and preventing it from building up enough momentum to slide off in a dangerous sheet.
There's a variety of designs, each suited for different roof types, materials, and aesthetic preferences. Some are almost invisible, designed to blend with the roof color, while others are more pronounced. The critical thing is that they create a barrier. Without them, even a light snowfall can become a heavy, damaging avalanche as it compacts and freezes on your metal panels. The specific type you choose will depend on factors like your roof's pitch, the amount of snowfall your region typically receives, and the type of metal roof panels you have, whether it's a standing seam or a corrugated metal roof.
The Dangers of Uncontrolled Snow Slides
It's easy to underestimate the sheer force of a large volume of snow and ice suddenly sliding off a roof. Imagine a ton or more of compacted snow and ice crashing down at once – it's like a small, localized earthquake hitting your property. This isn't just an inconvenience; it can cause substantial damage and even serious injury.
One of the most common casualties is your home's gutter system. Gutters, often made of aluminum or thin steel, are simply not designed to withstand the immense weight and impact of a snow avalanche. They can be ripped clean off the fascia, bent, crushed, or detached, leading to costly repairs and potential water damage to your home's foundation if rainwater isn't properly diverted. Beyond gutters, landscaping below the drip edge is incredibly vulnerable. Expensive shrubs, delicate flower beds, and even mature trees can be snapped, flattened, or completely destroyed. Patio furniture, grills, air conditioning units, and even parked vehicles are also at risk. Picture a homeowner in Denver, Colorado, whose brand new patio furniture was completely mangled by a sudden snow slide, costing thousands to replace, simply because they hadn't considered snow guards.
Most critically, there's the human element. Anyone walking beneath an unprotected roof can be struck by falling snow and ice, leading to severe injuries, including concussions, broken bones, or worse. Pet owners also worry about their furry friends. The peace of mind that comes from knowing your property and family are safe from such hazards is invaluable, making the investment in snow guards a wise decision.
Benefits of Installing Snow Guards
Investing in snow guards goes far beyond merely preventing a mess; it's about comprehensive protection for your property, enhancing safety, and potentially even extending the lifespan of certain roof components. The benefits are numerous and far-reaching, especially in regions prone to heavy snowfall.
Firstly, and most obviously, snow guards prevent those dangerous, uncontrolled snow avalanches. This direct prevention saves your gutters from being ripped off, your expensive landscaping from being crushed, and your outdoor furniture from being flattened. It also protects entryways, walkways, and driveways, ensuring that access to your home remains safe and clear without the constant fear of a sudden deluge of snow. For a homeowner in, say, Buffalo, New York, where snowfall is a regular and heavy occurrence, this means not having to shovel the same area multiple times a day due to roof-shedding snow, and not having to worry about family members or visitors getting hurt.
Beyond immediate safety, snow guards contribute to the longevity of your roof system. By allowing snow to melt gradually, they reduce the stress on your roof's edge and components that might otherwise be strained by repeated, heavy impacts. This also helps prevent damage to roof penetrations like vent pipes or skylights that can be ripped out by sliding snow and ice. While metal roofs are known for their incredible Metal Roof Lifespan, adding snow guards helps ensure that peripheral components, which are often more vulnerable, last just as long. Furthermore, if you're concerned about costly repairs, you might find that the installation of snow guards is a much smaller investment than constant Metal Roof Repair Cost from damaged gutters or landscaping.
Types of Snow Guards for Metal Roofs
When you start looking into snow guards, you'll quickly realize there isn't a one-size-fits-all solution. Different metal roof profiles and homeowner preferences call for different types of snow retention systems. Understanding these distinctions is key to making an informed choice for your home.
Pad-Style Snow Guards
Pad-style snow guards are among the most common and versatile options, often recognized by their individual "cleat" or "wedge" appearance. These are typically small, individual units, often made of clear polycarbonate plastic or metal, that are distributed across the roof in a specific pattern. They work by essentially "grabbing" the snow, creating enough friction and resistance to prevent it from sliding down.
- Description and Varieties: Pad-style guards come in various shapes and sizes. Many are designed with a low-profile aesthetic, making them less noticeable from the ground, especially the clear plastic varieties. Some metal pad-style guards can even be color-matched to your roof, blending almost seamlessly. They are typically installed in a staggered pattern across the lower third or half of the roof, above areas like doorways, walkways, and gutters.
- Installation Methods: The installation method for pad-style guards largely depends on your specific metal roof type.
- For Standing Seam Metal Roof Cost, many pad-style guards feature non-penetrating clamps that attach directly to the vertical seams of the panels. This is a highly preferred method as it avoids drilling holes into the roof surface, maintaining the integrity and warranty of the roof panels. These clamp-on designs are quick to install and offer excellent holding power.
- For exposed fastener metal roofs, such as corrugated or R-panel systems, screw-down pad-style guards are more common. These guards are designed to be fastened directly into the roof panel, usually through the raised ribs, with weather-tight screws and sealants to prevent leaks. The key here is to use high-quality, self-sealing screws and apply a durable, UV-resistant sealant to ensure water tightness.
- Pros and Cons: Pad-style guards are generally more aesthetically pleasing due to their discrete nature and can be highly effective when properly installed and spaced. They are also relatively cost-effective for smaller areas. However, calculating the correct number and optimal spacing requires careful consideration of roof pitch, snow load, and specific panel type. Improper spacing can lead to "channeling," where snow slides between guards.
Pipe-Style Snow Guards
Pipe-style snow guards, also known as rail or bar-style systems, offer a more robust and continuous barrier against snow slides. Instead of individual cleats, these systems consist of one or more horizontal pipes (or bars) supported by brackets that are attached to the roof.
- Description and Varieties: These systems typically use one or two pipes, though sometimes more, running parallel to the eave of the roof. The pipes are usually made of aluminum, stainless steel, or galvanized steel, offering excellent strength and corrosion resistance. The brackets that hold the pipes vary significantly based on the metal roof profile. For standing seam roofs, the brackets are non-penetrating clamps that grip the seams. For exposed fastener roofs, the brackets are designed to be screwed into the purlins or structural members beneath the metal panels, again requiring proper sealing.
- Installation Considerations: Installation of pipe-style guards usually involves measuring and marking the bracket locations, attaching the brackets securely, and then inserting the pipes through the brackets. The pipes are often joined together with internal couplers to create a continuous run. The height of the pipes above the roof surface can vary, providing ample space to retain a significant amount of snow. They are typically installed closer to the eave, above gutters and other vulnerable areas. Some systems, like those from S-5! or Alpine SnowGuards, offer specific solutions for various metal roof profiles, ensuring a secure and leak-free attachment.
- Pros and Cons: Pipe-style systems are incredibly effective for heavy snow loads and steep pitches, as they create a continuous line of defense. They are often chosen for commercial buildings or homes in very snowy regions. They can be more expensive than pad-style guards, both in terms of material and installation. While some find their appearance more industrial, they can also be powder-coated to match the roof color, making them less conspicuous. The primary concern, especially for screw-down systems, is ensuring all penetrations are perfectly sealed to avoid future Metal Roof Leak Repair Guide scenarios.
Continuous/Fence-Style Snow Guards
Continuous or fence-style snow guards are essentially heavy-duty versions of pipe systems, offering the maximum level of snow retention. They are less common for residential applications but are invaluable in specific, high-risk scenarios.
- Description and Varieties: These systems feature a continuous, often taller, fence-like barrier made of metal grating or multiple bars, supported by robust brackets. They are designed to hold back extremely large volumes of snow and ice, making them ideal for very steep roofs, roofs over high-traffic areas, or in mountainous regions with exceptional snowfall. They often extend higher than typical pipe guards, creating a more substantial wall.
- Installation and Applications: Installation is similar to pipe-style guards but requires even more robust fastening to the roof structure due to the increased load they are designed to bear. They are particularly effective for holding back entire snow fields. You might see these on ski lodges, large commercial buildings, or multi-story residential buildings where a massive snow drop could cause catastrophic damage or injury.
- Pros and Cons: The biggest advantage is their superior snow retention capability, providing unparalleled protection against large snow slides. The downside is their higher cost, more complex installation, and more prominent visual impact. They are generally overkill for typical residential applications but are essential where conditions demand maximum snow control.
Choosing the Right Type for Your Roof
Selecting the appropriate snow guard system involves a careful assessment of several factors unique to your home and climate. There's no single "best" type; it's about finding the best fit.
First, consider your roof pitch. Steeper roofs generate more momentum for sliding snow, requiring more robust or more densely placed snow guards. A low-slope metal roof might need fewer or different types of guards than a steeply pitched gable roof. Second, your local snow load is critical. If you live in an area like Flagstaff, Arizona, known for significant winter snowfall, you'll need a more substantial system than someone in a milder climate. Consult local weather data or building codes to understand average and maximum snow accumulation.
Third, the type of metal roof you have heavily influences your options. For Standing Seam Metal Roof Cost panels, non-penetrating clamp-on systems (for both pad and pipe styles) are highly recommended because they preserve the roof's integrity and often its warranty. For exposed fastener systems, like a corrugated metal roof or an R-panel roof, screw-down options are necessary, making proper sealing paramount. Fourth, aesthetics play a role. Do you prefer a nearly invisible solution, or are you comfortable with a more visible system if it offers superior protection? Many brands like S-5! and Alpine SnowGuards offer options that can be color-matched to blend in. Finally, consider your budget and whether you plan on a DIY installation or hiring a professional. While some homeowners opt to install snow guards themselves, complex roofs or those with high pitches are often best left to experienced contractors.
A good starting point for your research might be to look at companies like S-5! or Alpine SnowGuards, which are well-regarded for their innovative and robust snow retention solutions tailored specifically for metal roofs. You can find experienced contractors through platforms like Modernize who can provide quotes and recommendations based on your specific roof and local conditions.
Planning Your Snow Guard Installation
Before you even think about climbing onto your roof, thorough planning is absolutely essential. A poorly planned or executed snow guard installation can be ineffective, waste money, and, in the worst-case scenario, compromise your roof's integrity, leading to leaks. Taking the time to properly assess your needs and gather the right tools will save you headaches down the line.
Assessing Your Roof and Snow Load
This is the foundational step. You can't effectively install snow guards without understanding the specific characteristics of your roof and the typical snow conditions it will face.
- Roof Pitch: The angle of your roof directly impacts how quickly and forcefully snow will slide. A roof with a shallow pitch (e.g., 3/12 or less) will hold snow longer, but when it does slide, it can still be heavy. A steep pitch (e.g., 8/12 or more) encourages faster, more forceful slides, requiring more robust or densely spaced snow guards. You can typically find your roof's pitch by measuring the rise over the run from inside your attic or by consulting your home's blueprints.
- Local Snowfall Data: Research the average and maximum annual snowfall for your specific area. Websites like the National Weather Service or local government sites often provide this information. This data will help you estimate the potential snow load your roof will bear. For instance, a home in a heavy snowfall area like Lake Tahoe, California, will require a much more extensive snow guard system than one in, say, Nashville, Tennessee. You should also consider historical data for unusually heavy snow years.
- Calculating the Number of Snow Guards Needed: This isn't a simple guess. Manufacturers often provide guidelines or calculators based on roof pitch, eave-to-ridge distance, and local snow load. Generally, steeper roofs and heavier snow loads require more snow guards and/or more rows of guards. It's often recommended to consult these charts carefully. For a large home or one with complex rooflines, it might even be worth getting an expert opinion, perhaps from a roofing professional found via Modernize, to ensure adequate coverage. Installing too few snow guards is almost as bad as installing none, as it can lead to snow channeling and concentrated damage.
Tools and Materials You'll Need
Having the right tools and materials on hand is crucial for a smooth and safe installation process. Don't start a project like this without everything you need, as frequent trips to the hardware store can be frustrating and even dangerous if you're halfway through an installation.
- For Measurement and Marking: A sturdy tape measure, chalk line, and a grease pencil or non-permanent marker are essential for accurate placement.
- For Access and Safety: A reliable, extension ladder (ensure it's stable on uneven ground), safety harness with fall protection, and non-slip roofing shoes are non-negotiable, especially for steep roofs. Always prioritize safety when working at heights.
- For Fastening (Screw-Down Systems): A drill with the appropriate bit for your fasteners, and a nut driver or socket wrench if your fasteners require it. High-quality, self-tapping, self-sealing screws (often color-matched) are paramount. Don't skimp on fasteners; they are your primary defense against leaks.
- For Fastening (Clamp-On Systems): A torque wrench is often recommended by manufacturers to ensure clamps are tightened to the precise specifications without over-tightening or damaging the seams.
- For Sealing: A high-quality, exterior-grade, UV-resistant sealant. Brands like Geocel or OSI Quad are commonly recommended for metal roofing applications. Ensure it's compatible with your metal roof's finish. You'll also need a reliable caulk gun.
- The Snow Guards Themselves: Of course, you'll need the snow guards you've chosen – whether they're pad-style, pipe-style, or another type – along with all their associated brackets, clamps, and connecting components. Double-check that you have enough for your planned layout.
Best Practices for Layout and Spacing
The effectiveness of your snow guard system hinges heavily on proper layout and spacing. This isn't a random scattering of devices; it's a calculated pattern designed to distribute the snow load evenly.
- Primary Placement Zones: Focus on areas where falling snow poses the greatest risk. This almost always includes above all entryways, walkways, driveways, patios, and deck areas. Also, pay special attention to sections of the roof directly above gutters, air conditioning units, expensive landscaping features, and any lower roof sections that could be damaged by an upper roof's snow slide. For example, if you have a multi-level home, ensure the lower roof sections are protected from the upper roof's snow.
- Staggered Patterns (Pad-Style): For pad-style guards, a staggered, grid-like pattern is most effective. This creates a more uniform resistance across the snowfield. The spacing between individual guards, and the number of rows from the eave upwards, will be dictated by your roof's pitch and expected snow load. Manufacturers like S-5! often provide specific layout recommendations for their products, and following these is crucial. Typically, you'll want multiple rows, not just one, to effectively hold back the snow.
- Continuous Runs (Pipe-Style): Pipe-style guards are usually installed in one or two continuous runs along the eave, positioned to protect gutters and ground-level areas. The height of the pipe above the roof surface, and its distance from the eave, are important. Again, refer to the manufacturer's installation guides for optimal placement. On very long roof runs, expansion joints might be needed in the pipe system to accommodate thermal movement of the metal.
- Avoid Overlapping: While it seems counterintuitive, don't overlap the effective "zone" of snow guards from different roof sections if possible. Each section should have its own dedicated system to prevent snow from building up unevenly or being "pushed" past the guards. Remember, the goal is to break up large snow masses, not just create a single barrier that might fail under extreme pressure. A well-designed system will consider the entire Metal Roof Installation Process: Step by Step, ensuring all components work together.
Step-by-Step Installation Guide
Alright, you've done your homework, gathered your tools, and meticulously planned your layout. Now it's time to get up on the roof (safely!) and put those snow guards into action. While the specific details might vary slightly depending on your chosen snow guard system and metal roof type, these general steps will guide you through the process. Remember, safety first – always use appropriate fall protection and never work alone.
Preparing the Roof Surface
A clean and properly marked roof surface is fundamental for a successful and lasting snow guard installation. Skipping these preliminary steps can lead to premature failure or even leaks.
- Thorough Cleaning: Before anything else, the areas where your snow guards will be installed must be absolutely clean. This means removing any dirt, debris, leaves, moss, or old sealant residues. A stiff brush, a leaf blower, or even a gentle pressure wash (if your roof can handle it, and you're careful not to damage the finish) can be used. For clamp-on systems, ensure the standing seams are free of any oils or grime that might affect the clamp's grip. For screw-down systems, any surface contaminant will compromise the sealant's adhesion, so thorough cleaning is paramount. A clean surface allows for optimal adhesion of sealants and secure fastening.
- Precise Marking: Once the surface is clean and dry, use your measurements and layout plan to mark the exact locations for each snow guard or bracket. Use a chalk line for long, straight rows and a grease pencil or non-permanent marker for individual guard positions. Accuracy here is crucial for both aesthetic appeal and functional effectiveness. For clamp-on systems, mark the center of the seam. For screw-down systems, mark the precise points where screws will penetrate the panel, ensuring you hit underlying purlins or structural members if required by the manufacturer. This is particularly important if you're installing pipe-style guards that need structural support. This step also prevents unnecessary holes in your roof, helping you to How to Prevent Leaks on a Metal Roof down the line.
Installing Pad-Style Snow Guards
Pad-style guards offer flexibility in installation, primarily depending on whether your roof is standing seam or an exposed fastener system. The key is secure attachment and watertight sealing.
- Adhesive Attachment (Certain Materials): Some pad-style snow guards, particularly those made from durable plastics like polycarbonate, are designed for adhesive installation on specific smooth-panel metal roofs. If using this method, meticulously follow the manufacturer's instructions for the adhesive. This often involves specific temperature ranges for application, surface preparation (like priming), and sufficient curing time before any snow load is expected. While convenient, adhesive-only solutions are typically for lighter snow loads and may not be suitable for all roof types or climates. Always double-check if your metal roof and climate are appropriate for adhesive-only guards.
- Clamp-On Installation (Standing Seam): This is the preferred method for standing seam metal roofs because it avoids penetrating the roof panels. The clamps are designed to grip the vertical seams securely. Position the clamp over the seam at your marked location, ensuring it's flush and properly aligned. Then, using a torque wrench, tighten the fasteners to the manufacturer's specified torque settings. Over-tightening can damage the seam, while under-tightening can lead to slippage. Once the clamp is secure, attach the pad-style guard to the clamp, typically with a single bolt or screw. Repeat this process, working systematically across your marked layout, ensuring each guard is firmly attached.
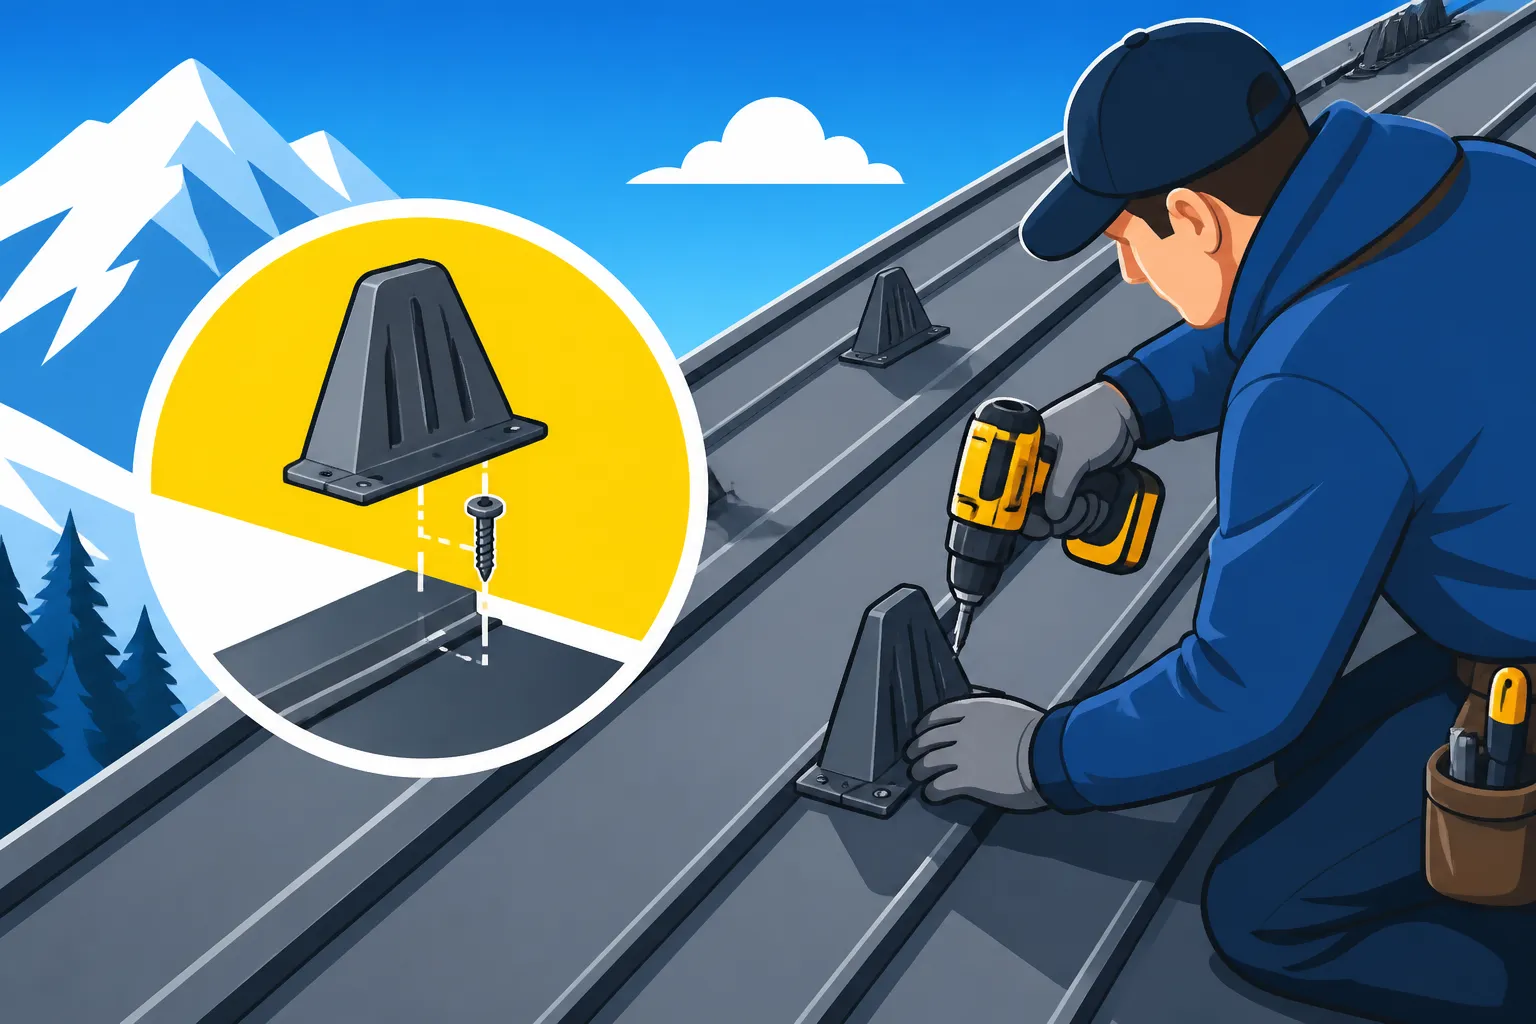
- Screw-Down Installation (Exposed Fastener): For corrugated, R-panel, or other exposed fastener metal roofs, screw-down pad guards are the norm. At each marked location, apply a generous dab of high-quality sealant directly under the base of the snow guard. Position the snow guard, pressing it firmly into the sealant. Then, drive the self-sealing screws through the designated holes in the snow guard and into the roof panel, ensuring they penetrate any underlying purlins or supports if necessary. The screws should be tight enough to create a watertight seal with their integrated washers but not so tight that they strip the metal or crush the sealant excessively. Excess sealant should squeeze out around the base, indicating a good seal. This method is common for profiles covered under Metal Roofing Types Explained: Profiles & Panels.
Installing Pipe-Style Snow Guards
Pipe-style systems require a bit more assembly but offer a continuous barrier, making them highly effective. The process focuses on bracket installation and secure pipe assembly.
- Mounting Brackets: Just like pad-style guards, the brackets for pipe systems vary by roof type.
- For standing seam roofs, clamp-on brackets are used. Position each bracket over the marked seam location, making sure it's plumb and level. Use a torque wrench to tighten the seam clamps to the manufacturer's specifications. The number of brackets and their spacing will be determined by your roof pitch, snow load, and the pipe material.
- For exposed fastener roofs, screw-down brackets are used. After marking the locations, apply sealant under each bracket base. Fasten the brackets securely to the roof panels, typically into structural framing, using heavy-duty, self-sealing screws. Ensure these screws are long enough to provide ample purchase in the underlying structure.
- Pipe Assembly: Once all brackets are securely installed, it's time to thread the pipes through them. Most pipe systems come in sections that are joined together. Slide the first pipe section into the brackets, ensuring it's centered. If using multiple pipe runs, ensure they are parallel. For long runs, you'll use internal couplers or connectors to join subsequent pipe sections, creating a continuous barrier. Some systems may require set screws or pins to prevent the pipes from shifting within the brackets. Confirm that all connections are secure and that the pipes are level.
- Crucial Sealing and Fastening Techniques: No matter the snow guard style, the integrity of your roof depends on proper sealing and fastening.
- Sealant Application: Always use a generous amount of high-quality, UV-stable sealant at every penetration point. For screw-down applications, apply sealant under the base of the guard or bracket and ensure the screw's washer makes firm contact with sealant as it's tightened. This creates a redundant barrier against water intrusion.
- Fastener Selection: Use only fasteners specified by the snow guard or roofing manufacturer. These are typically stainless steel or galvanized steel with neoprene washers, designed to resist corrosion and create a watertight seal. Never use standard screws that aren't rated for exterior roofing.
- Torque Settings: For clamp-on systems, adhering to the manufacturer's torque specifications is critical. Too loose, and the clamps can slip; too tight, and you risk deforming the metal seam, potentially leading to oil canning or even structural weakness over time.
- Regular Checks: After installation, especially after the first heavy snowfall, it’s a good idea to perform a visual inspection to ensure everything remains tight and secure. This proactive approach is part of effective Metal Roof Maintenance Guide practices.
Common Mistakes to Avoid and Maintenance Tips
Installing snow guards is a smart investment, but even the best intentions can go awry if you're not careful. Avoiding common pitfalls during installation and understanding how to maintain your system will ensure your snow guards perform optimally for years to come.
Pitfalls During Installation
Many issues with snow guard performance can be traced back to mistakes made during the initial installation. Being aware of these common errors can help you prevent them.
- Improper Spacing: This is perhaps the most frequent mistake, particularly with pad-style snow guards. If guards are spaced too far apart, snow can "channel" between them, still creating dangerous slides in concentrated streams. Conversely, placing them too close together can be an unnecessary expense without adding significant benefit. Always adhere strictly to the manufacturer's recommended spacing, which is typically based on your roof's pitch and local snow load. For complex situations, it might be beneficial to consult with a professional who understands the nuances of Best Metal Roof for Snow and Cold Climates for precise layouts.
- Wrong Fasteners or Sealant: Using incorrect fasteners is a recipe for disaster. Standard screws can rust, weaken, and eventually fail, creating leaks. Always use stainless steel or galvanized screws specifically designed for metal roofing, with integrated neoprene washers. Equally critical is the sealant. Using a low-quality, non-UV-resistant, or incompatible sealant will lead to cracking, shrinking, and ultimately, water leaks around the penetrations. Always choose a high-quality, flexible, and UV-stable sealant recommended for metal roofing. For instance, using a silicone sealant where an acrylic-based one is recommended can cause adhesion issues or premature degradation. This diligence is key to avoiding future discussions about How to Prevent Leaks on a Metal Roof.
- Neglecting to Follow Manufacturer Instructions: Every snow guard system has specific installation guidelines, particularly concerning placement, fastening, and torque settings for clamps. Ignoring these instructions, whether for a clamp-on or screw-down system, can void warranties, lead to ineffective snow retention, or even damage your roof. For example, over-tightening clamps on a standing seam roof can deform the metal, causing aesthetic issues or even compromising the seam's weather-tightness. Under-tightening can lead to guards slipping. Always read and follow the manual diligently.
Ongoing Maintenance for Your Snow Guards
While snow guards are designed to be durable, a little ongoing attention can ensure they last as long as your metal roof – potentially 50 years or more! Neglecting them can lead to unexpected failures when you need them most.
- Seasonal Inspections: The best time to inspect your snow guards is typically in the late fall, before the first heavy snow, and again in the spring after the last thaw. During these inspections, look for any signs of damage, such as bent or broken guards (especially after a very heavy snow year), loose fasteners, or cracking sealant. Check for any rust spots on metal components or discoloration on plastic ones. If you have pipe-style guards, ensure all pipe sections are still securely connected and haven't shifted. This is a crucial part of a comprehensive Metal Roof Maintenance Guide.
- Cleaning and Debris Removal: Over time, leaves, twigs, and other debris can accumulate around snow guards. While often harmless, excessive buildup can trap moisture or obstruct the guards' function. Gently clear away any debris during your inspections. For screw-down systems, pay particular attention to ensuring the sealant around the fasteners remains clear and uncompromised.
- Checking Fasteners and Sealant: With temperature fluctuations and roof movement, fasteners can sometimes loosen, and sealants can degrade. Check that all screws are snug (without over-tightening) and that clamps on standing seam systems are still at their proper torque. Inspect sealant lines for any cracks, shrinking, or signs of water intrusion. If you find any compromised sealant, clean the area thoroughly and apply a fresh bead of compatible, high-quality sealant. Addressing these small issues proactively can prevent minor problems from becoming costly roof leaks.
When to Call a Professional
While many handy homeowners can tackle snow guard installation, there are definite scenarios where calling in a professional is not just advisable, but essential. Don't risk your safety or your roof's integrity.
- Complex Roof Designs: If your roof has multiple peaks, valleys, dormers, or varying pitches, designing an effective snow guard layout can be incredibly challenging. Professionals have the experience and software to create a comprehensive plan that accounts for all these variables, ensuring proper snow retention across the entire roof. They understand how snow drifts and collects on different roof facets.
- Steep Pitches or High Roofs: Working on a very steep roof (e.g., 6/12 or higher) or a multi-story home is inherently dangerous. Professionals have specialized safety equipment, training, and experience working at heights. They understand fall protection systems, ladder safety, and how to maneuver safely on slippery surfaces. Your personal safety is always worth the investment in professional help. Many homeowners use platforms like Modernize to find qualified local roofing contractors.
- Warranty Concerns: Improper installation, especially with penetrations, can void your metal roof's manufacturer warranty. Many manufacturers require installation by a certified professional to maintain the warranty. A professional will know the specific requirements and best practices to ensure your roof's warranty remains intact. This is particularly relevant for high-value roofing systems like a copper roof cost installation.
- Uncertainty or Lack of Experience: If you're simply not confident in your ability to perform a watertight, effective installation, don't hesitate to hire a pro. The cost of professional installation is often a fraction of the cost of repairing a damaged roof, gutters, or landscaping, let alone dealing with personal injury. They can also advise on the best type of snow guards and the ideal placement for your specific conditions. It's often cheaper to get it right the first time than to fix mistakes.
Cost Considerations and ROI
Understanding the financial aspect of snow guards means looking beyond the initial purchase price. It’s about evaluating the total investment against the substantial savings and benefits they provide over the long haul.
Understanding Snow Guard Costs
The cost of installing snow guards can vary quite a bit, depending on a few key factors. It's not just the price of the guards themselves, but also the labor and complexity of your particular roof.
- Material Costs: Pad-style snow guards are typically the most budget-friendly option per unit, ranging from a few dollars to $15-$20 each, depending on material (polycarbonate vs. metal) and brand. Pipe-style systems, which involve brackets, pipes, and connectors, tend to be more expensive per linear foot, often starting around $15-$30 per linear foot, and going up for heavy-duty or aesthetic options. Continuous fence-style systems will be at the higher end of the spectrum. The specific metal material of the guards (e.g., stainless steel, aluminum) and their finish (e.g., powder-coated) will also influence pricing. Generally, plan for several hundred to a few thousand dollars just for materials, depending on your roof size and chosen system.
- Labor Costs: Professional installation labor will be a significant part of the total cost. Factors influencing labor include the roof's pitch (steeper roofs are harder and take longer), complexity (dormers, valleys, multiple levels), and the type of snow guard system being installed. Clamp-on systems might be quicker to install than screw-down systems that require meticulous sealing at each penetration. For a typical residential roof, labor can range from $500 to $2,000 or more, especially for large or intricate roofs in areas with higher labor rates. Getting multiple detailed quotes from reputable roofing contractors is always a good idea, and platforms like Modernize can connect you with professionals in your area.
- DIY vs. Professional Installation: Deciding whether to install snow guards yourself or hire a professional comes with its own cost considerations. DIY will save you labor costs, but you'll need to purchase all the necessary tools and ensure you have the expertise and safety equipment. This is where you need to honestly assess if you Should You Hire a Contractor or DIY Your Metal Roof?. For many, the peace of mind that comes from a professional, warranty-compliant installation outweighs the potential savings of DIY, especially given the risks involved with working on a roof and the importance of preventing leaks.
The Long-Term Value
While the initial outlay for snow guards might seem like an extra expense, considering their long-term value often reveals them to be a wise investment with a strong return.
- Avoiding Costly Damage: This is where snow guards truly pay for themselves. The cost to repair or replace damaged gutters can easily run into hundreds or even thousands of dollars. Replacing valuable landscaping, repairing smashed AC units, or fixing dented cars after a snow slide can quickly exceed the cost of snow guard installation. For instance, the cost to repair roof damage or gutters in a typical year in a snowy region like upstate New York can be more than the initial snow guard installation. Preventing just one major incident can make the investment worthwhile.
- Safety and Peace of Mind: You can't put a price tag on personal safety. Preventing injuries to family members, guests, or pets from falling snow and ice is invaluable. The peace of mind knowing that your property and loved ones are protected from sudden avalanches is a significant, if intangible, benefit. This allows you to enjoy winter without constant worry about what might come crashing down from your roof.
- Extending Component Life: By mitigating the impact of sliding snow, snow guards indirectly extend the life of your gutters, fascia, and other roof edge components. These parts won't suffer the repeated stress and damage that uncontrolled snow slides inflict, potentially delaying costly replacements and contributing to the overall longevity of your home's exterior. This also reduces the need for frequent Metal Roof Components & Accessories Explained repairs. In essence, snow guards protect your investments in other home features.
Disclaimer
Please note that this guide is intended for informational purposes only and should not be considered professional advice. Metal roofing installation and working at heights can be dangerous. Always consult with a qualified, licensed, and insured roofing professional for specific advice regarding your home's unique situation and local building codes. Adhere strictly to all safety guidelines and manufacturer instructions.