DIY Metal Roof Installation: What to Know
That leaking roof dripping onto your head every time a storm rolls through? It’s enough to make anyone dream of a brand-new, durable metal roof. And when you start looking at professional installation costs, that little voice in your head might just scream, "I can do that myself!" It’s a tempting thought, especially with the promise of significant savings. But here’s the unvarnished truth: installing a metal roof is a monumental task, far more complex than many realize. This guide will walk you through everything you need to know, from the initial planning stages to the final fasteners, so you can make an informed decision about whether DIY metal roof installation is truly for you.
Is DIY Metal Roof Installation Even Feasible for You?
Let's get real for a moment. The idea of saving thousands of dollars by installing your own metal roof is incredibly appealing. Who doesn't want to keep more money in their pocket, especially with today's rising home improvement costs? But that appeal can sometimes blind us to the sheer scale of the project. Before you even think about buying a single panel, you need to honestly assess if this undertaking aligns with your skills, your available time, and your physical capabilities.
The Allure of Saving Money
The primary driver for most DIYers is, understandably, cost savings. When you look at quotes for a professional metal roof installation, a significant portion of that expense is labor. By taking on the work yourself, you're essentially eliminating that cost, which can indeed be substantial. Imagine saving anywhere from $5,000 to $15,000 or even more, depending on the size and complexity of your roof. That’s enough to fund a serious home renovation, a family vacation, or a hefty chunk of your kid's college fund.
However, it's crucial to understand that "saving money" doesn't mean "free." You're still on the hook for all the materials, tools (some of which are quite specialized and expensive), and potential mistakes. A small miscalculation or improper installation can lead to costly repairs down the line, potentially negating any initial savings. Plus, your time has a value too! Are you prepared to spend weeks, possibly months, working on your roof, sacrificing weekends and evenings? It’s not just about the monetary investment; it's about the time and energy you'll pour into it.
Realistic Assessment of Your Skills and Resources
Okay, so you're handy around the house. You've built a deck, perhaps tiled a bathroom, or even replaced a few windows. That’s a great start! But roofing, especially metal roofing, requires a very specific skill set and an acute attention to detail. This isn't just about swinging a hammer; it's about precision measurements, understanding roof geometry, safely working at heights, and knowing how different materials interact.
Think about these questions:
- Do you have experience working on roofs, understanding pitch and valleys?
- Are you comfortable with power tools like metal shears, drills, and possibly specialized crimping tools?
- Do you have a strong understanding of carpentry, especially framing and sheathing?
- Are you physically fit enough to haul heavy panels up a ladder, work in varying weather conditions, and spend long hours bending, kneeling, and reaching?
- Do you have a reliable team of helpers? This isn't a one-person job, especially with long panels. You'll need at least one, if not two, able-bodied assistants.
Without these foundational skills and resources, you might find yourself quickly in over your head. It’s not just about getting the panels on; it's about ensuring a watertight, durable, and aesthetically pleasing finish that will protect your home for decades.
Understanding the DIY vs. Professional Spectrum
When considering your options, it's helpful to think of a spectrum. On one end, you have a 100% DIY project, where you handle everything from material sourcing to final installation. This offers maximum potential savings but comes with maximum risk and effort. On the other end, you hire a full-service professional contractor who manages the entire project, from permits to cleanup. This is the most expensive but also the most hands-off and often comes with strong warranties.
There’s also a middle ground. Perhaps you tackle the tear-off of your old roof yourself to save on labor, and then hire professionals to install the new metal roof. Or maybe you hire a contractor for the trickier parts, like flashing around chimneys or skylights, while you handle the simpler panel installation. Some homeowners even purchase materials directly from a supplier and then hire a crew for installation only, which can save a little but often means you’re solely responsible for any material issues.
Before committing, it might be wise to explore both ends of this spectrum. Get a few quotes from reputable local metal roofing contractors. Services like Modernize can help you connect with qualified professionals in your area who can provide estimates, giving you a clear benchmark for what professional installation would cost. Comparing these quotes with your estimated material and tool costs for a DIY project will give you a much clearer picture of the real difference, not just the perceived one. Ultimately, the decision depends on your comfort level, skill set, and how much risk you're willing to take on for your home's most important protective layer.
Essential Planning and Preparation Steps
If you’ve decided to move forward with at least exploring the DIY route, planning is paramount. You can’t just buy some panels and start screwing them down. A solid plan, meticulously executed, is the backbone of any successful home improvement project, especially one as significant as roofing. Ignoring these crucial preliminary steps is a recipe for disaster, leading to wasted time, money, and potentially severe structural issues down the line.
Permits, Codes, and HOAs: Don't Skip This!
This is perhaps the least exciting but most critical part of your planning. Every municipality has building codes, and almost every significant home renovation requires a permit. Ignoring these can lead to fines, forced removal of your new roof, or serious problems when you try to sell your house.
- Local Building Department: Your first stop should be your city or county’s building department. They can inform you about specific requirements for metal roof installations, including necessary inspections, acceptable materials, and structural load considerations. For instance, some areas may require specific wind resistance ratings or fire ratings, especially in regions prone to wildfires. You'll need to know, "Do You Need a Permit for a Metal Roof?" and what that process entails. They can also explain if your chosen metal roof gauge, such as 24 vs 26 Gauge Metal Roof, meets local standards.
- Homeowners Association (HOA) Rules: If you live in a community with an HOA, you absolutely must check their regulations. Many HOAs have strict rules regarding exterior home modifications, including roof material, color, and even profile. Some might outright prohibit certain metal roof types, while others may require specific aesthetic approvals. It's far better to get approval in writing before you start than to be forced to tear off a newly installed roof because it violates a rule you weren't aware of.
- Understanding Codes: Building codes aren't just bureaucratic red tape; they are designed to ensure your home's safety and structural integrity. They cover aspects like fastening patterns, flashing requirements, ventilation, and even the type of underlayment. While a professional contractor handles all this as a matter of course, as a DIYer, this responsibility falls squarely on your shoulders. Ignorance is not an excuse in the eyes of the law or, more importantly, when it comes to the safety of your home.
Material Selection: What Kind of Metal Roof Are You Installing?
This is where the fun starts to mix with the practicalities. Metal roofing isn't a monolithic product; there's a vast array of materials, profiles, and finishes, each with its own installation method and benefits. Your choice will significantly impact the complexity of your DIY project.
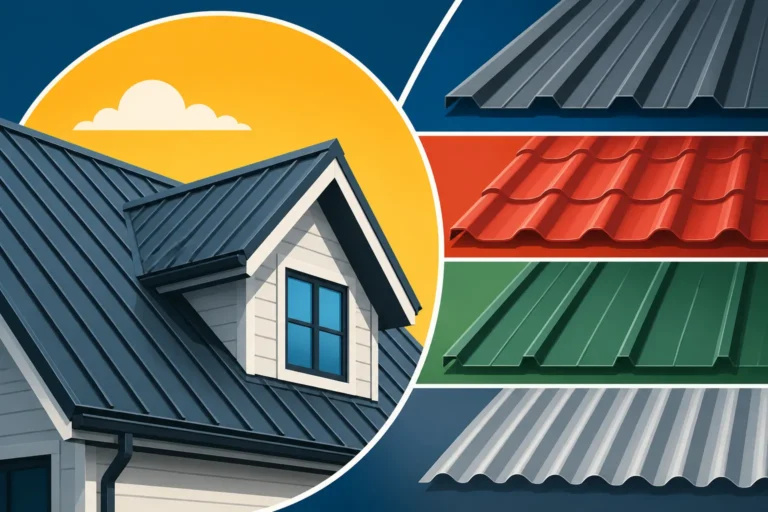
- Panel Types: Common options include corrugated panels, R-panels, 5V Crimp panels, and standing seam panels.
- Exposed Fastener Panels (Corrugated, R-panel, 5V Crimp): These are generally more DIY-friendly. The panels overlap, and screws are driven directly through the panel face and into the roof deck. They are often more forgiving with minor imperfections and require less specialized tools. However, the exposed fasteners can be a long-term maintenance point as washers degrade over time.
- Concealed Fastener Panels (Standing Seam): These are much more challenging for DIY installation. They feature interlocking seams that hide the fasteners, creating a sleek, clean look and superior weather protection. However, installation requires specialized tools (like seamers) and extreme precision. Mistakes are very difficult to correct without damaging panels. Understanding "Metal Roofing Types Explained: Profiles & Panels" is essential here.
- Material Composition: Steel (galvanized or Galvalume), aluminum, copper, and zinc are common choices.
- Steel: Often the most budget-friendly, but requires good coatings (like Galvalume) for rust resistance.
- Aluminum: Lightweight and excellent for coastal areas due to corrosion resistance, but generally more expensive and softer, making it prone to denting during handling.
- Copper & Zinc: High-end options, incredibly durable and beautiful, but prohibitively expensive and typically reserved for expert installation due to their unique properties and intricate fabrication requirements.
- Coatings and Finishes: These not only affect aesthetics but also durability and energy efficiency. PVDF (Kynar 500) and SMP coatings offer excellent color retention and protection. Think about how the finish will perform in your local climate.
- Purchasing: You’ll need to accurately measure your roof to calculate the square footage and determine how many panels and accessories (trim, flashing, fasteners, etc.) you’ll need. Over-ordering by 5-10% is wise to account for cuts and potential mistakes. Many suppliers can custom-cut panels to your roof's exact dimensions, which can save you a lot of on-site cutting.
Tooling Up: What You Absolutely Need Before You Start
This is another area where costs can quickly add up for a DIYer. You’ll need more than just a screwdriver. Many specialized tools are essential for a professional-looking and properly functioning metal roof.
- Safety Gear: This is non-negotiable.
- Fall Protection: A full-body harness, sturdy anchor points, and a lifeline are critical. A fall from a roof can be fatal.
- Gloves: Metal edges are sharp! Heavy-duty work gloves are a must.
- Eye Protection: Cutting metal and drilling fasteners will create flying debris.
- Hearing Protection: Power tools are loud.
- Sturdy Work Boots: With good grip.
- Basic Roofing Tools:
- Ladders: Several, stable, and appropriately tall for your roof.
- Scaffolding or Roof Jacks: For safe staging and movement on the roof.
- Tape Measure, Chalk Line, and Speed Square: For precise marking.
- Tin Snips/Shears: For smaller, intricate cuts.
- Drill/Driver: Cordless, with multiple battery packs, for driving screws.
- Impact Driver: Even better for fasteners.
- Specialized Drill Bits: For metal.
- Caulk Gun and Sealants: High-quality exterior-grade sealants.
- Metal Roofing Specific Tools:
- Metal Cutting Shears (Electric or Pneumatic): For long, straight cuts on panels. A regular circular saw with a metal-cutting blade can work, but generates a lot of heat and sparks and can void panel warranties if it damages the coating. Nibblers are also an option for more intricate cuts without heat.
- Seaming Tools (for Standing Seam): If you're tackling standing seam, you'll need a specialized seamer, which can be expensive to buy but might be rentable. This highlights why standing seam is rarely a DIY project.
- Panel Lifting Equipment: If you're dealing with very long panels, you might need a panel lift or a team of strong helpers.
- Brakes/Benders: If you plan to fabricate your own flashing or trim, which is often not recommended for DIYers. It's usually better to order pre-formed trim.
Making a comprehensive list of required tools and their associated costs is an important part of calculating your true "savings." You might find that purchasing all the necessary equipment, especially specialized items, significantly eats into your projected budget.
Preparing Your Roof Deck for Metal
Before any shiny new metal panels can go up, the foundation beneath them – your existing roof deck – needs to be in tip-top shape. This isn't just about aesthetics; it's about structural integrity, weather protection, and ensuring your new metal roof performs as it should for its full lifespan. Overlooking proper deck preparation can lead to sagging, leaks, or even damage to the metal panels themselves.
Tear-Off or Install Over Existing Shingles?
One of the first big decisions you'll face is whether to completely remove your old roofing material or install the metal roof directly over it. Both options have pros, cons, and significant implications for a DIY project.
-
Installing Over Existing Shingles:
- Pros: This is often seen as the "easier" and cheaper DIY route because it eliminates the messy, labor-intensive, and time-consuming process of tearing off the old roof. You save on dumpster rental fees, tear-off labor, and disposal costs. The old shingles can also provide an additional layer of insulation and sound dampening.
- Cons: This method adds weight to your roof structure. You absolutely must verify that your roof framing can handle the additional load. Most building codes allow a maximum of two layers of roofing, but it's essential to check with your local building department. The existing shingle layer must be relatively flat and in decent condition; any significant undulations will translate to the metal panels, causing "oil canning" (wavy appearance) and potential drainage issues. You'll likely need to install furring strips (strapping) over the existing shingles to create a flat plane and an air gap, which adds another layer of complexity and labor to your DIY effort. This also means your roof will be slightly higher, which can impact flashing around chimneys and vents. Learn more about the cost implications in "Tear-Off vs Metal Over Shingles: Cost Difference".
-
Complete Tear-Off:
- Pros: This allows you to inspect and repair the underlying roof deck (sheathing and rafters) for any rot, damage, or structural deficiencies. It creates a perfectly clean, flat surface for your new underlayment and metal panels, ensuring optimal performance and aesthetics. It also results in a lighter roof system overall.
- Cons: It's a grueling, dirty, and physically demanding job. You’ll need a large dumpster on-site, and you’ll need to factor in disposal costs. Your home will be vulnerable to the elements during the tear-off and re-decking phase, requiring careful weather planning. For a DIYer, this adds a significant amount of labor and time to the project.
Regardless of your choice, ensure the existing surface is clean, dry, and free of debris. Any loose nails or staples should be removed or driven flush.
Underlayment: The Unsung Hero of Your Roof
Often overlooked by eager DIYers, the underlayment is arguably one of the most critical components of your metal roof system. It's the last line of defense against water intrusion, protecting your home even if a panel is damaged or a fastener fails. Never skimp on quality or proper installation here.
- Why It's Essential: While metal roofs are incredibly durable and shed water efficiently, wind-driven rain or ice damming can force water under the panels. The underlayment ensures this water doesn't reach your roof deck or the inside of your home. It also protects the metal panels from abrasions caused by rough sheathing and can act as a thermal barrier.
- Types of Underlayment:
- Synthetic Underlayment: This is the modern standard for metal roofs. It’s lightweight, tear-resistant, water-resistant (often waterproof), and less prone to wrinkling or rotting than traditional felt. Products like Sharkskin or Epilay are popular choices. They often come with a non-slip surface, which is a huge safety benefit for DIYers.
- High-Temperature Self-Adhering Underlayment (Ice and Water Shield): This specialized product creates a complete waterproof seal. It's especially recommended for eaves, valleys, around penetrations, and in areas prone to ice dams. Many building codes require it in certain zones. This type adheres directly to the roof deck, sealing around fasteners, and can withstand the heat buildup that metal roofs can experience.
- Felt Underlayment: While historically used, traditional asphalt-saturated felt (like 15# or 30# felt) is generally not recommended for metal roofs due to its susceptibility to breakdown under the high temperatures a metal roof can reach.
Installing underlayment correctly involves overlapping seams properly (shingle-fashion, starting from the bottom edge and working upwards) and securing it according to manufacturer specifications. This is one area where thorough research using a guide like "Metal Roof Underlayment and Ventilation Guide" is absolutely vital.
Addressing Ventilation and Structural Needs
A metal roof, especially if installed over existing shingles, can dramatically change your roof's thermal dynamics. Proper ventilation is crucial to prevent moisture buildup and to ensure energy efficiency.
- Ventilation: Without adequate airflow, moisture can get trapped between the roof deck and the metal panels, leading to condensation, mold, and rot. It can also cause heat buildup in your attic, increasing cooling costs. Ensure you have a balanced system of intake (soffit) and exhaust (ridge or static) vents.
- Ridge Vents: These are a common and effective way to exhaust hot air. They are installed at the peak of the roof and covered by a metal ridge cap.
- Soffit Vents: These allow cooler air to enter the attic at the eaves.
- Air Channels: If installing over existing shingles, furring strips can help create an air gap that aids ventilation, preventing moisture buildup directly under the metal.
- Structural Integrity: Before you even think about installing anything, assess the structural health of your roof deck and framing.
- Sagging Sheathing: Indicates water damage or insufficient support.
- Rotting Rafters/Trusses: A serious structural issue that needs professional attention.
- Adequate Fastening: Ensure your existing sheathing is well-fastened to the rafters.
If you have any doubts about your roof's structural integrity, consult a structural engineer or a qualified contractor. Adding the weight of a new metal roof, especially over existing shingles, to an already compromised structure is extremely dangerous. While many homeowners successfully install metal roofs over existing shingles, it’s not a universal solution, and a thorough assessment of your specific roof's condition and local codes is absolutely paramount.
Understanding Different Metal Roof Panel Types for DIY
Choosing the right metal roof panel type is a critical decision for any DIYer. The "difficulty curve" varies dramatically between different profiles, and selecting one that aligns with your skill level and available tools is key to a successful, leak-free installation. Get this wrong, and you'll quickly discover why some projects are best left to the pros.
Exposed Fastener Panels: The DIY-Friendly Option
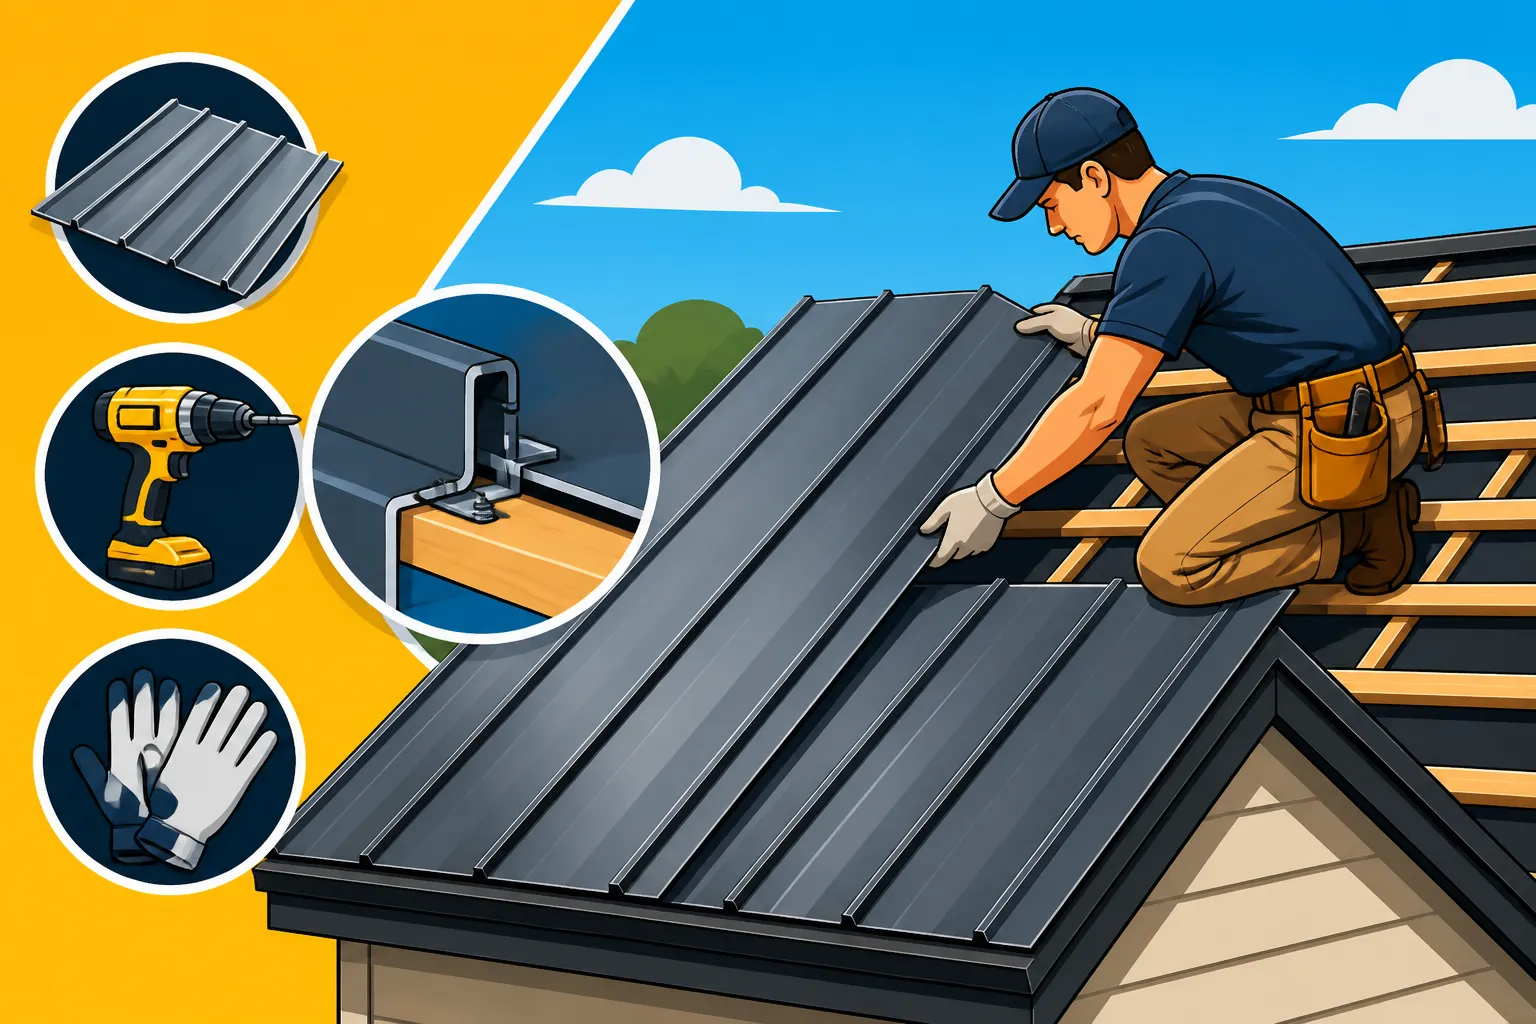
Exposed fastener panels are exactly what they sound like: the fasteners (screws with neoprene washers) are driven directly through the face of the metal panel and into the purlins or roof deck. This method is widely popular for its cost-effectiveness and relatively straightforward installation, making it the most common choice for DIY enthusiasts.
- Corrugated Panels: These classic wavy panels are known for their strength and rustic aesthetic. They are often used on agricultural buildings but are gaining popularity for residential use, especially on modern or industrial-style homes.
- Installation Ease: Generally very easy to install. Panels overlap horizontally and vertically, and screws are driven at the overlap points and through the 'flats' of the panel. The overlapping nature provides some forgiveness for minor alignment issues.
- Common Applications: Barns, sheds, carports, and increasingly, residential homes where a robust, economical, and somewhat industrial look is desired.
- DIY Considerations: Requires basic tools like drills, metal shears, and a good tape measure. Working with longer panels still requires careful handling to prevent bending. Pay close attention to screw placement and torque – over-tightening can crush washers, leading to leaks, while under-tightening leaves them vulnerable.
- R-Panel and 5V Crimp Panels: These are common choices for residential and light commercial projects, offering a more defined, often stronger profile than traditional corrugated.
- R-Panel: Features major ribs that are 12 inches on center, providing a strong, industrial look. It's often used for its durability and structural capabilities, sometimes even serving as a structural diaphragm.
- 5V Crimp: Characterized by five inverted V-shaped crimps, giving it a classic, clean, and often historic appearance. It’s a very common choice for residential metal roofs, offering good rigidity and a traditional aesthetic.
- Installation Ease: Similar to corrugated, these are relatively simple to install with exposed fasteners. They offer good coverage per panel, speeding up installation.
- DIY Considerations: Precision in alignment is more important here than with deeply corrugated panels to maintain a straight appearance. Fastener placement, ensuring they hit underlying purlins or the roof deck securely, is crucial for wind resistance and waterproofing. These profiles are also prone to oil canning if not installed perfectly flat.
The key with exposed fastener systems is ensuring every single screw is properly sealed. The neoprene washers under the screw heads compress to create a watertight seal. However, these washers can degrade over time due to UV exposure and temperature fluctuations, potentially leading to leaks decades down the road. Regular inspection and replacement of screws might be necessary over the roof's lifespan.
Concealed Fastener Systems: A Bigger Challenge
Concealed fastener systems, primarily standing seam metal roofs, are highly sought after for their sleek, contemporary aesthetic and superior weather performance. However, they represent a significant step up in complexity and require specialized skills and tools, making them a much more challenging, and often ill-advised, DIY project.
- Standing Seam Panels: These panels feature vertical ribs (seams) that stand up from the flat panel surface. The fasteners are hidden beneath these seams, out of direct exposure to the elements.
- Types: There are snap-lock systems (where panels simply "snap" together) and mechanically seamed systems (where the seams are crimped together with a special tool). Snap-lock is slightly more DIY-friendly if you have the right tools and precision, but mechanically seamed systems are almost exclusively professional.
- Installation Difficulty: This is where DIYers often hit a wall. Standing seam installation demands extreme precision. Panels must be perfectly straight and aligned from the first panel to the last. Any deviation can compound, leading to visible misalignment, difficulty in seaming, and potential leaks. Specialized tools like panel clamps, seaming machines, and specific types of shears are often required, which are expensive to buy and often not available for rent locally.
- DIY Considerations: Handling long, thin standing seam panels (which can be 20-40 feet or more) without kinking or bending them requires significant experience and a large crew. Cutting and flashing around penetrations (chimneys, vents, skylights) is an art form with standing seam, requiring meticulous fabrication and sealing. Mistakes are incredibly costly and difficult to rectify without replacing entire panels. While the longevity and aesthetics are fantastic, the potential for error and the specialized knowledge required make this a very high-risk DIY endeavor. It's truly worth asking yourself, "Is a Standing Seam Roof Worth the Extra Cost" if you're not confident in your skills, especially if considering the significant investment in DIY tools for a single project.
Special Considerations for Metal Shingles or Tiles
Beyond large panels, metal roofing also comes in shingle, shake, or tile formats, designed to mimic traditional roofing materials like asphalt shingles, cedar shakes, or clay tiles. These can be another option for DIYers, offering a different set of challenges.
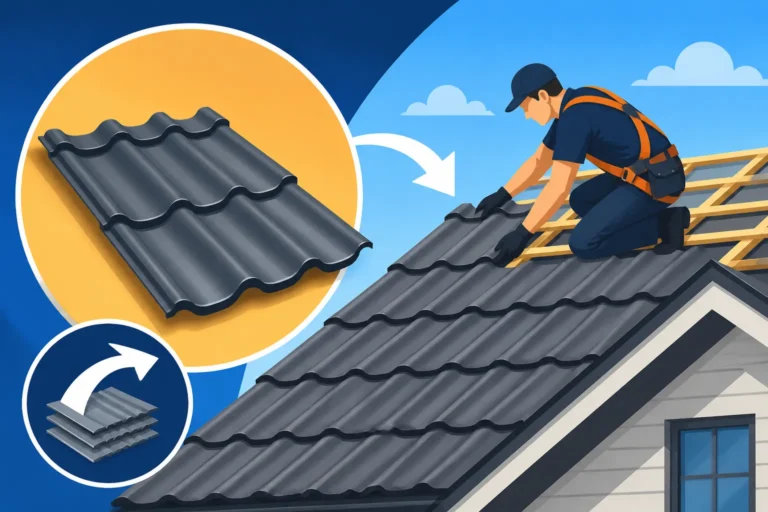
- Metal Shingles, Shakes, and Tiles: These are typically smaller, modular pieces designed to interlock or overlap. They can be made from steel (often stone-coated steel), aluminum, or even copper.
- Installation Difficulty: Generally falls somewhere between exposed fastener panels and standing seam. While the individual pieces are smaller and easier to handle than long panels, the sheer number of pieces and the intricate interlocking patterns require careful attention to detail and a methodical approach. Each piece needs to be properly aligned and fastened.
- DIY Considerations: These systems can be more forgiving than standing seam in terms of handling long panels, but they often require more fasteners and a precise layout to ensure straight lines and proper interlocking. Cutting these smaller pieces, especially stone-coated ones, can be labor-intensive. Proper flashing around edges and penetrations is still critical. For example, "What Is a Stone-Coated Steel Metal Roof?" details a popular option in this category, which often uses a hidden fastener system, adding to the complexity.
Ultimately, your choice of panel type should align with your comfort level, the tools you have or are willing to acquire, and your patience for precision. For most first-time DIY metal roofers, exposed fastener systems like corrugated or R-panels are the most realistic starting point.
The Step-by-Step Installation Process
Okay, you've done your research, obtained permits, secured your materials, and gathered your tools. Now comes the moment of truth: actually putting that metal on the roof. This isn't a race; it's a marathon where precision and safety are your two most important companions. Take your time, double-check everything, and remember that haste makes waste – especially on a roof.
Safety First: Setting Up Your Workspace
Before a single panel goes up, your work environment needs to be safe. Working on a roof is inherently dangerous, and even experienced professionals take extensive precautions. As a DIYer, you need to be even more vigilant.
- Fall Protection System: This is absolutely non-negotiable.
- Harness and Lanyard: Wear a full-body harness that fits correctly. Attach a self-retracting lifeline or a static rope with a rope grab to an anchor point.
- Anchor Points: Install robust anchor points into the structural members of your roof. These are typically heavy-duty, rated for fall arrest, and should be strategically placed to allow movement across the roof while remaining tied off. Consider permanent anchors that can stay on the roof under a ridge cap for future maintenance.
- Guardrails: If feasible, temporary guardrails around the perimeter can offer an extra layer of protection, especially when handling long panels.
- Egress and Ingress: Ensure your ladders are stable, extend at least 3 feet above the eaves, and are securely fastened at the top and bottom.
- Roof Safety:
- Footing: Never walk on wet, frosty, or otherwise slippery metal. Plan your work for dry, clear days. Wear non-slip work boots.
- Work Staging: Use roof jacks, toe boards, or temporary staging to create flat, secure work platforms on steep pitches. This prevents tools from sliding and gives you stable footing.
- Material Handling: Metal panels, especially long ones, can be unwieldy and sharp. Have enough help to carry and lift them safely, preventing kinks, scratches, or injuries. Use slings or lifts for extremely long panels.
- Weather Conditions: Always monitor the weather forecast. High winds can turn metal panels into sails, creating an incredibly dangerous situation. Rain makes everything slippery and can ruin your underlayment if exposed too long. Extreme heat can make metal panels too hot to handle and can quickly lead to exhaustion.
Remember, one accident can negate all your perceived savings and lead to life-altering injuries. Prioritize safety above all else.
Panel Placement and Fastening Techniques
This is the core of your installation. Each panel needs to be placed correctly, aligned precisely, and fastened securely to create a weather-tight seal.
- Starting Point: Generally, you’ll start installing panels at the eaves, on one side of the roof, and work your way up and across. This ensures proper overlap and water shedding. For most exposed fastener systems, starting at the downwind side of your roof (the side opposite the prevailing winds) can minimize wind-driven rain getting under the laps.
- First Panel: The first panel is the most critical. It sets the tone for the entire roof.
- Square and Plumb: Ensure it’s perfectly square with the eave and plumb with the gable edge. Use a chalk line and carefully measure from the eaves and rake edge. Even a slight misalignment here will compound down the line, leading to an obvious crooked roof.
- Overhang: Allow for the correct overhang at the eaves and gable rake edges, typically 1 to 2 inches, according to manufacturer specifications and local codes. This prevents water from running back under the roof edge.
- Lapping Panels:
- Side Lap: For exposed fastener panels, each subsequent panel overlaps the previous one by a rib or a specified amount. Ensure these overlaps are tight and consistent. Some systems require a bead of sealant along the overlap before fastening.
- End Lap (if applicable): For very long roofs requiring multiple panel lengths, panels will overlap end-to-end. This is a critical area for potential leaks and requires a generous bead of sealant and precise fastening.
- Fastening:
- Screws: Use only approved, high-quality roofing screws with self-sealing neoprene washers. For exposed fastener systems, fasteners typically go through the "flats" or specific designated areas of the panel into the roof deck or purlins.
- Pattern: Follow the manufacturer's recommended screw pattern and spacing. This is crucial for wind uplift resistance and warranty validity. Typically, screws are spaced every 12-24 inches along purlins or a specific grid pattern across the roof.
- Torque: Do not over-tighten or under-tighten screws. Over-tightening can strip the metal or crush the neoprene washer, rendering it ineffective. Under-tightening leaves the screw loose and prone to leaking. The washer should be slightly compressed, creating a visible "donut" seal, but not squished flat.
- Standing Seam Fastening: For snap-lock standing seam, panels are typically secured with clips that are fastened to the roof deck, and then the next panel snaps over these clips, concealing the fasteners. This requires specific clips and precise spacing.
Flashing, Trim, and Finishing Details
The devil is truly in the details when it comes to metal roofing. Improper flashing and trim are the leading causes of roof leaks. These components protect vulnerable areas and give your roof its finished, professional appearance. This is where a lot of DIYers find themselves overwhelmed, as it often requires custom cuts and bends. For a deeper dive, check out "Metal Roof Components & Accessories Explained".
- Drip Edge: Installed along the eaves before the underlayment, and along the rakes over the underlayment. It directs water away from the fascia and prevents it from wicking back under the roof edge.
- Eave Trim: Often installed after the panels, at the eaves, to provide a clean edge and support the panels.
- Ridge Cap: This covers the peak of your roof where the two slopes meet. It's usually a pre-formed metal piece that caps over the highest panels, ensuring a watertight seal. Proper ventilation often integrates with the ridge cap.
- Gable Trim (Rake Trim): Installed along the sloped edges of your roof (rakes) to protect the exposed panel edges from wind uplift and provide a finished look.
- Valley Flashing: If your roof has valleys (where two roof planes meet to form an internal corner), this is a highly critical area. Valley flashing is typically a pre-formed W-shaped or V-shaped metal piece installed over the underlayment before the panels. Panels are then cut to fit precisely against the valley flashing, with an open channel for water flow. This is one of the most challenging flashing details for a DIYer.
- Pipe Flashing: For any pipes penetrating the roof (plumbing vents, furnace vents), you'll need specialized pipe boots or rubber gaskets that seal tightly around the pipe and integrate with the metal panels. These are crucial for preventing leaks around common penetrations.
- Chimney Flashing: This is extremely complex and often involves multiple pieces (base flashing, step flashing, counter flashing) that are layered and sealed to prevent water intrusion around the chimney base. Custom fabrication is often required, making this a professional-level task.
- Sealants: Use high-quality, non-curing, UV-resistant sealants specifically designed for metal roofing (e.g., butyl or urethane sealants). Apply generously but neatly to all overlaps, seams, and around fasteners where additional protection is needed. Avoid silicone, as it can break down and cause issues with paint adhesion down the road.
- Clean Up: After installation, carefully clean off all metal shavings, screws, and debris. Metal shavings left on the roof can rust and stain the panels. Use a magnet to pick up stray fasteners.
Remember, every cut, every bend, and every fastener connection contributes to the overall watertight integrity and longevity of your metal roof. This stage requires patience, meticulous attention to detail, and a willingness to follow manufacturer guidelines exactly.
Common DIY Pitfalls and How to Avoid Them
Venturing into DIY metal roof installation is commendable, but it's also fraught with potential missteps. Many homeowners, fueled by enthusiasm and a desire to save money, underestimate the complexities, leading to frustrating and costly mistakes. Understanding these common pitfalls before you begin can help you steer clear of them.
Leaks, Dents, and Other Installation Headaches
These are the most common and disheartening problems DIYers face. Nothing sours the feeling of accomplishment faster than finding a drip in your attic after the first rain.
- Improper Fastening: This is probably the number one cause of leaks in exposed fastener systems.
- Over-tightening: Crushes the neoprene washer, reducing its sealing ability and causing the metal to dimple, which can collect water.
- Under-tightening: Leaves the washer too loose, allowing water to seep past. Screws can also back out over time.
- Missing Fasteners: An overlooked screw here or there can create a direct path for water.
- Incorrect Placement: Fasteners driven through the wrong part of the panel or missing the underlying support (purlin/sheathing) will not hold or seal correctly.
- Solution: Invest in a good impact driver with adjustable torque settings. Practice on scrap metal until you get the feel for proper compression of the washer. Always pre-drill pilot holes if recommended by the manufacturer. Follow the screw pattern rigorously, and visually inspect every fastener after installation. For more on this, consider reading "Why Is My Metal Roof Leaking at the Screws?".
- Poor Flashing Installation: The edges, valleys, and penetrations are the most vulnerable spots.
- Gaps in Flashing: Improper cuts or inadequate sealants around chimneys, vents, or in valleys create open pathways for water.
- Incorrect Overlap: Flashing must be layered correctly, like shingles, so water flows over, not under, subsequent pieces.
- Solution: Purchase pre-fabricated flashing and trim whenever possible. If custom bending is necessary, ensure you have the right tools (or hire a professional for just those components). Use high-quality, compatible sealants (butyl or urethane, never silicone) and apply them generously to all joints and seams. Double-check local codes and manufacturer instructions for flashing details, which are often highly specific.
- Oil Canning and Dents:
- Oil Canning: This wavy or buckling appearance on flat metal panels is caused by stresses in the metal, often due to improper handling, over-tightening of fasteners, or an uneven substrate. While typically cosmetic and not a structural issue, it can be unsightly.
- Dents: Dropping tools, stepping on panels incorrectly, or rough handling during installation can easily dent metal, especially softer materials like aluminum or thinner gauges.
- Solution: Handle panels with extreme care, especially during lifting and placement. Work with enough helpers to prevent panels from bending under their own weight. Ensure your roof deck is perfectly flat and even before laying underlayment. Avoid over-tightening fasteners. Choose a slightly thicker gauge metal, like 24 gauge over 26 gauge, for better dent resistance if this is a major concern. "How to Prevent Oil Canning on a Metal Roof" can offer more specific advice.
- Scratches and Coatings Damage: Dragging tools or walking on panels with debris underfoot can scratch the protective coatings, potentially leading to premature corrosion or reduced lifespan.
- Solution: Keep the roof clean, wear soft-soled shoes, and avoid dragging anything across the panels. Have touch-up paint kits on hand for minor scratches.
Material Waste and Budget Overruns
The promise of cost savings can quickly erode if you miscalculate materials or make mistakes that require reordering.
- Inaccurate Measurements: Ordering too few panels means costly delays and potentially paying higher prices for small reorders. Ordering too many means wasted money on unused material.
- Solution: Measure your roof multiple times, by different people if possible. Use online calculators or consult with your material supplier for precise estimates. Factor in a 5-10% waste factor for cuts and mistakes. A guide on "Metal Roof Cost Calculator: How to Estimate" can be invaluable here.
- Cutting Mistakes: A single miscut panel can be an expensive error, especially if it’s a long, custom-ordered piece.
- Solution: Measure twice, cut once! Use appropriate cutting tools for clean, accurate cuts. Use templates for complex cuts. Take your time, and don't rush. Have designated "cut zones" away from the main roof area to minimize debris.
- Damaged Materials: Panels damaged during delivery, storage, or installation count as waste.
- Solution: Inspect materials upon delivery. Store them properly, off the ground and protected from weather. Handle them carefully at every step.
- Unexpected Tool Costs: As mentioned earlier, specialized tools can add up. If you only use them once, the "savings" on labor diminish significantly.
- Solution: Rent specialized tools if available and cost-effective. Borrow from friends or network with other DIYers. Seriously evaluate if the upfront tool investment is worth it for a one-time project.
When to Call in a Professional (and How to Find One)
It's crucial to know your limits. There's no shame in realizing a project is too big or too complex. In fact, knowing when to call for help is a sign of smart, responsible homeownership.
- Signs You Need Help:
- You're consistently making mistakes.
- The project is taking far longer than anticipated, disrupting your life.
- You encounter structural issues you're not equipped to handle.
- You feel unsafe or overwhelmed.
- You're dealing with complex roof features (many valleys, dormers, chimneys, or a very steep pitch).
- The manufacturer's warranty requires professional installation.
- Finding a Reputable Contractor: If you decide to pivot from DIY to professional, or even to a hybrid approach, finding a qualified metal roofing contractor is key.
- Research: Look for contractors with specific experience in metal roofing, not just asphalt shingles. Ask for references and check online reviews.
- Licensing and Insurance: Verify their licensing, bonding, and insurance. This protects you if something goes wrong. A guide like "Metal Roof Contractor Licensing, Bonding & Insurance" is essential reading.
- Get Multiple Quotes: Obtain at least three detailed quotes to compare scope, materials, and price. Services like Modernize can help you get multiple quotes from vetted local professionals, making the comparison process much easier.
- Warranties: Understand both the manufacturer's warranty on materials and the contractor's warranty on workmanship. A professional installation can preserve your material warranty, whereas DIY often voids it.
Don't let pride get in the way of a sound, leak-free roof. Sometimes, the "DIY" solution is knowing when to bring in the experts.
Long-Term Considerations for Your DIY Metal Roof
Once your DIY metal roof is installed, your journey isn't over. While metal roofs are renowned for their longevity and low maintenance, a DIY installation comes with its own unique set of long-term considerations. Understanding these factors will help you maximize your investment and ensure your roof truly stands the test of time.
Maintenance and Inspection
One of the big selling points of metal roofs is their low maintenance. Compared to asphalt shingles that require frequent inspections and repairs, metal roofs are often touted as "set it and forget it." However, this isn't entirely true, especially for a DIY installation.
- Regular Inspections: You should plan to inspect your metal roof at least once a year, preferably in the spring and fall, and always after any severe weather event (heavy storms, hail, high winds).
- Check Fasteners: For exposed fastener systems, pay close attention to the screws. Are any backing out? Are the neoprene washers still intact and creating a proper seal, or are they cracked and degraded? Loose or damaged fasteners are a primary source of leaks and will need immediate attention. Learn how to address this in "How to Replace Metal Roof Screws and Fasteners".
- Look for Dents and Scratches: Hail damage or falling debris can create dents or scratches that compromise the coating. While minor cosmetic dents might not be an issue, deeper ones could expose the underlying metal to corrosion.
- Inspect Flashing and Sealants: Check all flashing around chimneys, vents, skylights, and in valleys. Look for cracks in sealants or signs of separation. These areas are prone to wear and tear.
- Debris Removal: Clear leaves, branches, and other debris from valleys, gutters, and behind snow guards. Accumulated debris can trap moisture, lead to premature corrosion, and impede water flow.
- Cleaning: Periodically cleaning your metal roof can help maintain its appearance and prevent the buildup of mold, mildew, or dirt that can degrade coatings.
- Gentle Cleaning: Use a soft brush and a mild, non-abrasive detergent with water. Rinse thoroughly.
- Avoid Pressure Washing: While it might seem efficient, high-pressure washing can damage the paint finish and force water under panels, potentially compromising seals.
- Moss and Algae: In damp, shaded areas, moss or algae can still grow on metal roofs. There are specific roof cleaning solutions designed to remove these without harming the metal or its coating.
- Snow Guards: If you installed snow guards in a snowy climate, inspect them to ensure they are still securely attached and haven't been damaged by snow slides.
Proactive maintenance and prompt attention to minor issues can prevent them from becoming major, costly problems.
Warranty Implications
This is a critical area where DIY installation can significantly differ from professional work. Metal roofing manufacturers offer robust warranties on their materials, but these often come with stipulations.
- Material Warranty: This covers defects in the metal panels themselves, such as premature fading, chalking, or corrosion, for a specified period (e.g., 20-50 years, or even limited lifetime). However, most material warranties explicitly state that they are valid only if the roof is installed according to manufacturer specifications. Any deviation from these instructions by a DIY installer could potentially void the warranty.
- Workmanship Warranty: When you hire a professional contractor, they typically provide a separate workmanship warranty, covering the quality of their installation for a period (ee.g., 5-10 years). As a DIYer, you are the installer, so you bear all the responsibility for workmanship. If a leak occurs due to an installation error, there’s no contractor to call back – you're on the hook for the repair.
- Impact of DIY on Warranty Claims: If you have a problem with your material and try to file a warranty claim, the manufacturer might request proof of professional installation or detailed documentation of your DIY process. Without this, they could deny your claim, arguing that the issue stems from improper installation rather than a material defect.
- Reading the Fine Print: Before you commit to DIY, obtain copies of the material warranties for the specific panels and accessories you plan to purchase. Read every clause, particularly those related to installation requirements and limitations for DIYers. This will help you understand the risks you're assuming. For more detailed information, check out "Metal Roof Warranties: Workmanship vs Manufacturer".
Impact on Home Value and Insurance
A new metal roof is generally considered an upgrade that can boost your home's value and appeal. However, a DIY installation can have nuanced effects.
- Home Value: A professionally installed metal roof is a strong selling point due to its longevity, durability, and energy efficiency. It can often lead to a higher resale value. A well-executed DIY roof can also contribute positively. However, a poorly installed DIY roof, especially one with visible flaws (like significant oil canning, misaligned panels, or obvious leaks), can deter buyers and might even require professional remediation, potentially hurting your home's value. Appraisers and home inspectors will note the quality of the roof installation.
- Home Insurance: Metal roofs are often eligible for discounts on homeowners insurance premiums due to their superior resistance to fire, hail, and high winds compared to traditional asphalt shingles.
- Discounts: Many insurance companies offer "wind mitigation" credits or discounts for Class 4 impact-resistant roofs, which many metal roofs qualify for.
- Inspection: To qualify for these discounts, you'll often need a wind mitigation inspection or proof of the roof's ratings (e.g., UL 2218 for impact resistance, specific wind uplift ratings). An insurer might also want to see that the roof was installed by a licensed professional to ensure it meets these standards. A DIY roof might not automatically qualify for the same discounts without documented proof of correct installation to code.
- Claims: If you have a claim (e.g., for storm damage), a poorly installed DIY roof might complicate the process, with the insurer potentially attributing the damage or excessive repairs to installation errors rather than covered perils. For more on this, check out "Metal Roof Insurance Savings & Discounts".
In summary, a DIY metal roof can be a source of pride and significant savings, but it's a long-term commitment. Regular vigilance, understanding your warranty limitations, and ensuring a high-quality installation are key to truly realizing the benefits of this durable roofing material for decades to come.
Disclaimer
Please remember that the information provided in this guide is for general informational purposes only and is not a substitute for professional advice. Metal roof installation is a complex and potentially dangerous project. Always consult with local building authorities to understand specific codes and permit requirements in your area. If you are uncertain about any aspect of metal roof installation, it is strongly recommended to consult with or hire a qualified and licensed roofing professional. Working on a roof carries inherent risks, including falls, and proper safety precautions, including fall protection, are paramount. The author and publisher are not liable for any loss or damage arising from your reliance on this information.